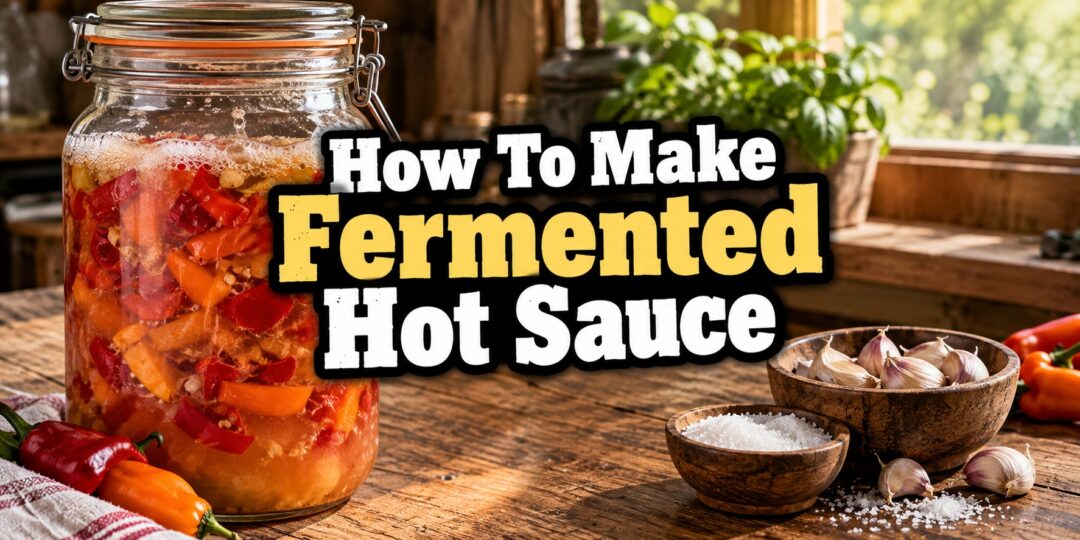
Every year my pepper plants outproduce every plan I ever made for them. I can only eat so many salsas and stir-fries before the crisper drawer starts looking like a fire hazard, and that’s exactly the problem fermented hot sauce solves for me. Instead of racing to use peppers before they go soft, I let a jar of salt brine do the work of turning a pepper glut into something that only gets better the longer it sits.
Fermented hot sauce isn’t the same thing as the quick vinegar-blended sauce most people picture. It’s a slow, live-culture process, the same kind of lactic acid fermentation that turns cabbage into sauerkraut, and it rewards patience with a depth of flavor a same-day sauce simply can’t touch. This is the method I’ve settled into after a few seasons of trial, error, and one memorably exploded jar.
Why Ferment Your Hot Sauce Instead of Just Blending Fresh Peppers
A fresh hot sauce, blended and bottled the same day, tastes bright and sharp but one-dimensional. Fermentation changes the whole character of the pepper. Naturally occurring lactic acid bacteria, the same family responsible for sauerkraut and kimchi, convert the sugars in the peppers into lactic acid over one to several weeks. That process softens harsh, raw heat into something rounder, tangier, and more complex, closer to the fermented hot sauces you find on grocery shelves that list vinegar as an afterthought rather than the main flavor.
It’s also, frankly, the more homestead-appropriate method. Fermentation is one of the oldest food preservation techniques there is, long predating refrigeration, and it turns a pile of peppers that would otherwise spoil into a shelf-stable, gut-friendly condiment that keeps for months.
Choosing Your Peppers
I don’t stick to one pepper variety, and you shouldn’t feel like you have to either. What matters more than the specific pepper is understanding roughly where it sits on the heat scale so your final sauce lands where you want it.
For a milder, more approachable sauce, I lean on jalapeños or fresnos. For something with real backbone, serranos or cayennes hit a nice middle ground. If I’m making a batch specifically for the heat-seekers in my life, habaneros or scotch bonnets go in, sometimes cut with a few milder peppers to keep the whole jar from becoming unusable.
A few habits I’ve picked up over the years:
- Use ripe, unblemished peppers. Any soft spots or mold on the raw pepper will carry straight through into the ferment.
- Mix colors and varieties in one batch if you want more flavor complexity. A blend of red and green peppers gives a more interesting final color and taste than a single variety alone.
- Decide your heat level up front. Leave the seeds and ribs in if you want more heat, or remove them if you’d rather control the burn and let the pepper flavor lead.
What You’ll Need
This is a low-equipment project, which is part of why I keep coming back to it every pepper season.
- A wide-mouth glass jar or a dedicated fermentation crock
- Canning or pickling salt (avoid iodized table salt, which can interfere with fermentation and cloud the brine)
- Filtered or dechlorinated water
- A fermentation weight, or a small resealable bag filled with brine, to keep the peppers submerged
- A blender or food processor for the final step
- Bottles for storage once the sauce is finished
The Brine: Getting Your Salt Ratio Right
Salt is doing more work in this recipe than almost any other ingredient, so it’s worth taking seriously instead of eyeballing it. According to fermentation guidance from University of Illinois Extension, a brine concentration of around 3 to 5 percent salt to water by weight is the standard range for vegetable fermentation, with the lower end used for more delicate, shredded vegetables and the higher end for firmer whole or chopped produce like peppers.
In practical terms, that works out to roughly 2 tablespoons of canning salt per quart of water for a 3 percent brine, which is where I start most of my pepper ferments. The salt does three jobs at once: it draws water and sugars out of the pepper flesh to help create the brine, it favors the growth of beneficial lactic acid bacteria over the bacteria and molds that cause spoilage, and it keeps the peppers firm rather than mushy.
Don’t skimp on the salt to make a “healthier” batch. Under-salting is one of the most common reasons home ferments fail, since it opens the door for the wrong microorganisms to take over before the beneficial bacteria can establish themselves.
Step-by-Step: How I Ferment My Peppers
- Wash and prep. Rinse your peppers well and remove the stems. Roughly chop them, seeds in or out depending on your heat preference. I usually toss in a few smashed garlic cloves at this stage too.
- Pack the jar. Pack the chopped peppers and garlic into your jar, pressing down gently as you go, leaving at least an inch of headspace at the top.
- Mix and pour the brine. Dissolve your salt fully in room-temperature water, then pour it over the peppers until they’re completely submerged, with about an inch of brine above them.
- Weigh it down. Use a fermentation weight or a water-filled bag to keep every piece of pepper under the brine line. Any pepper that pokes above the surface and stays exposed to air is a mold risk.
- Cover loosely. If you’re using a jar with a solid lid, “burp” it daily to release built-up gas, or use an airlock lid if you have one, which lets gas escape without letting air in.
- Set it somewhere stable. A spot out of direct sunlight, ideally between 65 and 75°F, works best. Extension research from the University of Minnesota notes that temperatures over 78°F can cause over-fermentation and spoilage, while temperatures below 60°F will slow fermentation too much to be reliable.
How Long to Ferment
I typically let my pepper ferments go for one to three weeks, tasting along the way starting around day five. You’re looking for a few specific signs that fermentation is active and progressing well:
- Bubbles rising through the brine, a sign the lactic acid bacteria are actively working
- A brine that’s gone cloudy, which is normal and expected
- A tangy, slightly sour smell developing alongside the pepper aroma
- A flavor that’s shifted from sharp and raw to rounder and more complex
There’s no single “done” day. I’ve had batches I loved at ten days and others I let ride for a full month because I liked where the flavor was headed. Taste is genuinely the best guide once you’re past the first week.
Troubleshooting: Mold vs. Kahm Yeast
This is the part that scares off a lot of beginner fermenters, and I get it, because the first time I saw a white film on top of a jar, I nearly dumped the whole batch.
Most of the time, what you’re looking at is kahm yeast, not mold. Kahm yeast forms a thin, flat, whitish film across the surface of the brine. It’s harmless, though it can affect flavor if you let it sit too long, and the fix is simple: skim it off with a clean spoon and keep an eye on the jar over the next few days. It tends to show up when the brine is a little warm or under-salted, so if you see it often, double-check your salt ratio and find a cooler spot for future batches.
True mold looks different; it’s fuzzy, raised, and often shows up in spots of green, black, or blue rather than as a flat film. Food safety guidance from NC State Extension recommends checking that vegetables stay fully submerged under brine throughout fermentation, since exposure to air is the main condition that lets mold take hold in the first place. If you see actual mold, the safest move is to discard that batch rather than try to salvage it, since mold can send roots down into the ferment that go well beyond what you can scrape off the surface.
The single best prevention for both problems is keeping every piece of pepper fully submerged under the brine at all times. Nearly every mold or yeast issue I’ve ever had traced back to one stray pepper piece poking above the surface.
Blending Your Hot Sauce
Once your ferment tastes the way you want it, strain the peppers from the brine, but don’t dump that brine down the drain. Save it. It’s full of the tangy, fermented flavor you just spent weeks building, and you’ll use it to thin the sauce to the consistency you want.
Add the strained peppers and garlic to a blender along with a splash of the reserved brine, and blend until smooth. From here, taste and adjust. A splash of vinegar brightens the flavor and adds extra acidity for shelf stability, a spoonful of honey can round out a very sharp batch, and more brine will loosen the texture if it’s too thick.
If you want a completely smooth, restaurant-style sauce rather than a rustic one, strain the blended mixture through a fine-mesh sieve or cheesecloth to remove the skins and seeds.
Bottling, Storing, and Shelf Life
Pour the finished sauce into clean glass bottles, leaving a bit of headspace. I keep mine in the refrigerator, where a well-fermented, sufficiently acidic hot sauce will easily keep for six months to a year, often longer.
If you want your sauce shelf-stable at room temperature, you have two paths. The first is adding enough vinegar to bring the final pH low enough for safe shelf storage, though testing pH with strips or a meter is the only way to know for certain rather than guessing. The second is heating the finished sauce briefly before bottling, which stops the fermentation and kills off the live cultures, trading away the probiotic benefit for a longer, more predictable shelf life. Either way, refrigeration after opening is still the safest habit once that jar is in regular use.
A Few Safety Notes I Always Follow
Fermenting peppers is genuinely one of the safer home food preservation projects, since the salt brine and resulting acidity create an environment that’s hostile to the harmful bacteria people usually worry about, including the one behind botulism. Guidance from University of Minnesota Extension emphasizes using a research-based, tested salt ratio and fresh, in-season produce as the foundation of safe fermentation. That said, a few habits keep the odds firmly in your favor.
Always use clean equipment, wash your hands and jars well, and use non-chlorinated water if your tap water is heavily treated, since chlorine can interfere with the fermentation itself. Keep everything submerged under the brine the entire time, and trust your senses. If a batch ever smells rotten, putrid, or simply wrong, rather than pleasantly sour and tangy, don’t taste-test your way through the doubt. When in doubt, throw it out, and start a fresh batch instead.
Flavor Variations I Love
Once you’ve made a basic batch or two, this recipe becomes a jumping-off point rather than a fixed formula. Some of my favorite variations:
- Fruit-forward: Add chunks of mango, pineapple, or peach to the ferment for a sweeter, more tropical sauce.
- Smoky: Swap in a few chipotle or smoked peppers alongside your fresh ones.
- Garlic-forward: Double the garlic and let it ferment right alongside the peppers for a deeper, more savory finish.
- Citrus brightened: Stir fresh lime juice in at the blending stage rather than during fermentation for a cleaner, sharper finish.
The Best Food Preservation Tool Is Knowledge
Fermenting peppers is a perfect example of what self-sufficiency used to look like.
No complicated machinery. No expensive equipment. Just fresh food, salt, water, time, and the knowledge to make them work together.
Long before refrigerators and supermarkets made food available year-round, families had to understand how to preserve what they grew while it was abundant. Fermenting was only one of the skills that helped turn a successful harvest into food that could still be useful months later.
Unfortunately, much of that everyday knowledge has disappeared.
The Lost Skills of Independence was created to help bring practical self-reliance back into the modern home.
Inside, you’ll discover old-fashioned skills and hands-on methods designed to help you grow, preserve, make, repair, improvise, and provide more for yourself instead of automatically depending on stores, services, or modern conveniences.
Because a pantry full of supplies is valuable, but knowing how to create, preserve, and replace what you need is even better.
Real independence isn’t having everything. It’s knowing what to do with what you have.
🌶️ Your fermented hot sauce can be one small step. The next step is rebuilding the practical knowledge that once made self-reliance an ordinary part of everyday life.
👉 Discover The Lost Skills of Independence and start bringing forgotten self-sufficiency skills back into your home.
GET THE LOST SKILLS OF INDEPENDENCE HERE!
Final Thoughts
Fermented hot sauce turned what used to be a seasonal scramble to use up my pepper harvest into one of my favorite homestead projects. It takes patience more than skill, and once you’ve got your salt ratio and submersion habits down, it’s remarkably forgiving. Grow more peppers than you think you’ll need, because once you taste a fully fermented, homemade hot sauce next to a store-bought bottle, you won’t want to go back.
You may also like:
 Join The Self-Sufficient Projects Facebook Group For Extra Free Homesteading Tips
The Only Food That Grows Almost Faster Than You Can Eat It (Video)
Fermented Vegetables – A Complete Homesteader’s Guide to Lacto-Fermentation
Lactic Acid Fermentation – A Complete Guide for the Home Homesteader
Fermented Pickles – The Complete Guide