This is one of the most annoying homesteading problems.
Your TV has no signal. You’re not able to watch anything without interruptions. And this keeps repeating day after day.
Why can’t you hold a channel out here when a house in town pulls in twenty of them with a piece of plastic stuck to the window?
You might think that the distance between you and the tower is the main problem. But in reality, this is just a small part of the whole story.
The great news is that you can fix your TV signal in a weekend with a ladder and about fifty bucks.
Ready?
Find Out What’s Actually Reaching Your Property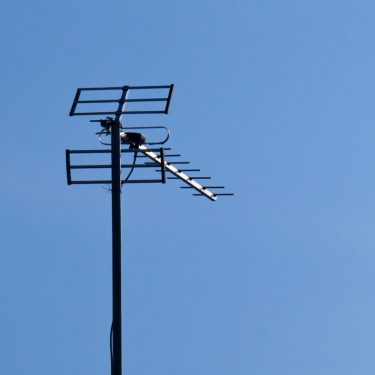
Before you buy a single thing, you need to know where the towers are and what direction they are from your house and what frequency each station uses.
The FCC keeps a free reception map for exactly this. You type in your address and it hands you every station within reach, sorted by signal strength, with a compass heading for each one.
Now, pay attention to the column marked RF channel, because this is where most people mess it up.
That number on your screen is just a name the station goes by. The frequency underneath it can be something else entirely.
Your local NBC station appears on channel 5. But the signal it puts out might be riding on channel 32. It’s that second number that tells you which antenna you need.
Channels 2 through 13 are VHF, and they need long antenna elements. Channels 14 through 36 are UHF, and they need short ones.
So write down which band each of your stations falls into. You’ll want that list in a minute.
The eternal power problem
Now, we might want to have a nice TV on our homesteads that helps us pass time and get new info, but it’s all in vain if you don’t have a stable power source.
If you are trying to live off-grid, the way you get power might be a real issue.
Some projects look great and promise a lot; you build them, and then they let you down from the first month.
Other projects are famous in the community and are reliable, but they are good only for those who have money to spend on them.
Considering this, I’d say I land somewhere in the middle, and I’d say the same for you.
Hopefully, getting power on your homestead completely off-grid is possible when you have the right instructions. When I first started my homesteading life I was completely depended on the gird. Now, I run a system that splits like this: 70% of the power is generated on my homestead, and 30% comes from the grid.
If you want to be more self-sufficient, making your own power is one of the biggest steps you can take. The only problem is that it’s very easy to start off on the wrong foot. YouTube alone won’t help you here. You need real guidance from people who know what they’re talking about.
Here you can find more about the “Backyard Power Plant” that I use
It includes everything you need to start, instructions, and a complete list of materials.
What’s Really Standing Between You and the Tower
So you point the antenna at the tower. But there’s a ridge in the way.
Fine, you buy a bigger antenna. But a bigger antenna can’t see through a hill either.
Then you add an amplifier. But once again, an amplifier makes the noise louder right along with everything else.
Every one of those is a real fix for a real problem. They’re just not fixes for your problem.
Here’s what’s actually happening. TV signals travel in a straight line. They don’t curve around the earth and they don’t go through hills.
Think about a yard light on a tall pole. Stand close and the light lands on you. Walk far enough away and the ground curves out from under the beam, and you’re standing in the dark while that light is still burning just fine.
That’s your reception right there. A thousand-foot tower throws its signal fifty or sixty miles before the earth gets in the way. Past that, you’re catching scraps.
And digital TV handles scraps badly. Analog used to give you a fuzzy picture that got worse a little at a time. Digital gives you a perfect picture right up until it gives you nothing.
But stay with me please, because there’s good news too! If you’re right at the edge, a small gain flips you from a black screen to a clean picture.
Height Beats Every Other Upgrade
Getting your antenna higher does more for you than any other change you can make. And it usually costs less, too.
The FCC’s reception maps assume your antenna is 30 feet above the ground. That’s the baseline behind every prediction on that map.
So if yours is up in the attic or clipped to a window frame, you’re already under the number those maps are built on. Every foot you gain pushes your horizon out further and lifts you over whatever is in the way.
If you are surrounded by a lot of trees, you need to know that wet leaves soak up UHF signal like a sponge. If your reception holds all winter and falls apart in May, you’re not imagining it. The woods leafed out.
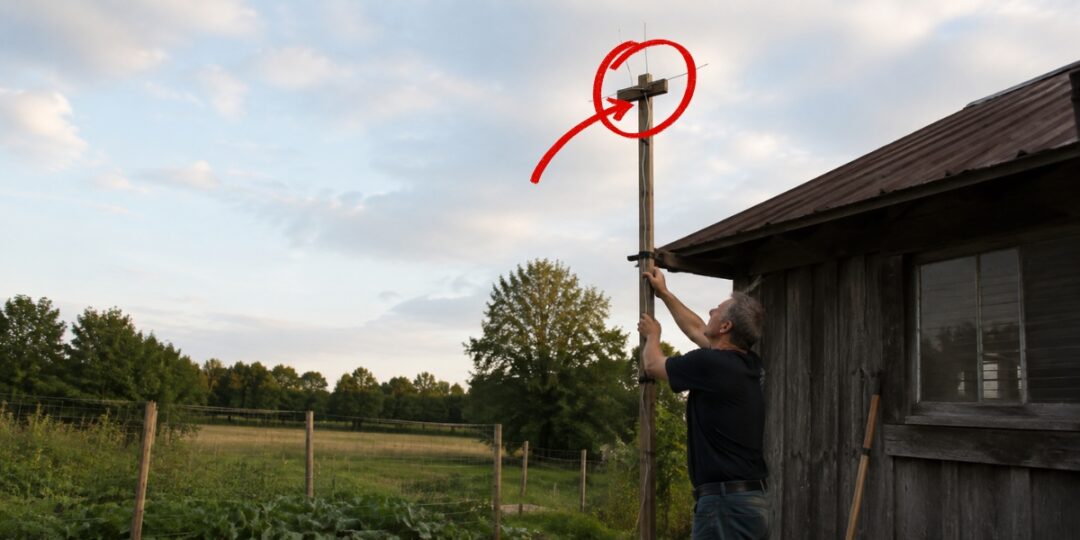
So, try to get that antenna above your tree line. A tripod mount on the roof, or a push-up mast strapped to the barn, or a length of galvanized pipe guyed to a corner post will all do the job.
Twenty extra feet often does more for you than an antenna that costs three times as much.
The climbing might sound off-putting, but if you think about it, you’re doing this once.
Always be careful about this
But before you lift anything, look up. Find the service drop running to your house and ask yourself whether that mast could reach it if it got away from you. If the answer is maybe, pick a different spot on the building.
And get somebody on the ground with you for the lift. Every year somebody out here puts an antenna into a power line, and that isn’t a mistake you get to learn from.
One project you can try
If you feel like you don’t have enough space on your homestead, this project is for you.
Since you’re thinking about adding a giant pole in your yard, why not use it for more things at once?
Putting this pole on your house to steal more height is a good strategy, but you can also build “the pole garden.”
This is a simple DIY project that lets you make the most out of your space and gives you the opportunity to expand your garden vertically. Many times when you feel like you have no more room left for veggies, the answer is to go up.
And the best part is that there is no need to build it on the pole. This is just a suggestion because if you plan to get an antenna, you can also do this.
But this vertical garden is also perfect for your fence. This is a smart concept that has been used since ancient times. See it like building a mini version of the Hanging Gardens of Babylon in your backyard.
👉 Click here to see how to expand your garden in the smartest way possible
What Finally Worked on Our Homestead
We’re about forty miles out from the towers, with a ridge between them and us.
When we first moved out here, Mark bolted a basic antenna to the eave of the house. It held six channels all winter. Then spring came, the woods filled in, and four of those six went away.
So he put up a twenty-foot push-up mast on the side of the barn, which is the tallest thing we own, and moved the antenna to the top of it. That brought back everything we lost and gave us two stations we’d never seen before.
The last piece was the amplifier. We run close to a hundred feet of cable from the barn back to the house, and that run was quietly eating the signal we’d just worked to get.
A small preamp mounted right at the antenna fixed it for about fifty dollars.
That setup has been up there for years now. The only thing we’ve added since is a rotator, so we can swing the antenna toward a second group of towers in the other direction.
How to Buy the Right Antenna
First, ignore the mile ratings printed on the box. A “150 mile antenna” is a marketing number.
And I get it, that number is the easiest thing to compare when you’re standing there in the aisle. But no antenna knows how far away anything is.
Bands – Go back to that list of RF channels. If everything you want is UHF, a UHF antenna is smaller and cheaper and better at its job. If you’ve got stations down in the 7 to 13 range, you need real VHF elements, which are the long rods sticking out the back.
Direction – A directional antenna aimed at one spot pulls in far more than one listening in every direction at once. Omnidirectional antennas belong in town.
Both bands – If your stations fall in two different bands, you can run a separate UHF antenna and a separate VHF antenna into one line. But you need a joiner made for it, called a UVSJ. A regular splitter used backwards will cost you signal.
Also, if this is your jam and you want to be highly prepared for whatever life throws at you, I also suggest you have a CB radio on hand.
This is the best way of communication in case something bad happens. Is the most reliable source of communication out there.
Even more, people who are living on remote homesteads even use them today to talk to one another. So, if you’re in a remote area where your phone has no signal, this can be a useful project that can keep you connected to your neighbors. In this way, you can be sure you can reach people if you need to.
👉 Click here to see how to turn your car radio into a CB station
How to Aim It Without Guessing
Grab those compass headings off the FCC list.
Then remember that your phone’s compass points at magnetic north while those headings point at true north. Depending on where you live, the two can be fifteen or twenty degrees apart.
So look up the magnetic declination for your county and adjust for it.
Then get someone to help you. One turns the antenna, the other watches the signal meter buried in the TV’s menu.
And watch the quality number, not the strength number. Strength tells you how loud the signal is. Quality tells you how clean it is.
A loud, dirty signal will still break up on you.
Turn the antenna a few degrees at a time and then stop and count to ten, because the tuner needs a moment to catch up. And once again, when you land on a spot you like, run a fresh channel scan.
Two odd things worth trying if the aiming alone doesn’t get you there.
Slide the antenna a couple feet up or down the mast. Signals bounce off ridges and buildings and cancel each other out in small dead spots, and two feet is sometimes the whole difference.
Or try aiming somewhere that isn’t the tower. If a ridge stands square in your path, point at a hillside or a grain bin or a water tower off to one side. Signals reflect, and some of the toughest locations in this country get their picture off a bounce.
Don’t Let the Cable Eat Your Signal
You can do everything else right and still lose the picture between the mast and the living room.
Use RG6 – Not the skinny RG59 off an old VCR. You want RG6 with a solid copper center and heavy shielding.
Keep the run short – A hundred feet of RG6 costs you real signal at UHF frequencies. If you can’t avoid a long run, step up to RG11, which holds onto noticeably more of it.
Skip the splitters – Every two-way splitter cuts your signal roughly in half. Feed three TVs off a fringe signal and you’ll starve all three.
Seal your connections – Use compression fittings outside, which are the ones you crimp on with a tool and not the twist-on kind. And leave a drip loop in the cable so water runs off the bottom instead of following the line into the connector.
Do You Need An Amplifier?
An amplifier can’t create a signal that isn’t there. It takes what your antenna already caught and makes it bigger, and it makes the background noise bigger right along with it.
But here’s the catch. Where you put it matters more than which one you buy.
Mount it at the antenna, not at the TV. A preamp on the mast with a one-foot jumper boosts a clean signal before the cable wears it down. That same amplifier behind your TV is only boosting a signal that’s already ruined.
I suggest you keep an eye on two things when you shop. You want a noise figure somewhere around 1 dB, and the lower is better. And you want LTE and FM filtering built in.
Cell traffic now runs right above channel 36, and FM radio sits in the gap between channel 6 and channel 7. Either one can swamp an amplifier and leave you worse off than when you started.
And never feed one amplifier into another one. You’ll overload the second and lose everything.
A $20 Antenna You Can Build This Weekend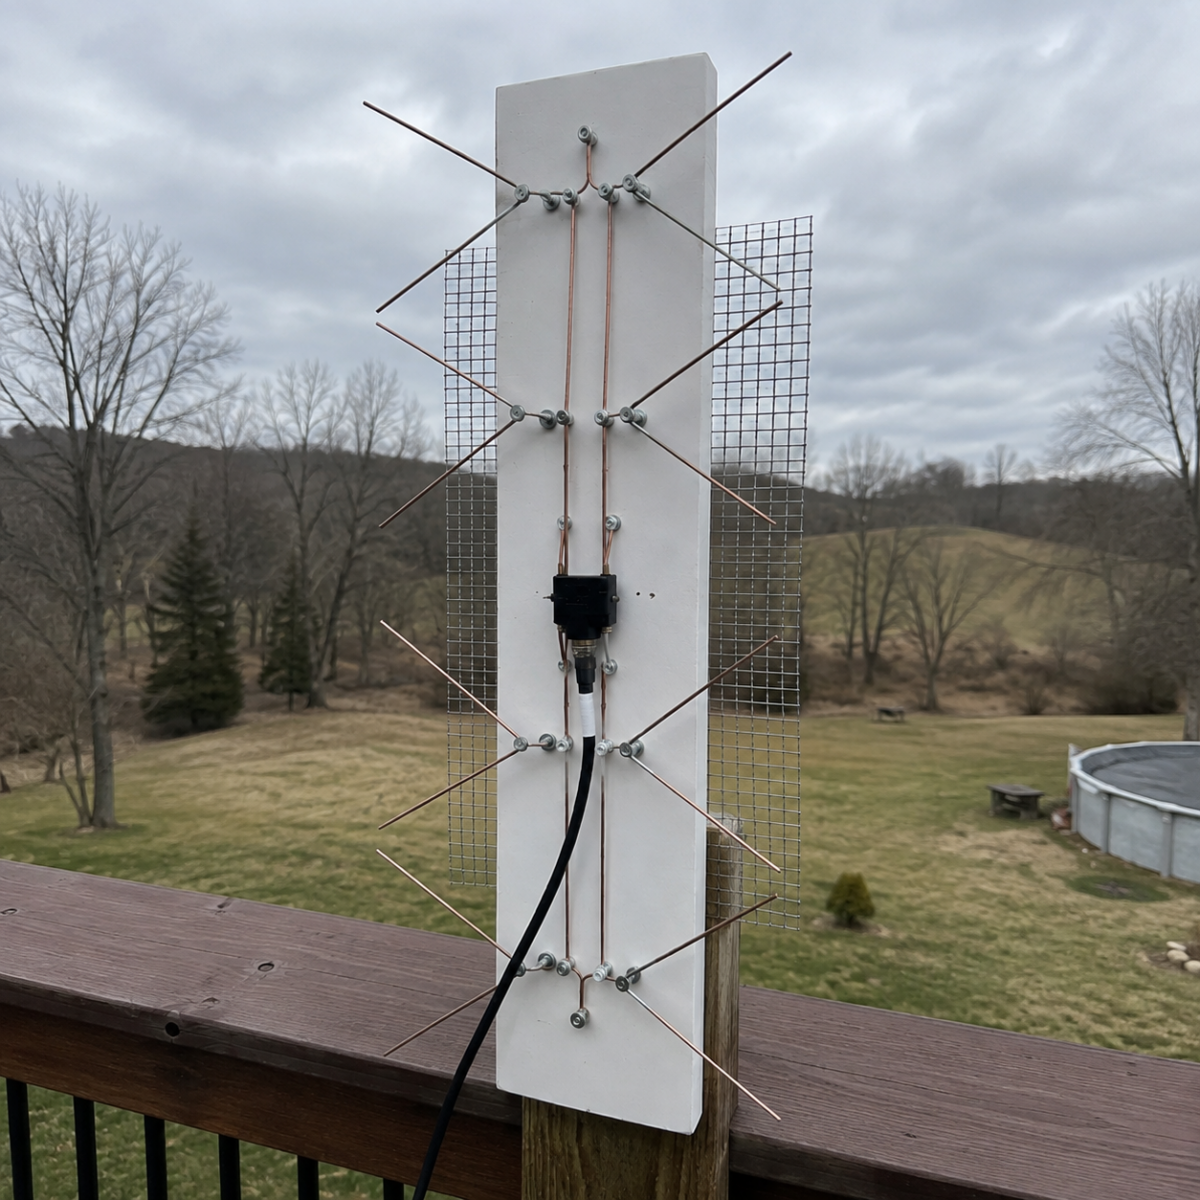
Now, you have two options here.
You can buy one off the shelf. And I get it, that’s the easy road. It shows up, you bolt it to the mast, you’re done by lunch.
But plenty of the antennas on the shelf still reach for channels that don’t exist anymore. Channels 38 through 51 went away when that spectrum got sold off, and a good chunk of what you’re paying for is still aimed at them.
So, let’s take another look at the other option.
You can build one. And I know, I know, you’re not an electrician. Neither am I.
But this thing is a board and some wire and eight screws. And trust me, you can put one together on a budget. Twenty dollars, one afternoon, no special tools.
It’s a UHF antenna with some reach into the high VHF channels, so check your list first.
You’ll need a piece of PVC trim board about 40 inches long, and roughly 25 feet of 10 or 12-gauge copper or galvanized wire, and eight stainless screws with washers, and a 300- to 75 ohm matching transformer, and a scrap of hardware cloth for the reflector.
The only part that might be unfamiliar is that matching transformer. It’s a small plastic piece with two screw terminals on one end and a coax connector on the other. The store might call it a balun, and either name gets you the same thing.
- Cut eight pieces of wire, 19 inches each. Bend each one in the middle so you get a V with two 9 1/2 inch arms and about 5 1/2 inches between the tips. These are your whiskers.
- Mark four points down the center of the board, 9 inches apart. Each mark is one bay.
- At each mark, set two screws side by side, about 1 3/8 inches apart.
- Attach one V to each screw so every bay has two Vs pointing away from each other, like a bowtie.
- Run one wire down the board connecting all the left screws and another connecting all the right screws. These are your phase lines. Between every pair of bays, cross those two wires over each other without letting them touch. That crossing is what makes the whole thing work, so don’t skip it.
- At the center of the board, between the second and third bays, connect your matching transformer to the two phase lines. Your coax goes on the other side of it.
- Mount the hardware cloth about 4 to 5 inches behind the whiskers and let it stick out an inch or two wider on each side.
You don’t have to be perfect on the measurements, but stay within a quarter inch.
And one more thing before you hang it. Use stainless screws and washers, because plain steel rusts and you’ll lose the connection in about two seasons.
Give the board a coat of paint, and guy the mast with three lines if it runs over ten feet, and check your connections once a year while you’re up there anyway.
Ground It Before You Climb Down
Any antenna on a mast is a lightning target, and the electrical code treats it like one.
So run a ground wire from the mast down to a ground rod, and put a grounding block where the coax comes into the house, bonded back to the same ground as your electrical service.
About thirty dollars of parts and an hour of work. I know, I know, it’s the boring part of the job. Do it anyway.
Final Thoughts
Pulling TV out of the air this far from town takes more fiddling than it ought to. But it’s a one-time job. And I am glad I took care of it. Now I can finally enjoy my TV.
Also, go easy on yourself if the first spot doesn’t work out. Mark and I moved that antenna three times before we got it right, and the third spot turned out to be the one he’d pointed at on the first day.
Just try things and see what works.
You may also like: 
How to Make Bricks at Home, Step by Step
How to Build a Space Heater That Works on Used Cooking Oil (Video)
How to Build a Predator-Proof Automatic Chicken Coop Door