If you cook from scratch or put up jars of what comes out of the garden, you know how this goes. There’s always a new and miraculous kitchen gadget that pops up in your feed or at the farm store promising to make everything faster, easier, or better.
And of course you look at it.
When you’re the one doing the work, anything that might save time sounds good…
The problem is, a lot of these things exist because somebody found another thing to sell us. You use them once or twice, then they get shoved into a cabinet.
Why?
Because they’re not as useful as people say.
The catch with them is that most are replacing an older, simpler way that already worked and cost almost nothing. Our grandmothers managed without a drawer full of special gadgets. How do you explain that?
So here are 7 things I would NEVER spend my money on.
The Magnetic Lid Wand and That Little Canning Kit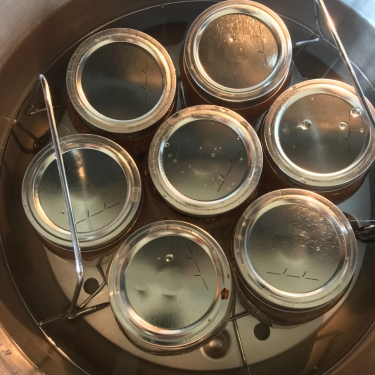
I’m sure you saw the kit I’m talking about. It has a plastic funnel, a jar lifter, a little magnet on a stick, and that notched plastic tool for checking headspace. It usually costs $12 to $15. I bought it a few years ago just because it looked nice and I was very curious.
You can imagine it was a total failure.
This kit is too small to help someone who is doing some serious canning work.
Also, that magnet was made to pull canning lids out of simmering water without burning your fingers. But you’re not supposed to simmer the lids anymore.
The lid makers stopped recommending that about ten years ago!
Now you wash the lids in warm, soapy water and that’s it. Heating them can even make the lids buckle during processing.
So the magnetic wand is simply not useful anymore.
What to use instead: Use your clean fingers for the lids. For headspace, use a chopstick or the end of a ruler. That’s what people used before someone molded a special piece of plastic and sold it. Keep the jar lifter, though. That one is actually useful.
The Bread Machine
Fresh bread without standing at the counter kneading dough sounds pretty good. I get why people buy these.
A basic bread machine costs around $75, a good one is closer to $200, and the fancy ones can pass $450. For that price, you get the same loaf shape every time, a hole in the bottom from the paddle, and another big appliance on the counter.
It doesn’t save money on bread, either. A homemade loaf still costs around $1 in flour and yeast whether the machine mixes it or you do.
And when the power goes out, it’s just a box.
The old way – Make no-knead dough. Stir flour, water, salt, and yeast together in a bowl, cover it with a towel, and leave it for twelve hours. Then bake it in a cast-iron Dutch oven. That’s about fifteen minutes of actual work, a better crust, and the same pot can go on a wood stove or over coals.
And a Dutch oven isn’t the only way to make bread without electricity.
People were making bread long before anyone had a temperature-controlled oven. There are campfire breads wrapped around a stick, bannock cooked in a skillet, simple ash cakes baked beside hot coals, and flatbreads cooked straight on a hot pan or griddle.
Some of these were made on farms and homesteads. Others were carried by travelers because all you really needed was a little flour, water, salt, and something hot enough to cook on.
That’s what I like about bread. You can make some version of it almost anywhere. Over a fire, in a skillet, on a stove, or even wrapped around a stick when you’re outside.
There are quite a few old ways of doing this that most people never hear about anymore.
See all the breads you can make without an oven here →
The Countertop Composter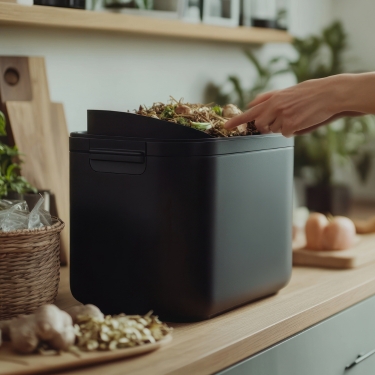
These cost a few hundred dollars, and some are close to $1,000. Put your scraps in, let it run overnight, and by morning you have dark, crumbly stuff that looks like soil.
But it isn’t compost. Real compost needs microbes and time. It takes weeks. These machines mostly heat the scraps and chop them into small pieces.
They’ve been compared with real compost more than once, and they don’t come close on nutrients. One man who tests compost for a living mixed the dried material into his soil, and it molded and set his plants back.
If you bury it in the garden, it’ll break down eventually. But then you’ve spent a few hundred dollars on a machine to do what your scrap bucket already did.
What to use instead: a five-gallon bucket with a lid under the sink. Give the scraps to the chickens. Whatever they don’t want can go on the pile.
The Cheese Press
People start looking at this right after they get a milk cow or a couple of goats. A nice cheese press with a crank and stainless hoop can cost $150 or more.
Almost every cheese most people are likely to make doesn’t need a press. Chevre, mozzarella, ricotta, queso fresco, cream cheese, cottage cheese. Even feta firms up without one.
A press starts to matter when you move into cheddar or gouda. Then you hit another problem nobody mentions much. Those cheeses need months at around 55 degrees with steady humidity. That’s warmer than your refrigerator and cooler than your kitchen. So somebody buys the press, uses it once, the cheddar doesn’t age right, and the press ends up out in the barn.
Build this instead: Use a mold, a flat board that fits inside it, and weight on top. A gallon jug of water weighs about 8 pounds, so stack two. Your great-grandmother could do it with a wooden hoop and a rock. Build yours for $15, make cheese for a year, then decide if you really need the expensive press.
If you actually want to try making cheese at home, Jack cheese is a good place to start.
It’s an old American cheese, and Amish families have been making versions of it from their own milk for a long time. It’s mild, delicious, and a lot less intimidating than some of the cheeses that need months of careful aging.
You don’t need a fancy setup for this one, either. It’s a good example of how much you can still make at home without buying another expensive gadget.
See how Jack cheese is made the old-fashioned way here.

The Butter Churn
Those hand-crank churns, especially the pretty glass ones with wooden paddles, cost $60 to $150. They look good on a shelf, and that’s why people want them.
But let’s be honest… Making butter was never hard because people didn’t have the right churn. Work cream long enough and it separates. The hard part is getting good cream, and an expensive churn can’t fix that.
I once read about a butter churning party where ten people took turns cranking a gallon churn, and the batch still failed. Ten people, a nice churn, and nobody went home with butter.
What I do: Fill a quart jar halfway with cream and screw the lid on tight. Shake it for about ten minutes. First it sloshes, then it gets quiet and heavy, and finally you hear the butter knocking against the glass. Grandkids love that job. And if you want a churn because you like how it looks, check farm auctions. Old dash churns can go for around $20.
I want to tell you a secret. Those expensive herb butters and cheeses at the store are incredibly easy to make at home. Once you have the butter or cheese, you can mix in whatever herbs you like.
And the herb you choose can do more than change the flavor.
Take lavender. Use just a little and it gives butter or soft cheese a completely different taste. But lavender has also been traditionally used to help people relax and wind down.
That’s what makes these herbs so interesting. Some of them can become part of your kitchen for more than one reason.
See the 10 most important medicinal plants and what people use them for here →
The Home Freeze Dryer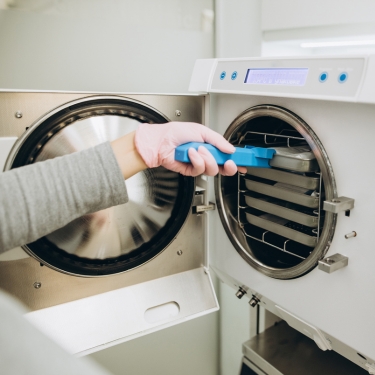
I’ll be fair about this one because some of you already own one.
A home freeze dryer starts around $2,100, and larger models can pass $4,900. A batch takes 24 to 36 hours and uses 9 to 12 kWh, close to $2 a load in electricity. The pump needs fresh oil every 20 to 25 batches. One man who ran his about once a week watched his electric bill go up $50 a month.
So yes, it can pay for itself, but only if you run it almost every week all year and your electricity is cheap and reliable. If you’re off-grid or depending on a generator, forget it. And if you only use it a few times each fall, that’s a few thousand dollars tied up in a machine sitting unused most of the year.
What to use instead: Use what’s probably already filling your shelves: pressure canning, a dehydrator, a root cellar, and salt. None of those quit working just because the power goes out.
The Multicooker With a Canning Button
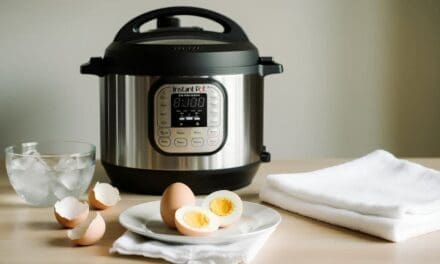
You’ve probably seen these sold as an appliance that does everything, including replacing your pressure canner. Some even have a button labeled canning or steam canning.
Please don’t use it for that!
The National Center for Home Food Preservation does not support using these appliances for pressure canning, even if the manual says you can. The reason is simple. Temperature kills the bacteria, not pressure by itself. Nobody has tracked the actual temperature inside the jars in those multicookers, and seeing a pressure number on the display does not prove the food got hot enough all the way through.
They also explain that processing times depend on heat from the whole process, including the slow cooling period afterward. A small multicooker cools down faster, so the food may not get the full heat treatment the processing time is based on.
Dedicated electric canners do exist, and the companies making them ran the testing first. That testing was not done on multicookers.
What to use instead: Use a stovetop pressure canner. It can run on a propane burner or a wood stove; the gasket and gauge can be replaced, and a good one can outlive you. For high-acid foods, a deep stockpot with a rack in the bottom does the same basic job a water bath canner always did.
One Bonus, and It Isn’t Even a Tool
Fruit and vegetable wash. This is marketed like a wash meant to get rid of all the chemicals on produce. It costs about $4 a bottle and you might see it on the produce aisle in stores.
But hear me out: You don’t need soap and you don’t need a special wash to eliminate nasty stuff from fruits and vegetables.
Rub fruits and vegetables under plain running water, and use a clean brush on firm produce like melons and cucumbers.
Each time these sprays were tested against plain water, regular water held up just fine.
So you’re basically paying $4 for water with a label on it.
The ONLY Old Kitchen Skills I’d Want Before Going Off Grid
If I had to start living off grid tomorrow, I honestly wouldn’t care about having a kitchen full of gadgets.
I’d care about knowing how to make bread without an oven, preserve food without depending on a freezer, cook over fire, smoke meat, make butter and cheese, render fat, use cast iron properly, and make the most of whatever food I had.
That’s why I like The Lost Skills of Independence so much.
It’s one of the most complete off-grid guides I’ve found, but the kitchen section is what really fits here. A lot of it comes back to the same thing we’ve been talking about in this article: you don’t always need a new machine. Sometimes you just need to know the old way.
I like to imagine it this way. You buy a piece of land, bring this book with you, and start figuring things out one skill at a time. Food, water, cooking, preserving, building, fixing things. It’s all there in one place.
I’ve gotten a lot out of it myself, which is why I keep recommending it.
See the old kitchen skills and everything else inside the book here.
Final Thoughts
None of this means we should make every job harder just to prove we can. I have a chest freezer, and I’m not giving it up.
But there’s a difference between a tool that does real work and one that will only sit in your garage or on your counter.
So when some new kitchen gadget catches your eye, give it a day before you buy it.
Think about what it does that you couldn’t already do with a jar, your hands, and a little patience.
Most of the time, I can’t come up with much.
You may also like: 
11 Scam Items Homesteaders Fall For
Sore Joints and Arthritis? Try This! (Video)
These 7 Homesteading Skills Pay for Themselves in Under a Year
How to Make Homemade Greek Yogurt
Should You Paint Your Chicken Coop Blue?