Yogurt is good food. In fact, it’s ranked as one of the superfoods. It’s an excellent source of protein, calcium, phosphorus, Vitamin B12, and B2. It’s also touted as an excellent source of probiotics, improving overall gut health. We’re going to make a variation on yogurt commonly known as “Greek yogurt.” It’s worth making because Greek yogurt is always the most expensive yogurt at the store.
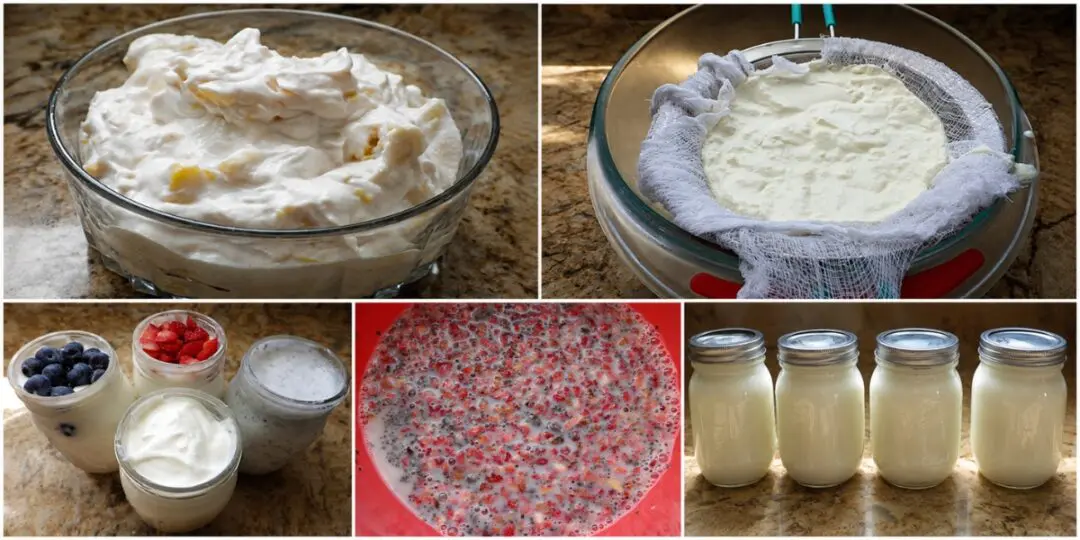
Greek yogurt is a concentrated yogurt that is filtered to remove excess moisture. This excess moisture or “whey” is mostly water. Removing the whey leaves a thick and creamy yogurt that will stand up on a spoon. It also concentrates the nutrients, making yogurt a highly nutrient-dense food choice.
Our final yogurt will be a plain Greek yogurt, but you can easily add fresh or dried fruit to add flavor, or natural sweeteners like honey, maple syrup, or Stevia leaves or extract. Our goal is to create the healthiest yogurt possible and that starts with the milk.
The ideal milk is organic, unpasteurized milk. It’s hard to find, but you can find it at some specialty food stores like Whole Foods or Trader Joe’s, or a local dairy farm. If you don’t have a source of organic milk, you can use pasteurized whole milk. They both work, but we’re in luck and found some organic milk.
You’ll also need a small container of plain Greek yogurt. The brand doesn’t matter as long as the label indicates that the cultures are active in the yogurt and you buy the plain variety. Many yogurts bought in a store have artificial flavors and colors and are highly pasteurized, which kills the active cultures. You need those active cultures in your small container of yogurt to jump-start your milk to make yogurt.
The refrigerated shelf-life of homemade Greek yogurt is 7 to 10 days, although it can last up to 2 weeks. Always date your jars and keep an eye on when it’s close to expiring. The good news is that you can use your old yogurt batch as a starter for your next batch, so you won’t have to buy another small container to get the new batch started.
Homemade Greek Yogurt Recipe
It’s going to take you from 8 to 24 hours to make your yogurt. Most of the time will be spent letting the yogurt ferment. The small container of yogurt is more than enough to get the milk fermenting. The final yield is up to you. We’re going to use a whole gallon of milk to start. The end result will be about 7 pints. We’ll lose about a pint (whey) when the yogurt is strained towards the final steps.
Here’s the rundown on equipment, ingredients, and directions.
Equipment
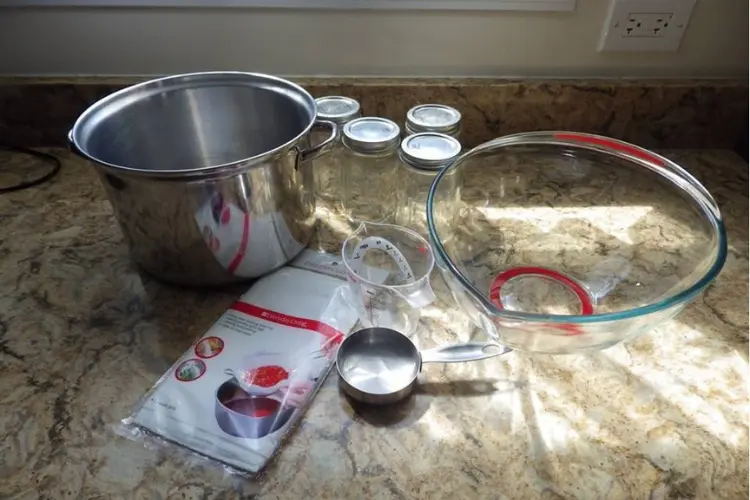
- A large, heavy-bottom saucepan
- A whisk
- Fine mesh strainer
- Cheesecloth
- 2 large glass bowls
- Mason jars and lids
- Candy thermometer
- Canning funnel
Ingredient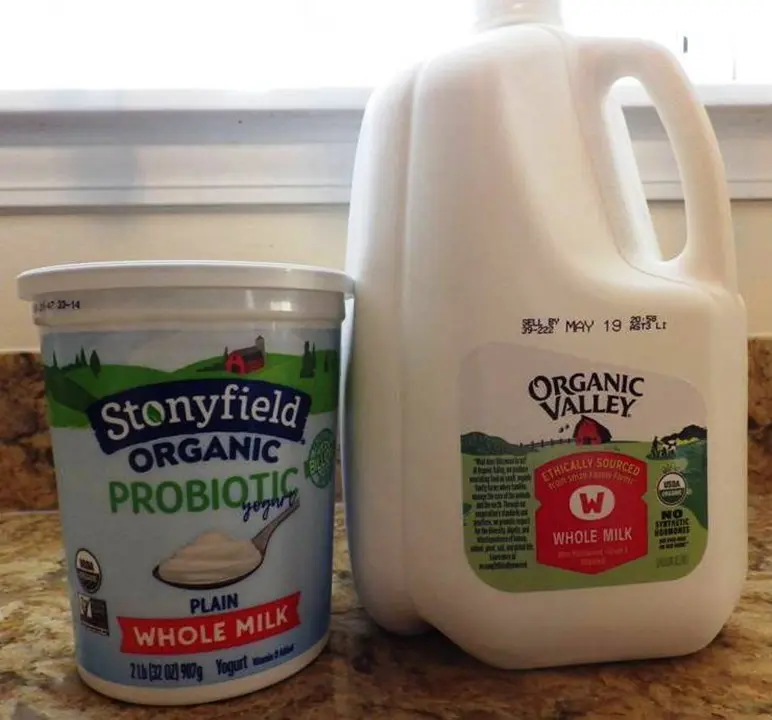
- 1 gallon of organic milk (or a regular gallon of whole milk)
- 6 ounces of plain Greek yogurt (label should state that it contains live and active cultures)
Why the Amish Still Drink Raw Milk
A lesser-known thing and an interesting one about the Amish is that they still drink raw milk. The milk they drink never undergoes any treatment to reduce the nasties. Now, you might wonder how they don’t get sick, right? Apparently, they developed some ways to curdle milk in a safe way so that they can use it to make cheese. The Amish call this “clabber” milk . They do this because they want to preserve the good bacteria found naturally in the milk. Using this secret method, they manage to get rid of the bad ones while preserving the beneficial bacteria.
Directions
- Pour the milk into the large, heavy-bottom saucepan and heat over medium heat to 110 degrees F. (44 degrees C.)
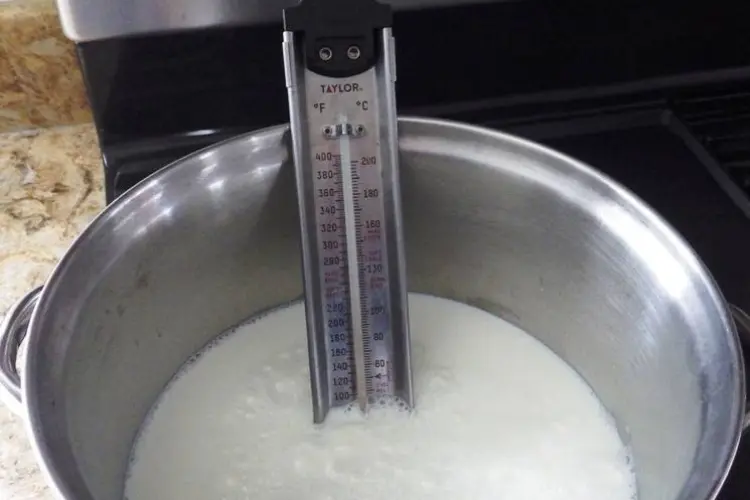
Whisk slowly but constantly.
- When the milk reaches the desired temperature, turn off the heat.
- Add the yogurt to a large, glass mixing bowl.
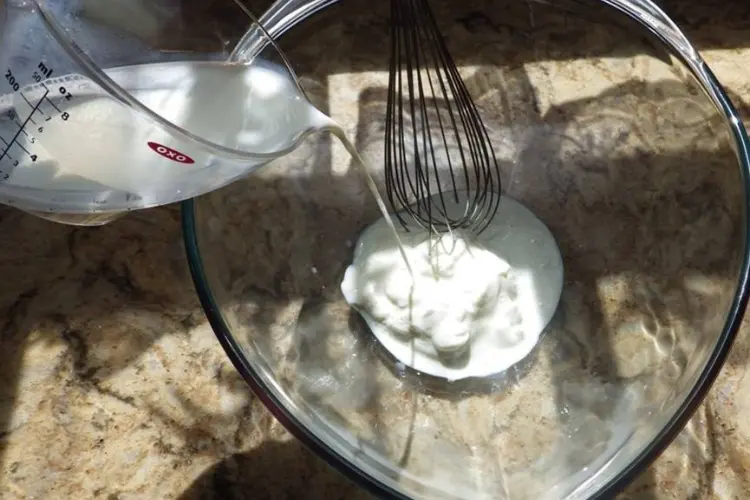
- Slowly pour in one cup of the hot milk on top of the yogurt, whisking constantly. You need to slowly temper the yogurt. If you just add the yogurt to the hot milk, you may kill the active cultures.

- After the yogurt is tempered, slowly add the rest of the hot milk to the bowl, whisking slowly but constantly until well blended.
- Preheat the oven to 110 degrees F. (44 degrees C.).
- Pour the yogurt into sterilized jars and loosely put the caps on top. Do not tighten the caps.
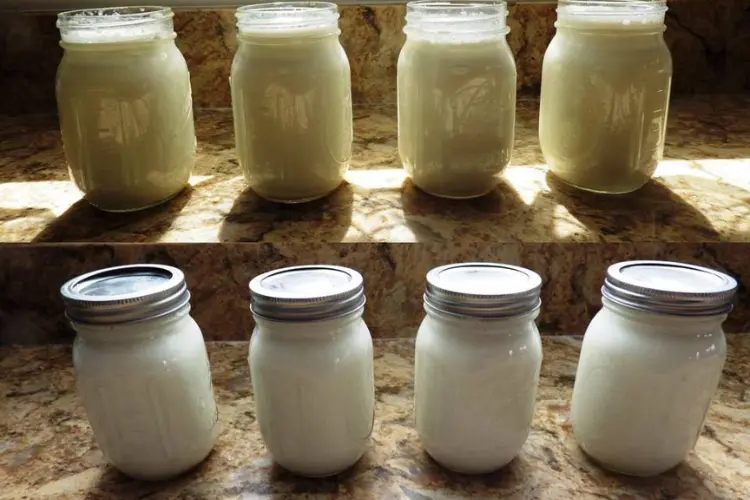
You want the yogurt to breathe while it ferments.
- Shut off the oven once it has reached 110 degrees F. (44 degrees C.) and turn the oven light on. The oven light will actually maintain a warm temperature in the oven.
- Place the yogurt jars in the oven on a baking sheet and close the oven door.
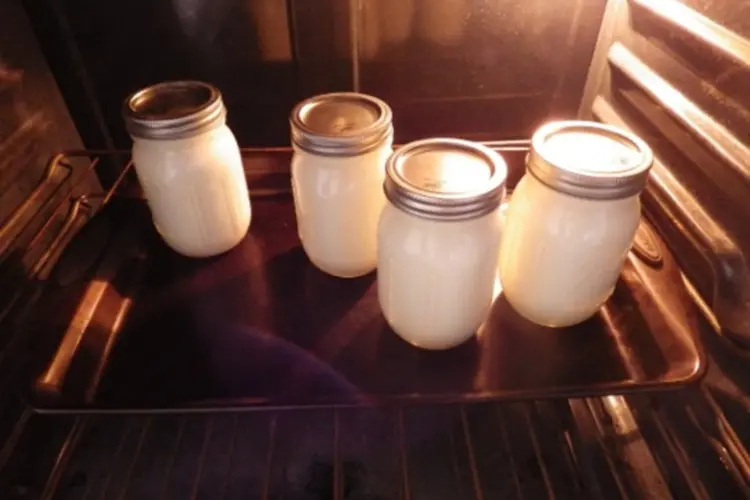
Do not open the oven door while the yogurt ferments. You want to maintain the warm temperature.
- Allow the yogurt to ferment for 6 hours or overnight.
- When the yogurt has fermented, remove it from the oven. You’re now ready for the next step: filtering.
How You Can Turn Fresh Milk Into Homemade Cheese
If you’re not a big fan of yogurt or you just want another recipe, you can also try your hand at making cheese. Here, the process is a little bit more complex, but it’s easier than you might think.
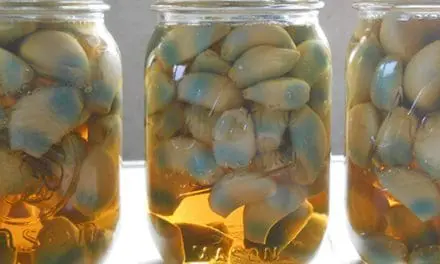
A beginner-friendly type of cheese you can start with is the Amish Jack Cheese. This recipe is easy to prepare and you can eat the cheese in 2 days. Also, it comes from Ohio and is a legacy recipe of the stricter Amish communities you find there. They make it with raw milk from their own cows, but you can also use store-bought milk and as long as it’s milk that has fat in it, the cheese will turn out good.
Click here to see the secret Amish cheese recipe
Also, if you are interested in preserving your cheese for years, a good way to do this is by waxing your cheese. This method works well for this Jack Cheese recipe.
Here you can find a full guide about waxing cheese.
It is written after a forgotten pioneer method most people have no idea existed.
Filtering Directions
Filtering the yogurt is what makes it Greek yogurt. You are trying to remove excess water.
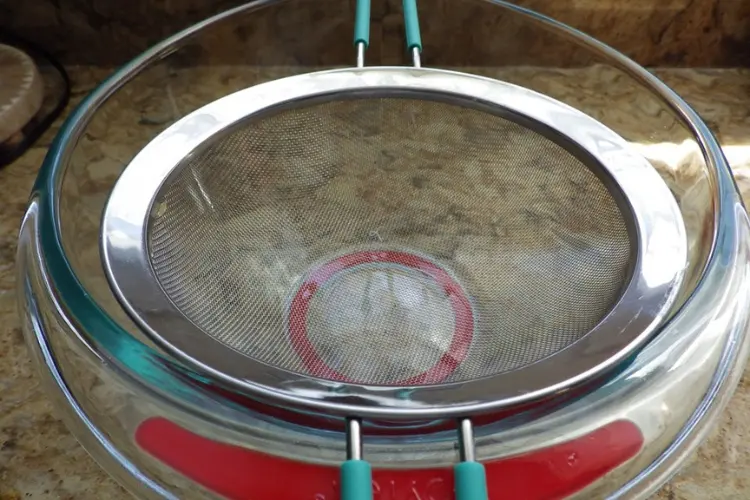
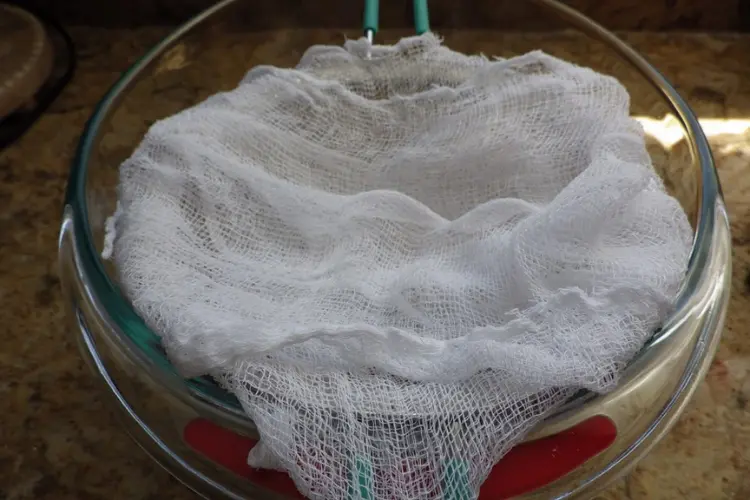
- In a sterile glass bowl, place a fine mesh strainer over the top of the bowl.
The strainer should be able to support itself on the top of the bowl.
- Carefully line the mesh strainer with 3 to 4 layers of crisscrossed cheesecloth.
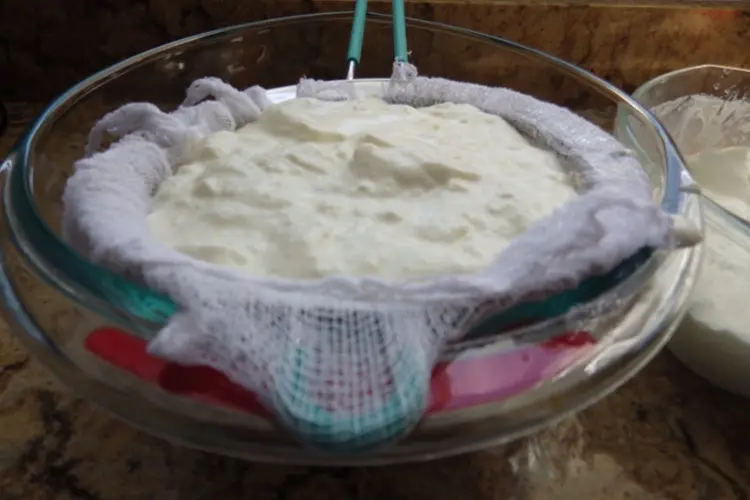
- Pour the yogurt into the cheesecloth strainer carefully and let it slowly filter and drain for 30 minutes to an hour.
- You will see a pool of whey collecting at the bottom of the bowl.
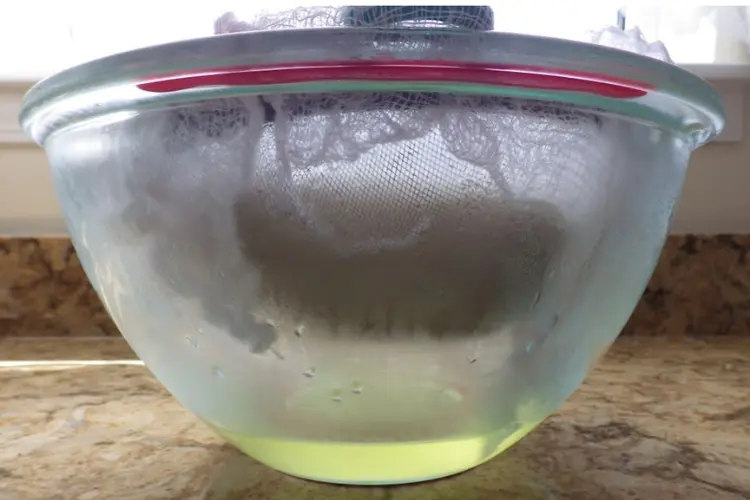
You can save the whey in a jar in the refrigerator as a yogurt starter or, as we’ll detail in a bit, use it to rehydrate chia seeds and/or flax seeds or dehydrated fruit to be added to the yogurt.
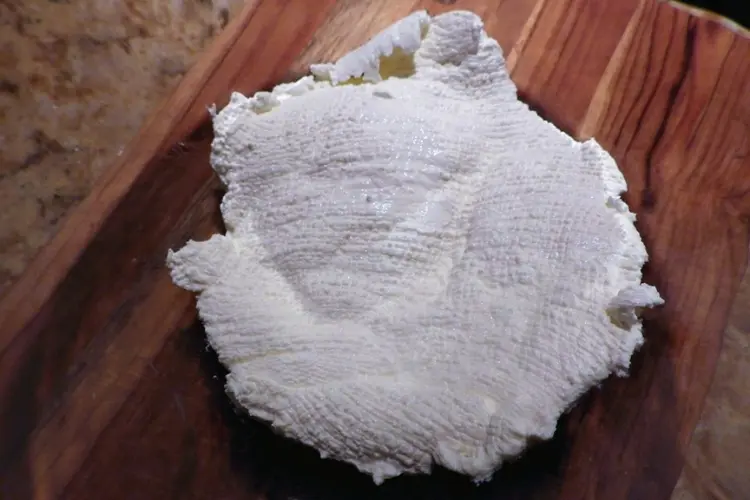
- Once the yogurt has drained, you will notice that the yogurt in the strainer appears thicker.
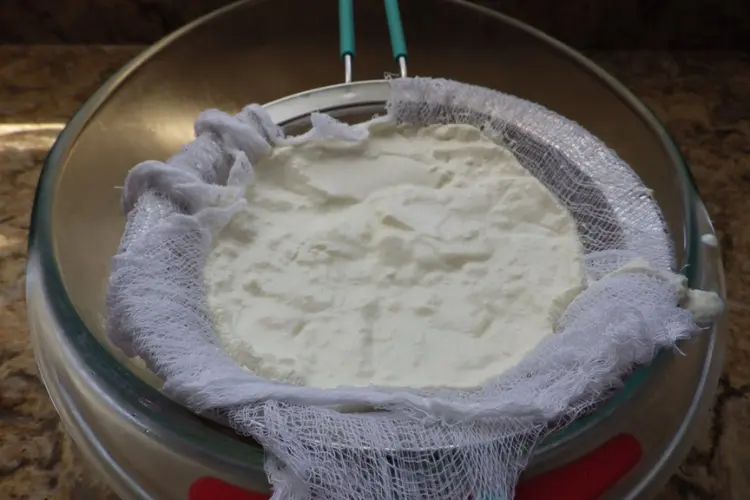
- You can even invert the strainer, and the yogurt will drop onto a cutting board or countertop as a semi-solid.
- You now scoop the Greek yogurt into sterilized mason jars. Do not process the jars in any way. That will kill the active cultures.
- Label the jars and refrigerate immediately. The yogurt will be good for 7 to 10 days. However, you could also add natural flavors and sweeteners before scooping into jars.
Flavoring and Sweetening Suggestions
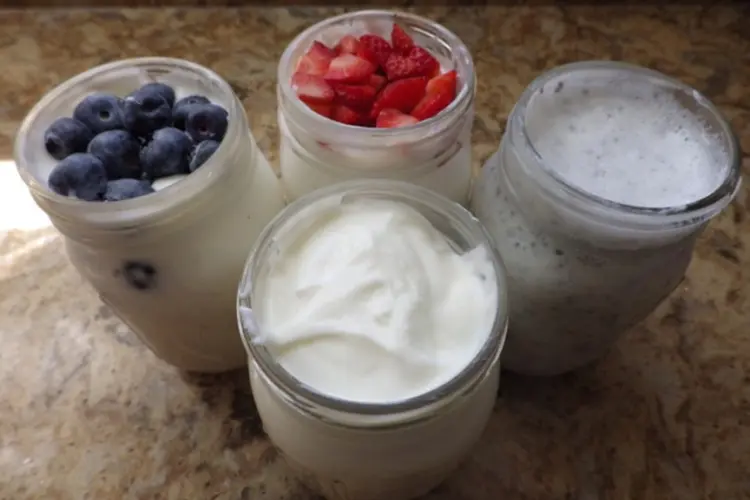
Fruit is a common flavoring addition. You can add any fresh fruit, frozen fruit, or even dehydrated fruit. After you have filtered your yogurt, drop it into a bowl and add your fruit. Use a large spoon to blend the fruit.
- If adding fresh fruit, make sure the fruit has been thoroughly washed. Small fruits like berries can be added to the yogurt whole
Larger fruits like pineapple, mango, or peaches and apples should be washed, peeled, and cut into bite-sized pieces or to the size you prefer.
- If adding frozen fruit, you can add the frozen fruit to the yogurt directly from the freezer bag. How much fruit you add is up to you.
- If adding dehydrated fruit, drop the dehydrated fruit into the whey you collected during the filtering step.
You could also add some chia seeds to the dry fruit mix if you like.
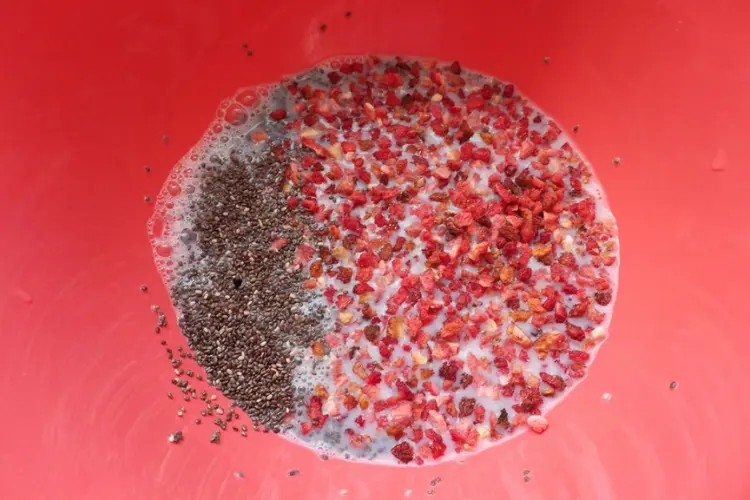
Let the dry fruits (and Chia) rehydrate for 30 minutes and then drain and add to the yogurt.
- Another option is to add just Chia and/or Flax seeds to the yogurt. If adding flax seeds, break them up in a food processor first, although chia seeds can be added whole. Ideally, let the Chia and/or flax seeds soak for 1 hour in the whey water. After 1 hour, drain them and add them to the yogurt. If the chia and whey have become gelatinous, you can add them to the yogurt without draining them.
- Regardless of the kind of fruit or seeds you choose to add, make sure you blend them well into the yogurt using a large spoon.
Natural Sweeteners
Plain Greek yogurt tastes a bit sour to some people. Think of it as sour cream on steroids. You can moderate the sourness with raw honey, real maple syrup, or a natural sweetener like Stevia leaves or Stevia extract. Add as much as you like to suit your taste. Washing and chopping Stevia leaves and adding to your yogurt is the most natural way to sweeten things, but raw honey and real maple syrup are a close second.
Another thing you can add to your homemade yogurt is fruit jam. Strawberry jam, blueberry jam, peach jam, any jam you have in your pantry will do it. And besides the sweet delicious taste, adding fruits also adds more vitamins, nutrients, and fiber to your yogurt. Click here to see how to make the best jams.
Also, another trick I know about that gives the yogurt a great taste is adding this Kidney Cleans Juice. This juice is made out of red grapes and is known to flush the toxins out of your kidneys. It also contains apples and lemons, so it adds a special taste to the yogurt. The most important thing is to consume it right after you make it to take advantage of its powerful properties. Give it a try.
If you are adding fruit or seeds to your yogurt, remember to reserve about 6 ounces of your plain, homemade Greek yogurt as a starter for your next batch. If you ever open a jar and notice any kind of mold or a mildew smell or an off odor, throw it out. That’s uncommon, but if the yogurt has been in the fridge more than 2 weeks, it’s always a possibility. That’s why clearly labeling and dating your homemade yogurt is so important.
It’s Worth a Try and It’s Inexpensive
The total cost of a gallon of milk and 6 ounces of yogurt will be about $4 to $5. If you buy the organic milk, it could be as much as $10, but you’ll get about $50 to $75 worth of Greek yogurt in return. Adding fruit or seeds will add a bit to the cost, but a pound of frozen blueberries is as little as $3 and can easily flavor the whole batch.
Once you try it and see how easy it really is, you’ll probably start making it on a regular basis. Just remember to rinse the cheesecloth well in hot, running water before reusing and always use sterilized jars and equipment. In no time at all you’ll look at that expensive Greek yogurt in the store and smile a knowing smile as you continue to make the world’s healthiest yogurt.
You may also like: 
No Cheesecloth? Try These 9 Household Alternatives
This Is The First Thing You Should Do With The Food In Your Fridge During A Blackout (Video)
Freeze Dried Strawberries: How to Make, Store, and Use Them at Home
What Happens if You “Water” Your Garden With Spoiled Milk
How to Make Yogurt Without Starter: 6 Methods That Actually Work


