If you’ve canned before, you know the drill. Sterilizing jars, making syrup, processing times, and time-consuming steps you can’t avoid. Or are they?
The old-timers had shortcuts that somehow got buried under decades of “safety rules.”
What I’m about to reveal aren’t risky corner-cutting methods. I want to present you proven techniques that deliver shelf-stable fruit with half the effort. Once you see how simple fruit canning actually is, you’ll wonder why anyone would complicate it in the first place.
What Is the Most Efficient Canning Method Out There?
When you want to can fruit, you have two options: water-bath canning and pressure canning. Which one you choose depends on the amount of effort you want to put into it.
Pressure canning requires heavy equipment and constant monitoring. While water-bath canning uses nothing more than boiling water. The fruits are highly acidic, which is why this method works.
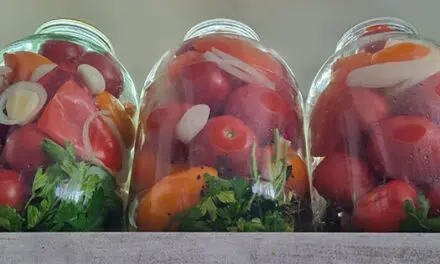
While it works great for fruits, you should NEVER use water-bath canning for meat or vegetables! That would create the perfect breeding ground for the bacterium that causes botulism, which is a life-threatening disease.
That being said, if your goal is to can fruit, you don’t need a $200 pressure canner to get the job done. A deep stockpot you already own will work. The water doesn’t even need to cover the jars completely if you use the method I’m about to reveal; more on that in a moment.
The beauty of water-bath canning is that it’s forgiving. Slight variations in processing time won’t ruin your batch the way they might with pressure canning.
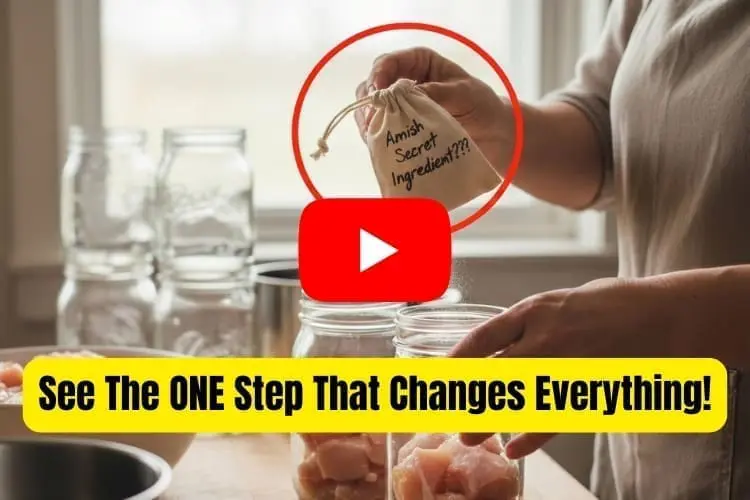
However, if fruits are not up your alley and you’re looking for the best way to can meat safely and effectively, you’ll want to see this forgotten old method. This is a type of pressure canning, but the Amish managed to improve it so that the meat stays fresh for longer and the flavor is enhanced.
They simply use these secret ingredients you probably have in your pantry but would never guess they help make canned foods last longer. Their method works for everything from beef and poultry to fish and even wild game. Discover their secret ingredients in the video below!
Always Choose These Fruits if You Want to Make Things Easy
Start with berries. Strawberries, blueberries, raspberries. They require almost no prep beyond rinsing. No peeling, no pitting, no complicated cutting. Pack them raw into jars, pour hot liquid over them, and process. That’s your entire workload.
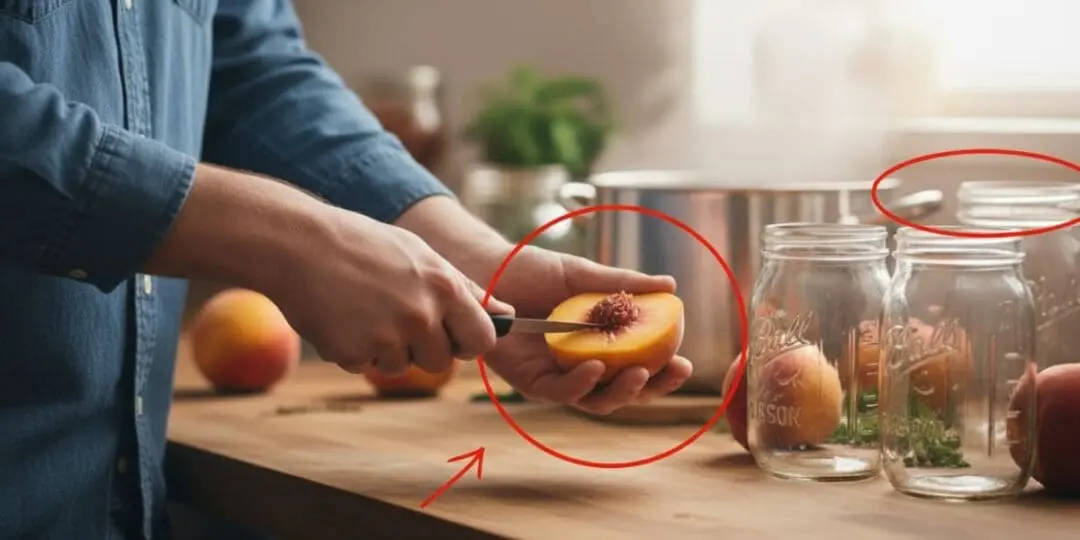
Then we have stone fruits such as peaches, plums, cherries, and apricots. Here I want to tell you a secret most people don’t know. You can leave the skins on peaches if you’re planning to cook with them later. Saves you the blanching step entirely. Plums can go in whole if they’re small enough. Cherries benefit from a pitter, but even that’s optional if you don’t mind your family working around the pits.
Apples and pears are workhorses. They hold their shape, tolerate different canning liquids, and taste good whether you add a sweetener or not. A simple apple peeler-corer makes quick work of a basket, but a sharp paring knife gets the job done just fine.
Here’s the overlooked trick: many fruits create their own canning liquid as they heat. This means you can pack them tighter, add minimal liquid, and let the fruit release its juice during processing. Less liquid to heat, less work measuring and mixing, and you end up with fruit that tastes more like fruit and less like sugar water.
Prep Shortcuts That Actually Save Time
The blanching method for peaches changes everything. Boil water, drop peaches in for 30-60 seconds, then straight into ice water. The skins slip off like they were never attached. No struggling with a paring knife, no mangled fruit.
Raw packing beats hot packing for most home canners. Hot packing means cooking fruit before putting it in jars. When you do this, you will need extra pots, extra stirring, and extra cleanup. Raw packing lets you skip all that. Fill jars with raw fruit, add hot liquid, and process. The fruit cooks during processing anyway, so why use an extra pot?
👉 See How to Make No-Effort Nausea Lollipops With Lemon and Ginger
Use what you have. A regular kitchen knife works fine instead of a specialized canning knife. A metal spatula removes air bubbles just as well as a plastic bubble remover tool. A chopstick or wooden skewer does the same job for free.
The Only Tools You Need
Four things make canning easier: a jar lifter, a wide-mouth funnel, a magnetic lid lifter, and something to measure headspace. The jar lifter saves your hands from burns. The funnel keeps jar rims clean. The magnetic lid lifter saves you from fishing in hot water. A ruler is all you need for headspace.
Something I use and I think deserves more attention is a steam canner. They use less water than traditional water-bath canners, which means faster boiling and less energy. The science is solid, considering the USDA approved them years ago, but many homesteaders still don’t know about them. They work exactly like water-bath canners but require only a few inches of water instead of a full pot.
A stockpot deep enough to cover jars by an inch or two works as a canning pot. Drop a cooling rack or silicone trivet in the bottom to keep jars off direct heat, and you’re all set. I’ve canned hundreds of jars in a $20 stockpot from a big-box store and let me tell you, it’s worth every dollar.
Skip the Syrup
Sugar syrup is optional as fruit doesn’t need added sugar to can safely. The sugar affects texture and flavor, but safety comes from acidity and heat, not sweetness. This means you can pack fruit in plain water, fruit juice, or the lightest syrup possible.
Water works for any fruit you plan to cook with later, from pie fillings and cobblers to jams. The fruit itself provides plenty of flavor once it’s baked or simmered. Juice is a must when you want fruit that tastes good straight from the jar. Apple juice, white grape juice, or juice from the fruit itself all work. Pour cherry juice over cherries, peach juice over peaches.
👉 Step-by-Step DIY Fruit Solar Dehydrator Guide With Pictures (Simple and Tested Method)
If you still want some sweetness, you can try to use light syrup. This has minimal sugar and does its job well. To prepare it, use the following ratio: about 2 cups of sugar to 6 cups of water. Heavy syrup is mostly for desserts and special occasions. If you are not into desserts, stick with light or skip syrup entirely.
Instructions for the Bath-Canning Method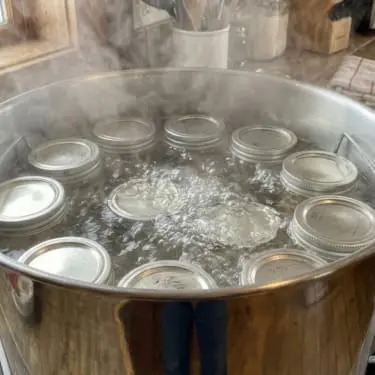
Let’s walk through canning peaches because once you’ve done peaches, you’ve essentially done everything. Wash and blanch your peaches. Slip off the skins, halve them, and remove pits.
Pack them raw into clean jars. Pour hot water or juice over them, leaving half an inch of space at the top. Run a chopstick around the inside to release air bubbles. Wipe the jar rims clean with a damp cloth. Put on lids and rings, finger-tight only.
Lower jars into your boiling water bath using a jar lifter. Make sure water covers the jars by at least an inch. If it doesn’t, add more boiling water. Never use cold water because it can crack hot jars. Cover the pot and maintain a steady boil for 20-25 minutes for pints, 25-30 for quarts. Altitude affects these times, so check a current canning guide if you’re above 1,000 feet.
When time’s up, turn off the heat and let the jars sit for five minutes. This prevents siphoning, that frustrating thing where liquid gets sucked out of jars when you lift them too quickly. After five minutes, use your jar lifter to move jars to a towel-covered counter. Don’t tighten the rings. Don’t tip the jars. Just set them down and walk away for 12-24 hours.
You’ll hear the lids pop as they seal. This will be a metallic ping and signal you that everything worked. After jars cool completely, press the center of each lid. If it doesn’t flex, it’s sealed. Remove the rings, wipe down the jars, and add them to your pantry!
One thing that still surprises me is most people don’t know how to safely store their food in the pantry. Yes, simply piling jars one on top of another in your pantry is not the way to go if you want to have a reliable stock for your homestead. There are a couple of simple rules you should follow to do a good job. These are the exact methods used every day, all over the country, by the massive warehouses. Click here and find out how to organize your pantry by following the staple rules of food safety.

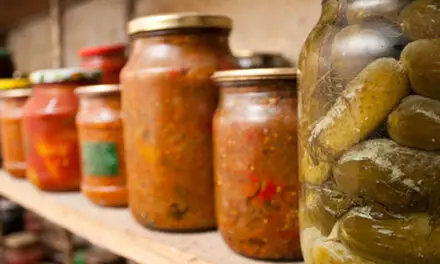
Store Your Jars Like This for Maximum Freshness
A basement, pantry, or closet is the perfect storage option because your jars need a cool, dark, dry place. Temperature matters more than you’d think. Above 70°F, fruit gradually loses quality. Below 40°F, liquid can freeze and crack jars. Somewhere between 50-70°F is ideal. Darkness prevents color fading. Dryness prevents rust on lids.
One important step you should never skip is labeling your jars and cans. Labels should include contents and date. You think you’ll remember what’s what and when you canned it, but six months later, when you’re staring at twenty identical jars, you won’t. All you need is a permanent marker and you can write directly on the lid.
Then don’t forget to rotate your stock. This is a method used in retail and they call it first-in, first-out. Move older jars to the front and use them first. Most properly canned fruit stays good for a year, sometimes longer, but quality peaks in the first 8-10 months.
What to Try Next
Once fruit canning feels like a piece of cake, try fruit butters. They’re just cooked-down fruit with spices. The process is similar to regular canning, but with a longer cooking time to reduce liquid. The payoff is a spread that’s worth more than gold when you need something more nutritious.
Simple jams follow the same principles as fruit canning, but with added pectin. Once you’re comfortable with water-bath canning and processing times, jams are a natural next step. They use the same equipment, same techniques, just slightly different ratios.
You may also like: 
Canning Potatoes: A Self-Reliant Staple for Your Pantry
The Herb You Can Add To Your Coffee Or Tea To Empty Your Bowels Effortlessly Each Morning (Video)
Home Canning Sausages for Maximum Shelf Life (10+ Years)
Canning Mistakes Even The Most Advanced Homesteaders Make
Canning Bone Broth That Lasts For More Than 2 Years


