Growing food and raising animals are the foundation of homestead life, and if you have those skills, you are ahead of most people. But they are not sufficient on their own when a crisis runs long enough to strain every other system you depend on. Gardens fail. Flocks get sick. Drought, flood, grid failure, and supply chain collapse each attack different vulnerabilities, and the homesteader who survives an extended crisis is not necessarily the one with the best harvest but the one with the broadest capability to adapt when one system breaks down.
The nine skills in this article were chosen for a specific reason: they address the gaps that food production alone cannot fill. Water sourcing when infrastructure fails. Medical response when hospitals are unreachable. Food preservation without electricity. Communication when the grid is down. Each one extends your window of self-sufficiency in a crisis scenario where conventional support systems have either failed or become inaccessible.
These are not beginner homestead skills. Most people with gardens and chickens have not worked through any of them seriously. That is the gap this article is designed to help you close.
One important note before diving in: several of these skills involve genuine physical risk if practiced incorrectly. Water purification done wrong can make you seriously ill. Lye soap made without protective equipment can burn you. Foraging without thorough identification knowledge can kill you. Each section includes the safety information you need alongside the practical instructions, and that safety information is not optional reading.
Here are the nine skills, worked through in enough detail to give you a real starting point for each one.
Where to Start – Prioritizing These Skills for Your Situation
Nine skills is a significant learning agenda, and not all of them are equally urgent for every homesteader in every location. Before working through the list, it helps to think about which skills to develop first based on four factors: your most likely crisis scenarios, your current skill gaps, how long each skill takes to develop to a useful level, and what resources or equipment each requires in advance.
- Start with the skills that address your most likely scenarios first. If you live in a region prone to ice storms and winter outages, water purification and alternative heating and cooking such as the rocket stove are immediate priorities. If you are in a wildfire zone, emergency signaling and communications matter more urgently. If you are in a rural area with limited medical access even under normal conditions, first aid skills are perpetually relevant regardless of crisis scenario.
- Separate skills that require practice from skills that require equipment. Water purification, first aid, and foraging are knowledge and practice skills that cost little to develop but require significant time investment before they are reliable under pressure. Soap-making and rocket stove construction require materials and practice builds. Natural refrigeration requires construction. Emergency signaling requires specific tools you need to acquire and test before you need them. Make a list of which skills you can begin developing immediately with what you have, and which require procurement first.
- Consider time to competency for each skill. Basic wound care, oral rehydration, and fire-based water purification can reach a useful level in a few focused practice sessions. Safe foraging identification for a meaningful range of species takes a full seasonal cycle at minimum, ideally two or three years of consistent practice in your specific region before your judgment is reliable enough to trust under pressure. Soap-making requires several practice batches to understand how your specific ash-based lye behaves with your available fats before the results are consistent. Plan your learning timeline accordingly.
- A suggested starting sequence for most homesteaders: Begin with water purification since water is the most immediate survival priority and the skill is straightforward to practice. Develop basic first aid capability in parallel since it is always relevant. Start the foraging learning process immediately because it takes the longest to develop safely, but begin with hands-on guided identification before you attempt solo harvesting. Build a rocket stove once and cook on it several times before you need it. Practice soap-making through at least two or three complete batches before you rely on it. Work on signaling and communications as a parallel project that requires relatively little ongoing practice once equipment is acquired and tested.
Scouting for Hidden Water Sources 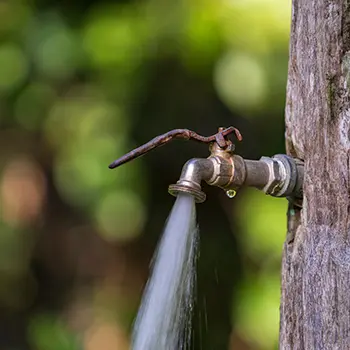
When your well runs dry or tap water stops flowing, knowing how to locate and harvest alternative water sources becomes a genuine survival skill. This section covers several methods, along with the safety limitations of each that you need to understand before relying on them.
- Dew collection: Spread plastic sheeting overnight over grass or low vegetation on sloped ground. By dawn, condensation collects and gravity pools it toward a low point where you can direct it into a container. Output depends heavily on temperature differential and humidity. In favorable conditions this method can yield a liter or two overnight. It is a supplemental source, not a primary one, and the water collected still requires purification before drinking since the sheeting, ground contact, and collection container all introduce contamination risk.
- Tree sap: Birch and maple sap are sometimes cited as emergency water sources, and it is worth being precise about what they actually are. Fresh birch and maple sap is approximately 97 to 99 percent water, with the remaining one to three percent being sugars and trace minerals. This makes it a legitimate hydration source in early spring when sap is running, not year-round. To collect it, drill a shallow hole no deeper than one and a half inches into the trunk at a slight upward angle, insert a spile or a clean hollow tube, and hang a container to collect the drip. A mature birch or maple in active sap flow can yield one to several quarts per day per tap. Tap no more than one hole per ten inches of trunk diameter to avoid damaging the tree. The sap should be boiled before drinking to eliminate any biological contamination introduced during collection.
- Locating underground water: Clusters of water-loving vegetation including cattails, willows, cottonwoods, and rushes indicate subsurface water within a few feet of the surface in many landscapes. This is a reliable indicator used by indigenous peoples and experienced foragers across many climates. However, digging for a subsurface water source carries real risks that must be addressed before you start. Any hand-dug pit deeper than knee height carries collapse risk, and a chest-deep pit in loose or sandy soil can collapse fast enough to trap a person before they can react. Never dig in sandy or gravelly soil without shoring the walls as you go. Work with a partner who remains outside the pit at all times. Dig only in dense clay or consolidated soil where walls hold their shape. Line the hole with rocks as you go to maintain wall integrity. Water collected from a hand-dug pit is not clean water. It requires filtration and purification regardless of how clear it appears, since soil filtration removes some but not all pathogens and does nothing for chemical contaminants.
- Solar still: For environments where surface water and vegetation are scarce, a solar still extracts moisture directly from the ground through evaporation and condensation. Dig a pit roughly three feet wide and two feet deep, place a clean container in the center, and cover the pit with clear plastic sheeting sealed at the edges with soil. Place a small rock in the center of the sheeting directly above the container to create a low point. Solar heat evaporates ground moisture, which condenses on the cooler underside of the plastic and drips into the container. Output in most environments is low, typically half a liter to a liter per day per still, and decreases as the ground dries out. A solar still is a last-resort supplemental source, not a reliable primary supply. The condensate collected is generally clean since it has been through an evaporation cycle, but the container and plastic should be clean before use.
- The critical rule for all collected water: No matter how clean a water source appears, treat all collected water before drinking. The water purification section later in this article covers filtration and treatment methods in detail. Apply those methods to every source described above without exception.
When there isn’t any running water, you won’t be able to go and dig yourself a well in a hurry. But you can make this no-electricity device that will provide drinking water from the atmosphere for you and your family.
First Aid and Emergency Medical Skills
When professional medical care is inaccessible, your ability to manage injuries and illness with available materials determines outcomes that would otherwise be straightforward emergencies. This section covers practical interventions with honest assessments of what they can and cannot do.
- Wound care and infection: Clean water and mechanical cleaning are the most important tools for wound infection prevention. Irrigate any wound thoroughly with the cleanest water available under pressure, using a syringe or a clean bag with a pinhole, before applying any topical treatment. Plantain leaf, specifically the common broadleaf plantain Plantago major that grows in disturbed soil and lawns across North America, has documented antimicrobial activity. Its primary active compound, aucubin, has shown antibacterial properties in laboratory studies. A poultice made from mashed fresh leaves applied to minor cuts and skin infections is a reasonable topical intervention when nothing better is available. It is not a replacement for proper wound irrigation or for oral antibiotics in the case of a spreading or deep infection. Signs that a wound infection has moved beyond topical management include red streaking extending from the wound, fever, significant swelling and warmth in surrounding tissue, and pus with a foul odor. These signs in a grid-down scenario indicate a situation that requires the strongest interventions available to you.
- Fever management: Yarrow, Achillea millefolium, has a documented history of use as a diaphoretic herb, meaning it promotes sweating and has been used traditionally to support the body’s fever response. It contains compounds including flavonoids and sesquiterpene lactones with anti-inflammatory activity. Brewing a tea from one tablespoon of dried yarrow flowers steeped in one cup of hot water for ten minutes is a reasonable supportive intervention for mild fever in adults. Claims that it reduces fever by a specific measured amount like “two degrees within hours” are not supported by clinical trial data in that precise form and should be treated as traditional observation rather than measured medical outcome. Do not use yarrow in pregnancy. Do not rely on any herbal fever intervention for a fever above 103 degrees Fahrenheit in an adult or above 101 degrees in a child under two, as these thresholds require more aggressive management.
- Oral rehydration: The WHO standard oral rehydration solution is one liter of clean water, six level teaspoons of sugar, and half a teaspoon of salt. This ratio is important: too much salt worsens dehydration and can be dangerous in children. The solution works because the glucose-sodium cotransport mechanism in the intestinal wall actively absorbs the sugar-salt combination along with water far more efficiently than water alone. This is the most evidence-backed non-pharmaceutical medical intervention in existence and has saved millions of lives in low-resource settings. Mix it accurately and give it frequently in small sips rather than large amounts at once to avoid vomiting.
- Hypothermia treatment: Remove wet clothing immediately since wet fabric against skin accelerates heat loss by a factor of roughly 25 compared to dry fabric. Layer with dry wool or synthetic insulation, avoiding cotton which retains moisture. Apply heat to the body’s core and high blood-flow areas: armpits, groin, and the back of the neck. Warm water bottles or stones wrapped in cloth placed at these locations transfer heat efficiently. Do not rub the extremities of a severely hypothermic person vigorously, as this can push cold peripheral blood to the core and cause cardiac complications. Give warm sweet liquids by mouth only if the person is fully conscious and able to swallow safely. Unconscious or severely hypothermic patients cannot be safely rewarmed in a field setting without medical support.
- A note on suture materials and anesthetics: Wound closure materials including suture thread are reasonable to stockpile for a genuinely prepared first aid kit. Lidocaine, however, is a prescription local anesthetic with a genuine toxicity profile. Local anesthetic toxicity from incorrect dosing causes cardiac arrhythmia, seizures, and death. It requires refrigeration to maintain stability and has a limited shelf life. Recommending that general readers stockpile and self-administer lidocaine powder without detailed medical training is not appropriate advice (like you can get here). If you want to develop the capability to manage wounds without medical support, the right path is to take a wilderness first responder course or a similar structured program that teaches wound management in context, not to acquire controlled medical substances without the training to use them safely.
Skills to Outlive a Crisis: Foraging 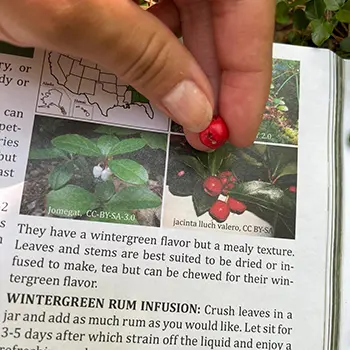
Foraging adds a genuine layer of food security to any homestead operation. Wild plants, berries, nuts, and fungi grow in environments your garden does not reach, produce in seasons when your garden does not, and require no inputs, water, or cultivation to maintain. Developing a working knowledge of the edible plants in your specific region is one of the highest-value skills you can build for long-term self-sufficiency.
It is also one of the skills where a mistake can kill you, and the instruction to simply “learn what’s safe and what’s not” understates the difficulty and the stakes significantly.
- How foraging errors happen: The most dangerous foraging errors share a common structure. The forager recognizes a general category of plant, finds something that partially matches their mental image or a single photograph, and harvests it without verifying multiple identifying characteristics simultaneously. Wild carrot and poison hemlock share the same habitat, the same white flower cluster structure, and overlap in leaf shape. Distinguishing them reliably requires examining stem coloration, surface texture, smell, habitat specifics, and root structure together, not any single feature. Morel mushrooms and the deadly false morel share a similar overall shape and fruiting season. The difference between them is visible but requires knowing specifically what to look for. Death cap mushrooms, Amanita phalloides, cause the majority of fatal mushroom poisonings worldwide and are frequently mistaken for edible species by foragers using photographs as their primary identification tool. Amatoxin poisoning is delayed in onset, meaning a person feels well for 24 to 36 hours after eating a lethal dose before liver failure begins, by which point the window for effective medical intervention is narrowing rapidly.
- How to forage safely: Learn plants in person with an experienced guide before harvesting anything for consumption. Photographs in a book or on a screen are a study tool, not a safe identification method on their own. Join a local mycological society, a regional foraging group, or find an experienced forager in your community willing to take you out. The investment of time in hands-on learning with a knowledgeable person dramatically reduces risk compared to self-teaching from references alone.
Learn the dangerous lookalikes in your region before learning the edible species they resemble. Know what poison hemlock looks like before you harvest anything resembling wild carrot or parsley. Know what false morel looks like before you eat a morel. Know your local Amanita species before you eat any gilled mushroom.
Use multiple identification characteristics simultaneously. Color, shape, smell, habitat, season, stem structure, root form, spore print color for mushrooms, and the specific details of leaf attachment and surface texture are all relevant. If you cannot confirm multiple characteristics, do not eat it.
Start with species that have no dangerous lookalikes and are unmistakable in your region. Cattails, blackberries, dandelions, and black walnuts are examples of plants that can be identified with confidence by a beginner. Mushroom foraging, particularly for species with dangerous lookalikes, should come later in your learning progression after significant supervised experience.
Never eat anything you are not certain about. The potential caloric gain from a questionable plant is never worth the risk of poisoning in a survival scenario where medical care may be unavailable.
You can look up foraging in your area online, but let’s be honest—it’s tough to find good, reliable information. Plus, guessing with wild plants can be dangerous. If you want to outlast any crisis and find free food like a pro, this is the best foraging guide out there. You can find free food regardless of the season.
I’ve got plenty of foraging books at home, but none break things down like this one. It covers over 400 plants with big, full-color pictures, making identification easy.
Whether you’re a beginner or experienced, this guide takes the guesswork out of foraging.
Soap-Making for Hygiene and Trade
Soap production from basic materials is a genuinely valuable skill. In an extended crisis, commercial soap supplies exhaust quickly, and the ability to produce effective cleaning and antimicrobial soap from rendered fat and wood ash lye gives you a renewable hygiene resource and a tradeable commodity. Here is how to do it correctly and safely.
- Safety first, without exception: Lye is sodium hydroxide or potassium hydroxide in concentrated solution, and it is a serious chemical hazard. It causes immediate and severe chemical burns on contact with skin and eyes. It reacts with water to produce significant heat. It reacts with aluminum, zinc, and certain other metals to produce hydrogen gas. Before you begin any lye-based soap-making, you need protective equipment: chemical-resistant gloves such as thick rubber or nitrile, eye protection such as safety glasses or goggles, long sleeves, and closed-toe shoes. Work outdoors or in a well-ventilated space. Keep a source of running water or a large container of clean water nearby for immediate rinsing if skin or eye contact occurs. Never work with lye around children or animals.
When combining lye solution with any liquid, always add lye to liquid, never liquid to lye. Adding water to concentrated lye causes a violent exothermic reaction that can splatter caustic solution. Add the lye slowly while stirring and expect significant heat generation.
Do not use aluminum pots, aluminum utensils, or zinc-coated containers. Lye reacts with these metals and contaminates the batch while potentially producing dangerous gas. Use stainless steel, cast iron, glass, or high-density polyethylene containers throughout the process.
- Making lye from wood ash: Use hardwood ash only. Oak, maple, hickory, and beech all produce strong lye. Softwood ash from pine or fir produces weaker lye that may not saponify fat reliably. Fill a non-aluminum container with hardwood ash and pour rainwater or distilled water slowly through it, collecting the liquid that drains from the bottom. This is your raw lye solution. Strength varies depending on the ash quality and the ratio of water used. To test concentration, float a fresh egg in the solution: the egg should float with an area roughly the size of a quarter exposed at the surface. If it sinks, boil the solution down to concentrate it. If it floats too high showing more than a quarter-sized area, dilute with more water.
- Making the soap: Melt two pounds of rendered animal fat in a cast iron or stainless pot over low heat. Allow it to cool to approximately 100 degrees Fahrenheit before combining with the lye solution, which should also be near 100 degrees. Combining at mismatched temperatures is one of the most common causes of failed batches. Slowly pour the lye solution into the fat while stirring continuously. Stir until the mixture reaches “trace,” the point at which it thickens enough that a drizzle from your spoon leaves a brief visible trace on the surface before sinking back in. This can take anywhere from 20 minutes to over an hour depending on your fat and lye.
Pour the traced mixture into molds. Wooden boxes lined with wax paper, silicone molds, or hollowed sections of log all work. Cover with a blanket or cardboard to retain heat and allow saponification to complete over 24 to 48 hours. Unmold once firm and cure in a single layer on a rack in a dry, ventilated space for a minimum of four weeks. During curing, excess water evaporates and the saponification process completes, producing a harder, milder bar.
- Testing completed soap: Do not taste soap to test for excess lye. The correct test is pH strips. Finished soap should have a pH between 8 and 10. A pH above 11 indicates excess lye and the batch needs extended curing or should be discarded. Tasting or touching uncured soap to the tongue risks a chemical burn and tells you less than a pH strip does.
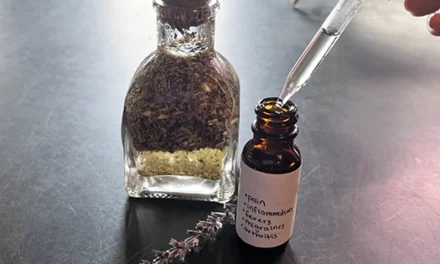
For antimicrobial soap, add dried thyme or lavender at trace, just before pouring into molds, at roughly one tablespoon of dried herb per pound of soap. The essential oils survive the curing process and contribute genuine antimicrobial activity.
Skills to Outlive a Crisis: Natural Refrigeration Without Electricity 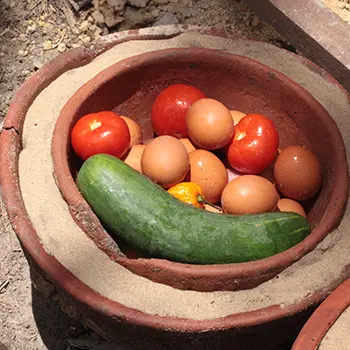
Keeping food at safe temperatures without grid power requires understanding which methods work in your specific climate and being honest about the limitations of each, because a refrigeration method that fails silently is more dangerous than no refrigeration at all. Spoiled food that appears and smells normal can cause serious illness, and in a crisis scenario where medical care is limited, food poisoning is not a minor inconvenience.
The zeer pot: what it actually does and when it works: A zeer pot is an evaporative cooling device consisting of two nested unglazed clay pots with wet sand filling the gap between them. Water in the sand evaporates through the porous outer pot, and the evaporation process draws heat from the inner pot, cooling its contents. This is a genuine and useful technology with a long history of use in hot, dry climates across Africa and the Middle East.
The critical limitation is humidity. Evaporative cooling only works when the surrounding air is dry enough to accept evaporated water vapor. In low-humidity environments, typically below 40 percent relative humidity, a well-built zeer pot can reduce interior temperature by 20 to 30 degrees Fahrenheit below ambient air temperature, which is meaningful in hot, dry conditions. In moderate humidity environments between 40 and 60 percent relative humidity, cooling effect drops to roughly 10 to 15 degrees below ambient. In humid climates above 60 to 70 percent relative humidity, the evaporation rate slows dramatically and the cooling effect may be only a few degrees, which is not sufficient to bring food into a safe storage range in warm weather.
If you live in a humid climate, including most of the eastern United States, the Gulf Coast, the Pacific Northwest, and most subtropical and tropical regions, a zeer pot built to the standard instructions will not reliably keep food at safe temperatures in warm weather. Building one based on performance figures from arid climate testing and trusting your perishables to it is a food safety risk. In those climates, the zeer pot may be useful for keeping water or produce slightly cooler and more pleasant, but it should not be treated as equivalent to a refrigerator.
To build a zeer pot: obtain two unglazed terracotta pots, one significantly smaller than the other, with the smaller pot able to sit inside the larger with a gap of at least two inches on all sides. Seal the drainage hole of the inner pot with a cork or clay plug. Place a layer of wet sand in the bottom of the outer pot, set the inner pot inside, and fill the gap around the sides with wet sand. Keep the sand consistently moist by adding water twice daily, or more frequently in hot dry conditions. Cover the top with a wet cloth or burlap. Place in a shaded outdoor location with airflow, never in direct sun, since direct sun heats the outer pot faster than evaporation can compensate.
Root cellars: A properly constructed root cellar is the most reliable non-electric food storage system available for most temperate climates. The key variables are depth, soil type, and ventilation. A cellar dug to six feet or deeper in dense clay or loam soil stabilizes at the soil’s mean annual temperature for your location, which in most of the continental United States ranges from 45 to 60 degrees Fahrenheit year-round. This is cold enough for long-term storage of root vegetables, apples, cabbage, and cured meats, though it is warmer than a refrigerator and storage times vary by food type.
Locate a root cellar on a north-facing slope if possible to minimize solar warming. Ventilation is essential: install two vents, one low on the south-facing wall to bring in cold air in winter and one high on the north-facing wall to exhaust warm air. Adjustable vents allow temperature management through the seasons. Store root vegetables in crates or bins packed with slightly damp sand or straw to maintain humidity and prevent desiccation. Do not store apples and root vegetables in the same space: apples emit ethylene gas that accelerates sprouting in potatoes and softening in other vegetables.
Outdoor cold storage in winter: In climates with reliably cold winters, the outdoor environment below freezing temperatures is a natural freezer that costs nothing to operate. An insulated outdoor box, a buried metal container with a tight lid, or an unheated outbuilding that stays between 28 and 38 degrees Fahrenheit provides freezer to refrigerator-range temperatures for several months. The challenge is maintaining consistent temperature without swinging above 40 degrees during warm spells or below 20 degrees during extreme cold, both of which affect food quality and safety differently. Monitor with a thermometer and move food as conditions change
The Amish found a way to make a fridge that needs no electricity. Many Amish recipes are already long-lasting without refrigeration. But there are some foods that would spoil in no time were it not for their Amish fridge.
In a blackout—especially a long-term one—this one Amish invention may end up saving more lives than any other. So, I hope you’ll add one to your own home while there is still time.
Building a Rocket Stove for Efficient Cooking
A rocket stove is one of the most practical cooking and heating tools available for off-grid or grid-down scenarios. Its design uses a J-shaped combustion chamber to create a strong natural draft that burns small-diameter fuel at high temperature with significantly better efficiency than an open fire. A well-built rocket stove produces more usable heat from the same amount of wood than an open campfire, which matters considerably when fuel supply is limited.
- How the design works: The horizontal feed tube at the base accepts fuel. As the fuel burns, hot gases rise through the vertical chimney section, creating a draft that draws fresh air in through the base of the feed tube. This draft sustains a high-temperature combustion that burns fuel more completely than an open fire, producing less smoke and extracting more heat per unit of fuel. The cooking surface sits directly above the chimney opening, receiving concentrated heat. Fuel efficiency compared to an open fire is genuinely better, though claims of exact percentages vary depending on the design quality, fuel type, moisture content of the wood, and what it is being compared against.
- Building a basic cinder block version: Arrange firebricks or solid concrete cinder blocks in a J shape on a stable flat surface. The horizontal section of the J is the feed tube, typically 12 to 16 inches long. The vertical section is the chimney, typically 12 to 16 inches tall. The interior combustion channel should be roughly 6 by 6 inches in cross section for a standard cooking stove. Seal joints between blocks with a mixture of clay and sand, or refractory cement if available. Firebricks or clay-lined interiors handle the high temperatures better than bare concrete block, which can crack under repeated thermal cycling. A properly built cinder block rocket stove is a fixed installation. Plan its location before building.
- Building a portable version: A portable rocket stove can be made from two nested metal cans. Use a large paint tin as the outer shell and a smaller can as the inner combustion chamber, cut and assembled in the J configuration. Pack the gap between the two cans with perlite, vermiculite, or dry wood ash for insulation. Cut the fuel feed and chimney openings with tin snips and smooth all cut edges to prevent injury. This version is less durable than a masonry build but is portable and can be made from salvaged materials.
Critical safety requirements:
- Never operate a rocket stove in an enclosed space without adequate ventilation. While a rocket stove burns cleaner than an open fire, it still produces carbon monoxide and other combustion gases. Using it indoors requires a flue or chimney pipe directing exhaust outside, the same as any wood-burning stove. Operating a rocket stove in a closed room without exhaust ventilation will produce dangerous carbon monoxide concentrations. If you are using a rocket stove inside a structure for winter heating or cooking, treat it as you would any combustion appliance: install and use it with a carbon monoxide detector in the space and maintain adequate ventilation.
- Keep the fuel feed tube clear of debris and always feed fuel from the front of the horizontal tube, not from the top of the chimney. Maintain a clear area around the stove free of flammable material. The exterior of a functioning rocket stove gets very hot and will ignite dry vegetation, paper, or fabric on contact.
- Use wrist-diameter or smaller dry wood. Larger diameter pieces do not feed efficiently and reduce draft. Wet or green wood produces significantly more smoke and reduces efficiency, though the high combustion temperature handles damp wood better than an open fire does.
Skills to Outlive a Crisis: Repairing Clothing and Footwear for Longevity 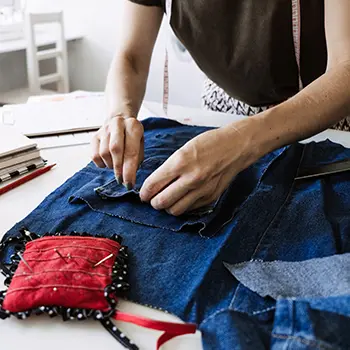
A split boot sole or torn jacket isn’t a death sentence if you’ve mastered basic cobbling. Here’s how I revive work boots using a scrap of truck tire rubber:
Cut the rubber to size, punch holes with a nail, and lace it to the sole with braided paracord or sinew. For waterproofing, melt beeswax into the seams—this fix lasts six months of daily use.
Hand-sewing demands more than a needle and thread. Use a saddle stitch (two needles working opposite directions) for unbreakable seams on heavy fabrics like denim or canvas. Finish up by rubbing pine resin on leather patches to bond them instantly to worn shoe uppers without stitching.
Emergency Signal Making and Communications
When your homestead is cut off, a simple signal could mean rescue. During wildfire evacuations like those in California, you can use a smoke pattern to alert a passing helicopter.
To make one for yourself, build a signal fire with three small, spaced-out pyres. Add green pine boughs or rubber strips to create thick, black smoke visible for 12+ miles. Knowing the skills to outlive a crisis can be the difference between life and death. Light only when you hear aircraft.
Conserving fuel is key.
For ground-to-ground signaling, polish the bottom of a tin can into a makeshift mirror. Sunlight reflections can flash Morse code (e.g., three quick flashes = SOS) up to 10 miles in clear weather. Practice the alphabet daily—it takes 20 hours to memorize the basics.
For isolated properties, rig a field phone: string copper wire between two tin-can “receivers” stretched taut over 300 yards. Pair it with a hand-crank radio (pre-tuned to NOAA frequencies) to monitor emergencies without grid power.
Skills to Outlive a Crisis: Advanced Water Purification Techniques 
Boiling water works, but fuel shortages demand smarter methods. Developing skills to outlive a crisis means having reliable water purification. During a 3-week flood that contaminated my well, I filtered 10 gallons daily using a layered system: gravel (removes debris), sand (traces parasites), and hardwood charcoal (neutralizes toxins like pesticides).
Crush charcoal into pea-sized chunks—too fine, and it clogs; too coarse, and it’s ineffective.
For droughts, build a solar still. Dig a 3-foot-wide hole, place a clean container in the center, and cover it with plastic sheeting weighted by a rock.
Sunlight evaporates ground moisture, which condenses on the plastic and drips into the container. In arid climates, I’ve harvested a quart daily using this method.
Long-term storage requires more than barrels. Add 8 drops of unscented bleach per gallon, seal in UV-resistant containers, and rotate every 6 months. For large-scale needs, bury a food-grade IBC tote wrapped in burlap—the soil’s thermal mass keeps water at 50°F, inhibiting algae.
Why These Skills Matter More Than Ever
Crises don’t discriminate. California’s wildfires forced evacuations, COVID-19 strained global supply chains, and Venezuela’s hyperinflation sparked blackouts. Nonetheless, with the right skills to outlive a crisis, you can make it through.
So which skill are you going to learn first?
You may also like: 
Power Outage: How To Survive The First 7 Days
How The Amish Grow Potatoes in Thin Air (Video)
Dutch Oven Recipes Cowboys Survived On
High-Risk Looter Places You Have To Stay Away From In A Crisis
15 Things You Should Teach Your Children That Can Save Their Lives
Ways to Teach Your Kids Homesteading Skills That Will Last a Lifetime


