Maybe you’ve just gotten a new canner or you’re excited to see what your pressure cooker can do. I’m the same way when I get a new kitchen gadget: I just have to see what it’s up for!
Today, I’ll be looking at canning pork. I’ve covered beef and chicken and it’s time to get on the bacon side of things. It’s great to freeze your meat, but imagine what happens when your freezer dips out of commission: boom; a ton of spoiled meat and everybody is so very sad.
Let’s get oinkin’!
Which Type of Pork?
For this example, I’ll be canning pork roast but feel free to use any type of pork that is skinless and boneless. This doesn’t work well for skin-on pigs’ feet or that kind of thing.
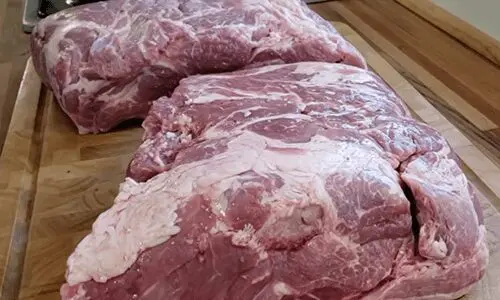
Cook your pork by boiling it until the top of the water no longer has scum floating to the top and skim off what scum does appear. Once cooked, drain it thoroughly. I do not recommend rinsing it, though you may choose to pat it dry. Why? The less fat on it, the better. Draining helps, but patting it also allows it to really get that last bit of grease from it. You may also use a collindar and let it drain, slowly, into a bowl beneath it then use the drippings for gravy or any number of delicious dinner additions later on tonight.
Our goal with this particular canning process is to try to find shelf-stable pork that can last up to three years with no refrigeration necessary. While pork probably isn’t going anywhere, the sharp increase in meat prices does suggest that pork is likely to follow very soon. Why pay higher prices when you can stock up now and store it on your shelf?
Related: Native American Recipes Every Homesteader Must Know
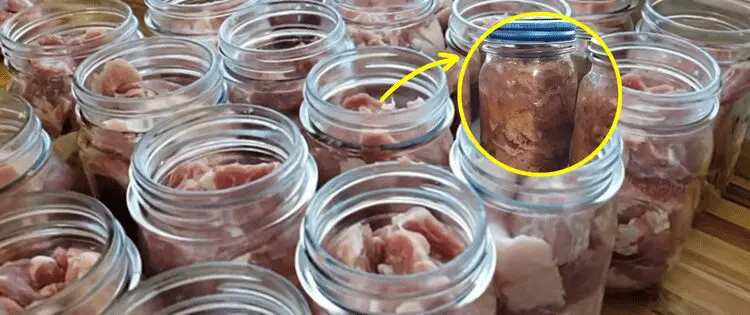
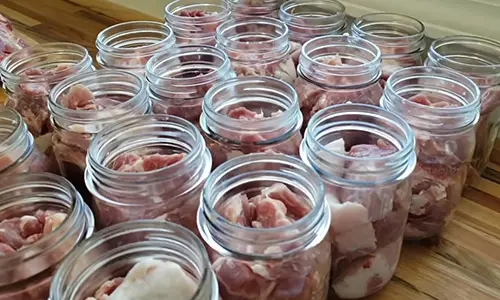
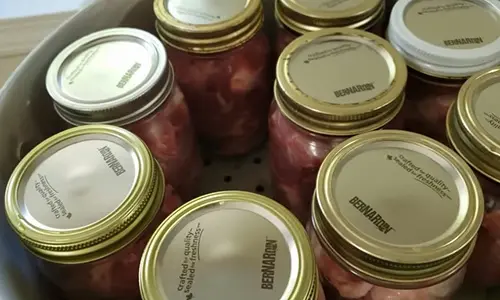
Fill your chosen canning jars approximately 1″ below the rim of the jar. Your average pint jar will hold about a pound of meat, give or take a little depending on the exact texture and size of the individual bits of pork. If desired, you can add a little seasoning to the meat at this point, too. This allows the seasoning to really settle into the meat versus using it in the pan where you may char it or leave some of it behind.
If you use your seasoning in the can, I recommend approximately 1 tsp of your chosen seasoning blend per pint of pork being stored. So, if you’re using a 2-quart jar, that’s 1 tablespoon and 1 teaspoon worth of seasoning. You may decide to go heavier or lighter depending on your exact spice blend. For those looking for taco-type seasoning, you may want to go a little lighter; you’ll likely add more after opening the cans years from now.
Let’s Get Ready
Once you’ve filled your jars with meat, it’s time to top them off. Boil water on your stove (I use an old teapot) and slowly top off your jars. If your seasoning floats, that’s just fine. It will eventually rehydrate and sink into the meat, essentially marinating it until it’s time to use the jar far in the future.
I generally recommend that you use vinegar or another astringent (that is food-safe) to wipe down the rim of your jars at this point. If you don’t, you may lose a jar or two to mold here and there. It is still rather unlikely and if you need to avoid this step due to health concerns or allergies, the seal should still hold tight to your jar and you should still have safe food to eat.
However, you won’t have every jar sparkling clean when you pop the top off. So, if at all possible, wipe down the rims of your jars with a paper towel soaked with plain white kitchen vinegar and let it air dry briefly so as not to trap the vinegar scent in your jar. Pork happily absorbs scents like vinegar, so make sure your meat is completely covered before doing this step or you’ll get some acidic aftertaste to your canned pork.
It’s Canning Time!
Place your lids on your jars and tighten them down, by hand, as much as you can. If you have gripping problems, you may want to ask a family member to help you. You may also desire to use a handheld grip mat to help you hold on to the rather slippery glass jars. Tightening your jars is necessary to avoid explosion. You don’t have to get a wrench after them, but they do have to be able to hold up to some pretty significant pressure.
Since I have no way to guess what your canner specifics are, I will give you a general sense of what ours is. Still, I strongly recommend that you read your canner’s recipe/guidebook/how-to booklet and abide by those guidelines. While most canners are so safe that most of these instructions are interchangeable between brands and series, I don’t want anyone getting hurt. Therefore, our complete disclaimer is this: if you decide to use our model’s settings rather than researching your own, I cannot be held liable for what happens on your end. I only know what my machine does. Please use your machine’s directions.
Related: Canning Mistakes Even The Most Advanced Homesteaders Make
I place my rack into our canner and add about 3-4 inches of hot water (depending on the size of our jars; you never want your jars to be fully submerged). When our canner is full, I clamp it down and let it get up to steaming heat and around 15 pounds of pressure. I carefully regulate that pressure and temperature, then allow it to work for about an hour and a half. Again, please check your manual and do as it says, not necessarily as I do. Our canner is a newer model and may work differently than yours.
Once I reach this time mark, I turn off the heat and allow the canner to fully release all the pressure within it. When the gauge reaches 0 pounds, I remove the lid (with the lid used as a shield opening toward ourselves so the steam can’t rush out and hurt us).
At this point, I allow the canner and those gorgeous jars to cool and rest. Don’t be surprised if your jars are still bubbling inside. This is totally normal. If they are not bubbling inside and there is not steam, something is wrong with your canner. Remember, these machines use heat to produce pressure. Without heat, you do not have sealed cans.
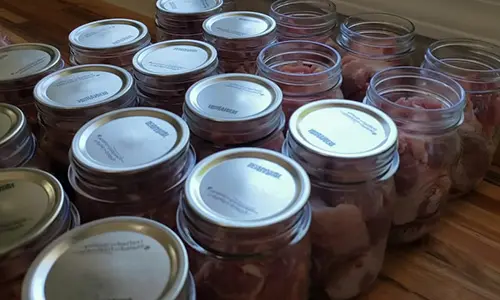
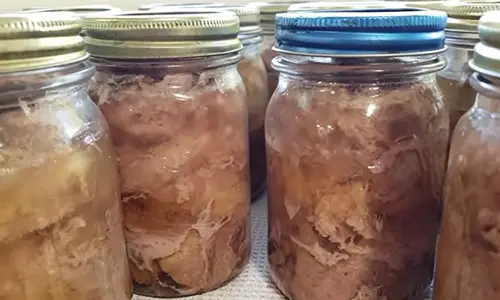
Remove your jars from the canner after about two hours of rest time. Place them on a kitchen towel and allow them to fully cool over the next 24 hours.
If desired, you can remove the screw rings from your cans. This does make inspection for popped lids a little easier, but I like the look of the screw rings on the lids and rarely remove them.
Final Thoughts
Keep in mind to inspect your jars as you put them on your shelves. If you see cracks, dents, or anything to suggest that a jar may not be fully sturdy, go ahead and throw the entire thing away. It is so much better than having a jar explode on you when you go to open it up. Exploding jars are dangerous and can cause serious injury. I also recommend storing your pork somewhere with a door to close over it if at all possible. A child accidentally dropping a jar or a pet knocking one over can result in one heck of a medical or vet bill.
These jars should remain viable food for up to three years after being sealed, so long as their seal remains. There may be a small amount of fat at the top of the jar, but that’s just fine. If the fat is visible all over the inside of the jar top to bottom, I recommend using those first.
Do you have a different method than I use in this article? Or a recipe you’d like to share? Meet us down in the comments and happy canning!
You may also like:

The Succulent Red Plant That Tastes Like Bacon (Video)
5 Recipes That You Can Make If You Live Fridge-Less
Livestock Animals You Should Start Raising For The Upcoming Economic Crisis


Great article!
I love canning meat, and this is a great refresher for me.
One word of caution: I learned the hard way that sage is NOT an herb you want to add to your canning jar. It comes out quite bitter during the pressure process.