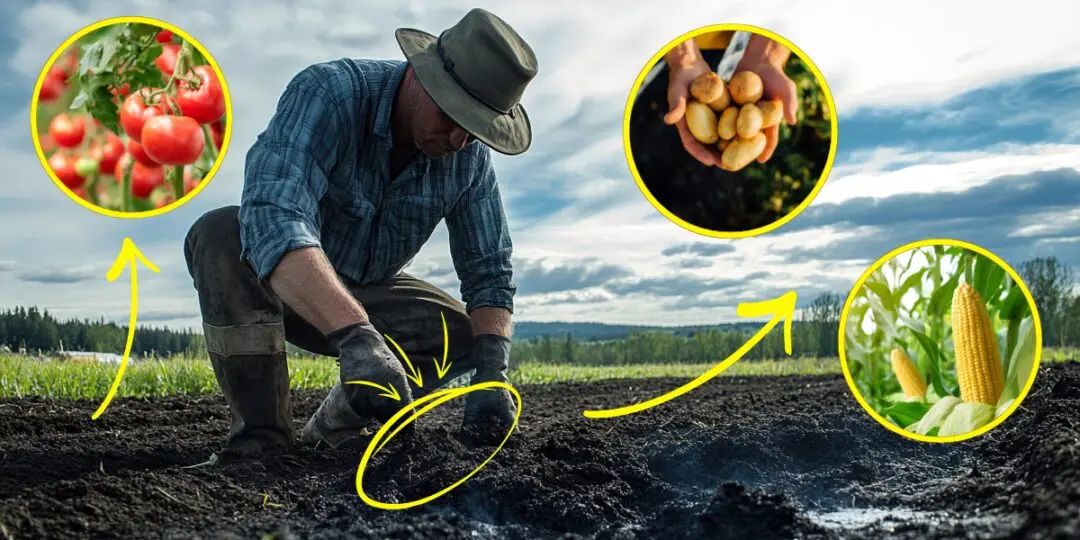
Fertilizer prices have already doubled in the last few years, and water bills keep climbing. If that trend keeps going, and to be honest, there’s no sign things are slowing down, the homesteaders who come out ahead are the ones who figured out how to stop depending on stuff they have to buy.
One fascinating thing I discovered recently is that there’s a simple DIY project that turns the dead branches, twigs, and yard waste you already have into something that makes your soil hold more water, keeps nutrients from washing away, and cuts your need for store-bought fertilizer.
The best part is that all you need for this project are a couple of old barrels and some cinder blocks. Even better, it costs nothing to run, and what it produces lasts in your soil for over a hundred years. If that sounds too good to be true, keep reading and see why it is real.
What This Stuff Actually Is and Why You Need It
It’s called biochar, and it’s literally charcoal made in a special way that gives it useful perks. The “recipe” to get biochar is simple. All you have to do is take wood, branches, crop leftovers, or other plant material and heat it in a setup where there’s very little oxygen. The secret lies in burning all of this without a full flame. 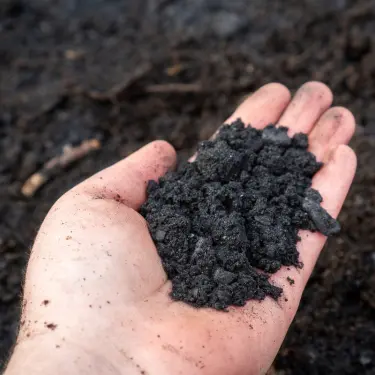
The reason biochar is so useful on a homestead is its ability to soak up water and hold onto nutrients in the soil instead of letting them wash away every time it rains.
Now think about what that means when prices go up. Less fertilizer to buy because your soil actually holds onto what you give it. Less water is wasted because the ground keeps it where the roots are. You’re spending less and growing more, using stuff that was heading for the burn pile anyway.
👉 The Military Buried This Water Device. One Man Dug It Back Up
Another advantage of biochar is that it lasts, so you won’t need to make it all the time. Oklahoma State University says the carbon in biochar is so stable that it can stay in your soil for over a hundred years.
Once you have this miraculous charcoal, you will be able to keep your plants healthy longer and even double your harvest. But in order for it to work properly, you must use it in a proper setup. Yes, throwing it on the ground will still give you results, but doing this one, no effort thing will help you make the most out of it.
You probably already have garden beds in your backyard, but just imagine having garden beds that need almost no maintenance. Garden beds that will last you 10+ years without you offering them special treatment. Garden beds that can keep up with your new biochar. Once you make your first batch of biochar, it can fertilize your plants for a century, but your garden beds will rot in 3 years. The math doesn’t add up.
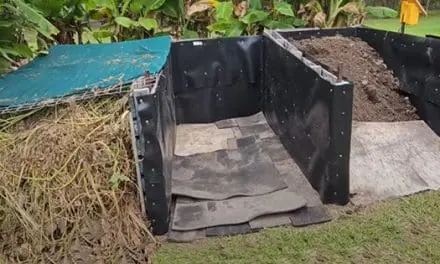
You can change all of this and make your life easier by simply building raised beds that don’t rot. Yes, this is completely possible and it’s easier than anything you can imagine. The method takes up just a couple of hours and a couple of materials you already have in your shed.
👉 See the complete instructions for “indestructible” DIY garden beds, click here.
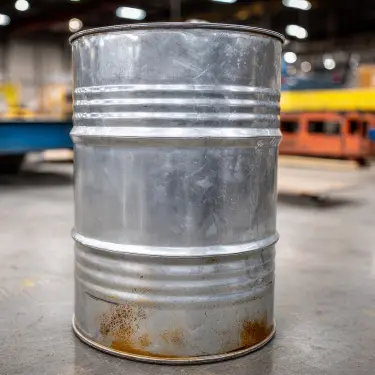
The Barrel Method
This is the method I’d start with because you can put it together in an afternoon with basic tools. The trick is simple. All you need is a small barrel that sits inside a bigger barrel. You heat the outside of the big barrel, and the wood inside the small barrel turns into biochar without catching fire because it’s sealed off from the air.
What you’ll need:
- One 55-gallon drum with a lid and clamp (the outer barrel)
- One 30-gallon drum with a lid (the inner barrel)
- Cinderblocks, blocks or bricks to build a base
- A drill
- Dry wood, branches, or sticks for fuel and feedstock
- Heat-resistant gloves and eye protection
- A water source nearby for safety
Instructions:
- Drill sixteen half-inch holes around the top and bottom rim of the big barrel. These let air flow in to keep the fire going outside.
- Drill eight small holes in the bottom of the small barrel. These let the gases escape during the burn.
- Set up a stand or a few bricks inside the big barrel so the small barrel sits up off the bottom. This lets gases flow out underneath.
- Fill the small barrel with dry wood, sticks, or branches. Leave a couple of inches free at the top. Seal it with its lid.
- Place the small barrel on the stand inside the big barrel.
- Pack seasoned firewood in the gap between the two barrels about a third of the way up. Light it with kindling.
- Keep feeding the fire for about three hours. You want actual flames, not smoldering smoke. Oklahoma State says you need temperatures between 300 and 550°C, and about 85 to 130 pounds of firewood keeps things going for that long.
- Watch for the gas coming out of the inner barrel. At some point, it’ll catch fire on its own. That’s normal and means the process is working.
- For this step, you’ll need your heat-resistant gloves. When the gas stops and the smoke dies down, let everything cool. Then pull out the inner barrel and dump the biochar into water to stop it from burning up.
- Spread it out to dry for a few days, then crush it into smaller pieces.
Safety tips: Use heat‑resistant gloves and goggles, maintain at least a 10‑foot distance from structures, keep water or a fire extinguisher on hand, avoid burning on windy days, and never leave the fire unattended.
👉 Stop Throwing Away Egg Shells. The Amish Never Do THIS
According to the International Biochar Initiative, this double-barrel setup is one of the most reliable ways to make biochar at home. A single batch gives you 20 to 40 pounds of biochar in just a few hours.
The Pit Method 
If you don’t have drums or don’t want to mess with drilling and welding, there’s an even simpler way that people have been using for a very long time: a pit kiln. This is one of the oldest biochar methods out there.
Here’s how to do it:
- Pick a spot away from buildings, fences, and anything that can catch fire. Clear the area around it.
- Dig a cone-shaped hole about 20 inches wide and 40 inches deep for a small batch. For bigger runs, go about 6 feet wide and 3 feet deep.
- Pile dry sticks and branches in the center and light the fire from the top, not the bottom. This step is important because top-lighting creates an updraft that pulls air in from the sides and pushes the heat downward.
- Once the top layer burns down and you start seeing ash, spread it out evenly and add a new layer of wood on top.
- Keep adding layers as each one starts to ash over. Watch the smoke for clues. Too much smoke means you’ve added too much ash at once. Still being able to see ash means you need to add more.
- When the pit is full and every layer has burned, kill the fire with water. Use several buckets and really soak it. Let it sit overnight to make sure it’s fully out.
- Crush the cooled char into small pieces with a hammer or a heavy rock.
It’s simple, it’s free, and it works. You won’t get the same results you would get with the barrel method, but it still makes solid biochar that is perfect for your backyard.
Now, since you have this new pit in your yard, please don’t rush to cover it. Yes, you can use it to make biochar again, but a pit is an incredible setup for many self-sufficiency projects. A pit is basically a controlled “work zone,” and the Amish knew this best. For example, this might be the perfect place for a root cellar or even for an “Amish fridge.”
See how to use the pit for messy jobs and other projects that would otherwise trash your yard. 👉 Click here and do it the Amish way!
Don’t Skip This Step
One mistake a lot of homesteaders make is that they crush up their fresh biochar and throw it straight into the garden. This will never work because fresh biochar is like an empty sponge. Even worse, just like a dry sponge you put in water, the biochar will start pulling nutrients out of your soil before it starts helping. Your plants could end up worse off for a while, so you want to avoid this at all costs.
The easy fix is charging your biochar. This is not complicated and it just means soaking the biochar in a liquid rich in nutrients before you use it. This fills up all those little pores with good stuff, so when it goes into your soil, it’s already loaded and ready to feed your plants.
Don’t forget to “charge” your biochar: 
- Mix equal parts crushed biochar and compost tea, worm casting tea, or fish emulsion.
- Let it soak for about two weeks. Stir it every few days.
- After two weeks, drain it and mix the charged biochar into your garden beds.
Experienced homesteaders who tried it recommend this method and say two weeks is enough time for the char to absorb what it needs. Once it’s charged, mix it into your soil. A few handfuls per planting hole or a couple of inches worked into a raised bed.
There is one more thing you need to be careful about. Don’t just leave biochar sitting on top of the soil. It’s so light that the wind will blow it away. Always mix it in or cover it with mulch.
Why is this method frugal
If prices doubled tomorrow, here’s where a biochar setup pays for itself.
Fertilizer: Your soil holds onto nutrients instead of losing them to rain. That means you use less fertilizer each season, and what you do add actually sticks around. When a bag of fertilizer costs twice what it does now, that matters.
Water: Biochar-treated soil holds more water between rainfalls. Less watering means a lower water bill and less time dragging hoses around. Oklahoma State’s research backs this up and their data shows real improvements in how long soil stays moist.
Feedstock costs you nothing. You’re using branches from pruning, dead wood, crop leftovers, and yard waste. Stuff that was going to the burn pile or the dump is now making your garden more productive.
👉 Stockpile THIS Before the Next US Blackout!
Building the setup is cheap. A double-barrel kiln can be put together for under $500 if you buy everything new. Use salvaged drums and scrap bricks and you’ll spend way less than that. The pit method costs you nothing at all.
And here’s a bonus: farmers can earn carbon credits for burying biochar because it locks carbon into the ground for centuries. Right now, most credit programs need large-scale operations, but as the markets grow, even you could start earning money from something you’re already doing in your backyard.
Build It Before You Need It
The whole point of a homestead is being ready before things get hard. A biochar setup is a project that costs very little, uses what you already have, and makes everything you grow produce more food.
Your soil holds more water, your fertilizer goes further, and your waste turns into something that feeds the ground for centuries. Whether prices double next year or not, biochar will always be a smart move. Results stick around for a very long time and this is why it’s completely worth it.
You may also like: 
5 Forgotten Soil-Revival Methods That Can Save Your Harvest
Do This to Your Soil and Double Your Harvest! (Video)
How To Choose The Best Plants For Your Soil Type
Bone Meal Fertilizer: The Secret Soil Booster Hiding in Your Kitchen
Don’t Throw Away Spoiled Milk! Do This Instead!


