The reason you might be struggling with sourdough starter is that you are actually trying too hard and following the wrong recipes. Not all of us have perfect conditions or the time to be near the sourdough no matter what. And historically, neither did the people who baked bread every single day.
Once you understand how simple a real sourdough culture actually is, store-bought bread starts to look less like food and more like a bread pretend. Commercial loaves are designed to survive weeks of transport and storage, which means they rely on fast industrial yeast, additives, and ultra-refined flour that strips out much of what made bread nourishing in the first place.
I want to share with you the method that made sourdough practical for me. It uses only flour and water, no special tools, no imported cultures, and no constant attention.
Many of the ideas I am about to discuss here are part of a broader collection of methods used by traditional communities. They have relied on them for generations. The Amish Ways Book explores these practices, focusing on hands-on ways to preserve health, skills, and resilience without modern dependency. The book is available right now at a big discount at THIS LINK.
Why You Should Have an Off-Grid Sourdough Culture
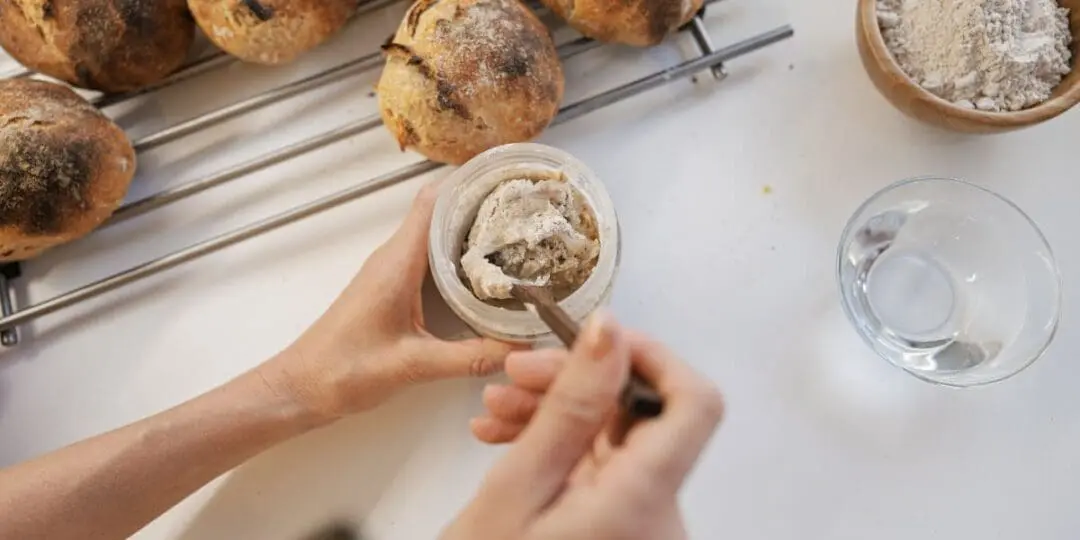
A sourdough starter is a living colony of wild yeast and lactic acid bacteria that you capture from flour and the air around you. Unlike commercial yeast that comes in packages and dies after one use, your starter is a self-renewing culture. Feed it flour and water, and it maintains itself indefinitely. Some keep it for decades, even generations! They pass them on to their kids and grandkids. That’s how long they last.
This is a method that our forefathers used long before refrigeration, grocery stores, and packaged yeast. That’s how I was sure it was safe to rely on it. The biggest advantage is that a starter can survive conditions that would ruin commercial yeast. Temperature swings, humidity changes, and even brief neglect. I’ve tested this unintentionally more times than I’d like to admit.
The other advantage most people don’t consider is that a healthy starter becomes more reliable over time. Commercial yeast degrades during storage. On the other hand, your starter improves with age as the microbial population stabilizes.
Having your homemade sourdough is how you can be sure you’ll have food on your table even when supply chains fail, stores are closed, or you simply can’t make the trip to town for another package.
What You Need for This Recipe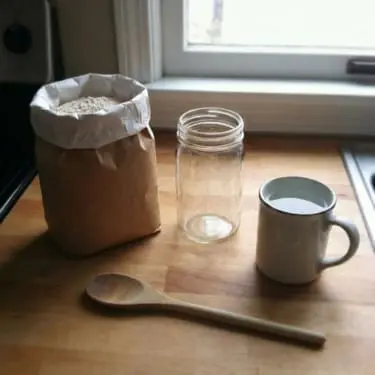
I want to be a little more specific about what actually works, because I’ve tested this with different flours and water sources over multiple years.
Best flour choices:
- Whole wheat or rye flour for your initial starter (faster fermentation due to more wild yeast on the bran),
- All-purpose flour works, but takes longer to establish,
- Organic flour often performs better (no pesticide residues that might inhibit microbes).
Water considerations
This is the part most people underestimate. In this recipe, water is not a neutral element. It directly affects whether fermentation starts cleanly or struggles from the start. Chlorine, chemical residues, and even microscopic contaminants can slow or completely stall microbial activity. I used tap water at first and it turned out to be a bad idea. This is how I decided to build this water filter using a simple, off-grid method that I highly recommend to you. This filter is able to remove chlorine and contaminants without electricity.
If you’re like me and don’t have access to a well, it’s worth learning how to make this filter yourself using basic materials we all have in our yards. This is a straightforward technique that works anywhere and doesn’t depend on store-bought filters. Once I switched to properly filtered water, my starters became more active, more consistent, and far harder to ruin.
I also use this filtered water for making herbal infusions and medicinal teas. When you’re extracting nutrients or medicinal compounds from plants, the quality of the water directly affects what you get out of them. Clean water pulls more from the herbs and keeps the infusion from tasting flat or “off.”
Learn how to make this type of filter yourself, CLICK HERE.
For this specific sourdough recipe, I recommend using:
- Filtered or dechlorinated water (chlorine can slow microbial growth),
- Well water works perfectly,
- Distilled water is fine, but not necessary.
Equipment:
- Glass jar (quart size) or ceramic crock,
- Breathable cover such as cheesecloth, coffee filter, or loose lid (cultures need air exchange),
- Something to stir with (wooden spoon or fork).
Step-by-Step: Build Your Starter in 7-10 Days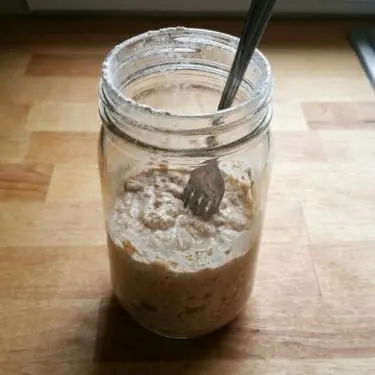
I’m going to walk you through the process that’s worked reliably for me and dozens of people I’ve taught.
This assumes average room temperature (65-75°F).
Warmer speeds things up, colder slows them down.
Day 1:
- Mix 50g whole wheat flour + 50g water in your jar (or 1/4 cup each if you don’t have a scale);
- Stir until combined; it’ll look like thick pancake batter;
- Cover loosely and leave at room temperature.
Days 2-3:
- You might see some bubbles. You might not. Either is fine;
- Each day, discard half the starter and feed it with 50g flour + 50g water;
- Mark the jar at the starter’s height with a rubber band or marker to track growth.
Days 4-5:
- You should start seeing consistent bubbles and some rise;
- The smell should be tangy, slightly sour, but not unpleasant;
- Continue daily feeding: discard half, add 50g flour + 50g water.
Days 6-7:
- The starter should double in volume within 4-8 hours of feeding;
- Smell should be pleasantly sour, like yogurt or beer;
- Texture should be bubbly with visible air pockets.
Days 8-10:
- Once the starter consistently doubles within 4-8 hours for 2-3 days in a row, it’s ready to use;
- You can now switch to maintenance feeding or start baking.
👉 Learn How To Build Your Own Endless Food Supply At Home
The timeline varies based on temperature and flour type. In my cold kitchen during winter, it took 12 days. In summer, 6 days. Don’t panic if yours is slower and just keep feeding it daily.
What’s Normal vs. What’s Not
- Slow activity or no bubbles: This is usually a temperature issue. Keep your starter in a warmer spot (70-75°F is ideal). Switch to whole wheat or rye flour temporarily, as they ferment faster. Be patient. Some starters take two weeks to show strong activity.
- Liquid on top (hooch): This is alcohol produced by the yeast. It means your starter is hungry. You can stir it back in or pour it off; both work. Then feed more frequently or use a higher ratio of fresh flour to starter.
- Mold: This is the only real failure sign. If you see fuzzy growth (green, black, pink), discard and start over. This is rare if you’re feeding regularly.
- Separation with clear liquid and thick paste: Completely normal. Stir it together before feeding. This happens when fermentation is active.
- Smells like nail polish remover: Your starter is hungry and producing excess alcohol. Feed it more frequently for a few days. The smell should shift back to tangy-sour.
- No rise after feeding: Could be old flour with weak yeast populations, or your starter isn’t mature yet. Keep feeding daily for another week. If still no rise, start over with fresher flour.
How to Maintain & Store Your Culture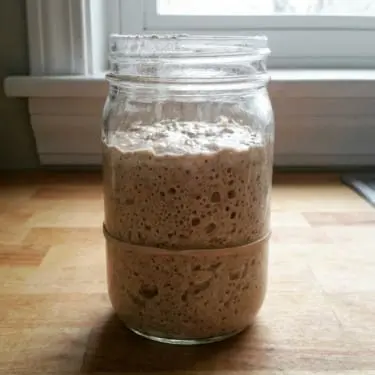
Once established, your starter needs a feeding rhythm, but it’s flexible based on your schedule and storage conditions.
Room temperature maintenance (if you’re baking weekly):
- Feed daily with equal parts starter, flour, and water (50g each);
- Keep in a jar loosely covered on your counter;
- Use in recipes when it’s at peak rise (doubled in size, domed top, lots of bubbles).
Cold storage maintenance (if you’re baking occasionally):
- Feed your starter, let it sit at room temperature for 1-2 hours, then refrigerate;
- Feed once per week, remove from fridge, discard most, feed fresh flour and water, let sit 1-2 hours, refrigerate again;
- Before baking, pull from the fridge and feed 2-3 times over 12-24 hours to reactivate.
Reviving a neglected starter:
Even if your starter looks dead (dried out, separated, smells awful), try this before giving up.
- Scrape off any discolored parts on top;
- Take a spoonful of the remaining culture;
- Feed with fresh flour and water (50g each);
- Repeat daily for 3-5 days.
I’ve brought back starters that looked completely dead using this method!
Off-Grid Considerations
Temperature is the single most important factor. Fermentation is a process that continues with no problems only if you are able to keep things cool and stable. So, if you have no electricity or you just want an off-grid method for your homestead, you should definitely start using a root cellar. It’s ideal for starters, ferments, preserves, and anything that needs protection from temperature swings. When the grid goes down or power becomes unreliable, having a naturally cool place is the only solution that can save you.
The Amish approach root cellars the same way they approach most things: build it once, build it right, and let it do its job. What stood out to me about Amish root cellars is how little attention they need once they’re finished. If you want to build a root cellar the Amish way, check out the method HERE.
If this is not an option for you, keep the starter in the coolest part of your home and feed every 2-3 days in warm weather, every 4-5 days in cool weather. Going away? Feed heavily (100g flour, 100g water, 20g starter), cover loosely, and leave. It’ll develop hooch but survive 10-14 days. You can also dry your starter on parchment paper, crumble it when dry, and store it indefinitely. Rehydrate with water and flour when needed.
Common Myths & Mistakes
I’ve watched people give up on sourdough starter for reasons that had nothing to do with their actual skill or the health of their culture. Most failures come from following advice that’s technically correct but practically useless.
You need commercial yeast to start a culture
- Absolutely false. Wild yeast in flour and air is sufficient and actually creates a more stable, complex culture than adding commercial yeast.
Chlorinated tap water will kill your starter
- Chlorine can slow fermentation, but it won’t kill an established culture. That said, letting water sit overnight to off-gas chlorine is easy and eliminates the variable.
You need exact measurements and feeding ratios
- Ratios help consistency, but sourdough is forgiving. I’ve fed mine by feel (roughly equal parts) for years without problems. Scales are helpful, not essential.
Temperature must be precisely controlled
- Temperature affects speed, not success. Warmer (75-80°F) = faster fermentation. Cooler (65-70°F) = slower but still effective. I’ve maintained starters in unheated kitchens that ranged from 55°F to 85°F seasonally.
Biggest actual mistake: giving up too soon
- Most starter failures happen because people quit at day 5 when nothing’s happening yet. Keep feeding for at least 10 days before deciding it’s not working.
Second biggest mistake: overfeeding
- Feeding three times daily or using huge ratios of fresh flour wastes resources and doesn’t speed up establishment. Once daily is sufficient.
How Will It Help You in the Long Run
First and foremost, what matters most for a homesteader is the freedom and independence of being able to prepare their own bread. Also, there would be no more store trips, and you’ll also stop spending $5-8 on the commercial yeast every time you want to bake a fresh loaf.
The energy matters too. No refrigeration required if you feed every few days. No special equipment that draws power. Just a jar, flour, water, and a bit of time. This is genuinely off-grid compatible in a way that most modern baking isn’t.
Once you establish this culture, you’ve created a permanent resource that costs you nothing beyond the flour you’re already buying. They pass them on to their kids and grandkids. That’s how long they last.
You may also like:

Tinderbread: The Fireproof Biscuit That Lasts Forever
Survival Bread To Make In An Emergency (Video)
How to Make Cowboy Bread (Lasts Months in Your Pantry)


