If you want to live a self-sustainable and zero-waste lifestyle, then this article is going to help you in achieving this goal.
The project is about turning your kitchen waste and other household scraps into something profitable and environmentally friendly. This is about producing biogas (cooking gas) and nutrient-rich organic fertilizer for your garden.
What is Biogas
Biogas is a mixture of methane(CH4), carbon dioxide(CO2) and small amounts of hydrogen sulphide. The biogas produced from the breakdown of organic materials- like wheat straw, leaves, twigs, kitchen waste, sewage waste, animal waste- in the absence of oxygen. In simple words, it is the anaerobic digestion of such matter by methanogenic bacteria to produce biogas.
This biogas plant gives a residue known as slurry, a nutrient-rich organic NPK (nitrogen, phosphorus and potassium) fertilizer.
In this project, there is an extra step in which organic wastes are pretreated before using them as a feedstock for the biogas plant.
The Pretreatment Of Organic Materials
In this stage, organic materials are broken down into simpler forms for digestion by methanogenic bacteria for producing biogas. There are different methods for pretreatment, like biological, chemical, mechanical and thermal pretreatment. We can use the combination of these pretreatments.
Reasons for Making Your Own Cooking Gas and Fertilizer
- It makes it easy for you to control your kitchen waste (leftover food, vegetable peels, and other organic waste) and turn them into something useful.
- It is pocket-friendly, because you will be using your own clean cooking gas.
- It gives you free natural NPK fertilizer.
- It helps to solve global environmental issues.
- It assists you to live a sustainable and self-sufficient life.
Biogas Plant Model: Materials Required
- a plastic bucket or a barrel with a lid.
- 1.5 inch wide/20 inches long PVC pipe.
- 1.5 inch wide/11 inches long PVC pipe.
- a reducer (optional), a hose barb, a hose barb tee.
- 4-pipe clips.
- two gas tubes (35 inches + 20 inches long).
- a gas valve (or a gas stove), a tire-tube, Teflon tape.
- clay (or hardener and resin), PVC solvent cement.
Pretreatment of Organic Wastes: Materials Required
- a grinder, limestone powder (CaCO3), rock salt or common salt.
- optional for high yields: ammonium, potassium, swine manure, microwave.
Extras: Black paint, to paint your digester for trapping more heat to make the process fast and increase biogas production.
Tools Required
- Hacksaw blade, Plier, Screwdriver, Soldering iron.
Diagram
Before moving on to build this project, have a look over this biogas plant model.
And if you want to build a different model, you may see our previous biogas plant project from below.
Related: How To Make Bio Fuel At Home From Leaves And Manure
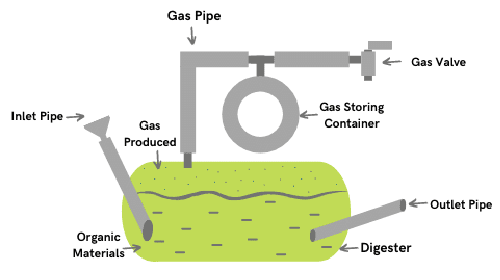
The Building Process
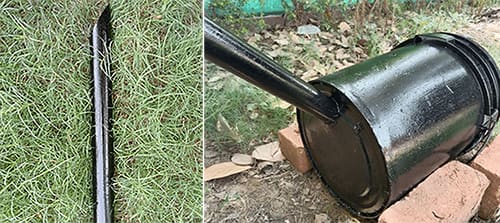
Step 1: The Inlet Pipe
- Make a cut at one end of a 1.5 inch wide/20-inches long PVC pipe with the help of a hacksaw blade.
- Lay down the bucket and put some bricks at its sides to support it.
- Make a hole of 1.55 inches wide on the bottom of the bucket (2-3 inches below the bucket’s side) using a soldering iron.
- Insert the pipe through this hole. And tilt it upwards at about 45 degrees.
- Fix it with some clay and PVC solvent.
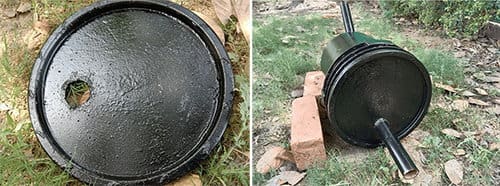
Step 2: The Outlet Pipe
- Make about a 1.55-inch wide hole on the bucket’s lid (2-3 inches apart from the lid’s circumference) with the help of the soldering iron.
- Then insert a 1.5 inch wide/11 inches long PVC pipe through this hole. And tilt it a little upwards.
- And fix it with the PVC solvent and clay.
Step 3: The Gas Outlet Setup
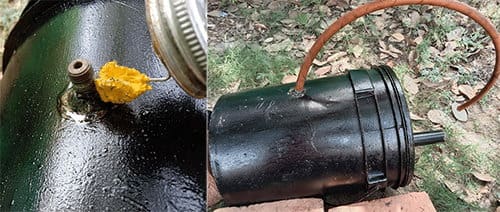
- Make a small hole on the bucket’s side using a soldering iron.
- Wrap some Teflon tape around the neck of the hose barb.
- Insert this hose barb in this hole using pliers.
- Fix the hose barb with some clay and PVC solvent.
- Join a 35 inches long gas tube to this hose barb and fix it using a pipe clip.
Related: How To Make A Moonshine Distiller
Step 4: The Setup for Storing The Produced Gas
- Wrap some Teflon tape around the hose barb tee.
- Fix this hose barb tee in the hole at the tire’s tube using clay and PVC cement.
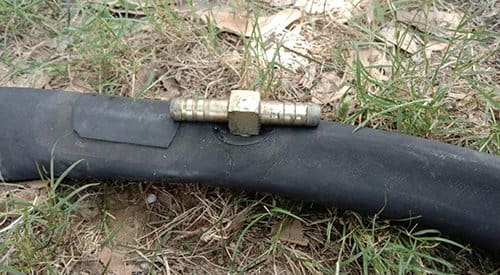
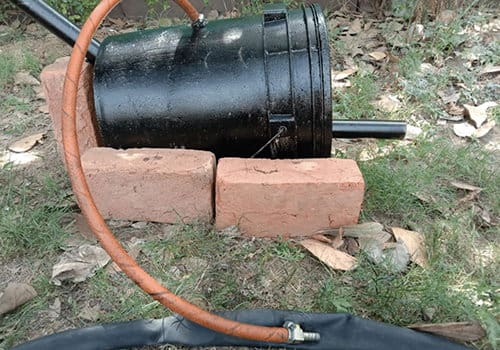
- Join the gas tube (previously connected with the hose barb on the bucket’s side) at one end of the hose barb tee.
- Fix both the connections with the help of pipe clips and a screwdriver.
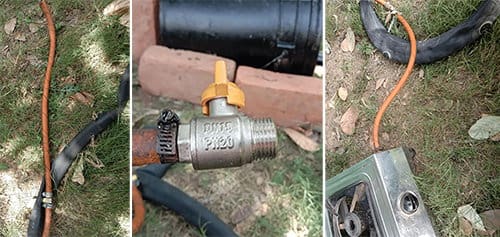
- Take a gas valve (or a gas stove) and connect it with a 20 inches long gas tube using a pipe clip.
- Connect another end of this gas tube to the hose barb tee with a pipe clip.
With this, we finished the building of the Biogas Plant Model. Now, let us initiate the task of producing biogas.
The Gas Producing Process
- Grind the kitchen wastes (like vegetable peels, rotten veggies, eggshells, and other organic waste) with water (1-2 litres) in the grinder to form a mixture of 1 kg.
- Add one small bowl of limestone powder and 4-teaspoons of salt into this mixture.
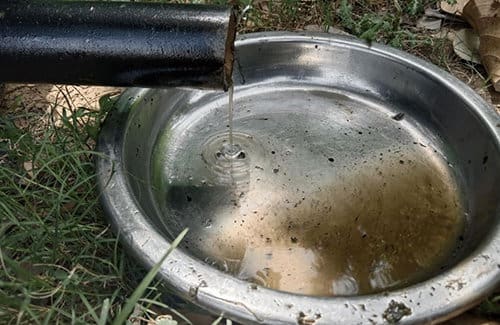
- After 24 hours, pour this mixture into the digester and add 9 litres of water.
Optional Step for Fast Production
You may keep this mixture in the microwave for 15 minutes at 180 degree C. After that, add 9 litres of water into this mixture and pour it into the digester.
How Long It Will Take To Produce The Biogas
Most often, it takes about 48 to 72 hours for the starting of biogas production. But if the materials used are well-grounded and well pretreated, then gas may produce faster with more yielding.
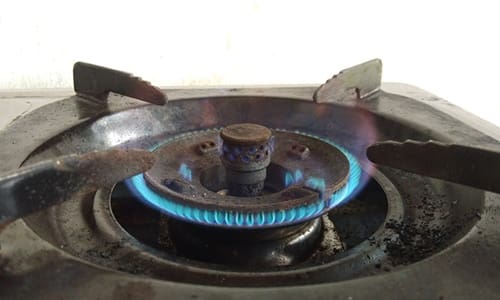
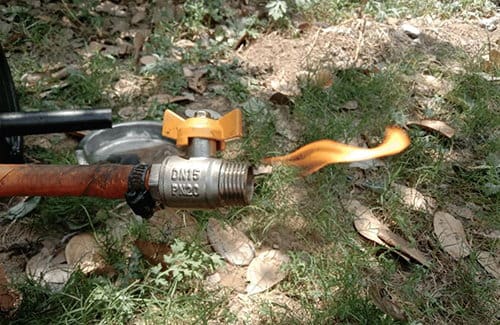
The biogas usually burns with a blue or transparent flame. But the color can also be yellow or red due to the different feedstocks used and due to insufficient biogas, and incomplete combustion.
And for higher yield, you may add 10-15 grams of any of the following group of substances-
1) rock salt + ammonium salt + potassium salt
2) rock salt + 1 kg animal manure (cattle, swine manure, or any other manure).
In about 4-5 days, the tube will get filled with gas. And once the gas tube starts getting tight, you may use the gas.
Safety and Precautions
- Do not add an extra amount of substances like limestone powder, as a higher amount of such substances can reduce biogas production.
- Keep the biogas plant away from electric and fire equipment and in a well-ventilated area to eliminate the risk of suffocation and fire.
- Do not put any medicinal wastes in the biodigester. It may kill the biogas producing bacteria.
- Reuse the slurry for feeding the biodigester or put it in the compost pit before using it as a fertilizer for the plants.
- Keep the whole setup away from the reach of children and animals.
- Regularly check for any leakage or damages in the biogas plant. If you find any flaws, then repair them properly.
You may also like:
An Insanely Effective Way to Build a 5 Year Food Stockpile (Video)
Easy DIY 165 Gallon Rain Harvester
Discover This Easy Way To Waterproof Your Boots
8 Easy Projects You Shouldn’t Miss From Your Backyard
What We Learned Living on Our Food Storage for a Month


I think this author has missed one of the most important aspects of proper Biogas generation. That is, that the entire reaction needs to be done WITHOUT ANY air. This is the second article on this site regarding Biogas that have both missed this vital point!
Authors: Do your research, then write articles.
Also: Looking his Block Diagram — there is NO pressure in this system. None. His exhaust tube goes straight out.
How do you pipe Biogas, at atmospheric pressure, to your cookstove?
Also, the project is supposed to be inexpensive. Therefore, no pressure gadgets are used. And without any such devices, gas was able to travel through the outlet pipe to the gas storing tube in about 3-4 days.
Thank you
Hi, Thomas.
I am glad you read this article. But it is clearly mentioned in the 4th and 5th lines of the second paragraph that the biogas is produced in the absence of oxygen or is anaerobic digestion. Moreover, for methanogenesis oxygen is not required at all.