Making your own cold frame can be a good addition for anyone with a love of growing plants or for those who love living a healthier life with little to no effort. That really is the truth because today we will build two automated water and nutrient supplier systems as well as the cold frame itself.
It will let us grow our herbs or plants one to two months before the usual growing season begins. One will allow you to not worry about water at all but will need you to add a nutrient mix into the frame separately, while the other will have enough water and nutrients stored in the frame that could (depending on your needs, the stage that the herbs are in, and the number of them) last up to three months without the need for you to replenish.
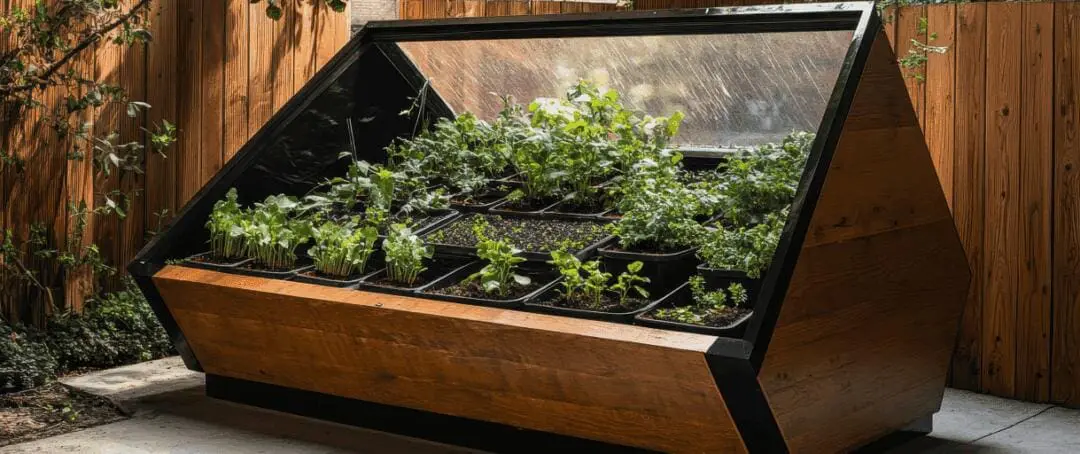
How to Build a Mini Greenhouse
It’s a simple design. We will create the frame and insulate the bottom and sides, while the top will be covered with a window glass. Inside the frame at the sides, we will place white foil that helps reflect the weak sunshine of fall. The window glass will create a greenhouse effect, which, in combination with the white foil, will provide the plants with enough heat to grow.
The water and nutrient supply will be based on passive hydroponics, with the use of a water tank or barrel (depending on your needs and material availability).
Now that we know what we want, let’s get started with the materials we will be using for our greenhouse:

- A water barrel or tank (The size of your barrel will be one of the things that determines how long the plants can go without you needing to water them. Larger size means longer time.)
- A bucket
- An old chair (or something else that can be used as a stand)
- White plastic wrap
- Pool liner (or some thick black plastic)
- Transparent plastic wrap
- Some thick hemp or linen bags (I used hemp.)
- Foam plastic
- 4.30-inch PVC piping
- 1-inch PVC piping
- A piece of hose (or more of the 1-inch PVC piping)
- One ABA clamp (if you’re using a hose piece instead of extra PVC piping)
- Different types of connectors for the 1-inch PVC pipes
- OSB planks
- A toilet fill valve (doesn’t have to be a new one as long as it still works)
- A glass window
- Wood planks (Their thickness is determined by the thickness of your foam plastic. Mine was 2 inches thick, so of course the wood planks corresponded to this size.)
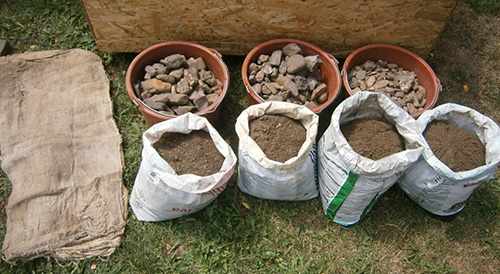
- Four 5-gallon buckets’ worth of rock
- Four 2.5-gallon buckets’ worth of sand
- A level
- Wood lacquer
- A paint brush
- White paint
- Black paint (optional)
- A jigsaw
- An electrical hand drill with different drill
- Metal hinges
- A Phillips screwdriver
- A few metal L corners
- Metal flat connectors
- A crowbar
- Screws
- Nails (in three different sizes)
- Thumbtacks
- A utility knife
- A tap
- A rougher and a fine sandpaper
If you’re building the system where you’ll add the nutrient supply yourself, take the water barrel and chair off your shopping list.
Steps For Building Your Wooden Mini Greenhouse
Building a wooden mini greenhouse might be just the thing that your backyard needs. It’s compact enough to fit on a porch, sturdy enough to last for years, and simple enough to put together over a weekend with just a few tools. Below, I’ll walk you through the steps to build your own:
Step 1: Creating the walls of the cold frame for your mini greenhouse
I started by cutting the OSB planks into four different sizes. These would create my walls. The wall in front was 4.50 feet long and 1.41 feet tall—I made two of these. The back wall was 4.50 feet long and 2.69 feet tall—I also made two of these. The side walls were 2.69 feet long, slanted at the top, and connected to the back and front walls. The lowest point of these was 1.41 feet, and the highest was 2.69 feet—I made four of these. The bottom side was left; once again, it was 4.50 feet long and 2.64 feet wide—two of these were created.
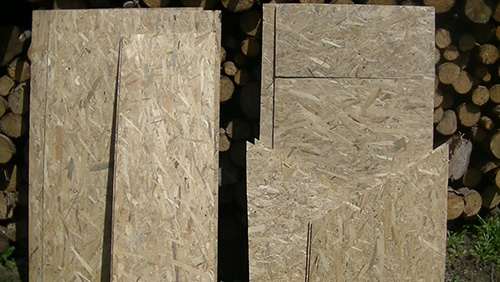
(The front left plank is the front side of the cold frame. The back left plank is the back side of the cold frame. The front right planks are the side walls, and the back right plank is the bottom side of the cold frame.)

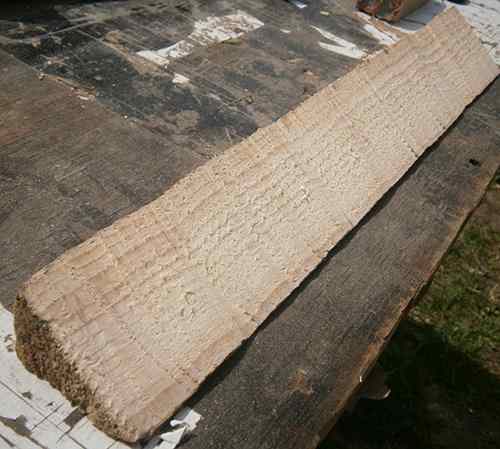
I started with the sides of the cold frame. I grabbed my wood planks and started cutting them into the shape of the OSB plank. The height of the plastic foam determines the needed height of the wood planks. Using a few screws, I screwed the wood into the OSB planks.

I started cutting the plastic foam to size to place inside my already made holder. This is the insulation to keep the heat in the cold frame.

Finally, I placed another side wall on top of it and nailed it in place to lock the foam plastic inside.

To strengthen it, I also screwed a few screws in; this helped give it a sturdier finish. This is what the first wall looked like. I did the same with each of the OSB planks, making two sides, one front, one back, and one bottom wall to create the shape of the end product.
Step 2: Protecting the wooden planks and painting them

I first cut down OSB planks that were the perfect size (except for the front and back walls of the cold frame, but more on that later) to cover up the exposed wood on my cold frame walls. Covering it makes it look better and will give it an extra layer of protection.
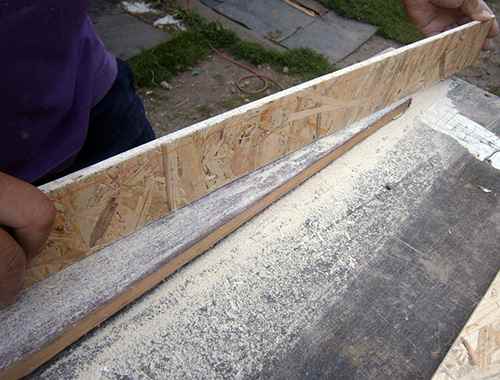
I started to finetune the sides of the OSB planks to make them smoother. I took a thin slab of wood and nailed a long strip of sandpaper onto it, which was once again nailed down so that it would be stable on the table while I was working on it.

Once I got them fairly smooth, I started working with finer sandpaper to finish off the job. I also gave it a small bit of roundness for the aesthetics.

I nailed them all onto the wall pieces.
Any part that had an unnecessary overhang was cut down with a jigsaw.
Except for one side of the front and the back wall, I left half an inch overhang on both sides of the back and front walls. This was so that when I start putting everything together, the side walls would have a stronger hold. I decided which sides of the front and back walls would face the inside of the cold frame and then placed the overhang on those sides, pointing inward.

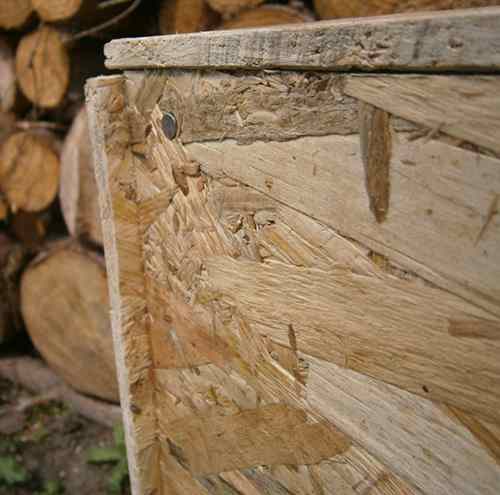
I then took a plank that was 2.36 inches in length and 1.57 inches in height. I drew a line onto the wood from one corner going across the wood to the corner it was facing and started cutting it.
The cut ended up looking like this.
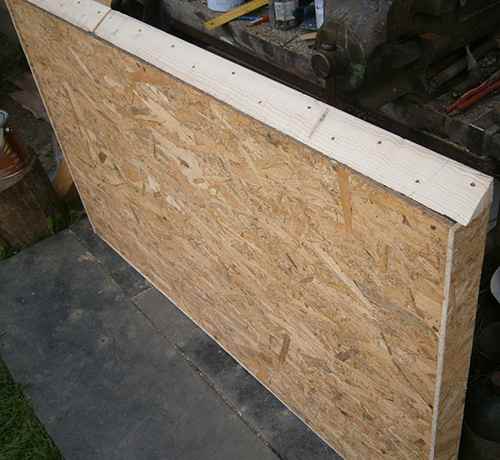
I nailed it onto the top of the back wall of the cold frame, the thinner side facing inward. (The inner side is the one with the overhang.)
I then painted them with wood lacquer.
Step 3: Putting it all together
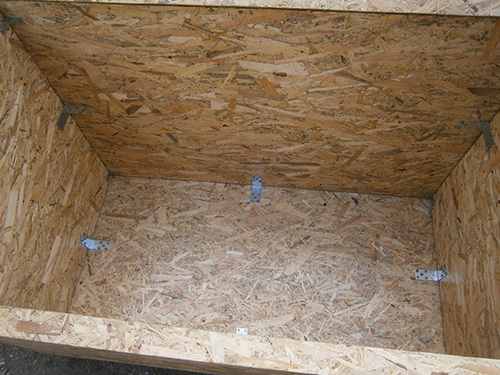
I started out with the bottom, the front, and the back walls of the cold frame. I placed the back and front walls on top of the bottom wall and connected it all together with the help of a few screws and metal L corners.
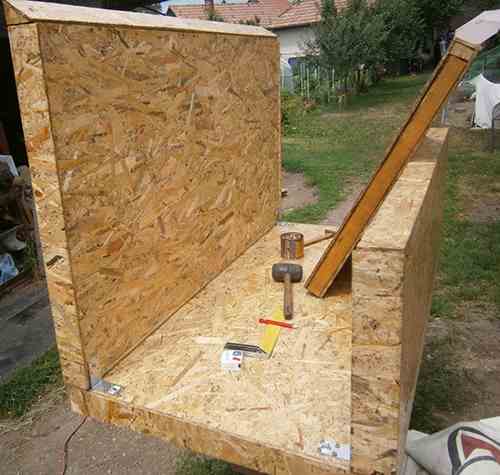
I put as many screws into it as I could. It needed to be strong enough to withstand the rocks, dirt, and sand that would be inside it.

I then cut a small bit out of the bottom corners of the side walls. This was necessary to give the cold frame a smoother finish as the L corners would raise the side walls. This way they were hidden inside.

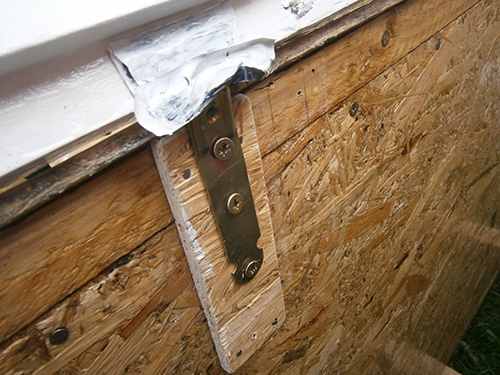
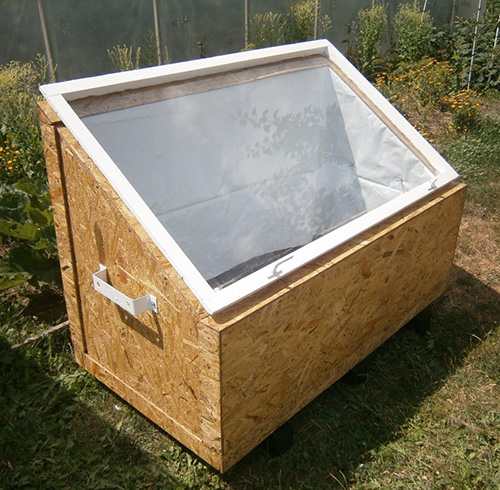
When the frame seemed sturdy enough (after 14 L corners), I placed the window frame (with the window glass inside) on top of the cold frame.

When it was on top, I painted it white and cleaned the windows thoroughly. To keep the glass itself clean, I used a little bit of tape so no paint would drip onto the glass and spoil it.

The window frame was connected to the cold frame with three hinges. Of course, I covered the hinges with some tape too.
After I finished up with the window and was waiting for it to dry, I went over to my old chair and started painting it black. This gave the rusted chair a cleaner look.

Step 4: Covering the inside in plastic sheeting
When everything dried up, I was ready to continue with the next step—which was to cover the inside with layers of plastic sheeting. Each kind of plastic sheet has different purposes.
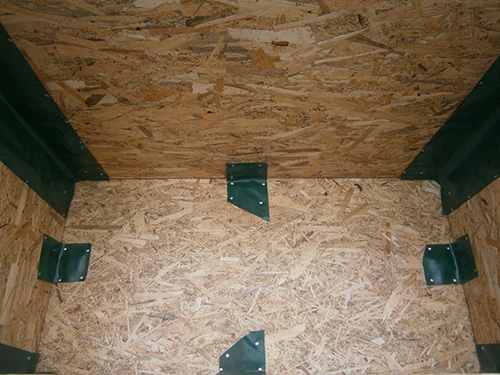
With a little bit of used car canopy (you can also use pieces of pool liner), I was able to cover the L corners to protect the plastic layering from getting cut and torn. I used a few thumbtacks and pushed them into the OSB to keep the canopy in place. We will use the same method on the next layers of plastic sheeting.
I put the transparent plastic sheeting in next. This was going to be the water holder plastic. Make sure there are no cuts or holes on the bottom of it, and place the thumbtacks at the top so the water doesn’t leak. Depending on how high you want the water to go (I was aiming for 5 inches, and because of this, I cut the plastic bigger, so the actual height of the plastic was 6–7 inches), make sure the plastic does not have any damage up to that level.

Next was the pool lining. This was going to hold the rocks and the sand and keep the transparent foil from tearing.

The last layer was the white plastic. I put this only on the sides. This was going to reflect the light onto the glass, which would lock the heat inside.

I then placed two handles onto the two sides of the cold frame so that moving it would be easier. These were handles from one of my out-of-use boilers.
Step 5: Filling up the cold frame and setting up the water system
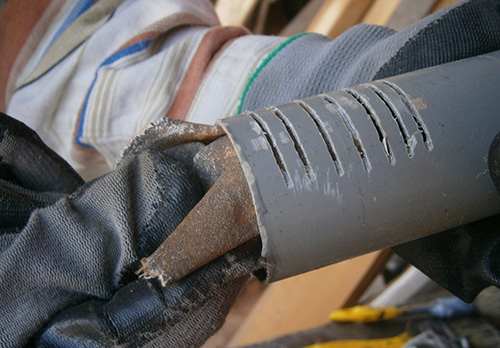
I cut a 12-inch-long piece off my 4.30-inch PVC pipe. Next I started cutting horizontal lines into one side of the pipe piece. I put three groups of six lines into it. This would disperse the water into the cold frame.

To clean any remaining pieces of plastic left on it, I went over the cuts with sandpaper.
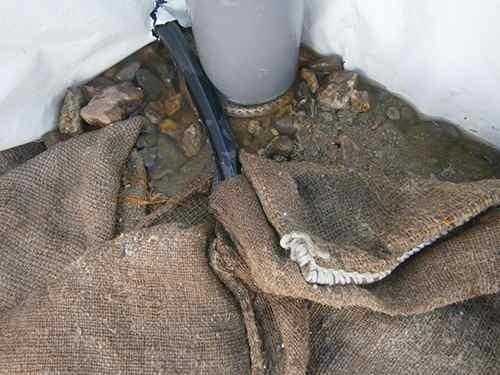
Then I took my hemp bags, my rocks, and my sand to start putting everything into the cold frame.
I placed the hemp bags into the cold frame. I took hold of one side and rolled it up to the other side then started placing rocks into the newly opened space. Make sure that the rocks don’t get under the bags; part of the bag needs to be on the floor while the rest will be sitting on top of the rocks and sand. It should be five inches high (so it just sits on top of the water level).

Next was the sand. I made sure to cover the whole surface with it until I could barely see the rocks.

After that, I rolled the bag out, making sure that one side was still at the bottom, and covered the rocks and sand with it. I repeated the process until I reached the end (around 4–5 bags). In the corner, I placed the PVC pipe into which I had cut a 1.5-inch-wide and 4-inch-long piece out. I didn’t put any sand directly around the pipe for better flow; the rocks were enough.

I then took my drill, and with a wooden drill bit of 25 mm, I drilled a hole slightly above the 5-inch mark.
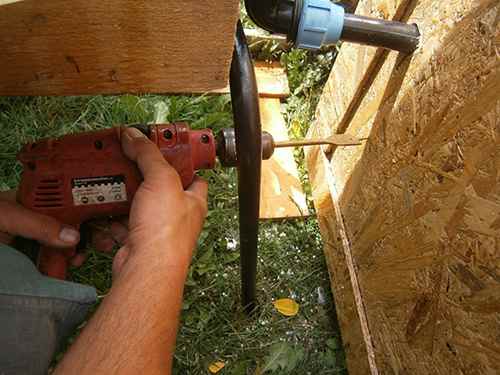
I put a 1-inch PVC pipe through it that had its sides drilled out. This was going to stop any water that would overflow the limit of 5 inches.

I attached a tap onto the pipe that was connected to a corner connector piece.
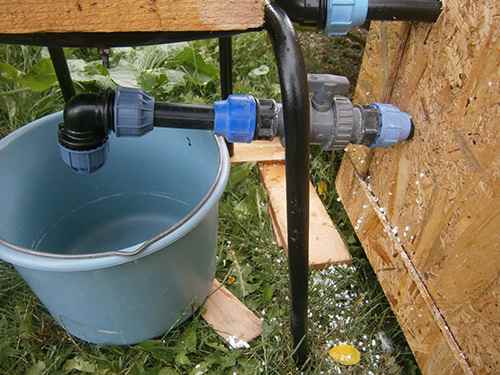
With a little bit of silicone, I stopped any water leakage that could happen. I covered the outside and inside as well.
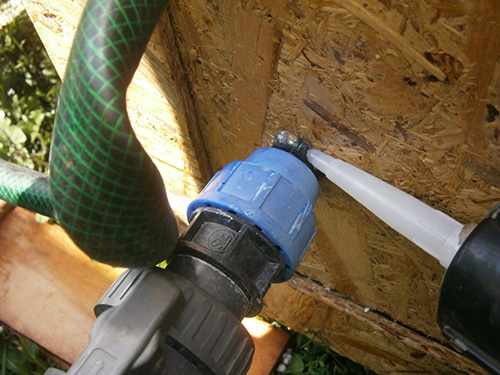
I then took my toilet fill valve and placed it into the PVC pipe.

After that, I drilled another hole, which led a hose into the cold frame. Make sure that the height of the hole and the height of your toilet fill valve are on the same level so connecting the two becomes effortless.
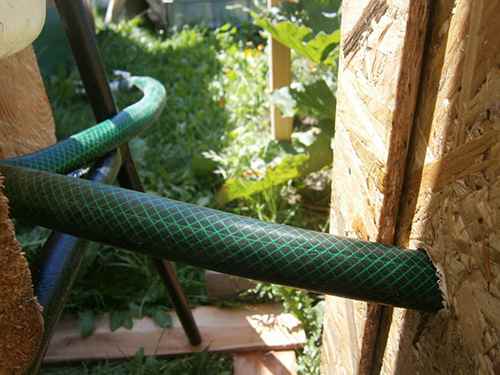
I connected the two using an ABA clamp.

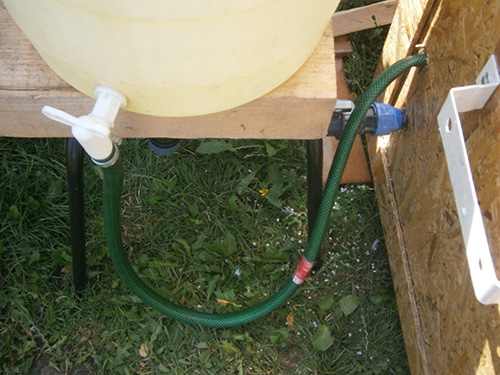
Depending on which system you want to make, you can either connect it to your barrel or connect it right to the water pipe that brings water into your house.
If you’re going with the barrel system, all you need to do is add the barrel on top of the chair (so gravity can work its magic) and drill a PVC tap onto the side of it so you have control over when you want the water to fall.
Trying it out showed that the system works.
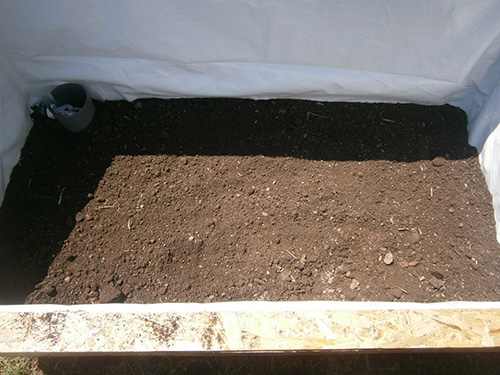
Step 6: Filling the cold frame with dirt and finishing it up
Using as much soil as I could, I started filling the cold frame, adding an additional five inches (so the dirt level and the water level don’t directly touch, only the hemp bags).
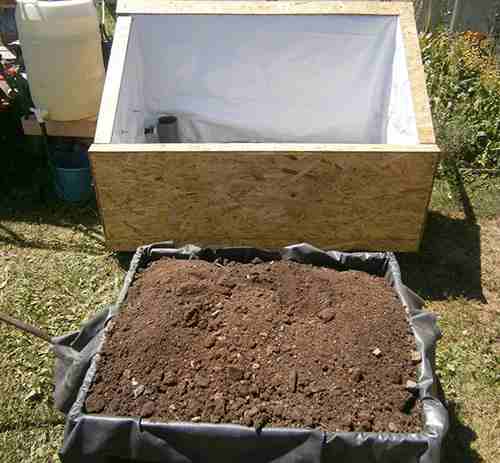
I filled the cold frame until I reached the 5-inch mark and then smoothed it out. It was ready for the seedlings.
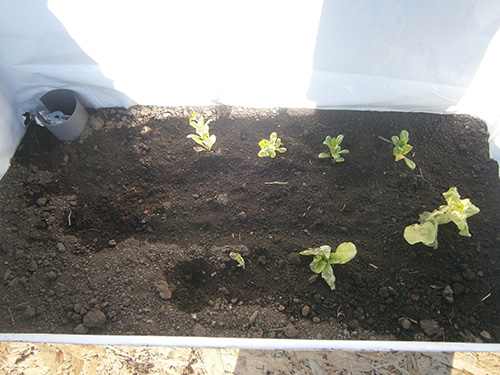
With my finger, I dug a small hole for them and pushed them in.
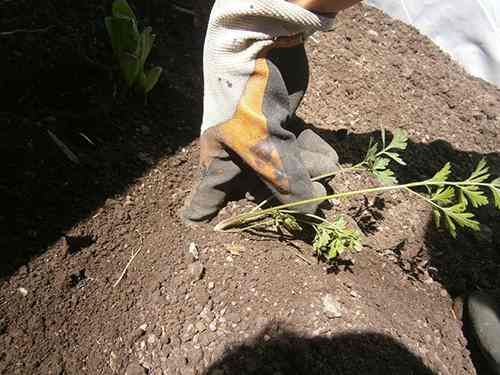
The last thing to do was wait as they all developed.
I hope you’ll enjoy making this DIY project over the weekend. Test.
Updated on May 7th 2025
You may also like:
10 Household Items You Can Use as Mini-Greenhouses
A Walgreens Is Opening In Your Backyard (Video)
Avoid These 7 Common Greenhouse Gardening Mistakes
DIY Greenhouse (With Step-By-Step Pictures)


