The Amish have been getting through some pretty harsh American winters for hundreds of years. And they’ve managed to do it without relying on the kind of heating systems most of us take for granted today.
What’s their secret?
Well, one certain thing is that it’s not just about burning wood. Over generations, Amish families have learned how to make the most of every bit of heat they produce. This is exactly what brought them so far.
I think we could all learn a thing or two from them.
Take a minute and imagine your own home. Then ask yourself one question.
How much heat are you losing through drafty windows, open doors, or rooms nobody even uses?
This is a lot of heat loss… At least for my home. Hopefully you can use the wise Amish approach and make your home warmer for less.
Also, you don’t have to live like the Amish to borrow their ideas.
So, here are seven Amish heating methods worth trying this winter.
Heat the Rooms You Use, Not the Whole House
This is a lesson the Amish have been using every winter and is probably the most important one. Why consume fuel to heat your whole house when in reality you’re only using the kitchen and the bedroom?
Nowadays, everybody wants to have complex heating systems that manage to heat your whole house no matter how big. Floor heating, fancy radiators, and heating walls. These are all expensive and most of the time not even that useful.
So, here’s a simple exercise. Spend an afternoon in a home heated by a woodstove and you’ll notice something pretty quickly. The room with the stove is cozy. The back bedroom? Not nearly as warm. And that’s fine if nobody’s using it.
If you heat with a stove or have a properly zoned system, there’s no reason to keep every empty room as warm as the kitchen. Close off unused spaces where your heating setup allows it, and put a draft stopper under a leaky door. You’d be surprised how much cold air can creep through one little gap.
Just one thing I want to mention. Don’t let rooms with plumbing get too cold. Aim to keep them at least around 55°F, and remember that pipes in exterior walls can freeze even when the room feels warmer. On bitter nights, open the cabinets under vulnerable sinks so indoor heat can reach the pipes.
Let the Wood Stove Do Two Jobs
This one’s close to my heart. We use a wood cookstove in winter, and there’s something wonderful about pulling bread out of the oven while the same fire warms the kitchen.
A cookstove gives you a place to simmer beans, boil water, and make supper while adding heat to the room.
The idea behind this practice is that you’re getting cooking and room heat out of the same fire you use for cooking.
Also, using cast iron kitchenware keeps giving off warmth after the fire settles into coals. This is why I always prefer to cook in cast iron pans during the winter.
But if you want to make the most of cast iron, you need to know how to take care of it properly. See how to make your cast iron pans last forever, here.
Now, most people living on a homestead already have a wood stove. But in case you don’t, I want to tell you that you don’t need much to build one on your own.
Most of the materials are easy to find, and the most important part is the assembly instructions.
Now, you might think: “But why not buy an already made wood stove?” Well, the truth is that big companies have a habit of taking advantage of our commodity. They know most people are not up to building their own stuff, so they make sure to charge extra just because you might be willing to give them the money to get the final product fast.
The thing is that there’s not such a big difference between building your own DIY woodstove and getting one already built. Installing it takes almost as much time for both of them…
But when it comes to money, here’s where you can see the real difference. Building your own stove is much cheaper. Also, once you know how to build it, you have unlocked a skill you’ll have with you no matter what.
Even more, a stove you build yourself lets you customize it however you want. Maybe you have limited space and want a smaller stove. Too bad that at the store all you can find are huge wood stoves. Or maybe you start with a little stove and then you want to add extra modules. Just think about it. If this is your DIY project, you have absolute freedom to adapt it according to your needs.
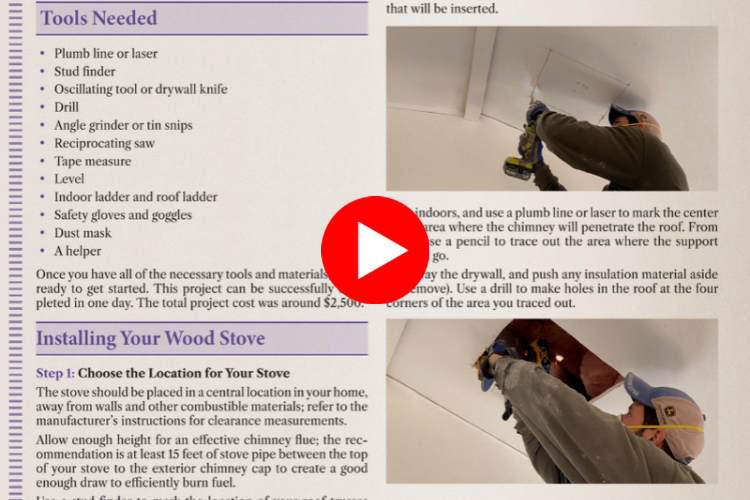
Click here and see how to build a fully functional wood stove in just one afternoon.
Move Stove Heat Around Without Using Electricity
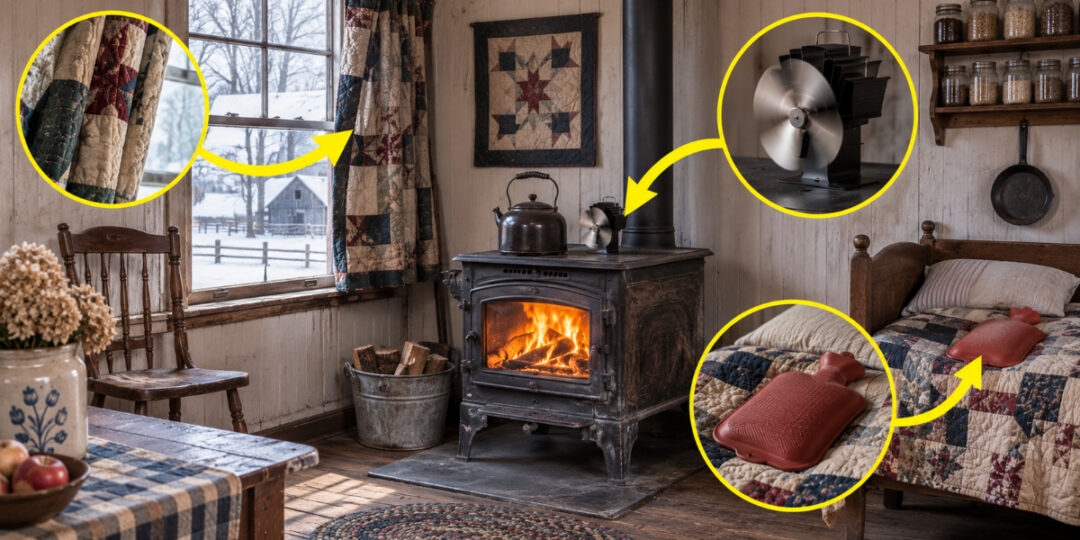
The first time I heard about how the Amish use a fan that runs on stove heat, I had to look it up. No cord? No batteries? Just set it on the stove and it spins?
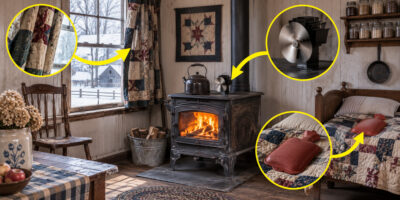
Well, that’s basically how a thermoelectric stove fan works. The hot base and cooler top create a temperature difference that generates a little electricity. That powers the blades, which help move warm air away from the stove instead of letting it collect right above it.
Some Amish households use these, and I can see why. They’re small, quiet, and don’t need an outlet.
Now, a fan won’t create extra heat or warm the entire house. But it will help spread the heat your stove already produces more evenly around the room. That way, you won’t have to sit right next to the stove to stay cozy, only to feel the cold as soon as you move a few steps away.
Start Insulating Your Windows
I want to start only by saying this: I love a good quilt, but quilts aren’t only for beds.
This is one Amish method I use since I moved to my homestead and the room thermometer is proof of how amazing this works.
This is how I do it. I install simple padded window covers when the weather turns cold, especially for the windows that always seem to send a chill across the room.
If you want to make them yourselves, you don’t need fancy sewing skills. Put cotton batting between two pieces of sturdy fabric and stitch the layers together. Or cut down an old quilt that’s been sitting in a closet. Make the cover a few inches bigger than the window so it overlaps the trim.
Hang it on a rod or hooks, and lower it after dark. That extra layer helps slow heat loss and makes the room feel less drafty. In the morning, pull it back. I never want to miss the free warmth coming through a sunny, south-facing window.
Also, you can bring this a step further and even install quilts on your walls too if you feel like your home is especially cold during the winter.
Have a Mudroom
One thing that remains constant during the whole year is that you’ll leave your house no matter the season. This means you’ll open the door from your house pretty often.
And you know what the Amish think about this?
They think that this is how you lose a huge amount of heat.
Considering this, they always built their houses with a mudroom with two doors. One leads outside, and the other leads into the house. They always close the first before they open the second and this is one of their secrets when it comes to preserving heat.
Now, building a mudroom is not that complicated. If you don’t have one, you can build it easily from mud. And then you’ll have a mudroom made out of mud. Click here to see how to make your own mud bricks.
Also, if you’re not that much into building, you can use a heavy curtain to improvise one. For example, if your door opens directly into your living room or a small hallway, you can create a small space that allows you to close the door.
Just cover the curtain so you have enough space to close the door behind you and this should help you seal the warmth in. The cold air will remain near the door behind the curtain and on the other side you’ll be welcomed by the warmth of your home.
Warm the Bed Before You Climb In
This is peak Amish knowledge and it has been used by generations. Also, it’s one of the easiest old-fashioned ideas to borrow. Having a warm place to sleep is more important than heating the whole room.
You can start with flannel sheets, a wool blanket, and a quilt. Several layers let you adjust things if the night gets warmer or colder. They also trap pockets of warm air around you.
For those first chilly minutes, I like a covered hot water bottle tucked near the foot of the bed about 20 minutes before bedtime. Use hot, not boiling, water, follow the bottle’s instructions, and take it out before you climb in.
Check the rubber for cracks or leaks, and replace an aging bottle. Some folks also use rice- or corn-filled warmers. If you think you’ll like this more, give it a try.
And since I mentioned the hot water bottles, I also want to tell you that one project I think is worth starting before the winter is getting an off-grid water heater.
This is basically an attachment that takes advantage of the wood stove you already have and uses the extra energy to heat your water.
Obviously, you can still use your stove to heat water each time you need it, but since you’re probably already running the stove anyway, just think how convenient it would be to have hot water all the time without using extra fuel.
This is why I consider the off-grid water heater an essential addition to any homestead. It’s just a simple DIY project that helps you save money and doesn’t depend on the grid in any way. It basically means that as long as you have your stove running, you’ll also have available hot water.
Even more, since this build is insulated, once the stove cools off, the water inside the heater will remain hot and nice for hours, even days.
After all, this is what self-sufficiency is all about: making the most of what you already have, spending less money, and finding ways to depend less on the grid.
See how to build your own off-grid water heater here.
Borrow Heat From a Pile of Manure
This one’s for the garden, not the house. But it’s exactly the kind of Amish resourceful trick I love.
One thing about the Amish is that their gardens never stop producing even during harsh winter. They have their methods that help them keep their gardens running and I am here to tell you more about the main one.
The most important thing they use to keep plants warm during cold weather is the manure-heated hotbed. I built one a few springs ago and it helped me boost my harvest because the garden season basically never ended!
The trick is getting the manure ready first. Fresh horse manure mixed with about one-third straw works especially well. Pile it up about 10 days before you need it, let it start heating, turn it, and wait for it to heat up again.
Then pack 12 to 18 inches of manure into a well-drained pit beneath a cold frame and cover it with 4 to 6 inches of clean soil. The soil can get hotter than 100°F at first. Wait until it drops to about 85°F before planting, and keep checking with a soil thermometer. For many seeds, around 70–75°F is a good growing-medium temperature afterward.
Prop the lid of your cold frame open when the sun warms things up, or you can cook your seedlings.
So, if you want to start growing crops during the winter and don’t know where to start, I have something special for you. Generally, the Amish save seeds all year long so they have enough to plant something during winter and save the rest for the next spring.
But you don’t need to do all that hard work. You can get all the seeds you need right now and start growing your winter garden immediately.
And this is the beauty of the homesteading community. The ability to share useful resources with your peers.
This is the All-in-One Fall/Winter Seed Bank and it’s the most complete cold weather seed collection you’ll ever find. Most of the time, you need to do some research and decide what you can plant during cold weather and then find a reliable place to get your seeds.
This seed bank takes care of all of that hard work, so all you have to do is start planting. No more wasted time on your side.
And even more, all the seeds are heirloom, so you can grow your plants and then save the seeds to grow the next generation only from what you harvested. No need to buy a new seed pack.
Want to get your winter garden started?
Get your All-in-One Fall/Winter Seed Bank here and start growing your own food!
All the Amish Knowledge You Need, in One Place
If you admire the Amish and how they’ve managed to stay so self-sufficient for generations, there’s one book I think deserves a place on your shelf.
It’s called The Amish Ways, and it was written by Eddie Swartzentruber, a former Amish who decided to share the practical skills he grew up learning.
What I like about this book is how easy everything is to follow. You get step-by-step instructions, pictures, and projects you can actually try on your own homestead.
Remember the manure-heated hotbed I mentioned earlier? I learned how to build my own cold frames from this book!
And here’s the reason I prefer having a physical copy and not relying only on digital info. Websites disappear, links stop working, and sometimes you can’t get online at all. But a book sitting on your shelf is always there when you need to look something up.
If you want to learn more of these old-fashioned skills, take a look at The Amish Ways and see what’s inside.

You may also like: 
7 Amish Greenhouse Hacks That Will Save You Money
There Are 10 Plants in Your Backyard That You Can Eat Right NOW! (Video)
Cut Down On Your Bills In 2026 With These Amish Projects
7 Natural Amish Soil Boosters You Can Make for Free
Why the Amish Are Immune to Inflation and How You Could Be Too