
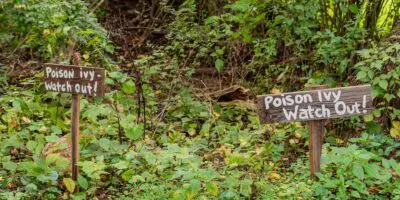
You pulled it last summer and you were sure you got it. Then this spring it came right back up along the fence line like nothing ever happened, and now your forearms are covered in that itchy, weeping rash again.
I am very familiar with this frustrating event. The thing about poison ivy is that it doesn’t care how careful you were. Even if you pulled out all the leaves but forgot one little piece of root behind, it just starts regrowing as if nothing happened.
So I want to give you something better than a quick fix. This is the plan I actually use to wear poison ivy down until it stops coming back, and you won’t need any harsh chemicals to do it. This is the only thing that worked for me and I want to guide you through the whole process.
One of the reasons most advice you find online doesn’t work is because people treat it like a regular weed. But poison ivy needs special treatment if you want to get rid of it for good.
Why It Keeps Coming Back
Poison ivy is not playing around and that’s why it spreads using two mechanisms: by seed and by underground roots that creep sideways. Those creeping roots can grow a brand new plant several feet from the one you’re looking at. So when you spot a patch, a lot of the time you’re really looking at one connected plant that might give the illusion of more plants.
Getting rid of it “for good” doesn’t mean that one day you go there with a trowel and show it who’s the boss. In reality, what you have to do is starve the root system until it gives up.
Every time you take the leaves off, the plant has to dip into its stored energy to grow them back. This keeps taking energy away and at one point the roots will eventually run dry and die. This is the main idea. It’s like a tug of war between you and the ivy.
Be Sure You’re Looking at the Right Plant
Before you touch anything, make sure you are looking at the right plant. I’m saying this because the look-alikes catch many people out. The old saying still holds up: leaves of three, let it be. Well, not in our case. If it has three leaves, then that’s the plant you want to get rid of.
Poison ivy grows three leaflets in a cluster, and the middle one sits up on a noticeably longer stalk than the two beside it. The leaves themselves can be smooth, toothed, or notched, and that variety is what confuses people, but that three-leaflet setup never changes.
The look-alike that fools the most folks is Virginia creeper, and that one is harmless. The easy tell is the count. Virginia creeper carries five leaflets instead of three, so if you count five, you can leave it be and move along.
Poison ivy also likes to shift its shape on you. Depending on where it’s growing, it’ll creep along the ground as a low cover, stand up like a little shrub, or climb a tree as a thick vine with hairy-looking rootlets hanging onto the bark. It’s the same plant and the same itch no matter which form it takes.
If you want to be sure and identify the plant correctly, you can use this guide.
It has clear instructions on how to identify most plants that grow on the territory of the U.S., and it can come in handy to anyone who’s homesteading.
Why the Gear You Use Matters
Every part of poison ivy carries urushiol, the oil that sets off the rash. That’s the leaves, the stems, and the roots, whether the plant is alive or long dead. So you want to cover up completely. Long sleeves, long pants, closed shoes, and waterproof gloves. Skip the cloth garden gloves, because the oil soaks right through them and gets on your hands anyway.
Also, this is a lifesaver trick I learned: tape the gap where your gloves meet your sleeves with a wrap of duct tape, and do the same at your ankles. It keeps a stray leaf from sliding against bare skin while you work. If you’re sensitive, add safety glasses too, so you’re not tempted to wipe your face with a contaminated wrist.
What to Do if You Touch the Poison
Ok, let’s say that you were careful, but sometimes accidents happen. It is what it is. But what should you do next?
The itch given by poison ivy is by far one of the worst things you can experience and the poisonous oil of this plant spreads easily. This is why the first step you must take is to wash the affected area thoroughly. Also, always use cold water when you do this. Warm water is not a good idea because it opens up the pores and this can spread the oil, causing even more irritation.
I know this is hard to do, but try not to scratch. The rash shows up 12 to 48 hours after contact and runs its course over a couple of weeks. This is why the aftercare is also important. You want to make living with this rash as bearable as possible and that’s why you want to take good care of it.
The thing that worked wonders for me was this All-Purpose (First Aid) Salve. I think it worked so well because it’s all natural and it has the best plants you can use when you want to calm down a rash: organic Yarrow, organic Arnica, organic Calendula, organic Plantain.
But you can also use this salve for anything from cuts, scrapes, and minor wounds to bites, stings, and sunburns. It works great for almost anything.
If you want to give it a try, you can find it here.
Start Removing the Ivy After a Good Rain
For small plants and young patches, digging is the way to go, and if you time it right it will be twice as easy. Wait until after a soaking rain or give the area a deep watering the day before. Wet ground lets the roots slide out rather than snap off underground.
The folks at Iowa State University Extension recommend digging or pulling only the small plants, and getting at it after that soaking rain, which lines up with everything I’ve seen in my own yard. Use a trowel or a spade and work it loose, then lift the whole thing out, roots and all. Go slow and try to follow the roots out instead of yanking, because a snapped root left behind is just next year’s plant.
There’s a chance you’ll miss a few. That’s alright. Watch that spot over the next few weeks and pull any new sprouts the moment they show.
Smother What You Can’t Dig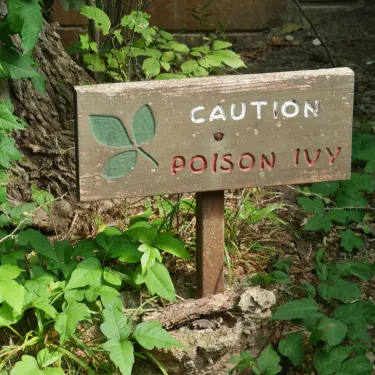
When a patch is too big to dig, or it’s woven through ground you’d rather not disturb, smothering is the slow and steady way to handle it. What you have to do is cut off every bit of light so the plant can’t feed itself anymore.
Start by cutting or knocking the patch down close to the ground. Then lay heavy cardboard or a thick opaque tarp right over the whole area, going a foot or two past the edges, because those creeping roots will try to sneak out the sides. Weigh it down well with rocks, wood chips, hay bales, whatever you’ve got, so it stays put and stays dark.
Now leave it. Eight weeks is the minimum, and honestly a full season is better. If you want to give that ground a second life, pile a foot of wood chips on top of the cardboard. The chips smother what’s underneath and rebuild the soil at the same time, so you can plant something you actually want once the ivy is gone. Check the edges now and then and take care of any stray shoots.
Now, one more creative and even more efficient way to smother poison ivy is to build a garden bed above the affected soil. This means you’ll simply replace the wooden chips or the cardboard with a garden bed.
This is the perfect method to use if you want to start using that area of your garden immediately. You’ll no longer have to wait weeks or even a whole season before you’ll be able to grow something there.
But there’s a catch. You can’t just build any garden bed. There’s a special way to do it when you have to deal with ivy. The way you build the foundation of the garden bed is the most important and this is something most homesteaders don’t know.
See how to make the perfect garden bed, step-by-step →
Starve It With Repeated Cutting
If you’ve got poison ivy creeping into a lawn or pasture, you may not need to dig or cover anything. Poison ivy can’t stand being cut down over and over. Mow it or clip it at ground level every time it gets going, and keep at it through the season. Without leaves, it can’t pull in the energy it needs, and a stand of it will eventually thin out and die.
This is the slowest way to go about it, but it’s the easiest on your back, and it folds right into chores you’re already doing. The thing to hold onto is that it only works if you keep at it. One pass with the mower won’t do a thing. Hitting that same patch every couple of weeks all summer is what finally breaks it.
For a vine climbing a tree, cut it through at the base and again about waist high, then pull that lower section away from the trunk. Cutting the vine stops the flow from the roots to the leaves up top, and those leaves will die back. Then leave the high stuff to wither on its own.
Take Advantage of Your Livestock
If you have goats on your property, you already have the best tool for poison ivy. Goats eat the stuff without any trouble, and the oil doesn’t bother them or carry over into their milk.
If you want to try this method, fence them onto an overgrown patch for a few days and they’ll take good care of it. And they’ll enjoy doing this too!
But the thing is that goats eat leaves, not roots, so the patch may push back up a time or two. That’s why you should bring them back when this happens or finish the job by smothering what regrows.
And now one thing that surprises people: don’t go petting a goat that’s been eating poison ivy. That oil clings to their coat and transfers straight to your hands and I am sure you don’t want that to happen.
What to Do With the Poison Ivy You Cut
This is one important thing I want to discuss. How you dispose of poison ivy can make the difference between a job well done and a visit to the ER.
Please NEVER burn it. The oil rides the smoke straight into your lungs and can land you in the emergency room. This is a very dangerous and irresponsible thing to do.
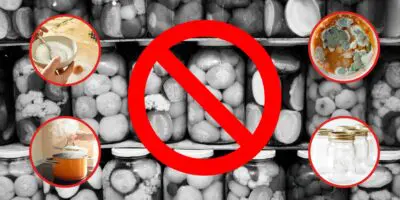
Every piece of ivy that you cut is loaded with urushiol, the toxic oil, and you don’t want to touch that. Use your gloves and put everything in plastic bags. Then you can put them in the trash.
Another thing you can do is to gather everything in one place and than burry all the ivy somewhere in the ground. Also, never add poison ivy into your compost pile.
Then you’ve got the tools and the equipment you used. This oil I am talking about is stubborn and it lingers. It can stay active for years on your tools! So you should wash everything well before you use them again. Also, the clothes you wore need a thorough washing too.
But what you use to wash all of these contaminated things matters the most. You can use regular detergent, but it might not work well from the first try.
Hopefully, when something happens because of nature, you’ll find the answer in the same place, in nature.
I am talking about jewelweed. This also has a nice story because most of the time it grows in the same shady spots alongside poison ivy. So, the solution might be right under your feet.
You can take this herb and make jewelweed water out of it. Then you can use this water to wash your clothes and tools. The beneficial compounds it has will wash away the dangerous oil, and you’ll not get rashes anymore, so everything will be safe to use again.
What About Vinegar and Boiling Water?
Maybe you’ve heard that these two are the answer when you deal with poison ivy. But there’s one thing you should know about them. What happens is the same as in the case of goats. They’ll destroy the leaves, but they rarely reach deep enough to kill off an established root system. The top dies, you think you’ve won, and a couple of weeks later the roots are pushing up fresh growth.
But they still have their place. Boiling water works fine on a seedling poking through a crack in the driveway. Strong vinegar will burn down young foliage. But keep in mind that these two methods kill anything green they touch, including your good plants, so be careful when using them.
Final Thoughts
Poison ivy gives up slowly. There’s no single trick that ends it overnight, and anybody promising you one is usually not honest. The only thing that works is being consistent. You dig the small stuff after a rain, you smother the big patches, you keep cutting back whatever creeps into the yard, and you pull the new sprouts while they’re still little. Stick with that through one good season and you’ll be surprised how little of it comes back the next.
Since summer’s here, there’s another big problem homesteaders struggle with: the lack of water.
This year is said to be one of the direst ones and most people trip up because they don’t prepare beforehand. The problem is that when a major drought is knocking on your door, the conventional methods don’t work anymore.
Let’s say you have rain barrels, but how can you use them if it’s not raining? Maybe you have a well. This is better, but what are you going to do if it’s so hot that it runs dry? Or maybe you’ve stored away some water for a rainy day. That’s smart thinking, but stored water only lasts as long as your supply does, and in a long dry stretch you’ll watch it drain down jug by jug with no way to refill it.
So, unconventional situations require unconventional methods.
This is where the Water Smart Box comes into play. This is a DIY water generator that can give you up to 40 gallons a day. It works by pulling the humidity from the air and transforming it into crystal-clear water you can use for drinking or in your garden. You can think of it like a dehumidifier, but it’s an upgraded one that is made to collect large quantities of water in emergencies.
Since it is designed to pull water out of thin air, the only thing that matters here is the humidity, not the quantity of rain. For example, dry spells can run for weeks, but humidity is still trapped in the air around you. This device allows you to use that humidity and transform it into real water you can use.
Click here to see more about how the Water Smart Box works →
Also, if you want unlimited water this summer, you can give it a try.
You may also like:
Join Our Homesteading WhatsApp Community!
How to Make an Amish Fridge That Needs No Electricity (Video)
Replace Your Harmful Pesticides With THIS
The Unseen Garden Pests You’re Accidentally Feeding
How to Keep Deer Out of Your Property Without Building a Fence


I’ve found that weed killer (glyphosate) that you spray on the leaves and vines will travel down to the root system and kill the whole thing. Depending on the extent of the underground parts you may need to do it again, but this has proven very effective for me. Also Poison Ivy is VERY easy to tell from Virginia Creeper. What is hard to tell it from is Box Elder. I have a very tall Box Elder tree a couple yards away and I find its babies coming up in my beds all the time. I originally panicked, thinking it was poison ivy because the trio of leaves is nigh on identical in shape. The way you tell the difference is that with Poison Ivy the stems are staggered in alternating steps up the vine. With Box Elder the stems of the leaf cluster trios are opposite each other in pairs up the stem. BE is more upright sapling-ish also, while PI tends to be more wimpy and viney.