If you like DIY projects or you are a homesteader, this biological project is perfect for you. This is unique.
Making this one will surely assist you in your savings and, and of course, it will help the environment in several ways.
So, what this project is all about?
This idea is about the production of flammable gas from dry leaves and manure.
What Is Biogas?
Biogas: a mixture of methane (CH4) and carbon dioxide (CO2)- is a renewable source of energy. The biogas produces from the anaerobic digestion of raw materials like straw, husk, leaves, twigs, household waste. And some feedstock like cow dung (manure) is required to initiate the process, as it builds the methanogenic bacteria that convert this organic matter into biogas.
And this biogas production also gives a byproduct called digestate or slurry- which is a kind of organic manure for plants.
Reasons For Making Your Own Fuel
- It helps you save money, because you no longer need to depend on the regular LPG cylinders or gas pipelines for cooking.
- It makes it easy for you to handle household waste like food scraps, fallen leaves and other organic materials.
- It provides you with free organic and nutrient-rich manure for your garden.
- It gives your participation in solving environmental issues like global warming, soil erosion because you would not be sending your household waste to the landfill sites.
We will be building a simple miniature biogas plant for your home.
Let’s begin!
Related: Best Fuels For Off-Grid Survival
Materials Required
- a plastic barrel or a plastic bucket along with a lid
- 1-inch wide/4-inch long PVC pipe
- 1-inch wide/10-inch long PVC pipe
- 5 inch wide/18 inches long PVC pipe
- 25-inches wide elbow pipe
- a reducer, a hose barb, a hose barb tee
- 4-pipe clips
- 12-inches + 20-inches long gas tube (can be transparent too)
- a gas valve, a plastic bottle, Teflon tape, clay (or hardener and resin)
- PVC solvent cement
Extras: For soaking the dry leaves and mixing manure with water, we will need two more buckets. And if you live in a place where the temperature is not between 75oF and 95oF, then you need black paint to paint your digester. It will help to trap the heat which is required to produce a good amount of gas.
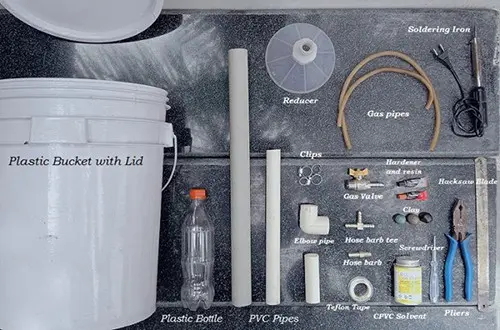
Tools Needed
- Hacksaw blade, Pliers, Screwdriver, Soldering iron
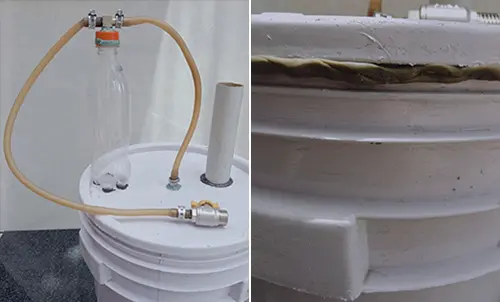
Diagram
Before we begin to build this project, here is a basic diagram of a biogas plant.

The Building Process
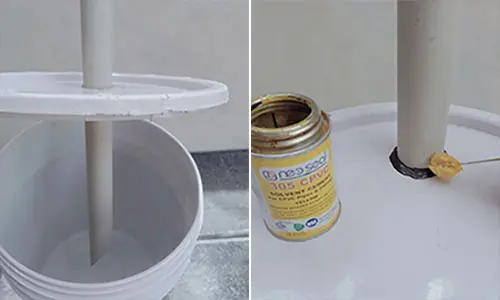
Step 1: Making the inlet pipe
First, let’s make the inlet pipe- from where we will add the raw materials and the feedstock. To build this intel pipe follow the steps below:
- Take a 1.5 inch wide/18 inches long PVC pipe and cut one of its ends using a hacksaw blade.
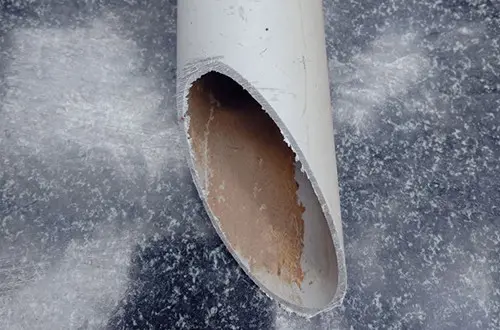
- Then make a hole a little bit more than 1.5 inches in the lid of the bucket with the help of soldering iron.
- Now, insert this pipe into this hole. Keep the pipe about 2-3 inches above the bottom of the bucket.
- And fix it with the help of clay and PVC cement.
Step 2: Making the outlet pipe
The outlet pipe is that pipe from where the digestate or the slurry will come out. To build this outlet pipe follow the steps below-
- First, make about a 1.30-inch wide hole on the side of the bucket (2-3 inches below the bucket’s brim) with the help of the soldering iron.
- Then insert a 1.25-inch elbow pipe in this hole.
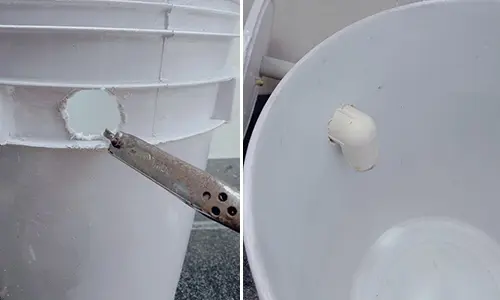
- Now fix a 1-inch wide/10-inch long PVC pipe in this elbow pipe’s inner side (inside the bucket).
- Then put a 1-inch wide/4-inch long PVC pipe on the other end of the elbow pipe (outside the bucket).
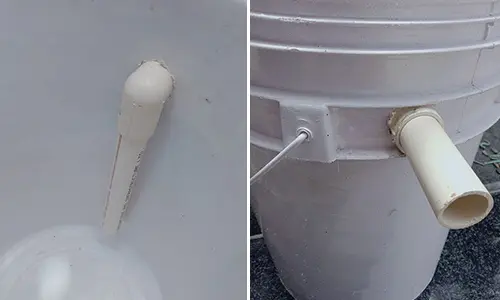
- And fix both joints with the PVC cement.
Step 3: Making the gas outlet setup
In this step, we will make the setup for taking out the produced gas. To build this gas outlet setup follow the steps below:
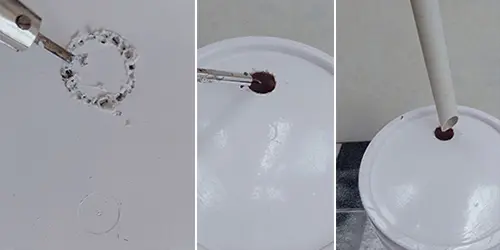
- First, make a small hole on the bucket’s lid with the help of soldering iron.
- Then wrap some Teflon tape around the neck of the hose barb.
- Then insert this hose barb in the hole using pliers.
- Finally, fix this hose barb using clay and PVC cement.

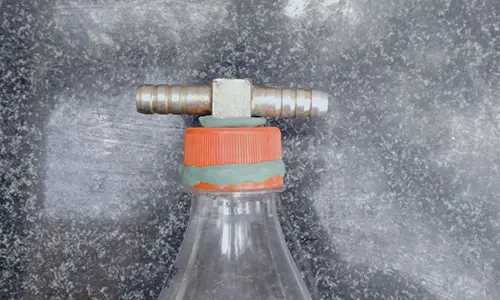
Step 4: Making the setup for storing the gas
Now we will make the setup for storing the produced gas. For this setup follow the steps below:
- First, wrap some Teflon tape around the bottle’s neck and then close the cap.
- Then apply some clay and PVC cement around the bottle’s neck.
- After that, make a small hole on the bottle’s cap using the soldering iron.
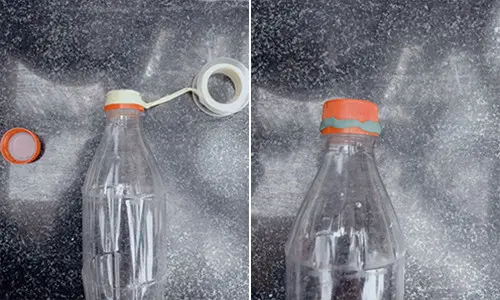
- Then wrap Teflon tape around the hose barb tee.
- Then fix this hose barb tee in the hole at the bottle’s cap using clay and PVC cement.
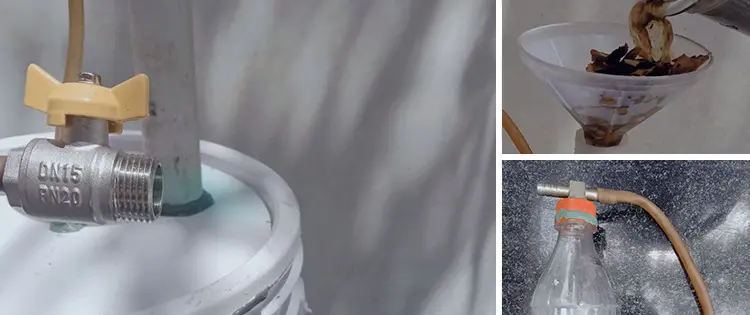
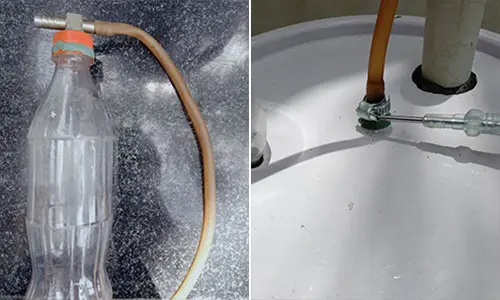
- Now connect a 12-inch gas tube at one end of the hose barb tee. And the other end to the hose barb (on the bucket’s lid).
- Then fix both the connections using pipe clips and a screwdriver.
- After that, add some clay balls at the bottom of the bottle.
- Now fix this bottle on the bucket’s lid.
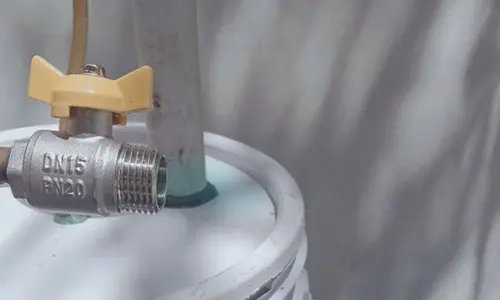
- Finally, take a gas valve and connect it with a 20-inch gas tube using a clip.
- Then connect another end of this gas tube to the hose barb tee with a clip.
- Now close the bucket’s lid. And apply some clay and PVC cement to make it airtight.
The miniature biogas plant setup is ready now, and it’s time to bring it to work.
The Process Of Making Gas
Follow the steps below to start producing your homemade biogas:
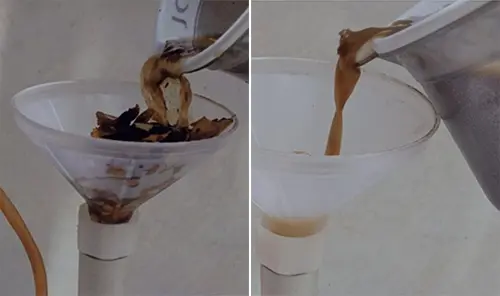
- First, put a small basket of dry leaves in a half-filled bucket of water.
- Then put ⅓ part of manure in ⅔ portion of the water in another bucket of about 10 litres. And then mix well.
- After two days, they will look similar to the pictures below.

- Then pour these soaked leaves with water and the mixture of manure into the digester.
When Will The Biogas Be Produced?
Usually, it takes about 3 to 30 days to produce gas, depending upon the type and the richness of the feedstock used.
After a day or two, you may see some vapors in the bottle. And in about 3-5 days these vapors will get collected in the bottle. And as soon as vapors reach up to 2-3 inches, you may use it.

But for a constant and abundant supply, you need to wait until the bottle is at least half-filled or fully filled.
If the bottle gets completely filled, use a bigger bottle. So you may stock gas for later use.
Safety And Precautions
For the proper building and functioning of this project, you need to take several required precautions:
- Risk of fire: Biogas contains about 50% to 70% methane gas, which is odorless, colorless and highly flammable. Therefore, you should not keep any electric or fire equipment near the biogas plant.
- Suffocation: Methane is a suffocating gas, which means it may suffocate you in an enclosed place. Therefore, you should keep the biogas plant in a well-ventilated area.
- Disease: Manure contains bacteria and germs that may infect you. So, you should wear safety equipment like gloves and a mask while handling it.
- Keep the whole setup away from the reach of children and animals.
- Do not use greywater for the biodigester. It may kill the methanogenic bacteria that produce biogas.
- Do not directly use the slurry from the outlet pipe as manure for plants, because it might contain bacteria or pathogens. Instead, reuse it as a feedstock for the digester or put it in the compost bin for further decaying. And then you can use it.
- Make sure that all joints are well sealed. If you smell any gas around the biogas plant, immediately repair it using clay or PVC solvent.
You may also like:
 How To Make A Moonshine Distiller
The Bunker Food You Need To Have Right Now (Video)
5 Ways To Power Your Homestead
How To Heat Your Home Without Electricity
Backyard Projects That Might Get You Arrested


This is a nice project and I am definitely going to make it.
Great article!! But I would make a bigger one.