Homesteaders and avid gardeners are rarely looking for extra work but some DIY seed starter pots may be a great way to spend a few free minutes.
They can be simplistic and effective, as you’ll see in this article. Many designs exist and plenty of things can be repurposed into pots (yogurt containers, water bottles, etc) but this minimalist idea will be quick and affordable!
Why DIY
There are many reasons homesteaders and gardeners look towards DIY projects and the reasons are typically the same. For these DIY seed starter pots, 3 benefits stand out:
- Less reliance on plastics
- Saving money
- Customizable
Plastics
When it comes to plastics, they are hard to avoid. While it may seem minuscule on the surface, especially if you reuse plastic pots season after season, there are more problems with plastic than you see on the surface.
Sure, you could buy plastic seed starting pots and trays that are recyclable. However, the majority of plastics aren’t recycled. That’s out of the scope of this article but nobody wants more waste in the landfill.
Next, microplastics might be nearly invisible to the naked eye, but they can easily leach off of plastic pots and into the soil. Tests have revealed microplastics have ended up in fruits and vegetables themselves! With endocrine-disrupting effects and other negative effects still unknown, avoiding plastics in the garden is imperative to the health and you and your family.
Luckily, no plastic is necessary for these DIY seed starter pots!
Save Some Money
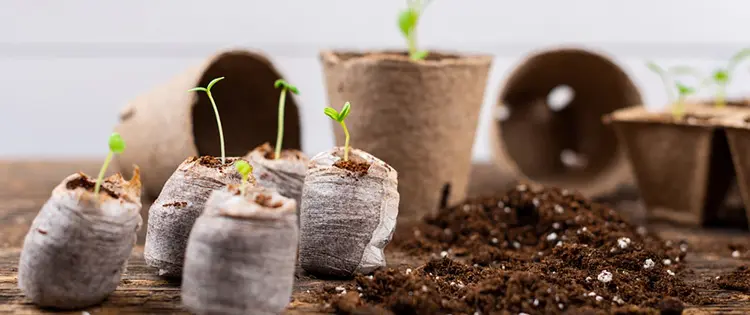
If you want to avoid plastics, you can go out and buy biodegradable pots, like peat, or reusable silicone pots.
Peat pots are nice because they can reduce waste in the garden and allow you to transplant directly into the soil without removing the root ball since the peat will break down over time naturally. However, they are too expensive when compared to these DIY seed starter pots that provide the same benefits.
Silicone pots are awesome because they are reusable and inert, meaning they aren’t leaching harmful chemicals into your soil and produce. However, they are pretty much the most expensive option on the market.
If you have the extra cash available, be my guest. Everybody else can choose to save some money with this project!
Customization
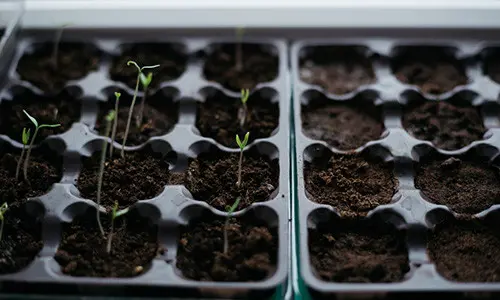
Different seeds need different spacing when starting them out in pots to transplant later. Some can be started in large pots for weeks to get a head start on the growing season while others do great in small cells ready to be transplanted quickly after sprouting.
That’s the best part about DIY seed starting pots like this project. You can shape them and size them exactly how your seeds need. You won’t even need different materials to do this either!
You can make them small or large, circular or squared, tall or short.
Start a few tomato seeds before your last frost in large DIY pots or start hundreds of lettuce seeds in pots ready to transplant in a matter of days!

The Benefits Of Bottomless Pots
When seedlings become root bound, they struggle when transplanted out. Typically you’ll see the roots bundle up towards the bottom of the pot and swirl around, binding each other and restricting free growth.
With these bottomless pots, the design allows the roots to either grow out beyond the pot or air prune themselves for better root structure. Once your seedlings are ready to transplant you won’t have to rough up the typical bundle of roots seen in seedlings that get left in the pot just a little too long.
Of course, having no solid bottom on the pots means that having these pots submerged in water all the time to utilize bottom watering isn’t the best use. Instead, water should be supplied on the soil surface using a light mist to avoid the bottoms of these bottoms breaking down before the seedlings are ready to transplant.
Using the right Kraft paper for this project will ensure your pots don’t disintegrate before transplanting. We want them to break down after they are placed in the garden bed, not before.
Related: How to Properly Harvest Seeds
Materials Needed For These Pots
There aren’t many homesteading projects easier than this. Here is all you will need:
- Kraft paper
- Tape (compostable preferred)
- Pot size guide (hot sauce bottle, cup, a squared wooden block, etc)
That’s it! Nothing about this project is complicated or expensive. Let’s break down each ingredient.
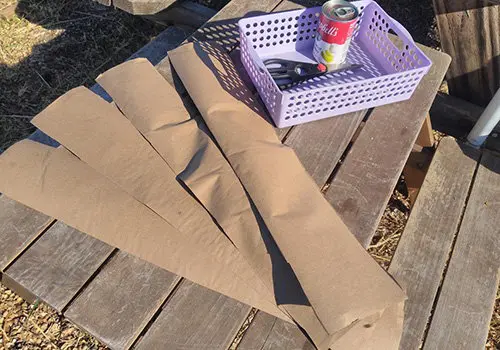
For the Kraft paper, go with the weight you need for the pots to last as long as the initial seed starting will so they are almost broken down by the time you transplant. The heavier the weight of the paper, the longer it will last. You can. Also repurpose paper grocery bags for this project.
The tape will keep the pots together. Compostable tape is preferred as you won’t have to remove it when you transplant your seedlings. If you use compostable tape you can dig your hole, put the whole pot in, firm soil around the seedling, and keep moving forward!
Using non-compostable tape means you’ll have to remove it before planting it out and that typically destroys the form of the pot and can cause unwanted root damage.
For the size guide you can use anything you can wrap paper around. I like hot sauce bottles when building round pots and a custom-cut wooden block when creating square pots. Having a good variety will allow you to make pots of all sizes. Get creative, you don’t need to spend money on this part!
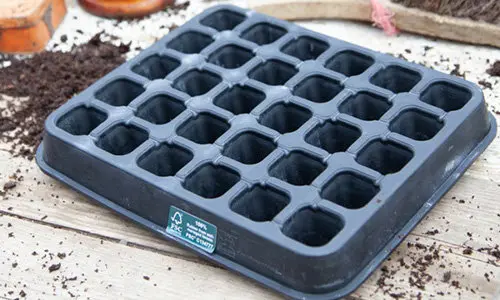
An optional, but handy, thing to have is a tray that will hold the pots. Whether circular or square, these pots hold up a lot better if they are put in a group and held together by the walls of a pot tray. You can use standard 1040 trays, litter pans, glass baking dishes, etc.
Putting The Pots Together
Let’s not over-complicate this:
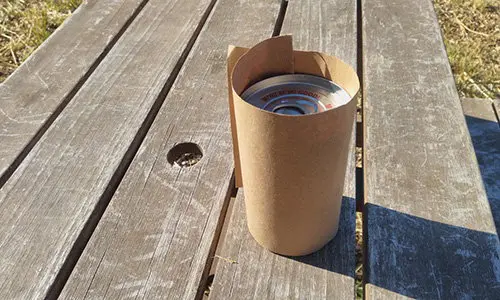
- Cut a piece of Kraft paper to the height you desire.
- Wrap the Kraft paper around your size guide evenly, ensuring a bit of overlap.
- Tape the seam.
- Slide the new pot off of the sizing guide.
You can repeat this over and over until you have enough pots for the season.
Planting Out Your Tray
You know how to put them together, but how do you properly utilize this style of seed starting pot?
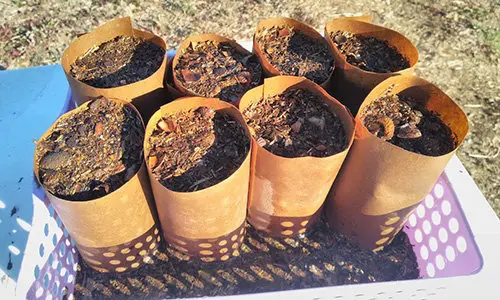
First, set them up in your tray side by side so the whole tray is full. Then slowly start filling each pot up with your chosen soil mix.
Use your sizing guide used previously as a way to tamp down the soil to fill all the air pockets in the pots and create a more solid foundation.
Plant your seeds according to their requirements and water the whole tray on a light mist setting. Once watered the soil will settle a little more so top them off with a bit of soil if needed and tamp them down gently.
Transplanting Your Seedlings
This is almost as easy as grabbing each one and putting them in a hole in the ground. If you used compostable tape there is nothing to remove before planting out.
One thing to make things easier is to have the seedlings dried out so the Kraft paper pots aren’t soaking wet. After days to weeks of being watered the paper will be more brittle and will rip much easier when wet. Transplanting when dry and watering afterward makes the process much easier.
There are a bunch of ways to make DIY seed starting pots. Each has its merit.
However, it’s hard to beat the functionality, simplicity, and affordability of these Kraft paper pots. Not to mention the eco-friendly bonus of using pots by this design!
Try these out and you’ll be transplanting healthy seedlings into your garden in no time.
You may also like:
 DIY Dutch Bucket Hydroponics System
New Invention 12X More Efficient Than Solar Panels (Video)
How To Build A Small Storage Shed From Pallets
Trees In Your Backyard You Should Tap Right Now
Strange Gardening Tips And Tricks That Really Work


