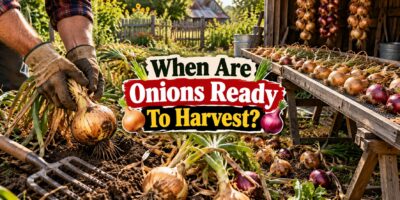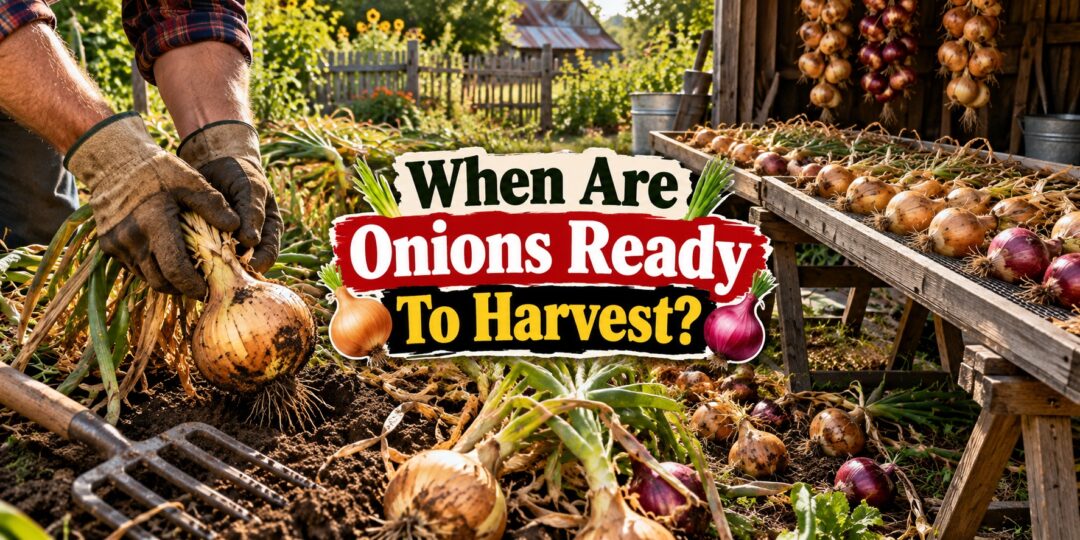
Every summer I get the same question from neighbors leaning over the garden fence: “Are those onions done yet?” It is a fair question, because onions do not turn red like a tomato or swell like a squash to tell you they are finished.
The good news is that onions do give you clear signals once you know what to look for. In this guide I will walk you through the signs I watch for, how timing changes with the type of onion you grow, and the harvesting and curing steps that decide whether your onions last until spring or turn to mush by Thanksgiving.
If you are still at the planting stage, start with our general guide to growing onions, then come back here when the tops start to lean.
The Short Answer
Bulb onions are ready to harvest when the green tops soften at the neck, fall over, and begin to yellow and dry. The Ohio State University Extension puts this at roughly 90 to 120 days after planting, once the majority of the tops have wilted.
Where it gets confusing is the exact moment to pull. The University of Minnesota Extension says to harvest when about half the tops are falling over and dry, while other universities suggest waiting for most or even two-thirds of the tops to go down.
Those numbers are not really in conflict. They reflect a trade-off between bigger bulbs and longer storage, and I will explain how I decide on that further down.
The Five Signs I Look For
I never rely on just one signal. Wind, heavy rain, or a dry spell can knock tops over before the bulbs are truly finished, so I check for several of these at once.
1. The Tops Fall Over at the Neck
This is the classic sign. As the bulb matures, the neck just above it softens and can no longer hold the leaves upright, so the whole top flops over.
It usually starts with a few plants and spreads across the bed over a week or two. A top that is bent halfway up the leaf does not count; I am looking for plants that have folded right at the neck.
2. The Neck Feels Soft When Pinched
This is the test I trust most. I gently pinch the neck between my thumb and finger, right where the leaves meet the bulb.
The UMass Extension fact sheet on harvesting and curing onions passes along guidance from the University of Georgia: immature onions have stiff necks, ripe ones have soft and limber necks, and onions whose necks are too weak to hold up the tops at all are already past their best. The same source warns that counting fallen tops alone can mislead you, because wind, rain, or drought stress can flatten plants early.
3. The Leaves Yellow and Brown From the Tips Down
Once growth stops, the foliage starts dying back. You will see yellowing and browning spread from the leaf tips toward the bulb.
Fully green, upright leaves mean the plant is still feeding the bulb. A bed of mostly straw-colored, collapsing leaves means you are in the harvest window.
4. Dry, Papery Skins Begin to Form
Brush a little soil away from the shoulder of a bulb and look at the outer layer. The SDSU Extension onion guide notes that mature bulbs begin developing dry, papery outer scales, and that those scales act as a protective wrapper during storage.
If the outer skin is still moist and fleshy, give the plant more time. If it is starting to look thin and paper-like, you are close.
5. The Calendar Agrees
I keep a note of the planting date on a stake at the end of every bed. If the signs above appear around the 90 to 120 day mark, I am confident the onions are genuinely mature rather than just stressed.
If tops start falling at 60 days, I look for another cause first, such as drought, disease, or wind damage.
Why the Experts Disagree on Timing
Here is the part most gardening articles skip. Extension services give different harvest thresholds because they are optimizing for different goals.
The UMass fact sheet explains that maximum storage life comes from harvesting while 30 to 40 percent of the foliage is still upright, but yields can climb another 30 to 40 percent between the moment tops begin to fall and the point when they are completely down and dry. In other words, waiting longer gets you bigger onions, while pulling earlier gets you onions that keep longer.
The Nebraska Extension guide to harvesting and curing onions recommends harvesting when about two-thirds of the tops have fallen and notes that research found the best flavor and sweetness at around 80 percent foliage dieback. It also cautions that once you reach that stage, you should not wait more than one or two weeks, or the bulbs may start to rot or regrow.
My own rule is simple. For storage onions I plan to keep into winter, I pull when roughly half the bed has fallen; for onions we will eat within a month or two, I let them go a little longer for size.
Harvest Timing by Onion Type
Not every onion follows the same schedule. Your harvest window depends heavily on day length and on what kind of onion you planted.
Long-Day Storage Onions
Long-day onions start forming bulbs once days reach 14 or more hours of daylight, according to Iowa State University Extension. They are the right choice for northern gardens because they grow big tops before bulbing begins, and bigger tops mean bigger bulbs.
In the North, these onions are typically ready in mid to late summer. The Illinois Extension onion guide points to late July or early August, when most of the tops have fallen over, and advises getting mature onions out before the fall rains because they rot quickly in cool, wet soil.
Short-Day and Sweet Onions
Short-day onions begin bulbing with only 10 to 12 hours of daylight, which is why they suit southern gardens planted in fall or winter. Southern growers usually harvest them in spring or early summer.
The Texas A&M AgriLife short-day onion guide explains that these varieties hold more water than storage types, so they do not keep well and are best eaten fresh. That includes Yellow Granex, the onion behind the famous Vidalia, which is described there as a poor keeper.
Intermediate-Day Onions
Intermediate-day onions bulb at around 12 to 14 hours of daylight and fit the middle latitudes. Ohio State notes that both long-day and intermediate-day types grow well in Ohio, and Candy is a common intermediate variety in home gardens.
They follow the same harvest signs as other bulb onions. Just remember that many of the sweet intermediate types are short keepers, so plan to use them first.
Green Onions and Scallions
Green onions are the easiest of all because you do not wait for the bulb to mature. Illinois Extension says you can pull green onions any time after the tops reach about 6 inches tall, and that true scallions are ready when the leaves are around 8 to 10 inches high.
I pull them as I need them straight from the bed. The flavor gets stronger as they get bigger, so the older ones go into the soup pot instead of the salad bowl.
Onions That Have Bolted
Sometimes an onion sends up a thick, hollow flower stalk, which gardeners call bolting. SDSU Extension explains that onions grown from sets are especially prone to this, and that heat and drought stress can trigger it too.
Bolted onions will not store well, so harvest them first and use them soon. SDSU also suggests cutting off the flower stalk as soon as you see it, which helps keep the bulb from spending its stored food on seed.
Please Do Not Bend the Tops Over
You have probably heard the old advice to stomp or roll the onion tops flat to “push energy into the bulb.” Plenty of old-time gardeners swear by it, and many still do it every summer.
Nebraska Extension addresses this directly and says it simply is not true: bending the leaves while they are still green only reduces bulb growth, because those leaves are what manufacture the carbohydrates stored in the bulb. Illinois Extension adds that breaking tops early interrupts growth, giving you smaller bulbs that do not keep as well.
Let the tops fall on their own schedule. Your patience will show up in bigger, longer-keeping onions.
Stop Watering Before Harvest
As the bulbs reach full size, ease off the hose. The University of Minnesota advises stopping watering once bulbs are full size and the tops begin to fall.
Drier soil in those final days helps the outer skins start to toughen and makes curing easier. It also keeps the bulbs from sitting in wet ground, which is an open invitation to rot.
How to Harvest Without Damaging Your Onions
Harvest day matters as much as harvest timing. A bruised or wet onion is the first one to rot in storage.
Pick a dry stretch of weather for the job. UMN recommends harvesting on dry, cool days to limit disease after harvest.
Loosen the soil first with a garden fork pushed in a few inches away from the row, then lift the bulbs gently. Nebraska Extension stresses careful handling to avoid bruising, and it recommends brushing soil off with a soft brush or gloved hand instead of washing the bulbs.
Watch out for the midday sun. Illinois Extension warns that freshly pulled onions can sunburn on hot, bright days, so move them into shade if the afternoon is scorching.
Curing: The Step That Decides How Long They Keep
Curing is simply drying the necks and outer skins so the onion seals itself up for storage. Skip it, and even a perfect harvest will rot.
The UMN guide recommends curing onions in a warm, well-ventilated spot at 75 to 90 degrees Fahrenheit for two to four weeks, until the outer scales are dry and the neck is tight. Iowa State’s guide on how to harvest, dry, and store onions suggests spreading them in a single layer in a shed or garage and curing for two to three weeks, until the outer scales begin to rustle.
I cure mine on old window screens propped up on sawhorses in the barn, where air can move above and below the bulbs. A covered porch, a garage with the door open, or a shaded hoop house all work too.
How to Tell When Curing Is Done
The neck is the best indicator. The NC State Extension guide to postharvest handling of onions says a properly dried neck should be dry nearly down to the bulb and should not slide back and forth when you squeeze it between your thumb and forefinger.
That same guide explains that the most common storage disease, neck rot, starts when Botrytis fungus gets into a neck that was not fully dried. Once an onion is infected, nothing can stop the decay, which is why I never rush this step.
Trimming the Tops
Only trim tops after they are fully dry. UMass warns that cutting through any part of the top that is still green or moist can lead to heavy neck rot in storage, and recommends leaving 2 to 3 inchves of neck on the bulb to give disease a longer path to travel.
If you prefer, leave the dry tops on and braid them. A braid of onions hanging from a rafter is about as homestead as it gets, and it lets you snip off one bulb at a time.
Storing Your Cured Onions
Once cured, onions need cool, dry, airy storage. Iowa State recommends 32 to 40 degrees Fahrenheit at 65 to 70 percent relative humidity, using mesh bags, crates, or baskets that let air circulate.
Too warm, and they wake up. UMN notes that onions start to sprout when kept above 40 degrees, while NC State warns that onions freeze at about 31 degrees and that repeated short freezes are just as damaging as one long one.
Variety makes a huge difference too. Iowa State notes that good keepers such as Copra and Stuttgarter can last several months, while sweet types like Walla Walla and Candy keep only a few weeks.
Keep onions away from apples and potatoes, which Nebraska Extension says will absorb the onion flavor. Check your stored onions every week or two and pull out any that feel soft before they spoil the rest.
Common Onion Harvest Mistakes
After many seasons of growing onions, these are the mistakes I see most often, and I have made a few of them myself.
Waiting too long is the biggest one. Onions left weeks after the tops die back can start rotting in the ground or push out new roots and shoots, especially if late-summer rains arrive.
Harvesting or curing in wet weather is a close second. Damp onions piled in a bucket are a recipe for mold, so wait for a dry spell and keep them spread out in a single layer.
Trimming too close to the bulb is another storage killer. Nebraska Extension notes that cutting stems too short reduces storage potential and raises the risk of storage rot.
Hilling soil over bulbing onions causes trouble as well. Illinois Extension explains that onions covered with soil before harvest often begin to rot soon after they come out of the ground.
Finally, do not try to store thick-necked or damaged bulbs. Iowa State advises using thick-necked onions as soon as possible, since they do not keep well.
Frequently Asked Questions
What if my onion tops never fall over?
Some onions, especially those with thick necks or ones that have bolted, never flop over naturally. If the rest of the bed is down and the stragglers have soft necks and yellowing leaves, harvest them anyway and use them first.
Can I harvest onions early?
Yes, you can pull onions at any stage and eat them fresh. SDSU Extension notes you can keep harvesting fresh onions through the summer, but if you want onions that store, wait until the plants stop growing and the tops begin to dry and fall.
How long can onions stay in the ground after the tops fall over?
Not long. Nebraska Extension recommends harvesting within one to two weeks once the foliage has mostly died back, because bulbs left longer may begin to rot or start growing again.
Should I cut off onion flower stalks?
Yes. Cutting the stalk as soon as it appears helps the bulb hold on to its stored food, but plan to eat bolted onions soon since they will not store well.
Do I need to cure onions I plan to eat right away?
Not really. Onions you will use within a week or two can go straight to the kitchen, but anything headed for the pantry or root cellar needs a full cure first.
Growing Food Is Only the Beginning. Learn the Skills to Keep It.
Knowing when to pull an onion may seem like a small skill, but it represents something much bigger: the ability to grow, harvest, preserve, and store your own food instead of depending entirely on someone else to provide it.
For generations, people knew how to make a harvest last through winter, preserve food without wasting it, produce what their families needed, repair and reuse what they already owned, and solve everyday problems with their own hands.
Much of that knowledge has quietly disappeared.
The Lost Skills of Independence was created to bring those practical skills back. It is packed with old-fashioned, hands-on knowledge designed to help you become more capable, resourceful, and self-reliant, whether you’re living on a homestead or simply trying to depend less on modern systems.
Because a productive garden is valuable. But knowing what to do with everything you grow, how to preserve what you have, and how to provide for yourself when stores or services aren’t available is what turns gardening into genuine self-sufficiency.
You don’t have to change your entire lifestyle overnight. Start by recovering one forgotten skill at a time.
The more you know how to do yourself, the less dependent you become on systems you cannot control.
Final Thoughts
Knowing when onions are ready to harvest comes down to reading the plant, not the calendar alone. Watch for tops that fold at the neck, soft necks, yellowing leaves, and papery skins, then decide whether you want maximum size or maximum storage life.
Pull them on a dry day, cure them until the necks are tight, and store them cool and dry. Do that, and you will be cooking with your own homegrown onions long after the garden has gone to sleep for the winter.
You may also like:
Don’t Throw Away Your Onion Skins, Do This Instead!
What Happens When You Pour Sugar Into An Onion? (Video)
How to Cook Chicken Feet: A Homesteader’s Guide From Cleaning to Plate
How To Make Your Own Vertical Onion Planter
Fermented Vegetables – A Complete Homesteader’s Guide to Lacto-Fermentation
Don’t Throw Away SPOILED Vegetables! Do THIS Instead!