
If you’re like me and you put up enough food to feed a small army, then you might be struggling with this problem: your pantry, root cellar, and freezer are full and you always feel like you never have enough space for food storage.
This is a pretty common inconvenience for many homesteaders, but I think I found a revolutionary solution and I want to share it with you in this article.
I’ve stumbled across this trick that conveniently preserves soup for half a year or more while also taking little to no space in your pantry. I know this sounds incredible, but it’s actually really easy to use this method and you already have all the tools you need to try it at home.
So, here’s everything you need to know about preserving soup long term.
What Makes This Worth Doing
Ok, what we’re making here is called “soup leather.” It’s a funny name, I know, but this is how seasoned homesteaders call it.
So, what is this soup leather? That’s what you get when you dry a finished soup into thin, bendy sheets. That’s the whole idea. You cook your soup, dry it flat, and store it.
Maybe when you first read this, it doesn’t sound like a big deal, but here’s what made it my favorite way to store soup. Let’s say you have a big pot of soup and you want to can it and store it long term. You’d probably fill four quart jars from that pot of soup. If you use the soup leather method, you can fit all of that soup into a single mason jar. Amazing, right?
This makes such a big difference when you want to put away food and you don’t have enough space. 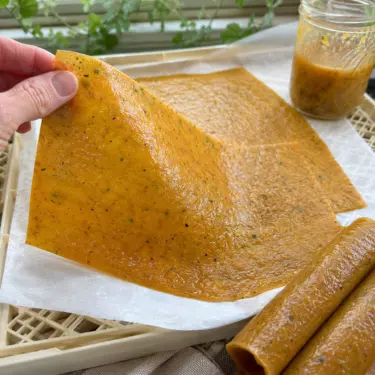
Think about the weight too. Dried soup is light as a cracker. If you ever need to grab your food and go, or you’re stocking a cabin or a back shelf, there’s no need to handle heavy jars.
But the part I love most is that it needs no electricity to store. A freezer is wonderful, and mine stays full all year, but it only works as long as the power holds. Soup leather just sits on the shelf in the dark, minding its own business through any storm or outage. For anybody who wants to lean a little less on the grid, that’s worth something.
Also, yes, you can keep this miracle soup in your pantry no fridge needed- but what about the rest of your food? This is a question I asked myself countless times. Ok, maybe you have a root cellar or a basement. This will work, but for how long? If we’re realistic for a moment, we can clearly see that you can’t keep raw meat in a root cellar for weeks. It’s still too hot inside for this. And now, it’s not just about the meat, but many foods sit better in a cold fridge than a root cellar.
So, what happens now? If you were in a real scenario with zero electricity, it would be great to have a way to store foods for longer without worrying that they will spoil in days. The thing is that even if you have a pantry full of foods that don’t need a fridge, new food will still come and you need a safe way to store it.
This question also made me think too much about it, but that was until I found the perfect backup fridge. And I want you to pay attention to this: I say fridge because this is a device that is able to preserve cold air inside.
This is not just another root cellar. I stumbled across this interesting method when I was looking into how the Amish store their food long term. They also have full root cellars and pantries, but when it comes to stuff that spoils fast, they use what we call the “Amish fridge.” This is an off-grid fridge that uses zero electrical power but still manages to keep food fresh for longer. You can use it as a transition space to store your meat before you can eat it, for example. Or you can safely use it if you have to keep food during a blackout.
You can find the full instructions explained by an ex-Amish here →
I built it inside my basement and I keep it there as a backup plan in case something bad happens. I also use it from time to time when there’s not enough space in my regular fridge. For now, I am pleased by how it works.

The Soups That Work and the Ones That Don’t
Before you fire up the dehydrator, you need to know that not every soup is a good candidate. This is where folks go wrong and end up with a jar of soup that goes rancid in a month.
The rule is simple. Fat is the enemy. Fat doesn’t dry out the way water does. It stays in the food, and then it turns rancid and gives everything an old, off taste. So the soups that dry beautifully are the lean, brothy, vegetable-heavy ones.
My split pea is the one I dry the most. I cook it down with a ham bone for flavor, fish the bone out before it goes anywhere near the trays so the grease goes with it, and what’s left dries into a powder that makes the best quick lunch come January. That’s the kind of soup you’re after.
These dry well: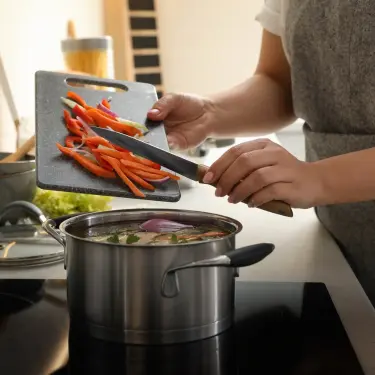
- Vegetable soup – Carrots, celery, tomatoes, green beans, corn, all of it.
- Bean and lentil soups – Split pea, lentil, black bean. High in protein, low in fat, and they powder up wonderfully.
- Tomato soup – Dries into a tangy base you can rehydrate into soup or even use as a sauce.
- Minestrone – Just leave the cheese off the top until serving.
These do not dry well, so keep them off the trays:
- Cream soups and chowders – Anything with milk, cream, or a butter base.
- Cheese soups – Same problem.
- Fatty meat soups – The grease is what ruins them.
You can dry a soup with a little lean meat in it, but the second you add fat, your shelf life drops from months down to a couple of weeks. So my honest advice is to dry your vegetable and bean soups for long storage, and if you want a hearty meat soup, brown some meat fresh and stir it in when you rehydrate.
Unfortunately, if you want to fully preserve a hearty meat soup, this is not the best method. But this doesn’t mean there is no way to preserve meat long term. We have SPAM at the grocery store, so be sure there’s a way to do that at home.
So, here’s the right way to preserve meat for the long haul. This is one of the most efficient ways to keep meat long term and what I love about it is that you can also use the spices and herbs you like and the meat manages to preserve its aroma. The lack of taste when it comes to canned meat is a big problem, but this preservation method manages to overcome it.
This is basically a tutorial about how to make SPAM at home, but if you ask me, this is for sure an upgraded recipe for SPAM because I swear I’ve never had SPAM that tasted this good my whole life. These are the perks you get when you’re preserving your own food.
See how to apply this method yourself, and make all of your canned meat taste better than ever →
How to Make Soup Leather, Step by Step
If you ask me, this is easier than canning by a long shot and also there’s no risk of a jar not sealing. Here’s how I do it from start to finish.
As for how much you’ll end up with, figure on a big stockpot of soup, around twelve to thirteen cups, drying down to roughly a quart jar of leather, and less than that if you grind it to powder. So one good batch of soup fits in a single jar with room to spare; that’s why this saves so much space.
What You’ll Need
- A pot of fully cooked soup, low in fat (see the list above)
- A blender or an immersion blender
- A food dehydrator with solid tray liners, or an oven with parchment-lined baking sheets
- Clean glass jars or vacuum-seal bags for storage
Step 1: Cook Your Soup and Skim the Fat
Make your soup the way you always do, and cook it all the way through. Once it’s done, let it settle for a few minutes and skim off any fat or oil floating on top. Take your time with this part. The more fat you pull off now, the longer your soup leather will keep later.
Step 2: Blend It Smooth
Pour the soup into your blender, or stick your immersion blender right in the pot, and blend it until it’s smooth. You want it about the thickness of a thin applesauce or pancake batter. If your soup is watery, simmer it down first so it thickens up. A thin, runny soup takes forever to dry and runs all over the tray.
Chunky soups don’t dry evenly, which is why we blend. The smooth puree dries at the same rate all the way across, so you don’t end up with crispy edges and a wet middle.
Step 3: Spread It on the Trays
Spread the puree about a quarter inch thick onto your dehydrator trays fitted with the solid leather liners, or onto baking sheets lined with parchment paper. Keep it even, and make the edges just a touch thicker since they dry fastest and can scorch.
One thing to know. Don’t use waxed paper or regular foil, because the leather sticks to them and you’ll never get it off. Parchment paper or the proper dehydrator liners are what you want.
Step 4: Dry It Low and Slow
Set your dehydrator to 140°F and let it run. Depending on how thick you spread it and how much water was in the soup, this takes somewhere between 6 and 12 hours.
No dehydrator? Your oven works just as fine. Set it to the lowest temperature it’ll go, usually 140 to 150°F, and prop the door open a few inches with a wooden spoon so the moisture can escape. If your oven has a convection fan, even better, since the moving air speeds things along.
Step 5: Know When It’s Done
Touch the center of the leather. It’s ready when there’s no soft dent, no sticky feel, and no wet spots anywhere. For the longest storage, I dry mine all the way past bendy to where it’s brittle and snaps when I break it. The drier it is, the longer it keeps.
Step 6: Break It Down and Store It
Let the leather cool completely. This matters because if you jar it up while it’s still warm, it sweats inside the jar and that little bit of moisture invites mold. Once it’s cool, tear it into pieces or, my favorite, grind it into a powder in the blender. Powder takes up the least room and rehydrates the fastest.
Pack it into clean, dry glass jars or vacuum-seal bags. Label every one with what it is and the date you made it. Trust me, six months from now you will not remember which jar is the split pea and which is the tomato.
Step 7: Bring It Back to Soup
When you’re ready to eat, stir your dried soup into hot water. A rough starting point is about three heaping tablespoons of powder per cup or two of water. Let it sit for a few minutes to soak up the water, then bring it to a simmer on the stove. Stir in any fresh meat, a splash of cream, or a handful of cheese now, at the end, not before drying.
Does This Taste Good?
Now, I know what you’re wondering, because I wondered it too the first time. Does it actually taste like soup, or like something sad that’s good only in an emergency?
The good news: it tastes like soup. A good blended vegetable or bean soup comes back nearly the same as the day you made it, and a simmer for a few minutes brings the flavors right back together.
But, since you blended it smooth before drying, it rehydrates smooth and thick, more like a pureed soup than a brothy one with chunks. If you miss having something to bite into, toss in a handful of fresh or dried vegetables, some cooked noodles, or even some meat as it simmers and you can be sure it will be just like a fresh soup.
I always prefer to add fresh vegetables, but for example, for meat I prefer to add canned ones because it’s way faster. I want to eat my soup now, not wait one more hour for the meat to cook. Also, I even add dried vegetables to it in the winter. I always dry a whole batch of carrots, celery, onion, and even tomatoes. I generally use my oven for this operation, but when I want to maximize my time and get things done faster, I also use my homemade solar dehydrator. If you want to see how to build one too, you can find more information here + the list of materials and the step-by-step instructions.
Also, when it comes to meat, since I told you I prefer to add preserved meat instead of fresh meat, my go-to recipe is the good old Amish Poor Man’s Steak. This meat is already prepared; it keeps all it’s natrual juices and fits perfectly when you want a more nutritious food that keeps you full the whole day. You can see how to prepare meat like this here in an exclusive series of videos.
How Long It Really Lasts
According to the National Center for Home Food Preservation, dried foods keep anywhere from four months to a year, and dried vegetables last about half as long as dried fruit. They also point out that heat is what shortens that window, so the cooler you store your jars, the longer they hold.
That means a well-dried vegetable soup leather will last around six months when you keep it in an airtight jar in a cool, dark pantry.
If you vacuum-seal it or tuck it in the freezer, you can stretch it closer to a year. Store it somewhere warm or leave air in the jar, and it won’t make it that long.
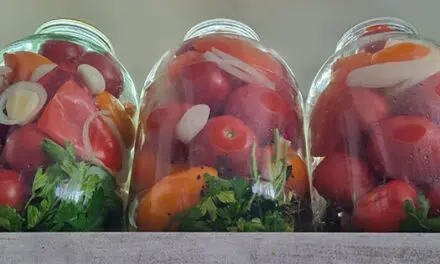
If You’d Rather Can Your Soup, Read This…
Ok, ok, maybe soup leather is not your cup of tea and I can completely understand that. Maybe you just want to follow the traditional ways and simply put up all the food in cans and stock them in the pantry. But you know very well that many times the canned food doesn’t taste the same way it used to taste when you cooked it. Most of us see this as a normal occurrence and simply tolerate it.
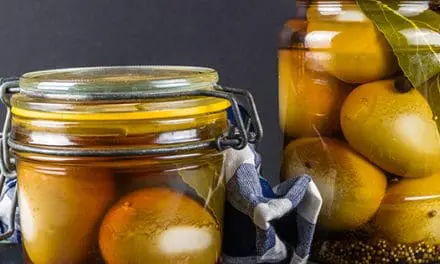
But have you ever tested the cans people sell at the farmer’s market? They taste almost as good as fresh. So, what are they doing to get their food to taste identical to fresh cooked food?
When sellers make these cans, they make them for commercial use. They want the customers to like their products so much that they’ll keep coming back. This is why they use some secret tricks that make preserved food taste fresh. And the thing is, doing the same is incredibly easy. I was baffled the first time I heard what the secret is. All I can tell you is that most of the process is based on a couple of basic but lesser-known techniques of food preservation. These methods used to be popular hundreds of years ago, but once people began to buy their canned food from the stores and not make it at home anymore, most of these tricks have been forgotten.
So, if you want to give it a try, here you can find a dozen recipes you can begin with →
Final Thoughts
The whole idea of this method is to preserve soup long term while not taking up too much space. This is incredible if you want to store a lot of food and you don’t want to depend on the freezer.
I keep a little notebook in the pantry where I note down which soups dried best and how long each batch lasted; you can try to do the same.
You may also like: 
12 Signs Your Canned Food Has Gone Bad
How to Make the Forever Butter, Step-by-Step (Video)
Canning Myths Debunked By The Amish
The Secret Trick That Cuts Fruit Canning Time in Half
Canning Potatoes: A Self-Reliant Staple for Your Pantry


