
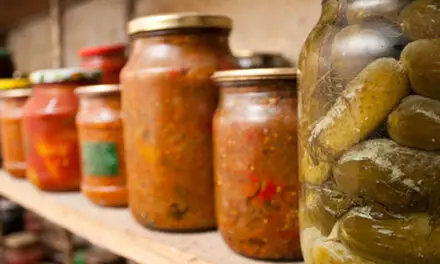
If you’re building a self-sufficient homestead or stockpiling food for the long haul, you’ve probably focused on grains, beans, and canned goods. But here’s what most people overlook: cheese is one of the most valuable foods you can store long-term, and freeze drying is the only method that makes it last decades without refrigeration.
Properly freeze dried cheese lasts 25+ years, retains nearly all its nutritional value, weighs almost nothing, and rehydrates instantly. It’s the perfect protein and fat source for your pantry, bug-out supplies, or off-grid lifestyle.
But here’s the catch: not all freeze dried cheese is created equal. Some brands taste like cardboard, others don’t rehydrate properly, and cheap versions spoil within months despite claims of 25-year shelf life. Worse, most people waste money buying commercial freeze dried cheese when they could make it themselves for a fraction of the cost.
In this comprehensive guide, you’ll learn everything about freeze dried cheese: how it’s made, how it compares to other preservation methods, which cheese types store best, how to freeze dry cheese at home (with and without expensive equipment), how to use it in everyday cooking, and which commercial brands are actually worth your money.
Whether you’re building a year’s supply of food, stocking your homestead pantry, or preparing for grid-down situations, this is your complete resource.
What Is Freeze Dried Cheese?
Freeze drying (lyophilization) is a preservation process that removes 98-99% of moisture from cheese while maintaining its structure, flavor, and nutritional content. Unlike dehydration or canning, freeze drying happens at extremely low temperatures, which preserves the cheese without cooking or melting it. The National Center for Home Food Preservation recognizes freeze drying as one of the most effective methods for long-term food storage.
The Freeze Drying Process Explained
Step 1: Freezing Cheese is frozen to temperatures between -40°F and -50°F (-40°C to -45°C). Rapid freezing creates small ice crystals that preserve the cheese’s cellular structure. Slow freezing creates large crystals that damage texture. According to research published by the USDA, the rate of freezing significantly impacts the quality of freeze-dried foods.
Step 2: Primary Drying (Sublimation) The frozen cheese is placed in a vacuum chamber where pressure drops to about 0.01% of normal atmospheric pressure. As temperature slowly increases to around 0°F to 32°F, ice crystals sublimate—they turn directly from solid ice to water vapor, bypassing the liquid stage entirely. This process, explained in detail by Colorado State University Extension, preserves the food’s cellular structure better than any other preservation method.
This is the magic of freeze drying. The cheese never melts. Its structure stays intact. The fat doesn’t separate. The protein doesn’t denature.
Step 3: Secondary Drying Temperature increases slightly (to around 50-60°F) while maintaining the vacuum. This removes any remaining moisture molecules bound to the cheese structure. Final moisture content: 1-2% (compared to 35-45% in fresh cheese).
Step 4: Packaging Freeze dried cheese must be immediately sealed in moisture-barrier packaging (Mylar bags with oxygen absorbers or #10 cans). Exposure to air causes rapid moisture absorption and spoilage.
What Happens to the Cheese
After freeze drying, cheese transforms:
- Weight: Loses about 90% of its weight (10 pounds fresh = 1 pound freeze dried)
- Texture: Becomes crispy, crunchy, or brittle (depending on cheese type)
- Appearance: Looks like cheese but with a porous, airy structure
- Flavor: Intensifies—freeze dried cheddar tastes “more cheddar” than fresh
- Shelf life: 20-25 years in proper packaging (vs. weeks for fresh cheese)
- Nutritional value: 97-98% retention of protein, fat, vitamins, minerals
Why This Matters for Homesteaders
If you raise dairy animals (cows, goats, sheep), you know the problem: you get a flood of milk during peak season and can only make so much fresh cheese before it spoils. Freeze drying lets you preserve that abundance for decades.
If you don’t have dairy animals, freeze drying store-bought cheese when it’s on sale can save you 50-70% compared to buying commercial freeze dried cheese.
Freeze Dried vs. Dehydrated vs. Canned Cheese: What’s the Difference?
People often confuse these preservation methods. Here’s how they compare:
| Factor | Freeze Dried Cheese | Dehydrated Cheese | Canned Cheese (Cheese Powder) |
| Moisture Removal | 98-99% (sublimation) | 85-95% (evaporation with heat) | Varies (spray-dried or canned) |
| Process Temperature | Below freezing, then 50-60°F | 125-165°F (cooks the cheese) | High heat (spray drying) or pressure (canning) |
| Texture After Rehydration | Nearly identical to fresh | Grainy, rubbery, or tough | Sauce-like (powder) or processed (canned) |
| Shelf Life (sealed) | 20-25 years | 5-10 years | 10-15 years (powder), 5 years (canned) |
| Nutritional Retention | 97-98% | 80-85% (heat damages some vitamins) | 70-80% (processing degrades nutrients) |
| Weight Reduction | 90% | 75-85% | Varies |
| Rehydration Time | 5-15 minutes | 15-30 minutes (often incomplete) | Instant (powder) |
| Flavor Quality | Excellent (intensified) | Good to fair (cooked flavor) | Fair to poor (processed taste) |
| Can Eat Dry? | Yes (crunchy snack) | Yes (chewy, leathery) | No (powder) |
| Fat Content Preserved | Yes (fat doesn’t separate) | Partially (some fat separates) | Modified (emulsifiers added) |
| Cost (DIY) | High initial equipment cost | Low (dehydrator $50-200) | Medium (canning supplies) |
| Best For | Long-term storage, highest quality | Medium-term storage, budget option | Sauces, soups, cheese-flavored dishes |
The Verdict
Freeze drying is superior for taste, texture, nutrition, and shelf life. Dehydrating is cheaper and works if you’ll use it within 5-10 years. Canned cheese powder is best for sauces and soups where texture doesn’t matter.
For true self-sufficiency and quality, freeze drying wins.
Why Freeze Dried Cheese Matters for Self-Sufficiency
The Protein and Fat Problem
Most long-term food storage focuses on carbohydrates: rice, beans, wheat, oats. But humans need protein and fat to thrive, especially in survival or high-work situations (farming, homesteading, manual labor).
Fresh cheese spoils in weeks. Canned meat is expensive and heavy. Freeze dried cheese solves both problems:
- High-quality protein: 25g per 100g cheese
- Healthy fats: Essential for hormone production, brain function, energy
- Calorie-dense: 400-500 calories per 100g (crucial for hard physical work)
- Shelf-stable: No refrigeration for 25 years
- Lightweight: Easy to transport, perfect for bug-out bags
The Milk Glut Solution
If you keep dairy animals, you know the seasonal milk surplus problem. You can only drink, sell, or give away so much fresh milk. Traditional cheese-making helps, but even hard cheeses need aging, storage space, and controlled humidity.
Freeze drying lets you:
- Process excess milk into cheese, then freeze dry it
- Store 10 pounds of cheese in the space 1 pound would normally take
- Keep it for decades without wax, aging caves, or refrigeration
- Use it year-round when milk production drops
Economic Advantage
When cheese goes on sale (cheddar often drops to $2-3/pound), you can buy 50-100 pounds, freeze dry it, and lock in that price for 25 years. Commercial freeze dried cheese costs $30-60/pound—you’re saving 90%.
Even accounting for equipment costs, you break even after freeze drying 30-50 pounds of cheese.
Shelf Life and Storage Requirements
How Long Does Freeze Dried Cheese Really Last?
Manufacturer claims: 25-30 years
Reality: It depends entirely on storage conditions and packaging quality. The USDA Food Safety and Inspection Service notes that properly packaged freeze-dried foods can maintain quality for decades when stored correctly.
Properly stored freeze dried cheese:
- In sealed Mylar with O2 absorbers: 20-25 years (realistic)
- In sealed #10 cans with O2 absorbers: 25-30 years
- In vacuum-sealed bags (no O2 absorbers): 10-15 years
- In regular Ziplock bags: 1-2 years (moisture absorption)
- Opened and resealed: 6-12 months
Improperly stored freeze dried cheese:
- Exposed to moisture: Days to weeks before mold
- Exposed to oxygen: 6-12 months before rancidity (fat oxidation)
- Exposed to heat: Accelerated degradation, reduced shelf life
- Exposed to light: Nutrient degradation, off-flavors
Optimal Storage Conditions
Temperature: 50-70°F (10-21°C)
- Cooler is better
- Every 10°F temperature increase cuts shelf life in half
- Freezing is fine but unnecessary
Humidity: Below 15% relative humidity
- Moisture is the enemy
- Use oxygen absorbers and desiccants in packaging
- Store in climate-controlled area, not damp basement or hot attic
- According to Iowa State University Extension, controlling humidity is critical for preventing food spoilage in long-term storage
Light: Complete darkness
- UV light degrades vitamins and fats
- Store in opaque containers or dark location
- Mylar bags block light; clear jars don’t
Oxygen: Eliminate completely
- Use oxygen absorbers (300-500cc for gallon Mylar bag)
- Vacuum sealing alone isn’t enough (doesn’t remove all oxygen)
- Oxygen causes fat rancidity
Packaging Options Ranked
Best: #10 cans with oxygen absorbers
- Impermeable to moisture and oxygen
- Rodent-proof
- Crush-resistant
- Long-term gold standard
- Expensive and requires canning sealer
Excellent: Mylar bags (7+ mil) with oxygen absorbers
- Heat-sealed for airtight seal
- Stored in buckets for rodent/crush protection
- Much cheaper than cans
- Requires heat sealer ($20-50)
Good: Vacuum-sealed bags with oxygen absorbers
- Convenient for short-to-medium term (5-10 years)
- Easier than Mylar sealing
- Not as impermeable as Mylar
Poor: Mason jars with oxygen absorbers
- Good for 1-3 years
- Glass is oxygen-permeable over time
- Fragile
- Only use for rotation stock
Terrible: Ziplock bags or opened containers
- Moisture and oxygen exposure
- Use within months
- Not suitable for storage
Best Types of Cheese for Freeze Drying
Not all cheese freeze dries equally. Here’s what works best and why.
Excellent for Freeze Drying
Cheddar (all varieties)
- ✅ Freeze dries perfectly
- ✅ Rehydrates with excellent texture
- ✅ Flavor intensifies pleasantly
- ✅ Low moisture content to start
- Best for: Everything—grating, melting, snacking, cooking
Mozzarella
- ✅ Becomes crispy cheese “chips” when freeze dried
- ✅ Rehydrates well for pizza, pasta
- ✅ Mild flavor works in many dishes
- Best for: Italian dishes, pizza, melting applications
Monterey Jack
- ✅ Mild, versatile flavor
- ✅ Good rehydration
- ✅ Melts smoothly
- Best for: Mexican dishes, general cooking
Parmesan and Hard Italian Cheeses
- ✅ Already low moisture (easy to freeze dry)
- ✅ Intense flavor concentrates beautifully
- ✅ Long shelf life even before freeze drying
- Best for: Grating, pasta, flavor enhancement
Gouda and Swiss
- ✅ Freeze dry well
- ✅ Maintain distinctive flavors
- ✅ Good for rehydration
- Best for: Sandwiches, cooking, snacking
Good but With Caveats
Cream Cheese
- ⚠️ High moisture content (takes longer to freeze dry)
- ⚠️ Doesn’t rehydrate to exact original texture
- ✅ Works great for dips, spreads, baking once rehydrated
- Tip: Freeze dry in small portions or mixed with other ingredients
Cottage Cheese
- ⚠️ Very high moisture (long freeze dry time)
- ⚠️ Texture changes significantly
- ✅ Protein content makes it worthwhile
- Best for: Blending into smoothies, baking, protein addition to meals
Blue Cheese, Gorgonzola
- ⚠️ Strong flavors intensify dramatically
- ✅ Freeze dries well technically
- ✅ Great for people who love bold flavors
- Best for: Salad dressings, specialty dishes
Poor Choices for Freeze Drying
Fresh Mozzarella (high-moisture)
- ❌ Too much water content
- ❌ Takes forever to freeze dry
- ❌ Texture suffers badly
- Alternative: Use low-moisture mozzarella instead
Ricotta
- ❌ Extremely high moisture
- ❌ Grainy texture after rehydration
- ❌ Not worth the effort
- Alternative: Freeze dry cottage cheese instead
Soft Brie, Camembert
- ❌ High moisture content
- ❌ Lose their characteristic creamy texture
- ❌ Flavors don’t concentrate well
- Skip these entirely
Processed Cheese (Velveeta, American Singles)
- ❌ High moisture and emulsifiers cause problems
- ❌ Contains stabilizers that don’t freeze dry well
- ❌ Poor rehydration
- Not recommended
The Best All-Around Choice
Medium or sharp cheddar is the gold standard for freeze drying:
- Readily available
- Affordable (especially on sale)
- Versatile in cooking
- Excellent freeze drying results
- Long shelf life
- Appeals to most palates
If you’re new to freeze drying cheese, start with cheddar. Once you master it, experiment with other varieties.
Nutritional Value: Does Freeze Drying Change It?
What Stays the Same
Freeze drying preserves 97-98% of nutritional value because the process happens at very low temperatures without oxygen exposure. Research from the Journal of Food Science confirms that freeze drying is superior to other preservation methods for nutrient retention.
Nutrients retained:
Protein: 100% retention
- Cheese is 25-30% protein by weight
- Freeze drying doesn’t damage protein structures
- Essential amino acids remain intact
Fat: 100% retention
- Cheese is 30-35% fat
- Fats are sealed away from oxygen, preventing rancidity
- Omega-3 and omega-6 fatty acids preserved
- Fat-soluble vitamins (A, D, E, K) remain
Minerals: 100% retention
- Calcium (750-1000mg per 100g cheese)
- Phosphorus
- Zinc
- Selenium
- Sodium
- Minerals are not affected by freeze drying
Calories: 100% retention
- Calorie-dense: 400-500 calories per 100g
- Critical for survival situations or high-energy needs
What Changes Slightly
Water-Soluble Vitamins: 95-98% retention
- Vitamin B12: Minimal loss (important for those without meat)
- Riboflavin (B2): Slight degradation over years in storage
- Other B vitamins: Well-preserved
Enzymes: Destroyed
- Freeze drying deactivates enzymes
- This is actually beneficial—prevents spoilage
- Not nutritionally significant (we have our own digestive enzymes)
Comparison to Fresh Cheese
| Nutrient (per 100g) | Fresh Cheddar | Freeze Dried Cheddar (rehydrated) |
| Calories | 403 | 400-405 |
| Protein | 25g | 24-25g |
| Fat | 33g | 33g |
| Calcium | 721mg | 710-721mg |
| Vitamin A | 330 IU | 320-330 IU |
| Vitamin B12 | 0.8 mcg | 0.75-0.8 mcg |
The bottom line: Freeze dried cheese is nutritionally equivalent to fresh cheese.
Why This Matters for Self-Sufficiency
Protein security:
- 100g freeze dried cheddar = 25g protein
- Equivalent to 3-4 eggs or 3 ounces of meat
- Complete protein with all essential amino acids
Calcium security:
- 100g cheese = 70% of daily calcium needs
- Critical for bone health, especially in children
- Hard to get from plant sources alone
- The National Institutes of Health emphasizes the importance of adequate calcium intake for preventing osteoporosis
Fat and calories:
- High-energy food for physical labor
- Satisfying (keeps you full longer)
- Necessary for hormone production and brain function
In a long-term survival or self-sufficiency scenario, freeze dried cheese provides nutrients that are hard to get from grains and beans alone.
How to Freeze Dry Cheese at Home
You have two options: invest in a home freeze dryer (expensive but versatile) or use DIY methods (cheap but limited).
Option 1: Home Freeze Dryer (Harvest Right and Others)
Home freeze dryers have become increasingly popular for homesteaders. They’re expensive but incredibly versatile.
Equipment needed:
- Home freeze dryer: $2,200-$3,800 (Harvest Right is most common brand)
- Mylar bags and oxygen absorbers
- Heat sealer ($20-50)
- Optional: Vacuum pump oil
Step-by-Step Process:
- Prepare the Cheese
- Cut cheese into uniform pieces (1/2 inch cubes or 1/4 inch slices)
- Grate cheese (freezes/dries faster than blocks)
- Remove any wax coating from aged cheese
- Work with cold cheese straight from refrigerator
- Load the Trays
- Spread cheese in single layer on freeze dryer trays
- Don’t overlap pieces (air must circulate)
- Leave small gaps between pieces
- Don’t overload—affects drying efficiency
- Run the Freeze Dry Cycle
- Typical cycle: 20-36 hours depending on cheese moisture and batch size
- Machine automatically controls temperature and vacuum
- Cheddar: Usually 20-24 hours
- High-moisture cheese (cream cheese): 30-40 hours
- Test for Dryness
- Remove a piece and let it come to room temperature (5 minutes)
- Break it in half—interior should be completely dry, not cold/wet
- Should be brittle or crispy, not flexible
- If any moisture remains, run another 2-4 hours
- Package Immediately
- Freeze dried cheese absorbs moisture from air rapidly
- Work quickly once cycle completes
- Fill Mylar bags, add oxygen absorber, seal immediately
- Label with contents and date
Freeze Dryer Tips:
✅ Do:
- Freeze dry multiple cheese types together (saves energy)
- Keep a batch log (cheese type, weight, cycle time)
- Clean trays thoroughly between batches (prevents flavor transfer)
- Store machine in climate-controlled space
❌ Don’t:
- Freeze dry strong-smelling cheese with mild (flavor transfer)
- Let cheese sit after cycle ends (moisture absorption)
- Skip the dryness test (under-dried cheese molds)
- Overload trays (extends cycle time, uneven drying)
Cost Analysis:
Equipment investment: $2,500-4,000 (freeze dryer + supplies)
Cost per pound of cheese:
- Electricity: $1-2 per batch
- Packaging: $0.50-1.00 per batch
- Cheese: $2-5 per pound (when on sale)
- Total: $3.50-8.00 per pound
Commercial freeze dried cheese: $30-60 per pound
Break-even point: After freeze drying 30-60 pounds of cheese, you’ve paid for the machine (compared to buying commercial).
Additional value: Freeze dryer can process fruits, vegetables, meals, meat—not just cheese. Many homesteaders use them for all excess garden produce.
Option 2: DIY Methods Without a Freeze Dryer
If you can’t afford a $3,000 freeze dryer, there are DIY methods. They’re less effective but can work in the right conditions.
Method 1: Deep Freezer Method (Best DIY Option)
This method exploits sublimation in a regular freezer. It works, but takes weeks instead of hours.
Requirements:
- Chest freezer or upright freezer
- Frost-free setting (or manual defrost freezer)
- Wire cooling racks
- Time (3-5 weeks)
Process:
- Prepare cheese: Grate or slice thin (1/8 inch maximum thickness). Thin = faster.
- Arrange on racks: Spread cheese on wire cooling racks in single layer. Don’t let pieces touch.
- Place in freezer: Set freezer to coldest setting (-10°F to 0°F if possible). Put racks inside with space for air circulation.
- Wait: Leave undisturbed for 3-5 weeks. Check weekly.
- Test for dryness: After 3 weeks, remove a piece. Let it come to room temperature. If still cold/wet inside, return to freezer for another week.
- Package immediately: Once completely dry, seal in Mylar bags with oxygen absorbers.
How it works:
In a freezer, especially a frost-free model, moisture slowly sublimates from frozen cheese into the air. The freezer’s defrost cycle or low humidity environment gradually removes that moisture.
Pros:
- Free (use existing freezer)
- Works with any cheese
- Simple process
Cons:
- Takes 3-5 weeks vs. 24 hours in freeze dryer
- Less consistent results
- Ties up freezer space
- Higher risk of incomplete drying (mold potential)
- Not suitable for large batches
Success tips:
- Grate cheese finely (dries faster)
- Use frost-free freezer (removes moisture better)
- Don’t rush it—5 weeks is safer than 3
- Test multiple pieces before packaging entire batch
Method 2: Dry Ice Method
This accelerates freezing and creates sublimation conditions, but requires careful handling.
Requirements:
- Dry ice (solid CO2)
- Cooler with drain hole
- Gloves (dry ice burns skin)
- Wire racks
- Well-ventilated area
Process:
- Prepare cheese: Grate or slice thin.
- Layer in cooler:
- Bottom: 2 inches dry ice
- Wire rack
- Layer of cheese
- Another rack
- More cheese
- Top with 2 inches dry ice
- Seal partially: Close cooler lid but leave drain hole open (allows CO2 gas to escape).
- Wait: Check after 5-7 days. Dry ice will sublimate, taking cheese moisture with it.
- Test and package: Once cheese is dry and brittle, package immediately.
How it works:
Dry ice sublimates at -109°F, creating extremely cold, dry conditions. The sublimating CO2 gas carries away moisture from the cheese.
Pros:
- Faster than freezer method (days vs. weeks)
- Creates ideal sublimation environment
- Portable (can do this anywhere)
Cons:
- Dry ice is expensive ($2-4 per pound, need 10-20 pounds)
- Requires careful handling (CO2 asphyxiation risk, cold burns)
- Inconsistent results
- Not cost-effective for large batches
Safety warnings:
- ⚠️ Never seal cooler completely (CO2 buildup can cause explosion or asphyxiation)
- ⚠️ Use in ventilated area (CO2 displaces oxygen)
- ⚠️ Wear insulated gloves (dry ice causes instant frostbite – see CDC safety guidelines)
- ⚠️ Keep away from children and pets
Method 3: Dehydrator (Not True Freeze Drying)
Technically this produces dehydrated cheese, not freeze dried, but it’s worth mentioning as a budget option.
Requirements:
- Food dehydrator ($50-200)
- Parchment paper or non-stick sheets
Process:
- Grate cheese finely or slice very thin
- Spread on dehydrator trays lined with parchment
- Set temperature to 125-135°F
- Dehydrate for 6-10 hours (until completely dry and brittle)
- Store in airtight containers
Pros:
- Cheap equipment
- Fast (hours, not days/weeks)
- Easy and consistent
Cons:
- NOT freeze dried (this is dehydrated cheese)
- Shorter shelf life (5-10 years vs. 25)
- Texture is chewier/tougher when rehydrated
- Fat may separate during heating
- Some flavor/nutrition loss from heat
Best for: Short-to-medium term storage (1-10 years) on a budget.
Which DIY Method Should You Choose?
- If you’ll freeze dry regularly (50+ pounds/year): Invest in a home freeze dryer. You’ll break even quickly and can process other foods.
- If you want to try freeze drying without investment: Deep freezer method. It’s free and works, just slow.
- If you need faster DIY results: Dry ice method, but watch costs and safety.
- If you just want shelf-stable cheese and don’t care about perfect rehydration: Dehydrator. Much simpler, though technically not freeze dried.
Commercial Brands: Which Are Worth Your Money?
If you’re buying freeze dried cheese instead of making it, quality varies dramatically. Here’s an honest review of major brands.
Premium Brands (Best Quality)
Thrive Life
- ✅ Excellent taste and texture
- ✅ Rehydrates beautifully
- ✅ Good variety (cheddar, mozzarella, cheese blend)
- ✅ #10 cans with 25-year shelf life
- ❌ Expensive ($40-55 per can)
- Verdict: Best quality, worth the premium if budget allows
Mountain House
- ✅ Trusted brand (50+ years in business)
- ✅ Consistent quality
- ✅ Available in pouches and #10 cans
- ❌ Limited cheese selection (mostly cheddar)
- ❌ $35-45 per can
- Verdict: Reliable, good for long-term storage
Augason Farms
- ✅ Good quality for price
- ✅ Wide variety (cheddar, mozzarella, Monterey Jack, cheese blend)
- ✅ Available at Walmart and Costco
- ⚠️ Quality varies by product line
- ✅ $25-35 per can (better value)
- Verdict: Best value in premium brands
Mid-Range Brands
Nutristore
- ✅ Decent quality
- ✅ Affordable ($20-30 per can)
- ⚠️ Texture sometimes inconsistent
- ⚠️ Rehydration can be hit-or-miss
- Verdict: Okay for budget-conscious buyers
Legacy Food Storage
- ✅ Competitive pricing
- ⚠️ Quality varies by batch
- ⚠️ Some complaints about flavor
- Verdict: Proceed with caution, read recent reviews
Budget Brands (Buyer Beware)
Amazon Generic Brands
- ⚠️ Wildly inconsistent quality
- ⚠️ Often improperly freeze dried (mold issues)
- ⚠️ Sketchy shelf life claims
- ❌ Poor customer service
- Verdict: Not worth the risk
What to Look For When Buying
Quality indicators:
- ✅ Proper packaging: #10 cans or thick Mylar bags with oxygen absorbers
- ✅ Recent manufacture date: Check for dates, fresher is better
- ✅ Clear labeling: Ingredients, weight, shelf life clearly stated
- ✅ Real cheese: Avoid “cheese powder” or “cheese food” (these are not freeze dried cheese)
- ✅ Company reputation: Established brands with reviews and accountability
Red flags:
- ❌ Suspiciously cheap prices (if it’s $10/pound, it’s not quality freeze dried cheese)
- ❌ No manufacture or best-by dates
- ❌ Unclear packaging (ziplock bags, unclear sealing)
- ❌ “Cheese product” or “cheese food” instead of real cheese
- ❌ No company contact information
Cost Comparison: Commercial Brands
Per pound pricing (as of 2026):
- Thrive Life: $50-60/lb
- Mountain House: $45-55/lb
- Augason Farms: $35-45/lb
- Nutristore: $25-35/lb
- Homemade (with freeze dryer): $4-8/lb
- Fresh cheese (for comparison): $3-7/lb
The economics: If you eat freeze dried cheese regularly, a home freeze dryer pays for itself after processing 50-100 pounds.
Cost Analysis: DIY vs. Commercial
Let’s break down the real costs to help you decide whether to buy or make freeze dried cheese.
Scenario 1: Buying Commercial Freeze Dried Cheese
Annual needs for family of 4: 50 pounds (about 1 pound/week)
Cost breakdown:
- Augason Farms (mid-range quality): $40/lb × 50 lbs = $2,000/year
- Thrive Life (premium quality): $55/lb × 50 lbs = $2,750/year
10-year supply cost: $20,000-27,500
Scenario 2: DIY with Home Freeze Dryer
Initial investment:
- Harvest Right Medium Freeze Dryer: $3,200
- Mylar bags (500): $100
- Oxygen absorbers (500): $50
- Heat sealer: $30
- Total startup: $3,380
Per-batch costs (makes ~4-6 pounds):
- Cheese (bought on sale): $3/lb × 5 lbs = $15
- Electricity: $1.50
- Packaging (Mylar + O2 absorber): $0.60
- Total per batch: $17.10 for 5 pounds = $3.42/lb
Annual production (50 pounds):
- Cheese cost: $3/lb × 50 = $150
- Electricity: 10 batches × $1.50 = $15
- Packaging: 10 batches × $0.60 = $6
- Annual total: $171
10-year supply cost: $3,380 (equipment) + ($171 × 10) = $5,090
Savings vs. buying commercial: $15,000-22,000 over 10 years
Scenario 3: DIY Freezer Method (No Equipment)
Investment:
- $0 (use existing freezer)
- Mylar bags and supplies: $150
- Total: $150
Per-batch production:
- Cheese: $3/lb × 5 lbs = $15
- Packaging: $0.60
- Electricity: Negligible (freezer already running)
- Time: 4-5 weeks per batch
- Total: $15.60 for 5 pounds = $3.12/lb
Limitations:
- Slow (can only do 2-3 batches per year realistically)
- Ties up freezer space
- Less reliable results
Best for: Small-scale storage (10-20 pounds/year)
Break-Even Analysis
How much cheese to break even on freeze dryer?
Equipment cost: $3,380 Savings per pound vs. commercial: $40/lb (commercial) – $3.42/lb (DIY) = $36.58/lb saved
Break-even point: $3,380 ÷ $36.58 = 93 pounds of cheese
If you process:
- 10 lbs/year: Break even in 9.3 years
- 25 lbs/year: Break even in 3.7 years
- 50 lbs/year: Break even in 1.9 years
- 100 lbs/year: Break even in 0.93 years
But remember: Freeze dryer also processes other foods (fruits, vegetables, meats, full meals), making the value proposition much better.
How to Rehydrate Freeze Dried Cheese
Proper rehydration makes the difference between cheese that tastes like fresh and cheese that tastes like cardboard.
Basic Rehydration Method
For grated/shredded cheese:
- Measure freeze dried cheese
- Add water at 1:1 ratio (1 cup cheese : 1 cup water)
- Stir gently
- Let sit 5-10 minutes
- Drain excess water if needed
- Use immediately or refrigerate up to 3 days
For sliced cheese:
- Place slices in shallow dish
- Cover with water
- Let sit 10-15 minutes
- Pat dry with paper towel
- Use for sandwiches, burgers, etc.
Advanced Rehydration Techniques
For melting (pizza, casseroles, nachos):
- Don’t fully rehydrate
- Sprinkle freeze dried cheese directly on hot food
- Moisture from food + heat will rehydrate and melt it simultaneously
- Works beautifully for pizza, lasagna, nachos
For sauces (mac and cheese, cheese sauce):
- Add freeze dried cheese directly to hot liquid (milk, water, broth)
- Whisk continuously as it rehydrates
- Add gradually to control consistency
- No separate rehydration step needed
For eating as-is (crunchy snack):
- Don’t rehydrate at all
- Eat freeze dried cheese like chips
- Intense cheese flavor
- Popular with kids
For cream cheese/soft cheeses:
- Use less water (2 parts cheese : 1 part water)
- Let sit 15-20 minutes
- Beat with mixer to restore smooth texture
- Add more liquid gradually if needed
Rehydration Ratios by Cheese Type
| Cheese Type | Freeze Dried : Water Ratio | Time | Result |
| Cheddar (shredded) | 1:1 | 5-10 min | Texture nearly identical to fresh |
| Mozzarella | 1:1 | 10 min | Good for melting, slightly different texture for eating cold |
| Parmesan (grated) | 1:0.5 | 5 min | Use less water, will clump when rehydrated |
| Cream cheese | 1:0.5 | 15 min | Beat after rehydrating, add liquid gradually |
| Swiss/Gouda slices | 1:1 | 10-15 min | Pat dry after rehydrating |
Common Rehydration Mistakes
- ❌ Using too much water: Creates soggy, flavorless cheese. Start with less, add more if needed.
- ❌ Rushing the process: Give cheese time to fully absorb water. Rushed rehydration = uneven texture.
- ❌ Using boiling water: Can cause cheese to clump or become rubbery. Use cool to warm water only.
- ❌ Not draining excess water: Results in watery cheese. Always drain after rehydration.
- ❌ Expecting perfect texture for all uses: Rehydrated cheese works best melted or in cooked dishes. Eating cold may have slightly different texture than fresh.
Pro Tips for Best Results
- ✅ Use milk instead of water: For creamier, richer rehydration (especially for mac and cheese or cream cheese)
- ✅ Add a pinch of salt: Enhances flavor during rehydration
- ✅ Warm water works faster: Room temperature or slightly warm water rehydrates faster than cold
- ✅ Stir gently: Prevents cheese from breaking apart or clumping
- ✅ Test first: Before rehydrating entire batch, test a small amount to get ratios right
Cooking with Freeze Dried Cheese: Tips and Recipes
Freeze dried cheese is incredibly versatile. You can use it in almost any recipe that calls for fresh cheese.
Best Uses for Freeze Dried Cheese
Melting applications (best results):
- Pizza and flatbreads
- Lasagna and casseroles
- Nachos and quesadillas
- Grilled cheese sandwiches
- Mac and cheese
- Cheese sauces
Why it works: Heat + moisture from other ingredients = perfect rehydration and melting
Cooking applications:
- Soups and stews (add near end)
- Scrambled eggs and omelets
- Baked potatoes
- Pasta dishes
- Gratins and au gratin dishes
Eating cold (works but texture differs):
- Sandwiches (rehydrate sliced cheese first)
- Salads (sprinkle dried or rehydrate first)
- Cold snacking (eat crunchy as-is)
Recipe 1: Instant Mac and Cheese (No Rehydration Needed)
Ingredients:
- 8 oz pasta (cooked)
- 1 cup freeze dried cheddar cheese
- 1 cup milk (warm)
- 2 tablespoons butter
- Salt and pepper to taste
Instructions:
- Cook pasta, drain
- Return pasta to pot over low heat
- Add warm milk and butter, stir
- Gradually add freeze dried cheese while stirring constantly
- Cheese will rehydrate and melt into creamy sauce (2-3 minutes)
- Season with salt and pepper
- Serve immediately
Why it works: Hot milk rehydrates cheese while cooking creates smooth sauce.
Recipe 2: Freeze Dried Cheese Crackers
Turn freeze dried cheese into crunchy, flavorful crackers.
Ingredients:
- 1 cup freeze dried cheddar (crushed to powder)
- 1 cup flour
- 4 tablespoons cold butter (cubed)
- 1/4 cup cold water
- 1/2 teaspoon salt
Instructions:
- Preheat oven to 350°F
- Pulse cheese in food processor to fine powder
- Add flour, butter, salt—pulse until crumbly
- Add water gradually, pulse until dough forms
- Roll out thin (1/8 inch) on floured surface
- Cut into squares or shapes
- Bake 12-15 minutes until golden and crispy
- Cool completely before storing
Shelf life: 2-3 weeks in airtight container
Recipe 3: Creamy Cheese Soup
Ingredients:
- 2 cups chicken or vegetable broth
- 1 cup freeze dried cheddar cheese
- 1/2 cup freeze dried vegetables (optional)
- 1 cup milk or cream
- 2 tablespoons flour
- Salt, pepper, garlic powder to taste
Instructions:
- Heat broth to simmer
- Whisk in flour until smooth
- Add milk/cream gradually, whisking constantly
- Add freeze dried cheese, stirring until melted and incorporated
- Add vegetables if using
- Simmer 5-10 minutes until thickened
- Season to taste
Variations: Add cooked bacon, broccoli, or cauliflower
Recipe 4: Trail Mix with Cheese Snacks
Eat freeze dried cheese as-is for a high-protein, crunchy snack.
Ingredients:
- 1 cup freeze dried cheddar cheese “chips”
- 1 cup mixed nuts
- 1/2 cup dried fruit (cranberries, raisins)
- 1/2 cup pretzels or crackers
- Optional: chocolate chips, seeds
Instructions:
- Mix all ingredients
- Store in airtight container
- Perfect for hiking, camping, or snacking
Why it works: Freeze dried cheese is crunchy, lightweight, shelf-stable, and doesn’t need refrigeration.
Recipe 5: Cheesy Scrambled Eggs
Ingredients:
- 4 eggs
- 1/4 cup milk
- 1/4 cup freeze dried cheese (shredded cheddar or mozzarella)
- Salt and pepper
Instructions:
- Beat eggs, milk, salt, pepper
- Pour into hot, buttered pan
- Sprinkle freeze dried cheese into eggs while still wet
- Stir gently as eggs cook
- Cheese rehydrates from egg moisture and melts
- Serve immediately
Result: Creamy, cheesy eggs without extra rehydration steps.
Cooking Tips
- ✅ For sauces: Add freeze dried cheese to hot liquid gradually while stirring constantly
- ✅ For pizza: Sprinkle directly on pizza—oven heat and moisture from toppings will rehydrate it
- ✅ For casseroles: Mix freeze dried cheese into casserole before baking—dish moisture rehydrates it
- ✅ Adjust quantities: Freeze dried cheese is more concentrated than fresh. Start with less, add more to taste.
- ✅ Storage after opening: Reseal package immediately with oxygen absorber. Use within 6-12 months once opened.
Storage Best Practices: Maximizing Shelf Life
Proper storage is the difference between cheese lasting 25 years vs. spoiling in months.
Packaging Step-by-Step
Method 1: Mylar Bags (Most Common)
What you need:
- 7-mil or thicker Mylar bags (gallon or quart size)
- Oxygen absorbers (300-500cc for gallon bags – PackFreshUSA provides detailed sizing guides)
- Impulse heat sealer or iron
- 5-gallon buckets for extra protection (optional)
Steps:
- Fill Mylar bag with freeze dried cheese (leave 3-4 inches at top)
- Add oxygen absorber (don’t let it sit in open air—works immediately)
- Seal bag 90% of the way using heat sealer
- Press out remaining air gently
- Seal final 10%
- Label bag with contents, date, weight
- Place sealed bags in 5-gallon bucket for rodent/crush protection (optional but recommended)
Shelf life in Mylar: 20-25 years in cool, dark, dry location
Method 2: #10 Cans (Gold Standard)
What you need:
- #10 cans with lids
- Can sealer machine ($150-300)
- Oxygen absorbers (2000cc for #10 can)
Steps:
- Fill can with freeze dried cheese (leave 1 inch headspace)
- Add oxygen absorber
- Place lid on can
- Use can sealer to crimp and seal lid
- Label can with contents and date
Pros:
- Most impermeable to oxygen and moisture
- Rodent-proof and crush-resistant
- Professional appearance
- True 25-30 year shelf life
Cons:
- Expensive initial equipment investment
- Once opened, entire can should be used or repackaged within weeks
- Not resealable
Method 3: Vacuum Sealing (Short-to-Medium Term)
What you need:
- Vacuum sealer (FoodSaver or similar)
- Vacuum seal bags
- Oxygen absorbers (optional but recommended)
Steps:
- Fill vacuum bag with cheese
- Add oxygen absorber
- Vacuum seal according to machine instructions
- Label and date
Pros:
- Convenient and fast
- Good for rotation stock (1-5 year supply)
- Resealable with some systems
Cons:
- Bags not as impermeable as Mylar over long term
- 5-10 year shelf life (shorter than Mylar/cans)
- Sharp cheese pieces can puncture bags
Best for: Cheese you’ll use within 5 years
Storage Location Guidelines
Ideal locations:
- ✅ Climate-controlled basement (50-70°F)
- ✅ Interior closet away from exterior walls
- ✅ Pantry in temperature-stable room
- ✅ Under beds in climate-controlled bedroom
Avoid:
- ❌ Garage (temperature fluctuations, potential heat in summer)
- ❌ Attic (extreme heat in summer)
- ❌ Damp basement (moisture exposure)
- ❌ Near water heater, furnace, or heat sources
- ❌ Near windows (UV light exposure)
- ❌ Outdoor sheds (temperature and moisture extremes)
Rotation System
Even with 25-year shelf life, rotating your stock ensures freshest product and tests your storage system.
First In, First Out (FIFO) Method:
- Date all packages clearly when stored
- Arrange with oldest packages in front
- Use oldest first when opening stock
- Replace used packages with newly freeze dried cheese
- Check annually for any package damage or bulging (sign of seal failure)
Recommended rotation schedule:
- Open and test one package every 2-3 years
- Verify cheese is still dry, crisp, good color, good smell
- If quality is maintained, continue storage
- If quality degraded, investigate storage conditions
Signs of Spoilage
Even properly stored freeze dried cheese can spoil if seal fails or storage conditions are poor.
Inspect before using:
- ❌ Moisture inside package: Soft, wet, or flexible cheese (should be dry and crispy)
- ❌ Mold: Any visible mold growth (discard entire package)
- ❌ Off smell: Rancid, sour, or “off” odor (fat has oxidized)
- ❌ Color change: Significant browning or discoloration
- ❌ Clumping: Cheese has absorbed moisture and clumped together
- ❌ Package bloating: Bulging package indicates gas production from spoilage
If any of these signs are present, discard the cheese. Don’t risk food poisoning.
Common Problems and Solutions
Problem 1: Cheese Won’t Rehydrate Properly
Symptoms: Stays hard, grainy, or doesn’t soften even after soaking
Causes:
- Under-dried during freeze drying (moisture wasn’t fully removed)
- Too old (lost rehydration capability)
- Wrong rehydration ratio (not enough water)
Solutions:
- Use warm water instead of cold (rehydrates faster)
- Increase soaking time (try 20-30 minutes)
- Use milk instead of water (adds moisture and creaminess)
- For cooking, add directly to hot liquid dish rather than pre-rehydrating
Problem 2: Freeze Dried Cheese Tastes “Off” or Rancid
Symptoms: Bad smell, bitter taste, unpleasant aftertaste
Cause: Fat oxidation (oxygen exposure during storage)
Prevention:
- Always use oxygen absorbers in packaging
- Store in cool location (heat accelerates fat oxidation)
- Don’t reuse packages—reseal properly or transfer to fresh Mylar
- Check seals annually
Solution: Unfortunately, once cheese is rancid, it can’t be fixed. Discard and improve storage methods for future batches.
Problem 3: Cheese Absorbed Moisture and Became Soft
Symptoms: Cheese is soft, flexible, or slightly damp instead of crispy
Cause: Package seal failed or wasn’t airtight
Solutions:
- If caught early (cheese still relatively dry): Re-freeze dry or dehydrate to remove moisture, then repackage
- If cheese is very moist: Use immediately (treat like fresh cheese, refrigerate, use within days)
- For future: Test seal by squeezing package gently—should be firm and not flexible
Problem 4: Mold Growing on Freeze Dried Cheese
Symptoms: Visible mold spots (usually green, white, or black)
Cause: Moisture exposure, incomplete drying, or seal failure
Solution:
- Discard entire package (mold spores spread throughout)
- Don’t try to “cut off” moldy sections
- Investigate storage conditions to prevent future batches
Problem 5: Cheese Clumps Together in Package
Symptoms: All cheese pieces stuck together in a solid mass
Cause: Moisture absorption or residual moisture from incomplete freeze drying
Solutions:
- If recently packaged: Re-freeze dry to remove moisture
- If already stored: Break apart pieces, spread on baking sheet, dehydrate at 135°F for 4-6 hours, repackage immediately
- For future: Ensure cheese is completely dry before packaging (test by breaking a piece—interior should be totally dry)
Problem 6: Cheese Doesn’t Taste Like Fresh
Symptoms: Flavor is weak, bland, or “processed” tasting
Causes:
- Low-quality cheese used initially
- Too old (even properly stored cheese loses some flavor over many years)
- Over-dried (excessive heat or time can degrade flavor)
Solutions:
- Start with high-quality cheese (sharp cheddar, aged varieties have stronger flavor that survives freeze drying better)
- Use within recommended shelf life (20-25 years)
- Add seasonings when cooking with rehydrated cheese to boost flavor
Frequently Asked Questions
Q: How long does freeze dried cheese really last?
A: 20-25 years if properly packaged in Mylar bags or #10 cans with oxygen absorbers and stored in cool (50-70°F), dark, dry conditions.
However, shelf life depends entirely on storage:
- Perfect conditions: 25-30 years
- Good conditions: 15-20 years
- Poor conditions (heat, light, moisture): 1-5 years
- Opened package: 6-12 months if resealed with oxygen absorber
The manufacturer claims of “25-year shelf life” assume optimal storage. In reality, cheese stored in a hot garage or opened package in a ziplock bag will spoil much faster.
Best practice: Rotate stock every 5-10 years even though it theoretically lasts 25 years. This ensures you’re always using relatively fresh product.
Q: Can I freeze dry cheese at home without a freeze dryer?
A: Yes, but with limitations.
The deep freezer method works by exploiting natural sublimation in a regular freezer. Spread grated cheese on racks in your freezer for 3-5 weeks. The low temperature and low humidity (especially in frost-free freezers) gradually sublimates moisture from the cheese.
Pros: Free, uses equipment you already own Cons: Very slow (weeks vs. 24 hours), less consistent results, only works for small batches
The dry ice method accelerates the process by creating extremely cold conditions (-109°F) where sublimation happens faster. Place cheese between layers of dry ice in a cooler for 5-7 days.
Pros: Faster than freezer method Cons: Dry ice is expensive, safety concerns (CO2 buildup, cold burns), still less consistent than machine
Bottom line: DIY methods work for small batches or experimentation, but home freeze dryers produce far superior results if you’re serious about storing cheese long-term.
Q: What’s the difference between freeze dried cheese and cheese powder?
A: They’re completely different products.
Freeze dried cheese:
- Real cheese that’s been freeze dried
- Retains cheese structure (can see cheese shape)
- Rehydrates to nearly original texture
- 97-98% nutritional retention
- Can be eaten as-is (crunchy snack)
- Example: Freeze dried cheddar shreds
Cheese powder:
- Heavily processed cheese that’s been spray-dried
- Contains additives, emulsifiers, anti-caking agents
- No structure—just powder
- Designed for sauces and flavoring (not to reconstitute as “real” cheese)
- Lower nutritional value
- Example: Kraft Mac & Cheese powder
Both have uses: Freeze dried cheese is for recipes where you want real cheese texture and flavor. Cheese powder is for sauces, soups, and cheese-flavored dishes where texture doesn’t matter.
Don’t confuse the two when shopping—many survival food companies sell “cheese powder” and market it as if it’s freeze dried cheese. Read labels carefully.
Q: Can I freeze dry all types of cheese?
A: Most cheeses freeze dry well, but results vary.
Excellent results:
- Hard and semi-hard cheeses: Cheddar, Colby, Monterey Jack, Swiss, Gouda
- Mozzarella (low-moisture variety)
- Parmesan and aged Italian cheeses
Good but challenging:
- Cream cheese (high moisture, takes longer)
- Cottage cheese (very high moisture)
- Blue cheese and Gorgonzola (strong flavors intensify dramatically)
Poor results:
- Fresh mozzarella (too much moisture)
- Ricotta (extremely wet, grainy after rehydration)
- Brie and Camembert (lose their creamy texture entirely)
- Processed cheese (Velveeta, American singles—emulsifiers don’t freeze dry well)
General rule: The firmer and lower-moisture the cheese, the better it freeze dries.
Q: Is freeze dried cheese healthy? Does it lose nutrition?
A: Freeze dried cheese retains 97-98% of its nutritional value, making it nearly equivalent to fresh cheese nutritionally. This has been confirmed through multiple studies, including research published in the Journal of Food Engineering.
What’s preserved:
- Protein (100% retention)
- Fat (100% retention)
- Calories (100% retention)
- Minerals—calcium, phosphorus, zinc (100% retention)
- Fat-soluble vitamins A, D, E, K (95-98% retention)
- Water-soluble vitamins like B12 (95-98% retention)
What changes slightly:
- Some B vitamins degrade very slightly (2-5% loss)
- Enzymes are deactivated (not nutritionally significant)
Comparison to fresh cheese: 100g of freeze dried cheddar (rehydrated) has nearly identical nutrition to 100g fresh cheddar.
The freeze drying process happens at such low temperatures and without oxygen that nutrient degradation is minimal. This is far superior to dehydration (which uses heat) or canning (which uses high heat/pressure).
Health considerations:
- Freeze dried cheese has the same calories, fat, and sodium as fresh cheese (it’s still cheese)
- If you’re watching sodium, cheese (fresh or freeze dried) is high in salt
- Good source of protein and calcium for food storage
Q: How much freeze dried cheese do I need to store?
A: It depends on your family size and how much cheese you typically use.
Average cheese consumption:
- U.S. average: 40 pounds per person per year (fresh cheese equivalent) – according to USDA Economic Research Service data
- That translates to about 4 pounds freeze dried cheese per person per year (since freeze dried is 10% the weight of fresh)
For a family of 4:
- 1-year supply: 16 pounds freeze dried cheese
- 5-year supply: 80 pounds freeze dried cheese
- 10-year supply: 160 pounds freeze dried cheese
Storage volume:
- 1 pound freeze dried cheese = approximately 1 quart (0.95 liters)
- 16 pounds = 4 gallons of storage space
- Much more compact than storing fresh cheese in a refrigerator
Budget planning:
- Commercial freeze dried cheese: $40-60/pound × 16 pounds = $640-960 for 1-year family supply
- DIY with freeze dryer: $4-8/pound × 16 pounds = $64-128 for 1-year family supply
Recommendation: Start with a 3-6 month supply (4-8 pounds for family of 4), use it in rotation to get comfortable with cooking and rehydrating, then scale up for longer-term storage.
Final Thoughts
Freeze dried cheese is one of the most valuable foods you can store for self-sufficiency. It provides protein, fat, and calories that are hard to get from grains and beans alone. With proper freeze drying and storage, you can preserve cheese for 25 years without refrigeration—a game-changer for homesteaders, off-gridders, and anyone building food security.
Whether you invest in a home freeze dryer or buy commercial products, having shelf-stable cheese gives you flexibility, nutrition, and comfort food when you need it most.
Don’t Stop at Cheese — Build the Amish-Level System Behind It
Freeze dried cheese is a huge win for long-term food security… but it’s only one piece of a real self-reliant pantry. The difference between “I stored some food” and “I can ride out anything” is knowing the old-school systems that keep you fed when the grid, the store shelves, and the supply chain all tap out.
That’s why I recommend The Amish Ways Book.
This isn’t trendy homestead fluff. It’s the kind of practical, low-tech know-how that helps you:
- Preserve food without depending on electricity (smoking, root cellaring, curing, fermenting, and more)
- Stretch ingredients farther when you’re cooking from storage
- Build a resilient pantry that doesn’t collapse if one method fails
- Handle everyday “homestead problems” with simple tools and time-tested routines
- Stay steady in a long outage with methods that worked long before modern convenience
Freeze drying is powerful. But if your plan relies on machines, fuel, or replacement parts, you’ll eventually hit a wall. Amish-style self-sufficiency is about having backup methods for your backup methods—and that’s what turns a pantry into a system.
If you want to go beyond “storing cheese” and start building a lifestyle that can hold up under real pressure, grab The Amish Ways Book and start learning the skills that keep families fed for generations.
You may also like:

Cheap and Easy to Build Root Cellar in Your Own Backyard (Video)
How to Make Homemade Cottage Cheese
How To Wax Cheese For Long Term Storage


