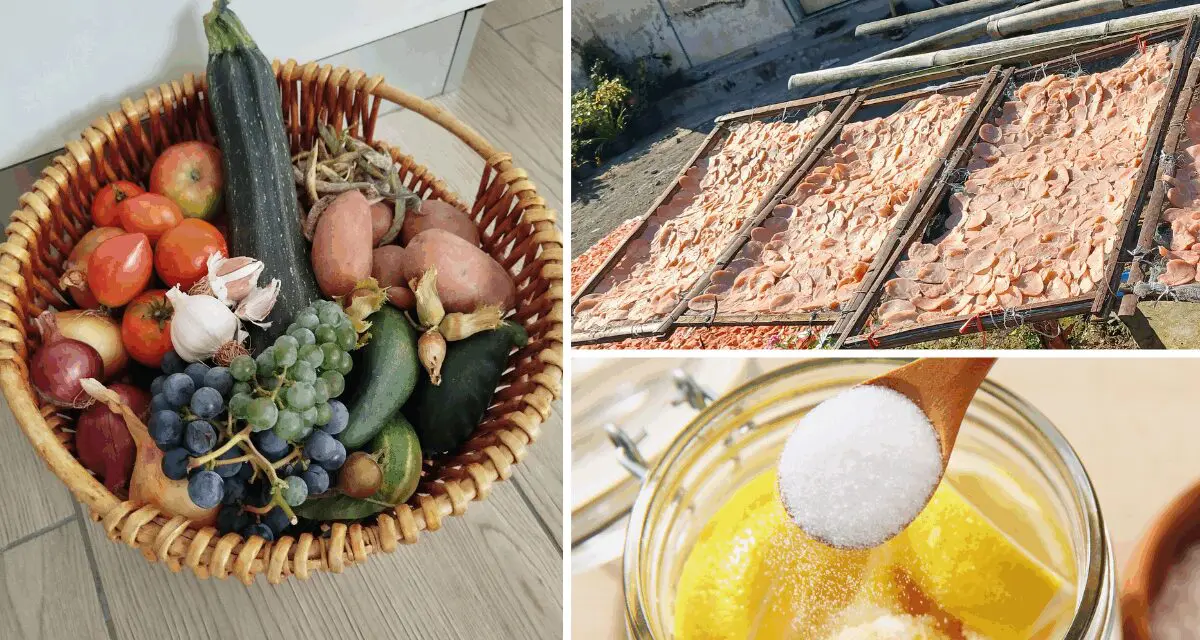
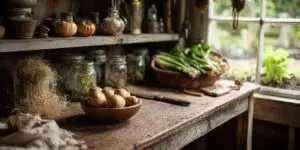
For most of us, Autumn is harvest season. One reason is that the fruits and vegetables in our gardens have ripened. Another reason is the onset of winter as the first frosts and freezes turn many fruits and vegetables into toast.
It’s those first frosts and freezes that often overwhelm us as we try to harvest as much as possible from cherry tomatoes to herbs to no shortage of fruits.
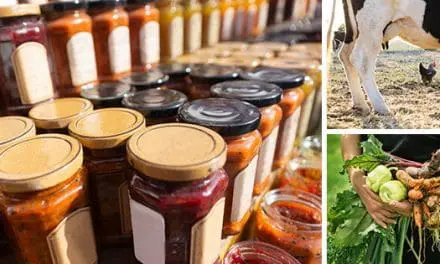
There are a lot of options for food preservation from canning to fermentation. But we’re going to focus on two methods that people don’t use as much. Sun-drying with a homemade sun-dryer and air-drying with a food dehydrator or an open-air mesh net. Both methods preserve the foods to varying degrees. Here’s what we’ll cover:
Sun-Drying
This is a classic sun-dryer set up. It’s a box with foil lining the sides and a screen stretched and stapled onto a wood frame. The fruits or vegetables are sliced and distributed evenly across the screen. A sheet of glass or plexiglass is then set over the top with about 6 holes in the sides of the box to release moisture. It’s best if set in the sun and the fruits and vegetables will dry faster if the outdoor temperatures are high. Timing varies and we’ll cover that with each recipe. 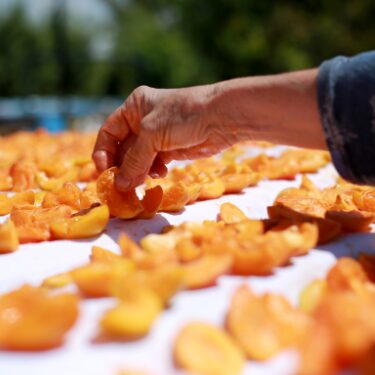
√ Sun-dried tomatoes
Sun-dried tomatoes are one of the most popular sun-dried vegetables (although technically it’s a fruit). You can sun dry any tomato variety, although cherry tomatoes and grape tomatoes are best because of their small size. To sun dry them, wash them and cut them in half. Distribute them evenly around the drying screen and cover with the piece of glass. Start with them cut side up and after a couple of days flip them over. It should take 3 to 5 days for them to be dry but there’s a storage trick that will really extend their shelf life.
Drop the sun dried tomatoes into a mason jar and then fill to the top with olive oil. Leave about a ½-inch of headspace. Store in the panty but once opened store in the refrigerator. They will last up to 6 months.
√ Sun-dried beans and Dill seeds
Shell the beans and remove the dill heads from the plants. Distribute them on the drying screen and cover with the glass. They should be dried within 6 to 8 days. Cut one of the beans with a knife to see if they are sufficiently dry and remove the dill seeds onto a plate. They can be stored in mason jars or Mylar or plastic bags. The beans will be good up to 2 years if sufficiently dry and so will the dill seeds.
√ Sun-dried Mushrooms
We often see dehydrated mushrooms at the grocery store. Shitake are a popular variety but button mushrooms, portobellos and most any other mushroom can be sun-dried in a sun dryer setup. Wash and slice the mushrooms an 1/8 of an inch thick and spread them around on the screen. In 2 to 4 days, they should be done but make sure they are very dry. They’re a fungus and moisture can cause mold growth. If in doubt give them another day or two. To use for cooking you simply add them to a broth or stock or rehydrate them in a bowl of water for 2 to 3 hours. Store the dried mushrooms in canning jars or mylar or plastic zip lock bags. They should be good for up to a year if properly dried.
Air-Drying
√ Apples
For this recipe, the food dehydrator is best. Any variety of apple will work. It’s best to peel them, core them and then slice them thin about 1/8 of an inch. It’s also important to soak the apples slices in either lemon juice or vinegar. Apples often oxidize and turn brown and a treatment with lemon juice or vinegar will prevent them from browning while they dry. Layer them around the dehydrator tray and turn it on. It usually takes 3 to5 days for the apples to dry. Check on them daily and take a bite to assess doneness. Store in a mason jar or a Mylar bag. Keep refrigerated and they should be good for up to 3 months.
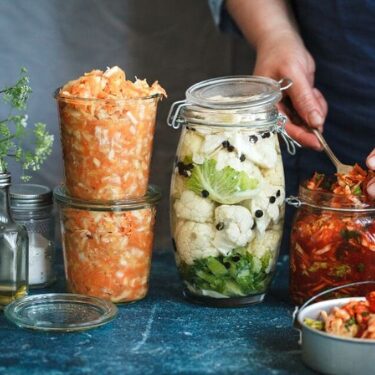
√ Apricots
Dried apricots are quite popular. Cut them in half and remove the pit. Place them with the cut side up for 1 day in the dehydrator. The next day. Flip them so the cut side is down. On the third day, flip them all again. Repeat this process until sufficiently dry. Taste as you go. It can take anywhere from 3 to 6 days until done depending on the size and moisture level of the apricot.
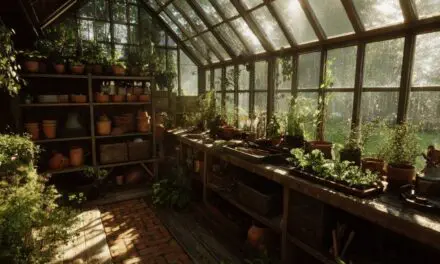
√ Air-drying Herbs
An air dryer is a jointed series of circular, horizontal screens surrounded by more screening to create a tubular shape. The sides of each horizontal compartment have a zipper allowing you to air-dry multiple herb varieties at the same time across the different levels. The combination of wind and exposure to the sun dries the herbs while retaining their natural, green color. Any herb can be air dried this way. Their best stored in mason jars. Don’t forget to identify the herb and the date they were dried. They should retain their flavor for up to 6-months if stored in a cool, dark place like a pantry or cabinet.
This works best for medicinal herbs, especially if you don’t want to risk losing them to mold or sun bleaching. I found a great kit with 4,818 high-quality, NON-GMO seeds packaged in the US, that you can turn into hundreds of powerful natural remedies without spending a dime at the pharmacy anymore. It’s called the Medicinal Garden Kit and you can find it here.
Freezing
Freezing is one of the easiest ways to preserve fruits and vegetables while keeping their flavor and nutrients intact. Most produce should be blanched before freezing (briefly boiled then cooled) to prevent spoilage.
- Berries: Wash, dry, and freeze on a tray before transferring to freezer bags to prevent clumping.
- Corn: Blanch ears of corn, cut the kernels off, and freeze in portioned bags.
- Herbs: Chop fresh herbs and freeze in ice cube trays with a bit of water or olive oil.
Properly frozen, most vegetables and fruits will last 6–12 months.
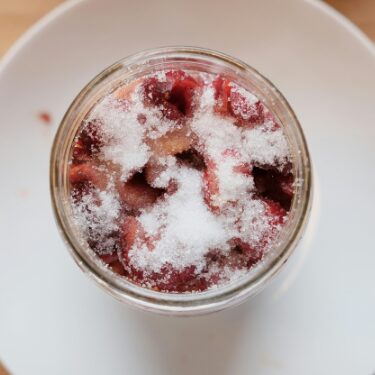
Fermentation
Fermenting is a natural preservation method that also adds probiotics to your diet. It works well for vegetables, fruits, and even some beverages.
- Sauerkraut: Shred cabbage, add salt, and press it into a jar. Store in a cool place for 1–4 weeks, tasting until it reaches your preferred flavor.
- Pickles: Cucumbers can be fermented in a brine of water and salt. Fermentation time depends on the temperature and your taste preference.
Fermented foods can last months if stored in cool, dark conditions.
Cold Storage
Some root vegetables and hardy fruits can be stored fresh in a cool, humid environment for months without drying or freezing.
- Potatoes, carrots, and beets: Keep in a root cellar, garage, or basement in sand, sawdust, or paper to maintain moisture and prevent sprouting.
- Apples and pears: Store in a single layer in a cool, dark place with good airflow.
Cold storage allows you to enjoy fresh produce well into winter without cooking or processing.
Sugar Preservation
Using sugar is an age-old method to preserve fruits. It works for jams, jellies, and even crystallized fruits.
- Jam and jelly: Cook fruits with sugar and sometimes pectin. Store in sterilized jars.
- Crystallized ginger or citrus peel: Coat small pieces of fruit or peel in sugar to preserve them for months.
Sugar preservation not only extends shelf life but also adds sweetness to your winter pantry.
I first learned about salt preservation from the Amish Ways book. Honestly, I wish more people knew about it; it’s a game-changer for any homesteader.
For the first time ever, this 200-year-old wisdom is available in a beautifully made hardcover edition, authored by Eddie Swartzentruber, a man who spent 16 years living within the Amish community and learning their way of life first-hand. You can grab your own copy today and claim 3 FREE BONUSES using my exclusive 76% discount coupon right here.
Smoking and Curing (for certain vegetables & proteins)
Smoking isn’t just for meat—some vegetables like peppers or tomatoes can benefit from light smoking to extend storage life. Curing with salt or vinegar also helps preserve root vegetables.
- Hot peppers: Smoke and dry for long-term use in cooking.
- Garlic and onions: Cure in a dry, ventilated area for 2–3 weeks before storing in a cool, dry place.
These methods combine preservation with added flavor, making your fall harvest versatile.
Sun-drying and Air-drying Fails
Things can sometimes go wrong. Here are some things to avoid to guarantee your food drying success: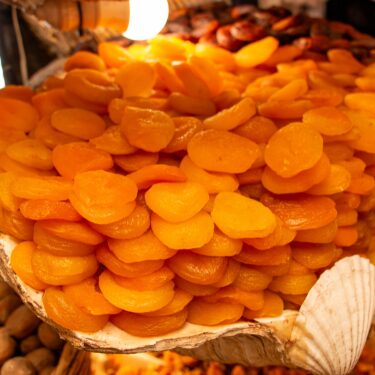
- Leaving either a sun-drier or air-drier outdoors during a rainy or snowy day can not only set you back but encourage mold growth. When the sun is shining and the skies are clear you’re go to go. Just keep an eye on the weather and bring that hanging air-drier or sun-drier box indoors until the weather clears.
- Slicing fruits and vegetables too thick can add time and possible moisture retention leading to mold. An 1/8 or an inch thick is a standard recommendation. Cherry tomatoes do find when simply sliced in half, but most fruits and vegetables should be cut to 1/8 of an inch.
- Forgetting to pretreat apples and any other fruit or vegetables subject to oxidation like potatoes will result in a very brown and dried result. Pretreat them in lemon juice or vinegar to prevent oxidation. Even orange juice can work in a pinch.
- Insufficient drying of certain fruits and vegetables can lead to mold. This is especially true for mushrooms, strawberries and other fruits or vegetables high in sugars. Apricots seem to be an exception but in most instances you want the fruit or vegetable crisp and dry.
- Poor packaging and food storage is always a challenge with food preservation. Make sure your packages are dry and sterile. Store in a cool dark place or refrigerate if in doubt. Remember to mark the date the food was dried.
- Always check the food before eating. The standard test is to take note of the appearance, smell it and then taste it. If anything looks, smells or tastes off – toss it. It’s the old food storage mantra: If in doubt, throw it out.
Underground Cellar Storage
Once your fruits and vegetables are dried, fermented, or frozen, it helps to have a reliable place to store them. An underground cellar works perfectly for that. A simple design, like the one outlined in The Easy Cellar, can be built just a few feet beneath your backyard and will keep your preserved food cool, dry, and safe for months.
This type of cellar is based on the traditional root cellars used by early homesteaders but updated to provide better protection and stability. The soil itself helps regulate temperature and humidity, making it ideal for storing everything from jars of dried mushrooms and sun-dried tomatoes to root vegetables and canned goods.
Another benefit of this kind of setup is that it adds an extra layer of security for your supplies. Built below ground, it naturally shields your food and essentials from the elements—and even from power disruptions or other emergencies.
It’s also very affordable and easy to build. With common tools and materials, you can put one together for under $400 in less than a week. Once finished, it becomes one of the most dependable storage spaces on any homestead, especially when you’re working toward self-reliance.
Experiment
Over time as you dry more and more fruits and vegetables with different methods you’ll learn what works best and what can fail. It’s a food preservation technique worth learning and can significantly add to food storage and preserve the harvest.
You may also like:
The SHTF Medicinal Garden You Should Have in Your Backyard (Video)
Plant These Veggies In Fall For An Early Spring Harvest
10 Things To Plant In The Fall To Harvest In The Dead Of Winter
200 Pounds Of Food You Can Harvest Only This Winter


