Ah, inflation.
No, no. I haven’t lost my mind (yet).
You see, with the rise of prices, so have I come to realize that many things are simply easier to do on my own. Tomatoes? I’m canning those rather than paying $2 for something that will cost me far less. And you know what pairs beautifully with tomatoes?
Garlic.
There is no reason now, nor has there ever been, to purchase garlic beyond your first bulb. This, of course, does not count for bulbs bought in grocery stores. No, I’m talking about the kind of garlic that you get to see or that you’ve gotten direct from the farm and is organic. It need not remain so, but it does need to start off like that if you want to grow from the bulb.
Today, we’ll look at how you can save a little extra money and have constant, fresh garlic at your disposal. Let’s get started.
Growing Garlic Is Easy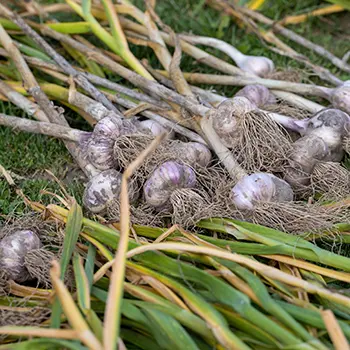
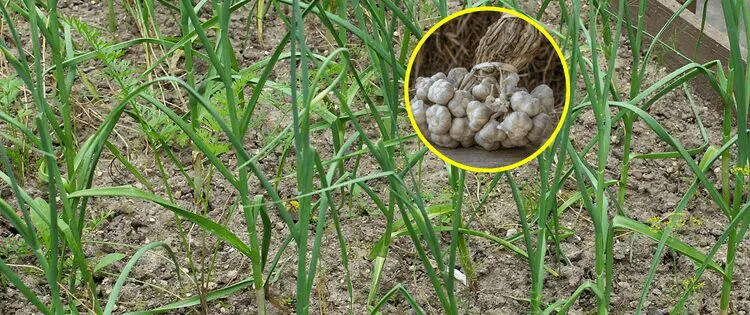
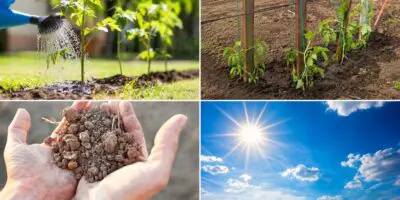
I plant garlic in the fall, ideally in early October in the Savannah, GA area. Adjust as necessary for your own temperatures. Someone in Maine is certainly planting earlier; perhaps even in late August.
Settle in with a 4’x2′ plot of land (or potting or raised area, we’re all for container gardening here!). Draw furrows about 1/2″ deep and plant your garlic cloves at least 3″ apart. Many types of garlic will say that they can be planted closer, but over the years I’ve noticed that planting garlic any closer may end up with bulbs growing together when they become extremely large.
Gently scoop soil over your cloves. Water them lightly. Just enough to keep them moist. And when the cold steps in, add mulch and only water when you must. Garlic requires very little assistance through the cold months and primarily remains dormant at this point.
Once the world thaws, remember that you’ll be watering your garlic every now and again. Garlic doesn’t like it soaked, but it does need a little fertilizer (10-5-10 is fine) and some maintenance to grow. Very little preys on garlic as well, the scent is too much for most predatory insects. If desired, you may trim the ends of the scapes (the green shoots) and enjoy them in stir-fries and such throughout the growing season. Allow at least 4″ of scapes at all times.
Harvesting Garlic Is A Little Harder
Most garlic is harvested during the peak of summer. For me, that’s just about the same time we’re spreading out a picnic blanket and watching the fireworks go off (early July). For some others, especially those with shorter growing seasons, you may nearly be planting as soon as you’re harvesting. Or it may never quite get as dry as you require.
If this happens, simply stop watering once your garlic has been in the ground just about for 9 months or so.
If you see your scapes starting to yellow and wilt, that means your garlic is finishing growing. It no longer requires nutrition, so it allows that part of the plant to start dying off. With some varieties, you may also simply see yellowing right at the area that meets the ground. It strongly depends on the moisture content of your soil and your particular variety, so keep that in mind!
Related: How To Make Pickled Garlic (And Why You Should Do It)
Once your yellowing starts, pull one bulb up and see what’s going on. It is well-formed? Are the cloves tightly clustered? It looks like what you want it to look like? Pull another few. If they all appear to be in good shape, you need to start harvesting. If one or two are not quite to size, it won’t hurt to leave them in the ground a little longer.
Remember, when you harvest your garlic you should not introduce moisture to the bulb itself. And, best of all, you can eat every bit of the stalks if you want to. Personally, I love them for garnish in eggplant parmesan rather than basil.
Storing Garlic Is As Simple As It Gets
All you need is somewhere dry and relatively cool that can stand up to the delicious smell of drying garlic.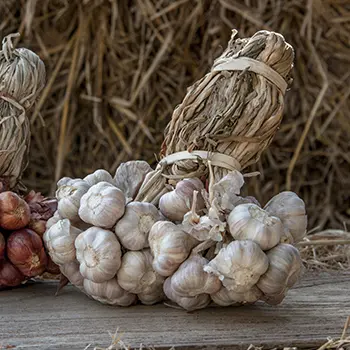
Brush the soil from your garlic as best you can. Remember to save several bulbs to plant again in the fall. If you will be planting soon after harvesting, remember that you do not have to dry your garlic to plant it.
String your garlic up by the yellowed ends and allow it to hang in an approximately 50-55 F-degree dry area for a minimum of 2 weeks. At this point, I recommend peeling a bulb or two to check them. The cloves should be shiny and hard, with no hint of mold or mildew.
If this is the case, well done. You’ll save a lot on your garlic bill. You simply rinse and repeat this procedure until you get tired of garlic (what? is this possible?) or you decide that you don’t need to grow garlic that year.
Final Thoughts
Most garlic crops will keep from one year until the next, easily sitting on shelves from their harvest point in July(ish) until the following summer, assuming that they are maintained in a dry environment. I realize this may be difficult for some in very moist climates. Therefore, my suggestion for those in humid conditions is to fully clean their dried garlic and do one of two things: put it in the dehydrator and make a ton of garlic powder/dried garlic or freeze large, chopped batches of it.
You may also consider canning garlic. And don’t worry, I’ll get to that very soon. Pickling, drying, canning, freezing; garlic is very versatile and very abundant. So why are you paying so much for it when it’s so simple to grow yourself?
When fall rolls around this year, I know that I’ll be planting next year’s garlic in the garlic patch. What will you be doing? Leave your comments down below. Talk garlic to us! And, as always, Happy Gardening!
You may also like:
Veggies You Only Plant Once And Harvest Forever
Similar to Morphine: The Best Natural Painkiller that Grows in Your Backyard (Video)
DIY Corner Vegetable Storage Bin
20 Foods That Can Last 20 Years
How To Use Toothpaste For Your Garden


