
We may be in the heat of summer, but wintertime isn’t all that far away. Before we know it, we’ll be digging out the winter coats and grabbing the snow shovels. I don’t know if time is really going faster or it just seems that way; but either way, snow and colder temperatures are coming before you know it.
Actually, the warm temperatures we’re having now are the ideal time to prepare your home for the cold weather to come. It’s a whole lot better than trying to deal with frozen pipes in the wintertime. This is especially true for those who are seasonal residents, moving north and south as the weather changes. If they don’t winterize their pipes before heading south for the winter, they’re going to return to a very wet home.
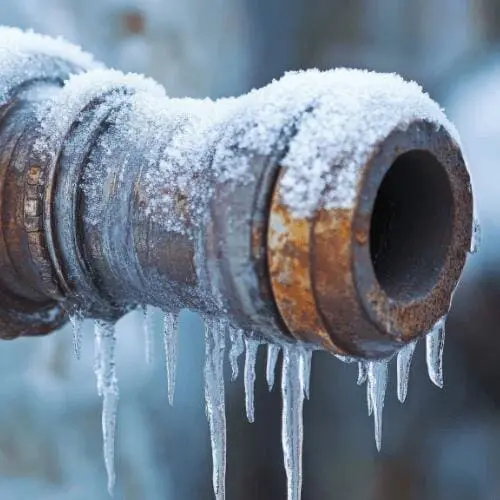
Freezing weather is very dangerous for plumbing pipes because of a peculiarity of water. Alone of all the substances known to humankind, water expands when it freezes. This causes glass bottles filled with water to explode (which is part of the reason you don’t find water bottled in glass) and can cause plumbing pipes to split. In severe cases, it can destroy all of a home’s plumbing.
Protecting your pipes from this damage is an important piece of preventative maintenance, especially for those who live in the northern part of the country, where freezing weather comes early and stays late into spring.
Before you start winterizing, you need to decide what sort of winterization you need to do. Winterizing the plumbing of a home that you are living in is much different than winterizing a home that you are going to leave empty while going south for the winter.
Why Do Water Pipes Sometimes Burst in the Winter?
Water pipes can burst in the winter because when temperatures drop, the water inside the pipes can freeze. Here’s why it happens:
- Freezing Water Expands: When water freezes, it expands. This creates pressure inside the pipe, and if the pressure becomes too high, the pipe can crack or rupture.
- Exposed Pipes: Pipes that are outside or in unheated areas (like basements, crawl spaces, and attics) are more vulnerable to freezing temperatures. If these pipes aren’t insulated, the cold air can reach them directly.
- Insufficient Insulation: Pipes without proper insulation are more likely to freeze. In homes with poorly insulated walls or attics, the water in pipes can freeze much quicker.
- Rapid Temperature Fluctuations: When temperatures suddenly drop (like after a warm spell followed by a cold front), pipes may freeze more quickly. Similarly, a deep freeze after a milder fall can catch homeowners off guard.
- Lack of Water Flow: If water isn’t moving through a pipe (for example, if you’re away for an extended period or the faucet is turned off), the still water can freeze more easily.
- Frozen Outdoor Faucets: Outdoor faucets are particularly susceptible because they’re exposed to the cold and often aren’t drained before winter.
When a pipe bursts, it can cause major water damage. To prevent this, it’s recommended you winterize your plumbing by insulating exposed pipes, shutting off outdoor water sources, and keeping a trickle of water running during extreme cold.
Pipe Winterization in a Home You’re Shutting Down
If you’re shutting down your home for the winter, winterizing is a fairly straightforward process. While there is a fair amount of work required, you can do it in an afternoon. Just make sure that it is the last thing you do, before vacating the home, as you won’t have any water left to use.
Draining pipes for winter
#1. Close off the whole house water valve, at the point where water enters the home. If your home gets its water from a well, rather than the city, shut off the water pump.
#2. Open all the faucets inside and outside the home and allow the water to drain.
#3. If the home receives water from a well, open the drain valve on the pressurized surge tank and allow the water to drain. You may have to connect a garden hose to the valve, if there is no drain right by the tank.
#4. Shut off the hot water heater. If it is electric, shut it off at the breaker panel. If it is gas operated, shut off the gas valve attached to the tank. Verify that the pilot light goes out.
#5. Unless there is a drain near the hot water heater drain valve, connect a garden hose to the valve and run the other end to a drain, or in the case of hot water heaters above ground level, run it out the door to outside. Be careful as to where you place it, as the water coming out of the hose will be hot.
#6. Double-check that the hot water heater is turned off. Open the drain valve for the hot water heater and allow the water to drain out.
#7. Flush all toilets twice to empty the tank and then the bowl of water.
#8. If you have an air compressor available to you, use it to blow out the water lines as much as possible. This requires attaching the hose, with a blow gun, to a faucet and allowing air to blow into it. You will probably need to add some wrapping around the blow gun nozzle to seal against the sides of the faucet. Repeat this from as many faucets as you can.
#9. Pour a small amount (approx. 1/4 cup) of anti-freeze into sink and tub drains to keep the water in the traps from freezing. Do the same for toilet tanks and bowls for the water that remains.
With these steps completed, it is safe to leave your home unheated, without any risk of the plumbing pipes freezing and cracking during the winter.
Winterizing Pipes in a House You’re Living In
Winterizing a home that you’re living in can actually be harder. The tricky part about winterizing a home that you’re living in, is making sure that you will still have water. Rather than draining out all the water, it is necessary to ensure that the water in the system will not freeze.

How to prevent pipes from freezing in winter
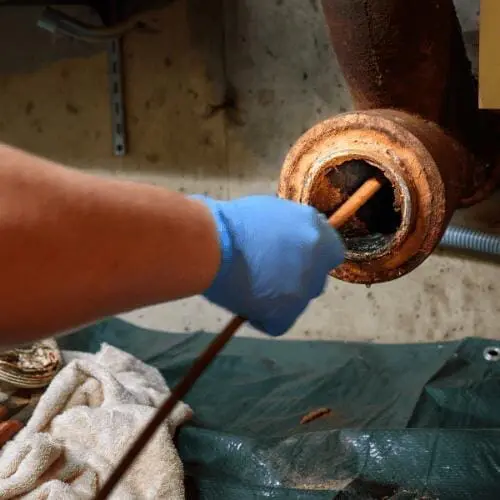
#1. Start your winterization by inspecting your home, specifically looking for any pipes or faucets that are outside your home’s insulating layer. Keep in mind that hose bibs are almost always outside of this insulation, making them vulnerable.
#2. If your home does not have exterior hose bibs specifically designed for cold climates, replace them. Cold climate hose bibs will extend 4 to 14 inches into the home, so that their shutoff point is inside the insula
ting layer. If you are not familiar with soldering copper pipe, you may need a plumber to do this for you.
#3. Insulate all pipes in areas that are unheated or not adequately heated with foam insulation sleeves. Do not leave any unprotected areas, as you only need a small gap in the insulation to allow the cold to freeze the water at that point.
#4. In places where pipes are going through unheated areas, such as in a crawl space, attach electric heat tape to the pipes, which will keep it warm enough to prevent freezing.
Keep in mind that this heat tape will stop working, if the power goes out.
#5. Seal all cracks in the home’s exterior, which would allow cold air to enter, with caulking, caulk rope or expanding foam insulation.
#6. Maintain the temperature inside the home high enough to prevent freezing. In the event of a power outage where the interior temperature drops down close to freezing, open all faucets slightly, so that water is dripping. This small flow of water will help prevent freezing.
With your plumbing winterized in this manner, your home is safe for living in all winter, without any risk of your pipes freezing and cracking, unless you lose the heat in the home.
Updated on May 7th, 2025
You may also like:
8 Common Mistakes Most People Make When Preparing For Winter
Get Unlimited Hot Water During The Winter Months With This Easy DIY Project (Video)
10 Things To Do To Winter-Proof Your Home
Do This To Your Wood Stove Before Winter


Great article Adam. I’d add just one more thing for readers. We lived in an area that was chilly. Like -40 and -50 each winter. No matter how well insulated we made our water line from the well to the house, it would freeze. The solution was to purchase an inline water line heater. This is made purely for the purpose of keeping water lines from freezing and they work great as long as you have power available. Depending on how long the water line is will determine how much power is required to heat. But we found we could power it up in the morning and evening for a short period and that kept us from freezing.