
Here is a trick or two, to learn to impress your mates with your exceptional outdoor camping skills, or to create a heat source if you need to work in the cold for a long period of time.
The pioneers managed to keep these fires going for fifteen hours. Perhaps a mid-winter night does indeed last for that amount of time in some areas. This is the target that homesteaders should aim at, so I know.
Before you start your fire, you must do what is rather euphemistically called ‘some preparation.’ Which in this particular case means sawing up some logs into two foot long sections.
You will need about twelve logs so prepare yourself for some fairly active sawing as the logs need to be around 6 inches in diameter. Having been through the experience, I can happily share with you a further tip regarding the logs. Find some that are round, and more importantly, ones that do not have any side branches sticking out, as this will prevent the log from rolling down the slope and feeding the fire.
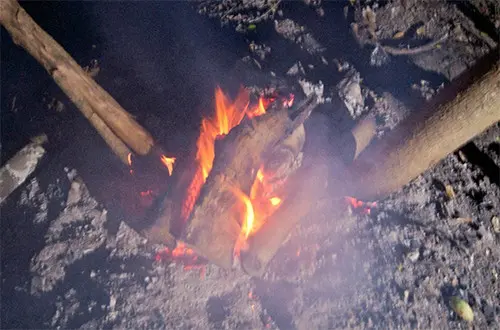
Having cut up the required logs, there remains one other activity to complete before the reality of a fireside sing song. The two side supports need to be fixed to enable the logs to travel down the slope into the fire as the logs burn. Have a look at the photo below because that will show you how not to construct the slope.
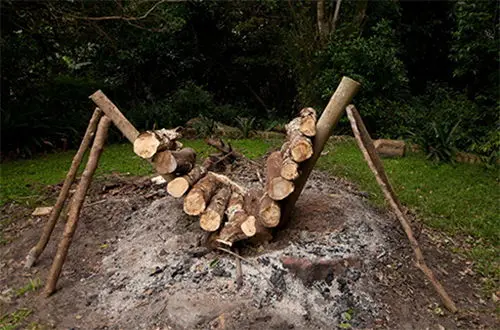
In the above photo the slope is too severe, and experience will lead you to alter the angle to less than 45 degrees. And yes, two supports on either side would be better but this fire did survive with only one support on either side.
Now another tip, and this is a good one, although it will require you to repack all the logs but reading all the instructions before commencing with building, is the way to go; so don’t blame me if you have to rebuild the logs.
Hollow out the area between the bottom two logs separating them with a couple of dry twigs and place a fair amount of kindling under the two center logs. In this way, air will be able to circulate around both bottom logs and ensure a good start to your fire.
Right, so now the logs are all set and with clock in hand you are poised to light the fire. This was my position as it started raining. The following day it continued raining so by the third day the logs were well watered and the challenge for the fifteen-hour fire became well, a little more challenging.
Onward we go and day four is sunshine and the fire is lit in the early morning.
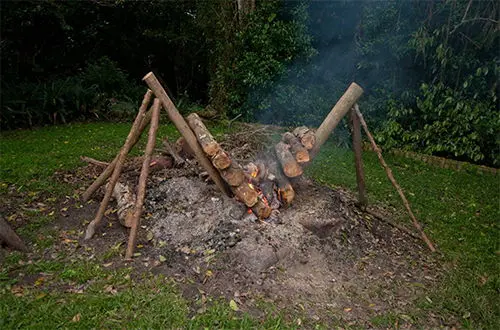
Things are looking good. The two center logs are burning well, and everything looks orderly and as it should be. Now it is just a matter of monitoring the fire during the day and into the night.
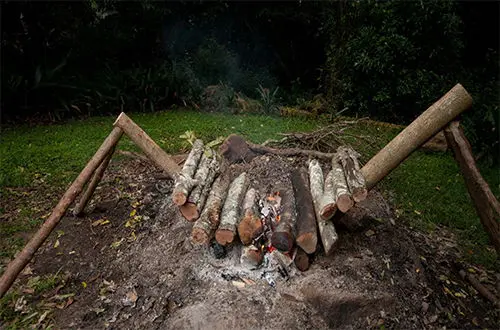
And I would like to say that things continued this way all through the day, but in truth the fire went out and I’m blaming the rain for that. So, with a little rehash of the fire and a fine tuning of the angles, the fire was lit again and then things did pretty much go according to plan.
The change in the angle of the fire was a good idea and the fire took on a semblance of permanence. The thing that worried me about the fire is why the pioneers would want a fire like this in the first place. It would be difficult to cook over a fire like this without erecting some sort of structure to support the cooking utensils and the heat produced by the fire was not substantial. Another issue that did worry me while the fire was burning, was that unattended fires are something to be avoided in almost all circumstances and more especially in a forest type setting.
The fire continued in a fairly predictable way for most of the day and into the evening, and then it became a little magical. It did elicit a sense of the pioneering days. A campfire at the end of a long day to reheat their bodies, also it did have that aura about it.
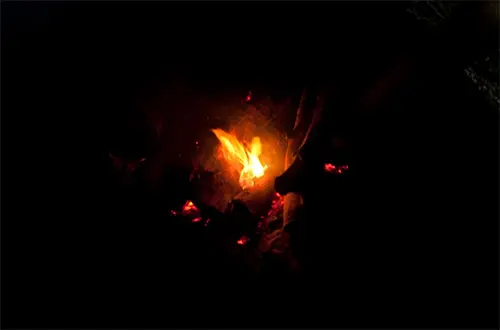
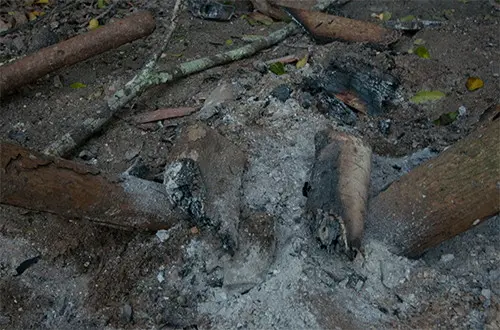
I would have worried during the night had the wind come up, but happily it was a still and calm night and there was no need to be concerned. In the early morning I went out to check on the fire expecting to see embers and little else. However, the last two logs were burning brightly and whether this was because of the wood being soaked by the rain of the previous days and burning a lot slower, or simply my good design will be left to you, dear reader to decide.
So, over all, the fire did burn for fifteen hours even taking into consideration the restarting. In fact, when I visited the fire later in the day, there were still embers glowing and the fire could have easily been restarted if required.
It is a rather clever way to make a fire available for a lengthy time, and it is remarkably frugal in the consumption of timber, but the lingering unease about an unattended fire does remain. It would only be an option if there was a special site prepared for the fire, as a change in wind direction or intensity could have a significant effect on the size and shape of the fire.
You may also like:
 The 10 Best Trees For Homesteaders
What really happens when you bury a shipping container (Video)
How To Heat Your Home Without Electricity
10 Things To Do To Winter-Proof Your Home
If You Have This Plant in Your Backyard, You Will Never Run Out of Soap


