You need a reliable way to preserve your harvest without plugging into the grid.
Hanging herbs indoors works sometimes. But it’s slow, risks mold in damp weather, and often loses precious flavor and color.
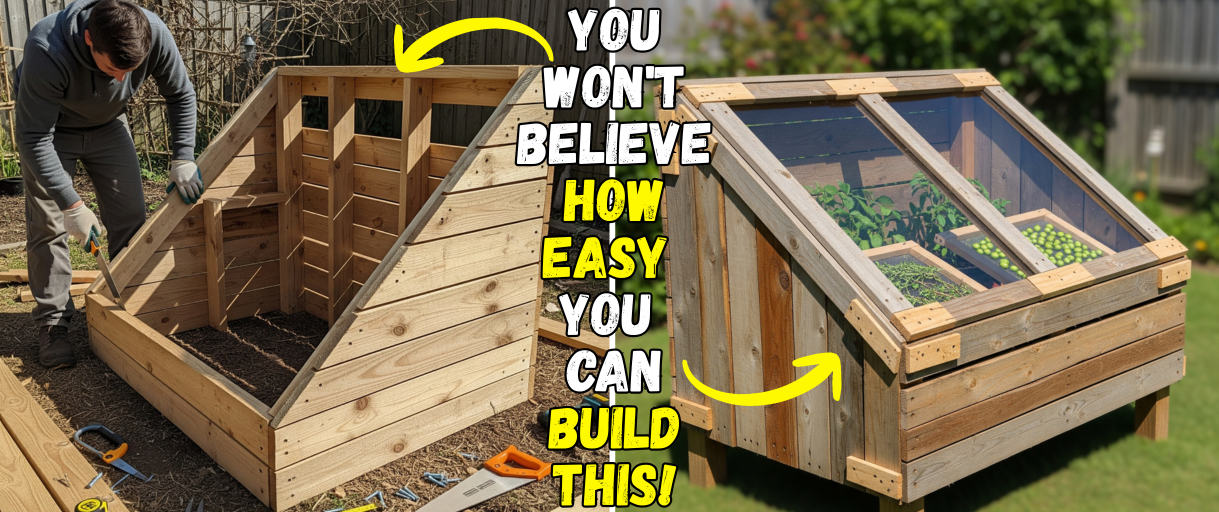
A solar herb dryer solves all of that using free energy from the sun.
Building one from scrap materials moves you closer to true self-reliance.
Instead of buying a solution, you build it—turning what others see as junk into something useful and lasting.
Planning the Project with What I Had
Before drawing any plans, I started by scavenging for usable materials around my homestead. You should begin by taking a walk around your property to inventory your own collection of scrap.
Look for old windows, leftover lumber, discarded screens, and any hardware you may have saved. My entire design was reverse-engineered based on the specific items I found in my scrap pile. You do not need a formal blueprint to start; let the materials you have on hand dictate the size and shape of your dryer.
I actually got the idea of using old windows and scrap wood for this herb dryer from one of the projects in the Amish Ways Book. The writer used stuff like this to build some raised beds with hoop houses for his garden. The old materials around his house that he repurposed got me thinking. If it worked to trap warmth and air for plants, why not flip the concept and use it for drying my herbs? So I did it, and turns out it worked just fine!
For the first time ever, this 200-year-old wisdom is available in a beautifully made hardcover edition, authored by Eddie Swartzentruber, a man who spent 16 years living within the Amish community and learning their way of life first-hand. You can grab your own copy today and claim 3 FREE BONUSES using my exclusive 76% discount coupon right here.
Materials I Used (All Scrap or Recycled)
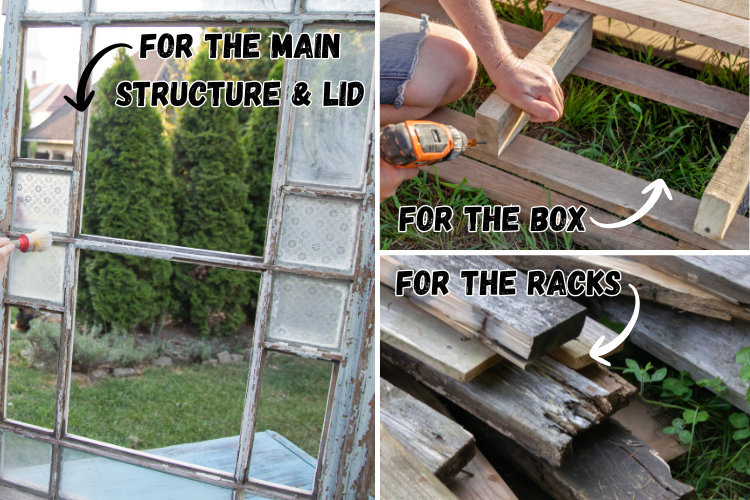
Your scrap pile will look different from mine, but you can use my materials list as a guide for what to look for. The main structure of my dryer was built around an old wooden window frame that still had the glass panel, which became the lid.
For the body of the box, I gathered sturdy pallet wood and a few old fence boards that were straight enough to use. These kinds of untreated woods are perfect for a project like this.
Inside the box, I needed racks that could slide in and out. I was able to salvage a pair of broken drawer slides from a discarded cabinet.
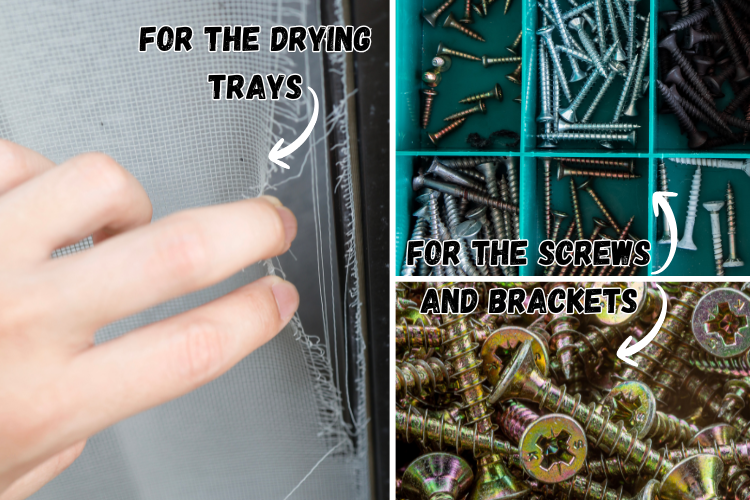
The drying trays themselves were made from a section of rust-free mesh cut from an old screen door, which is ideal because it allows for maximum airflow around the herbs. You need to ensure any mesh you use is clean and not made of a material that will rust or flake.
All the small hardware components came from similar scavenging. I removed hinges and a simple latch from a piece of junk furniture to make the lid functional.
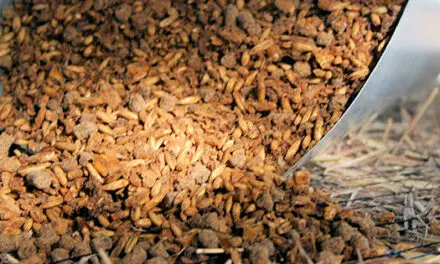
The screws and brackets I used were a mix-and-match collection from my “saved for later” jar. As a final thought, I also prepared a thin layer of crushed charcoal to spread on the bottom of the dryer. You can add this as a passive moisture control element, as charcoal is excellent at absorbing humidity from the air.
I dry most of my herbs for teas, tinctures, and salves, which is why I’m so picky about the materials I use, especially anything that might touch the plants.
One of the best resources I’ve found on how to actually use these herbs once they’re dried is The Forgotten Home Apothecary by Dr. Nicole Apelian. It includes over 250 time-tested remedies for things like inflammation, pain, infection, and even sleep problems, made with common herbs like calendula, chamomile, or lavender.
You can check it out here, especially if you’re looking to turn your homegrown herbs into something truly useful.
Building the Frame
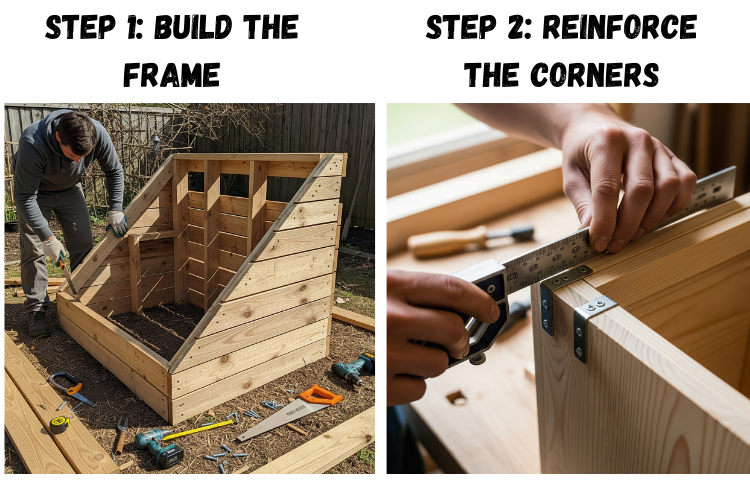
With your materials gathered, you can start building the main box. I framed the dryer to work like a small, slanted cold frame. You can achieve this by making the back wall of the box taller than the front wall.
This creates a natural angle for the window lid to sit on, which maximizes its exposure to the sun throughout the day. I simply cut my pallet and fence boards to size and screwed them together to form the four walls of the box.
Because you are likely working with imperfect scrap wood, the corners of your frame might not be perfectly square or strong. To solve this, I reinforced the inside of each corner with reclaimed metal brackets I had saved.
You should use a square to check your corners, but the brackets will provide the necessary rigidity even if the joints are not perfect. This extra support ensures your dryer will be durable enough to handle being moved and exposed to the elements.
Finally, you need to decide how to position the dryer. I attached four short, sturdy legs cut from a thicker piece of scrap wood to elevate the box off the damp ground.
This also makes it easier to level on uneven terrain. Alternatively, you could skip the legs and mount the frame directly onto a south-facing wall if you have a permanent, sunny spot picked out. Adding legs simply gives you the freedom to move the dryer to chase the sun as the seasons change.
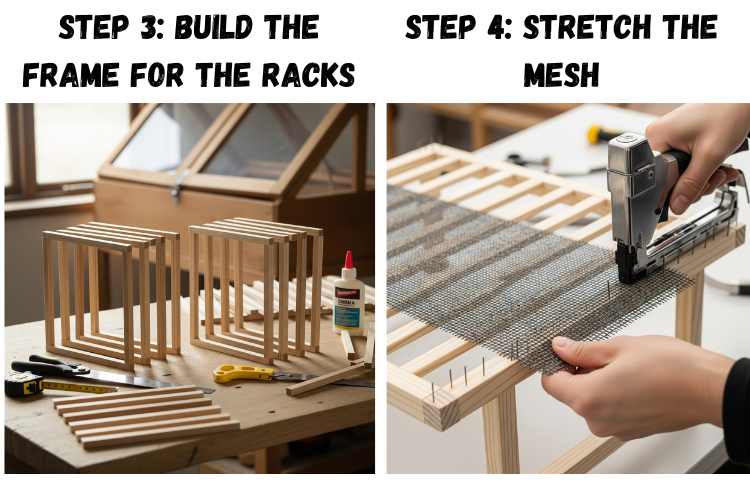
Creating the Drying Racks
The drying racks need to hold your herbs securely while allowing air to circulate from below. I built simple, lightweight frames using thin scraps of wood, making them just small enough to slide easily into the dryer box.
I stretched the mesh from the old screen door over each frame and pulled it tight, securing it with staples. You want to make sure the mesh is taut so it can support the weight of your herbs without sagging.
To make the rack heights adjustable, you can create your own custom side rails. I took thin strips of plywood and drilled holes every few inches along their length, creating a pegboard-like effect, and then attached these rails to the inner walls of the dryer.
This system gives you the flexibility to change the spacing between racks. You can set them far apart for bulky items like whole flower heads or place them closer together for small leaves like oregano.
To support the racks, you need simple tray stops that work with your rails. I created my own DIY supports by cutting and bending a thick wire coat hanger into small, L-shaped hooks.
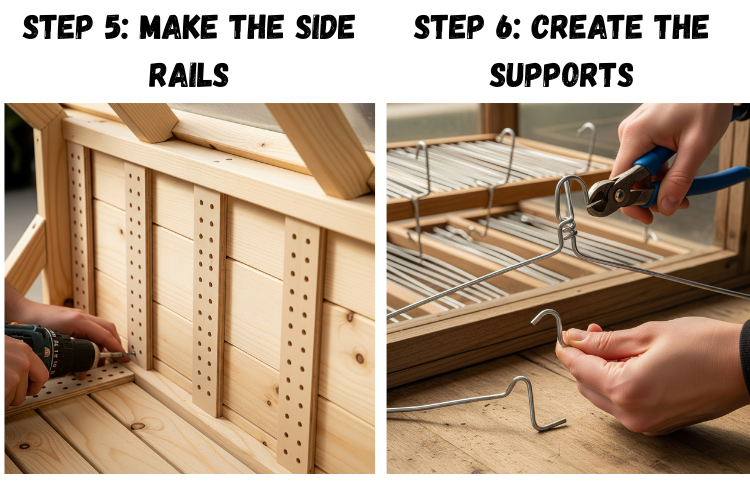
You can insert these hooks into the holes on your side rails at any height you choose. This allows the trays to slide in and rest securely. For a more permanent solution, you could use a small wood screw or even a metal bottle cap nailed into the wood as a sturdy, reliable ledge for each tray.
Maximizing Solar Heat and Airflow
A well-built frame is only half the battle; you need to actively manage sun and air to make it work efficiently.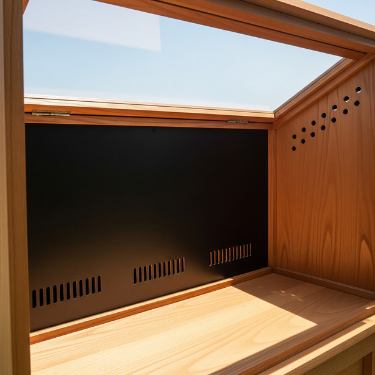
You should place your finished dryer in a spot that receives full, direct sun for the longest part of the day. The angled glass top needs to face the sun to capture the most energy. Before you settle on a permanent spot, you can track the sun’s path across your yard to find the optimal location.
To increase the heat inside, I painted the interior back panel of my dryer with a matte black paint. A dark color absorbs sunlight and radiates heat far more effectively than bare wood, which helps you achieve higher and more consistent drying temperatures.
Heat, however, is not useful without airflow to remove the moisture released by the herbs. You must create a path for air to move through the dryer. I drilled a series of vent holes near the bottom of the box and another series of holes high up on the opposite side.
This arrangement allows for passive airflow; as the air inside heats up, it rises and escapes through the top vents, which naturally pulls cooler, drier air in through the bottom vents.
Testing and Tweaking It
Your first drying session is really a test, so pay close attention. I started with fresh mint, basil, and some foraged plantain to see how it handled different leaves.
A cheap thermometer on the rack let me track the temperature—on a sunny day, the inside got much hotter than the outside, which was a great sign.
But I did run into a problem: condensation on the glass. That meant poor airflow. I added a few extra vent holes near the top, and it worked perfectly the next time. Expect to tweak things—that’s part of the fun.
What Should You Use It For?
Once your solar dryer is ready, you’ll probably want to give it a real test run, and herbs are one of the best ways to break it in. Not only do they dry quickly, but they also let you see just how well the dryer holds in flavor, color, and scent.
Start with the herbs you use most in the kitchen or for simple home remedies. Mint, basil, oregano, and thyme are perfect choices. They dry fast and stay vibrant when done right. You can crumble them into spice jars later or steep them for teas.
This setup works best for medicinal herbs, especially if you don’t want to risk losing them to mold or sun bleaching. Herbs like yarrow, calendula, lemon balm, lavender, chamomile, and echinacea dry beautifully in a solar dryer. They all benefit from low, steady heat and good airflow. This helps preserve their color, flavor, and potency far better than hanging them in a damp shed or sunny windowsill.
I found a great kit with 4,818 high-quality, NON-GMO seeds packaged in the US, that you can turn into hundreds of powerful natural remedies without spending a dime at the pharmacy anymore. It’s called the Medicinal Garden Kit and you can find it here.
I also use mine to dry foraged plants like plantain leaves and mullein. The gentle heat helps preserve their properties without cooking them. Once dry, I store everything in labeled glass jars in a cool pantry, ready for teas, tinctures, or salves all winter long.
What I’d Do Differently Next Time
My solar dryer works well, but there are a few things I’d change if I built it again, and maybe these tips can save you some trouble too.
First, the old latch I used is secure, but clunky. Next time, I’ll use strong magnets from scrap electronics. They’d give the lid a clean, snap-shut feel.
I’d also seal the wood. I used untreated scraps, but a coat of linseed oil would help prevent rot and warping from sun and moisture.
Lastly, the glass window was way too heavy. I’d swap it for UV-safe plastic to cut weight and avoid breakage.
If you enjoyed building your own solar dryer, there’s a whole collection of hands-on blueprints just like this in this guide called No-Grid Projects. It covers everything from smokehouses to water heaters, fridges, wind turbines and many more, all designed to work without electricity.
You may also like:
How To Build An Endless Hot Water System Without Electricity (Video)
5 Solar-Powered Items That Actually Make Sense To Keep Handy
How To Build a Solar Heater from BEER cans for FREE


