
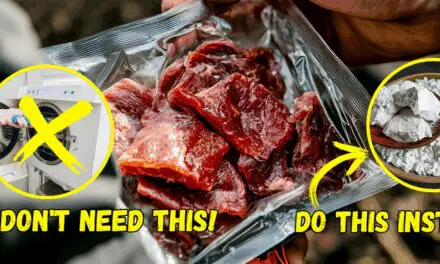
Ancient cultures around the world have been sun-drying foods for thousands of years. It was in fact the first food preservation technique. Fruits and vegetables were the most commonly dried foods, but strips of meat were also sun dried. Think of it as the world’s first jerky.
The foods were often dried on flat rocks and sometimes long slabs of wood. They were left uncovered, so they were subject to insects. That’s one of the reasons they were often suspended in the sun over a smoldering, smoky fire.
We’re going to solve that insect problem and create the perfect environment for sun drying using a pizza box, aluminum foil and a small sheet of plexiglass. An added element is a length of screen stretched over a frame that fits in the box and keeps the foods elevated so both air and heat from the sun can circulate around the food. We’re also going to cover out box with a clear cover to keep the bugs out and hold the heat in.
The Basic Materials: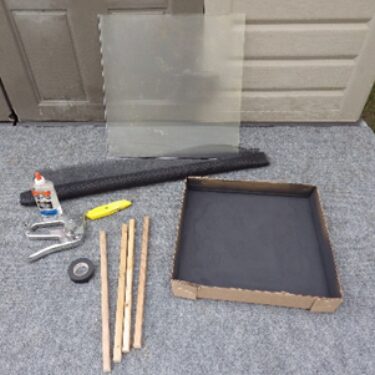
- A large pizza box. A 16-inch box works well. If you don’t have a pizza box you can construct something similar from cardboard.
- Aluminum foil
- Flat black spray paint
- A glass sheet to fit over the top of the box. You could also use plexiglass or in a pinch, clear saran wrap.
- A piece of screen or mesh
- 4 16-inch 1×1 inch wood strips to build your frame.
- Glue, tape, scissors, utility knife.
Building the Box
- Remove the lid from your pizza box and lay your box on a work surface.
- Spray the bottom of the box with the black spray paint. This will help to absorb heat from the sun’s rays.
- Make 4 to 6 small holes along the top sides of the box for ventilation. This is important. As the food dehydrates it will release moisture. You want the moisture to be able to escape, or the food will take longer to dry or even form mold. You might want to cover the inside holes with a small patch of screen. Fruit flies can fit into the tightest spaces.

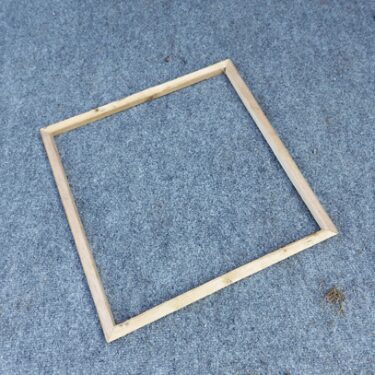
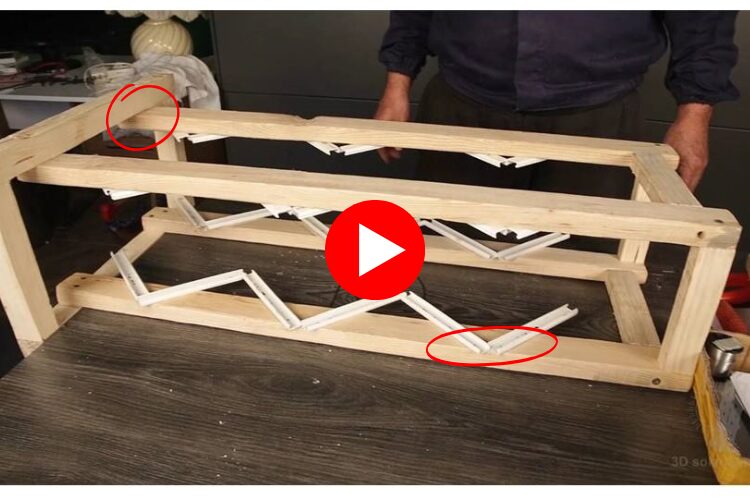
- Build your drying rack. Start by gluing your 4 16-inch sticks together to form a square. You could also use small screws or nails on the corners to hold the frame together.
- Attach the screen to the wood frame. You could staple it to the sticks or tape it. The whole idea here is to improve airflow.
- Place your wood frame into the box.
- Line the inside walls of the box with aluminum foil and tape in place. You could also glue the aluminum foil to the sides of the box if you want. The foil helps to reflect the sunlight in towards the foods.
- You’re now ready to place food on the screen and then cover with the glass, or plexiglass or clear plastic wrap.
- Place the box in the sun (preferably above ground to keep it away from rodents).
- You can angle the box towards the sun to give it more direct exposure to the sun’s rays.
The internal temperature will from 135º F to 150ºF (57º to 65º Celsius). We’ll cover food prep tips in a bit, but the standard recommendation is to rotate or flip the foods daily to accelerate dehydration.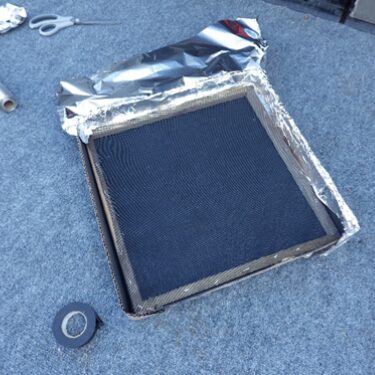
Obviously it’s best to use your solar dehydrator during hot dry weather. It also makes sense to bring it indoors in the event of rain or any time of the year when morning dew is present. The cover will do a fairly good job of protecting the foods from precipitation, but cardboard in the rain never does well. The garage or a shed is a good indoor option during wet weather. Sunlight becomes your backup plan, keeping your food preserved and your kitchen running, even during a blackout.
>>> Amish Survival Hacks that Can Help You Thrive in a Long-Term Blackout <<<
Foods to Consider
We’re going to stick with fruits and vegetables for our solar dehydrator. Starting with vegetables:
- Onions
- All pepper varieties
- Tomatoes (technically a fruit)
- Celery
- Herbs like rosemary, thyme, oregano and sage
- Mushrooms
In a bit we’ll cover how to slice or dice to get the best results, but first here’s our fruit list:
- Bananas
- Orange slices
- Lemon slices
- Apple rings
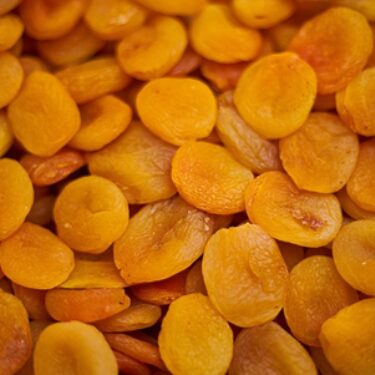
- Apricots
- Grapes
- Plums
- Strawberries and other berries
There are more fruits and vegetables that can be dehydrated from cranberries to pineapple to kiwis, but we tried to stick to the most common varieties. If in doubt about any fruit or vegetable, give them a try.
Once you’ve picked your fruits and vegetables for drying, you might notice something: the sun isn’t just great for dehydrating food, it can actually cook it too. Using the same basic principle as your dehydrator (trapping and concentrating sunlight) you can bake, roast, or warm meals without fire, fuel, smoke, or even odor by building a completely off-grid oven. You can find the complete step-by-step blueprint for it in this guide.

These ovens use reflective panels, insulation, and a clear cover to turn sunlight into steady heat. You can cook everything from bread and casseroles to slow-roasted vegetables, all while keeping your kitchen cool and energy-free.
Basic Prep Steps for Food Dehydration
Here’s a quick note: Timing varies widely for sun-drying anything. It all depends on the weather, how high the heat got in your box, and the size and variety of fruit or vegetable. Fruits usually take 2 to 6 days and vegetables 3 to 5 days.
Vegetables:
- Peppers and Onions. Smaller peppers can be sun-dried whole. For larger peppers like bell peppers or poblanos dicing is the easiest and fastest way to dehydrate them and the same is true for onions. The fine mesh of the screen can easily hold diced foods. Spread them evenly across the screen. Go in and push them around every day until they look and feel dry.
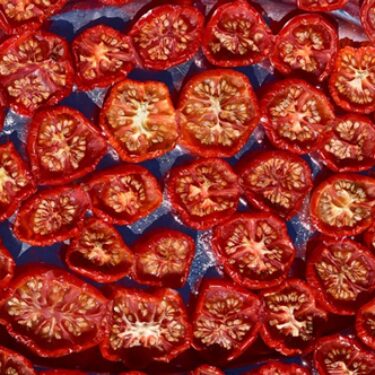
- Sun dried tomatoes are quite popular, and the prep is easy. Cut the tomatoes in half. You don’t have to remove the seeds unless you want to. Place the tomatoes on the screen with the cut open side up. The next day, flip them over. The next day, turn them so the cut side is once again up. Repeat until you have a dried tomato. How long this will take will depend on the size of your tomatoes. Experiment. Most people start with cherry or grape tomatoes, or medium sized tomatoes like Roma or Early Girl. Beefsteak tomatoes are rarely sun-dried but if that’s all you have, give it a try.
- Not a vegetable. It’s a fungus but we have to put it somewhere. Wash and slice an 1/8 or an inch tick and do the process.
- This is a great way to dry herbs. It’s best if they are left on their stalks or stems. Place the herbs stalks or stems on the screen and rotate every day until dry. This works best for robust herbs like rosemary, thyme and sage. Delicate herbs like basil will darken and may not tolerate the intense heat as well. They’ll just turn brown or black.
Fruits:
- Peel and slice the bananas into rings about 1/8 of an inch thick. Place them on the screen and turn them every day. Try one from time to time until dry.
- Peel and core the apples and slice into rings about 1/8 or an inch thick. Soak the apple slices in lemon juice or orange juice. If you don’t, the apples will oxidize and turn brown while drying. You could also do this with vinegar or any other citrus juice. Place them around the screen and do the everyday flip. Taste as you go until done.
- Citrus fruits.
Slice the oranges or lemons into rings about 1/8 or an inch thick. Do the everyday flip and taste until you are satisfied with the result.
- Grapes and Plums.
The result here will be either raisins or prunes. The grapes you just put directly on the screen after removing them from the stem. The plum has to be pitted and then placed on the screen. Drying time varies depending the size of the grapes or plums. Plums take longer. Once again, taste as you go until satisfied. Both will retain some degree of moisture. Just think of what you noticed about the texture of raisin or prune the last time you ate one.
- This is a very popular dried fruit. Pit the apricots and place them on the screen and rotate daily. This can take a while so taste as you go.
- Slice strawberries 1/8 of an inch thick and spread around. Other berries like blueberries and raspberries can be sun-dried whole.
This setup also works for medicinal herbs, especially if you don’t want to risk losing them to mold or sun bleaching. Herbs like yarrow, calendula, lemon balm, lavender, chamomile, and echinacea dry beautifully in a solar dryer. They all benefit from low, steady heat and good airflow. This helps preserve their color, flavor, and potency far better than hanging them in a damp shed or sunny windowsill.
I found a great kit with 4,818 high-quality, NON-GMO seeds packaged in the US, that you can turn into hundreds of powerful natural remedies without spending a dime at the pharmacy anymore. It’s called the Medicinal Garden Kit and you can find it here.
Storing Sun-Dried Fruits and Vegetables
There are various ways to store your sun-dried fruits and vegetables. The good news is that because you have removed so much moisture, they will all have a pretty good shelf life. Figure a shelf life of 3 to 6 months depending on packaging and storage conditions. Here are some options:
- Mason Jars. The go-to food storage solution. Just drop your sun-dried fruit or vegetable into the jar and seal.
- Mylar bags. These bags are great for food storage especially if they’re vacuum sealed.
- Plastic containers with lids. This is another go-to food storage option.
- Resealable plastic bags. In a pinch, zip lock bags always work.
- Sun-dried tomatoes in oil. A classic way to preserve sun-dried tomatoes is to place them in a mason jar and fill with olive oil. They can easily keep up to a year.
Storage locations are the usual suspects. A pantry or a cool, dark place. But don’t forget to label any package with the day the food was packaged and rotate if you have sun-dried a large volume of fruits and vegetables.
From Sun-Dried Fruits to Solar Power: Easy Ways to Go Off-Grid
Most people think going solar is complicated, expensive, and only for people with big rooftops or deep pockets. The truth is, there’s a far simpler way to harness the sun’s power, and it doesn’t require hiring an electrician, buying giant panels, or digging into your savings. A carpenter from Orlando discovered how to build a compact, vertical solar system that fits in just ten square feet. That’s right: smaller than most patios or garden plots, yet powerful enough to keep essential lights, a fridge, or small appliances running during a blackout or emergency. He calls it the Backyard Revolution, and according to the design, it’s efficient enough to cut a home’s electricity bills by more than half.
What makes it so exciting is how approachable it is for regular people. There’s no need for specialized skills or high-end equipment. The system is designed to capture sunlight from multiple angles, even when the sun is low in the sky, making it far more effective than traditional flat panels. Imagine combining this with a solar dehydrator: while one setup preserves your fruits, vegetables, and herbs, the other turns sunlight into real, usable electricity for your home. It gives you energy independence and food security at the same time, stretching every ray of sunlight for maximum value.
If you’re serious about living off-grid, reducing reliance on the grid, or simply protecting your family from power outages and skyrocketing bills, this system shows what’s possible when you think a little differently about the sun. It’s a practical, compact, and surprisingly simple solution that makes the idea of total self-sufficiency actually feel achievable (and even exciting). And you can get the blueprint for it right now, with a limited-time discount of 30%, by using this link.
It Works!
This is an easy project to do. If you are serious about it you can make more than one dehydrator box and go beyond the cardboard of a pizza box to a wood frame. In the meantime, give the pizza box food dehydrator a try. It’s a great way to understand the fundamental principles of a food preservation technique that originated thousands of years ago.
You may also like:
70 Ingenious Projects You Need To Add To Your Backyard (Video)
How I Made a Solar Herb Dryer with Scrap Materials
DIY Solar Water Heaters To Cut Down On Energy Bills
How To Build a Solar Heater from BEER cans for FREE


