Chickens don’t care if you’re sick, busy or on vacation. They demand food daily.
Store-bought automatic feeders? Pricey, power-hungry, and prone to failure.
Five years ago, I jury-rigged my first gravity-fed feeder from a cracked bucket and leftover PVC. Today, it’s evolved into a foolproof system that costs under $20 and runs for weeks.
It’s survived -18°F winters and torrential rains, all while cutting my coop chores by 8 hours a month. Without wiring. No apps. Zero stress.
Let’s break down how to build one for yourself.
Automatic PVC Chicken Feeder – Materials and Tools List
Start by raiding your scrap pile or local salvage yard—this project thrives on reused materials.

For the frame and hopper, you’ll need four planks of recycled wood (½-inch thick, 24×18 inches minimum) or sturdy plastic boards.
Grab 20-30 screws (1.5-inch), rust-proof nails and two L-shaped brackets to reinforce joints.
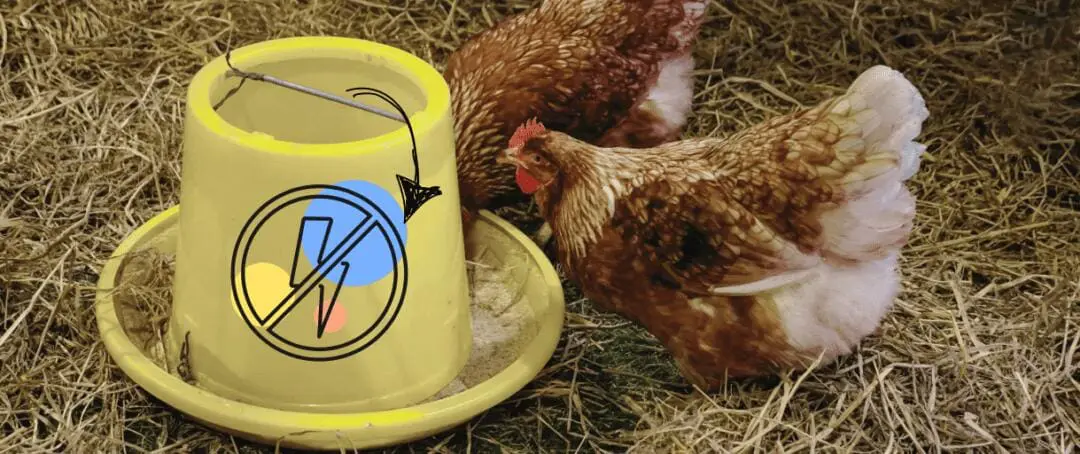
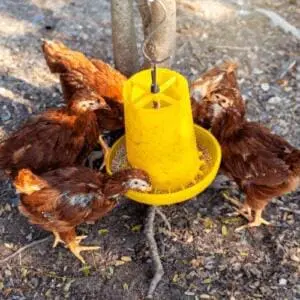
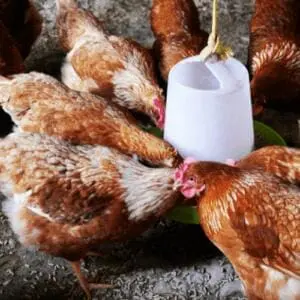
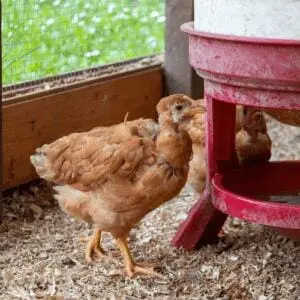
The gravity system hinges on a 5-gallon bucket (or repurposed grain bin) for the hopper, plus a 3-foot PVC pipe (2-inch diameter) as a feed chute.
I’ve even seen folks retrofit old coolers or metal filing cabinets. Get creative, but avoid materials with sharp edges or chemical residues.
Your toolbox needs basics: a handsaw for cutting wood, a hammer, screwdriver, and measuring tape. A level is non-negotiable—crooked frames cause feed jams.
Mark cuts with a carpenter’s pencil, and if you’re using plastic, score lines with a utility knife before sawing. For the mechanical timer hack, scout thrift stores for analog kitchen timers or wind-up toys.
Check Buy Nothing groups or Facebook Marketplace for free materials. Last year, I scored a dented but functional 10-gallon plastic drum this way, saving $35.
When it comes to stuff like this, we all have a lot to learn from the Amish. They’ve got this whole mindset around making do with what you’ve got. Bartering, repurposing, building things that’ll last without relying on the grid.
I picked up a bunch of clever ideas from this book, called ”The Amish Ways”. It’s written by Eddie Swartzentruber, who grew up Amish and lived that life for decades before deciding to share what he knew with the rest of us. In here, he covers all the hidden things we had no idea about the Amish way of living until now. From how they build air-powered tools that run without electricity, to why they keep eggs packed in salt instead of relying on refrigeration or even how they make their very own natural antibiotics. It’s packed with the kind of old-timey know-how that just makes sense, and for the first time ever, we get to find out all about it.
Budget tight? Swap PVC for dryer vent tubing, or use pallet wood planed smooth. Just ensure all surfaces are sanded and sealed. Rough edges deter chickens from eating.
Planning and Designing Your DIY Chicken Feeder
Before you grab your tools, spend 10 minutes mapping your flock’s needs. A dozen chickens plow through 2.5 lbs of feed daily—mine do, anyway—so size your hopper to hold at least three days’ worth (7.5 lbs minimum).
Sketch a rough design on scrap paper or a napkin: a tall, narrow hopper reduces feed bridging (when grain clumps and blocks the chute), while a 30-degree slope on the dispensing tray prevents clogs. I learned this the hard way after my first prototype, with a flat base, left my hens pecking at empty corners.
Here’s where creativity kicks in. A seesaw-style dispenser works like this: as chickens eat from one side, their weight tilts the platform, refilling it from the hopper above. No springs needed—just a wooden pivot point.
For timed releases, integrate a mechanical wind-up timer (the kind you’d find in a dollar-store egg timer) into a sliding gate. My neighbor made his using a mousetrap spring and a yogurt container lid—quirky, but it drops feed like clockwork every six hours.
Space matters. Measure your coop’s layout to ensure the feeder fits snugly against a wall, away from roosts to avoid droppings. If you’re tight on square footage, build vertically: stack the hopper above the dispenser, connected by a 2-inch PVC pipe.
Don’t skip the test run. Dry-fit all parts without screws first. If the feed sticks, tweak the angles.
Your goal? A seamless gravity flow that even a skeptical Buff Orpington can’t disrupt.
Now, if you’ve ever had a Buff Orpington, you know they can be a bit… particular about their food. But once you get the setup right, they’re pretty reliable layers. I’ve found they’re not just great for beginners, but also excellent in colder climates, which is why I love having them around.
That’s actually something I learned from a guide called How to Become Self-Sufficient on 4 Acres, which I received as a bonus with another purchase. It gives a lot of details on chicken breeds like the Buff Orpington and others that lay consistently, giving you a solid idea of which breeds will best suit your needs. It’s not just about chickens, though. The digital guide also gives complete instructions on how to set up a DIY greenhouse, how you can create your own remedies with backyard plants, and even build a root cellar to keep your food fresh all year.
How to Build an Automatic Chicken Feeder: Step-by-Step Building Process
Step 1: Building the Base and Frame
Start with a flat, stable surface—warped wood or uneven ground guarantees feed spills. Cut two 24-inch planks (recycled 2x4s work) for the base’s sides and two 18-inch planks for the front/back.
Screw them into a rectangle, then reinforce corners with L-brackets. I double-check levelness by placing a marble on the frame; if it rolls, shim the low side with folded cardboard.
For vertical supports, attach two 36-inch posts to the back corners using 3-inch screws. These will hold the hopper. Pro tip: Drill pilot holes to avoid splitting salvaged wood.
Step 2: Constructing the Feed Hopper
Grab your 5-gallon bucket or repurposed barrel. Cut a 2×4-inch opening near the bottom—this is where feed will flow into the chute.
Angle the cut upward 30 degrees to prevent bridging. Mount the hopper to the vertical posts with sturdy straps (old belt leather works).
My first hopper was a cracked livestock water trough; I sealed gaps with food-grade silicone. Test the slope by pouring a cup of feed—if it hesitates, sand the interior or tweak the angle.
Step 3: Assembling the Dispensing Mechanism
Here’s the fun part: the mechanical timer. Gut a wind-up kitchen timer, keeping the spring and gear.
Attach the timer’s hand to a plywood flap with a small hinge. When the timer ticks down, the flap lifts, releasing feed.

For a simpler approach, rig a seesaw platform: nail a plank to a central pivot rod. When chickens peck one side, the other rises, refilling from the hopper. I’ve seen this done with a skateboard wheel as the pivot—slick and silent.
Step 4: Final Assembly and Testing
Bolt the hopper to the frame, connect the PVC chute to the dispensing zone, and secure all joints with screws. Load a half-pound of feed and watch. If it clogs, widen the chute by ¼ inch or sand rough edges.
My third feeder failed spectacularly until I added a vibrating doorbell motor (salvaged from a junk drawer) to nudge stuck grain. Once it runs smoothly, load a full batch and check every 12 hours for two days. Adjust the timer or flap tension as needed.
Automatic Chicken Feeding: Safety, Maintenance, and Best Practices
Predators like raccoons and rats see your feeder as an all-you-can-eat buffet, so secure it with a carabiner clip or a childproof latch.
Bolt the feeder to a wall or post, and elevate it 12 inches off the ground to deter rodents.
But here’s the thing. No matter how clever your setup is, those sneaky predators more than often seem to find a way in.
Now, if you’re serious about keeping these predators at bay, you could build an automatic chicken predator trap. This isn’t your average DIY project. It’s a trap that works 24/7, catching the sneakiest raccoons and rats without you even being there.

And you can learn how to build it yourself right here. This guide walks you through building a simple yet effective trap that’ll catch even the cleverest of the predators, keeping your flock safe and your feeder intact. It’s definitely worth checking out if you want to take predator control to the next level.
Position your feeder under a coop window or vent—this keeps feed dry and leverages airflow to prevent mold, a lesson I picked up after losing a batch of grain to a rainy week.
For long-term reliability, clean the hopper and chute every two weeks with a 1:1 vinegar-water mix.
Scrub stubborn grime with a bottle brush, and let parts dry fully before refilling.
Store unused feed in galvanized steel cans with airtight lids; weevils ruined my first 50-lb sack because I left it in a plastic bin. Check moving parts monthly: tighten screws, sand rust off hinges, and replace worn PVC sections.
Best practice? Treat your feeder like livestock—monitor it daily. Note how much feed disappears (a healthy hen eats ¼ lb daily) and adjust the dispenser’s opening seasonally.
In humid summers, I widen the chute by ⅛ inch to combat swollen grain. Winter demands narrower gaps to deter ice clumps.
Keep a logbook for adjustments; mine’s scribbled with notes like “June: added silicone drip edge” or “Feb: swapped timer spring.” Consistency here means fewer midnight coop checks.
Your Next Steps for a Happy Coop
Watch your chickens.
Their behavior will tell you everything.
If they cluster nervously around the feeder, the dispenser might be too stiff.
If feed piles up untouched, adjust the flow rate. This system thrives on iteration, not perfection.
My first design took three tweaks to get right, but once dialed in, it ran autonomously for 14 days during a cross-country move.
Ready to give yours a try?

You may also like:
Ingenious Ideas For Taking Care Of Your Chickens
How to Take Care of Your Livestock When They Are Sick (Video)
Homemade Chicken Feed Recipes: How to Make Feed That Keeps Your Hens Healthy
Chicken Coop Mistakes You Should Avoid at All Costs


