There is actually a way to make a harmless rat trap for catch-and-release. The idea is to capture the mice or rats alive and then take them to a remote area to release them. Then again, some people don’t like the idea of rats and mice in the area and want to eradicate them. But there’s another problem, especially with those spring-mounted traps.
Anyone who has ever set a spring-mounted mouse trap knows how quickly they can snap.
The worst that happens to most of us is a bruised thumb, but there are others we need to think about when it comes to mouse traps and especially large rat traps.
In a perfect world, we can put a mouse or rat trap in a location inaccessible to kids or pets. But that’s not always the case. In those instances, there are a couple of options we’ll explore.
Option 1: The Harmless Rat Trap Bucket
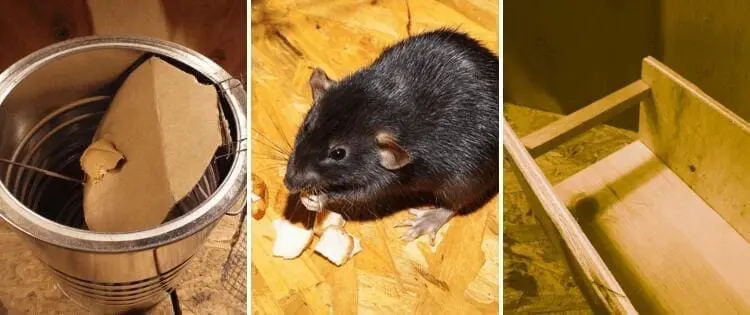
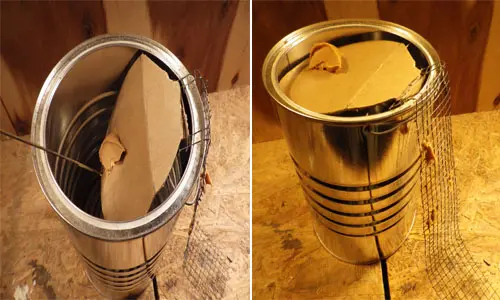
This is a truly harmless rat trap and it’s one of the projects I learned from this guide. This trap captures the mouse or rat alive in a bucket and will harm no pet or child. What makes the trap work is a piece of cardboard on the top of the trap that is loosely supported and hinged.
A stairway of sorts made from a strip of wire mesh or fencer wire allows the mouse or rat to get to the top of the bucket with almonds stuck into peanut butter along its length to entice them to the top.
When they get to the top a large collection of almonds stuck to the end of the lid with peanut butter can be seen.
The mouse or rat moves onto the hinged cardboard and their weight causes the cardboard lid to collapse at the seam trapping the rodent in the bucket. Some gravel in the bottom of the bucket keeps it from tipping if numerous rodents are captured and active. The cardboard lid pops up back into place to enclose the rodents.
Related: Easy DIY Garden Pest Killer You Can Make At Home
The size of the bucket depends on the size of the pest. A large coffee can will work for mice, but you may need to consider a 5-gallon bucket for rats.
It’s a very safe harmless rat trap because there are no springs to snap a bar shut. The only downside is you have to figure out how to dispatch a live mouse or rat in your bucket.
One idea is to fill the bottom of the bucket with water and let the mouse or rat drown. That assumes you have the stomach to let that happen but it’s better than trying to figure out what to do with those live mice -unless you know a remote field far from home.
I know it’s only February, but time flies, especially when you’re a homesteader. Spring is just around the corner, so I highly recommend grabbing a pack of these NON-GMO pest-repellent seeds and planting them now before they sell out again.
Building the Harmless Rat Trap Bucket
We’re going to build a basic bucket harmless rat trap from a tall coffee can. You can upsize the concept to a 5-gallon bucker for larger rats. They both work with the same concept.
Equipment: 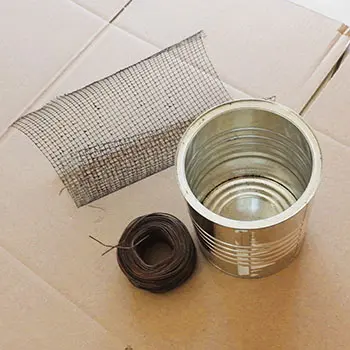
- Drill and drill bits
- Scissors
Supplies:
- A tall coffee can or 5-gallon bucket
- A large sheet of corrugated cardboard
- Fencer wire or a fence wire will the mouse or rat climb to the top
- Bailing wire (This will be the support for the cardboard hinge)
- Duct tape to attach the hinges to the buckets
- Gravel to add some weight to the bottom of the bucket so it won’t tip
Directions:
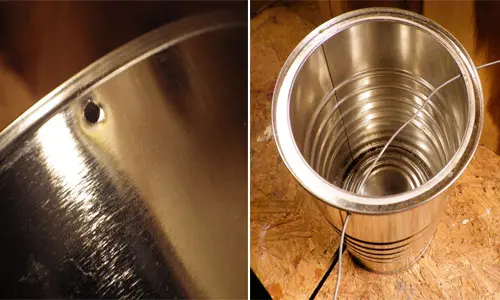
Drill 2 16th-inch holes ¼ inch from the top of the bucket about ¼ around the rim.
Thread the baling wire through the holes bring it to the back of the bucket and twist tight. You want a taut wire.
Cut the cardboard into a circle that’s about 1/8 inch smaller than the opening. Make sure it doesn’t rest on the rim.
Next, leave a 2-inch-wide tab sticking out about 2 inches. Then, fold the tab so you can tape it to the top inside of the bucket.
Set the cardboard on top and mark where the support wire touches the lid.
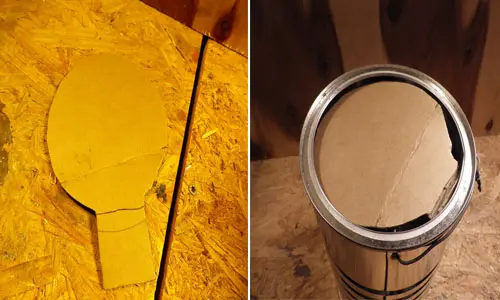
Fold the cardboard back and forth to create a hinge. Tape the cardboard tab to the inside of the bucket so it rests on the wire support.
Next, test the lid by gently pressing on the edge of the cardboard to ensure it moves properly. Cut the wire ladder to about 2 inches wide and tape it to the top of the bucket where you attached the lid.
Related: 9 Signs You’ve Got Rats
Add about an inch of gravel to the bottom of the bucket. Then, smear some peanut butter and stick almonds on the ladder in spots leading to the top.
Spread peanut butter on the far edge of the cardboard, away from the hinge. Place the bucket in the problem area and check it periodically. If needed, partially fill the bucket with water, keeping it no more than 1/3 full.
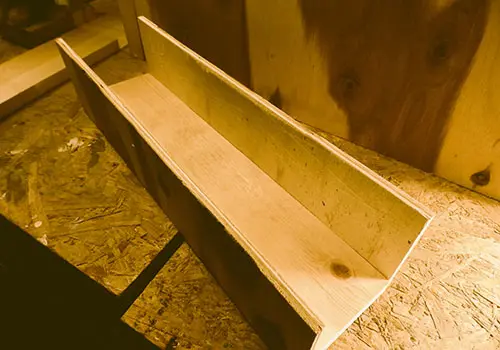
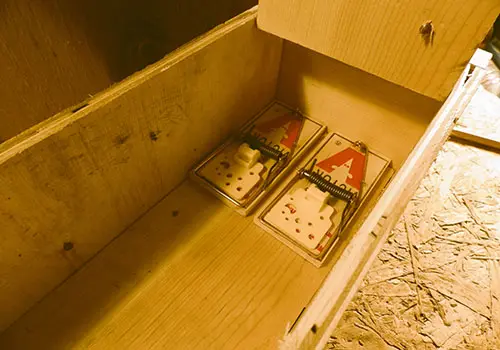
Option 2: The Enclosed Box
This harmless rat trap creates an enclosure around a traditional sprig-powered mouse or rat trap. It keeps the trap enclosed from pets and kids. It’s a way to make a dangerous trap harmless.
The key is to have an enclosed wooden box that is deep enough to keep a dog’s long nose or a kid’s small arm or foot from reaching the trap but can still allow a mouse or rat to enter. Kids typically know and respect the traps, but dogs and cats are another story.
Building the Enclosed Box
For anyone troubled by killing live mice, this offers a quick solution with a sprig trap that’s safe for pets and kids. Here’s what you need to do:
Equipment:
- Saw
- Drill and drill bits
- Hammer or screwdriver
- Tape measure and pencil
Supplies:
- Nails or screws
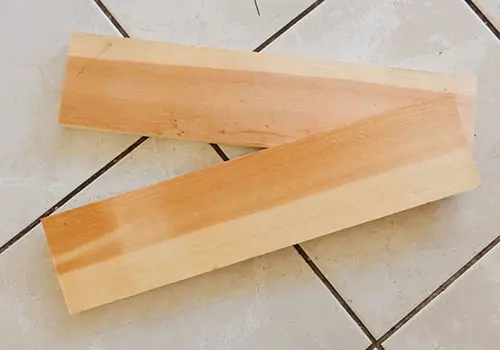
- 3 foot long 1×4
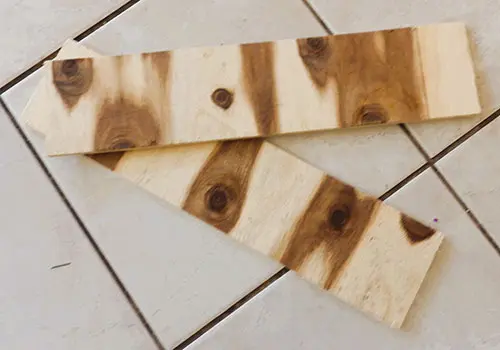
- 4×1 sheet of ¼ plywood
- A ½ by ½ piece of wood 4 inches long
- A hinge
- Mouse traps or rat traps (The average rat trap is 4×11” and the average mousetrap is 3 7/8×1 13/16. The box can hold either one large rat trap or two smaller mouse traps side by side)
Directions:
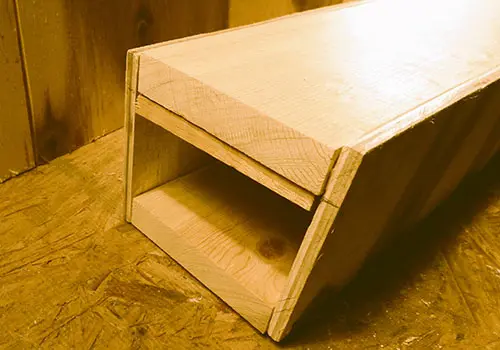
Cut the 3-foot long 1×4 so you have two pieces each 18 inches long. This will form the top and bottom of the box.
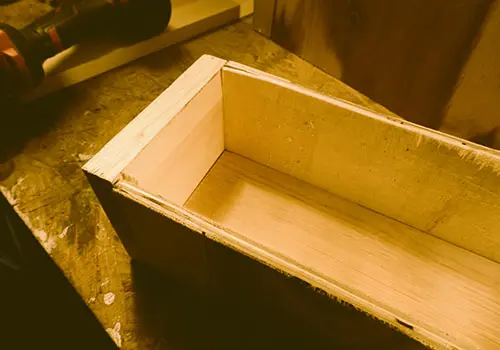
Cut the plywood into two pieces 18 inches long and 4 inches wide. This will form the sides of the box.
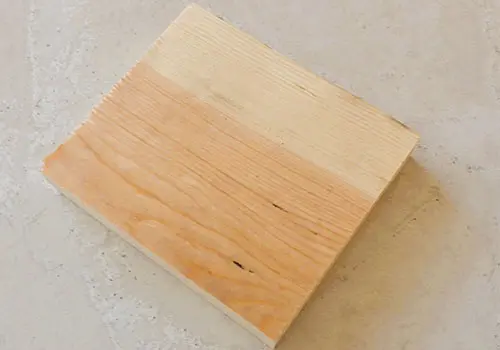
Cut a piece of 1/4 into a square 4 ¾ x 4 1/8. This will be the back of the box.
Drill holes along the sides of the plywood and either nail or screw the sides to the 1×4’s.
Drill holes around the edges of the end cap and either nail or screw it to form the back of the box.
Install the crossbar at the front of the box to support the hinged lid.
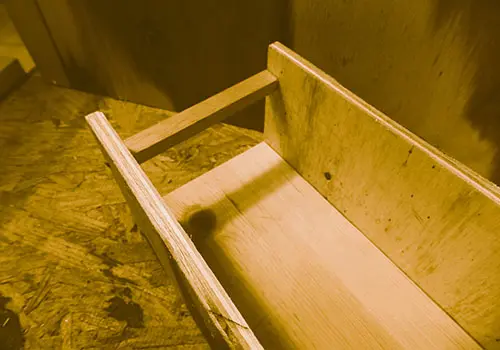
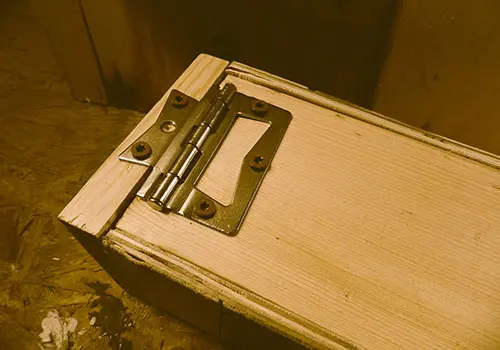
Attach the hinge to the top 1×4 at the back of the box so it will open and close.
Place the trap or traps in the back of the box and use peanut butter as bait.
Load the traps lower the lid and place them in the location where you have the infestation.
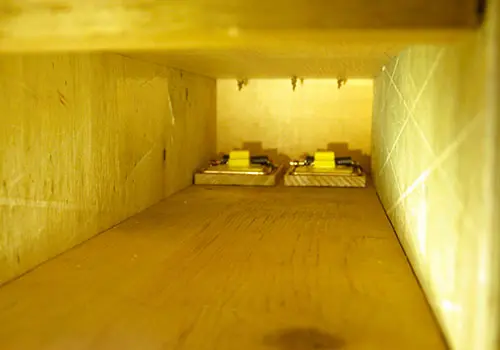
It helps to put down a trail of almonds leading to the box and some almonds in the box leading to the trap.
There are Numerous Variations on Mouse Traps
People have come up with numerous ways to trap rats and mice although the two techniques we covered pretty much define the variations on the concept for a homemade and safe mousetrap.
You may also like: 
Plant These To Keep The Pests Away
DIY Automatic Backyard Traps and Alarms for Looters and Intruders (Video)
Ingenious Ways To Keep The Critters Out Of Your Pantry
Stop Making These Dangerous Pest Control Mistakes
15 Things You Should Teach Your Children That Can Save Their Lives


Nice article and thanks for it.
I’m so glad my mice trap and poison days are over. After various attempts with traps, we opted for poison (which we hate, because of the possible knock-on harmful effect.)
Since we got our two cats, we rarely have mice and rats problems. No more losses in our chicken and goat feed, no more damage to electrical cables, no more mice droppings falling from the roof, etc.
And a bonus of the cats – they are super cute.
Francois