Before the days of refrigeration and year-round access to fresh vegetables, folks had to figure out how to store their harvest to last through the year. This is what I wish I had known before building a root cellar in my backyard.
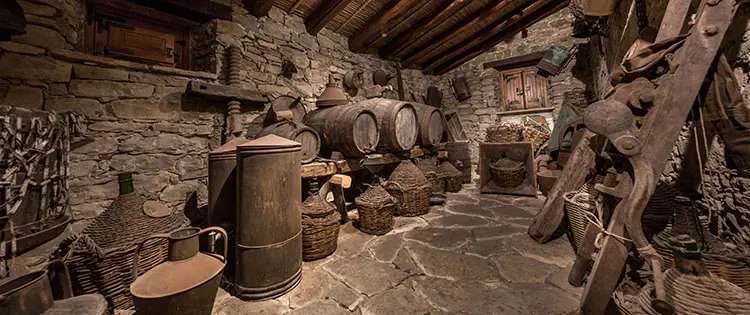
For many, the answer was a root cellar. Built partially or entirely underground, a root cellar was used to store root vegetables, fruits, and even nuts until they were ready to be eaten.
Even today, building a root cellar can be just as useful. It’s a great way to keep your harvest fresh and reduce your reliance on grocery stores or the modern food supply chain.
Types Of Root Cellars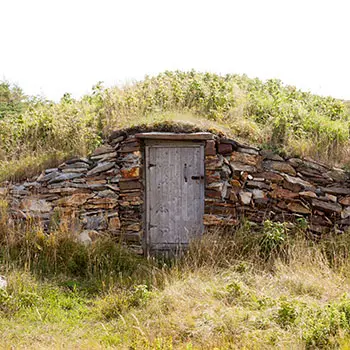
Building a root cellar can be as simple as a weekend project or as involved as a weeks-long homesteading investment—it’s all up to you.
Traditional root cellars are typically built underground and away from the house, with their own door for easy access.
Under-structure root cellars, on the other hand, are dug beneath a shed or house. These are accessed through a trap door on the floor, making them convenient for quick trips during cold weather.
Related: DIY Root Cellar In A Box
Another option is building a root cellar into the side of a hill. All you need to do is dig into the hill, install a door, and you’re good to go. To add insulation and blend it into the environment, you can cover the exposed area of the hill with grass or other vegetation.
If you’re after the simplest and most affordable option, check out this guide on how to build a mini root cellar right in your backyard. It’s perfect for small-scale storage and easy to set up!
How To Keep Your Root Cellar Cool
Keeping your root cellar at the right temperature is one of the most important factors in making sure your stored food lasts as long as possible.
If the temperature isn’t right, your vegetables and fruits might spoil faster than you expect. A root cellar that’s too warm can quickly lead to wasted food. But don’t worry—there are a few simple tips to help you avoid this.
First, aim to dig your root cellar about 10 feet deep. At this depth, the temperature is naturally stable, helping to keep your food fresh for a longer time.
Related: Foods You Should Never Keep in a Root Cellar
For the structure itself, use the packed earth from your backyard for the flooring and walls. Not only is this cost-effective, but it also helps regulate temperature naturally. For shelving, stick with wood—it’s durable and complements the natural insulation of the space.
Finally, be sure to monitor your root cellar with a good thermometer to keep an eye on the temperature and a hygrometer to check the humidity. These tools are key to maintaining the perfect environment for your stored produce.
How To Keep Your Root Cellar Well-Ventilated
Improper ventilation is another common problem people face with root cellars. Without proper airflow, your food can spoil faster, and you might end up dealing with mold and mildew.
To prevent this, make sure to install two vents when building your root cellar.
One vent should be placed at the top of the cellar to let out stale air and excess humidity. The second vent should go at the bottom to allow fresh air to flow in and circulate. This setup keeps the environment inside balanced and your food in good condition.
Don’t forget to angle the vents slightly during installation to prevent rainwater from getting inside your root cellar. With this simple addition, you’ll save yourself a lot of trouble down the line!
What Kind Of Lighting Does A Root Cellar Need?
Stored foods thrive in the dark—it’s a fact. Too much light can cause vegetables to lose nutritional value and may even lead to unwanted sprouting.
To keep your root cellar in optimal condition, aim to keep it as dark as possible. If your cellar has a window, cover it with curtains or burlap to block out the light.
Always remember to turn off any lights when you leave the cellar. If you need to use a light that might warm the space, make sure to cover your vegetables before heading out to protect them from unnecessary exposure. Simple steps like these can make a big difference in preserving your stored food.
Tips For Using Your Root Cellar Efficiently
Now that we’ve covered the basics of building a root cellar, let’s go over some tips to make the most of it.
First, cure potatoes, pumpkins, and onions before storing them. Curing helps thicken their skin, reducing the risk of mold or mildew.
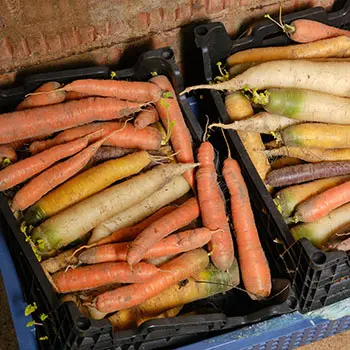
It’s also a good idea to store root vegetables with some dirt still on them. Washing them beforehand can leave them damp, which encourages rot. Instead, just shake off loose dirt and store them in boxes of sand or peat moss.
Avoid overcrowding your vegetables, as this can cause heat buildup and speed up spoiling.
Related: Root Cellar Mistakes You Need To Avoid At All Costs
When organizing your cellar, stock the top shelves first. The air near the ceiling and door is warmer and drier, making it better for certain crops. Lower shelves, farther from the door, are more humid, so use those for vegetables that thrive in damp conditions.
Make it a habit to check your vegetables regularly for signs of rot. Rot spreads fast and can ruin a lot of your stored food if left unchecked.
For anyone striving for self-sufficiency, building a root cellar is a fantastic way to stay resilient. If there’s ever an issue with the food supply, you’ll still have fresh vegetables to rely on year-round. While building and maintaining a root cellar takes effort, it’s worth it for the independence it brings, especially if modern conveniences ever fail.
Long-Lasting Foods That Got Soldiers Through the Civil War
The Small Amish Backyard Root Cellar (Video)
50 Tips From the Great Depression

