Water is survival. Without it, even the toughest homestead will fail at some point.
Long before power drills or modern rigs, pioneers dug wells with nothing but shovels, and you can too. Forget waiting on contractors or pricey equipment. In this guide, I’ll show you the pioneer way to dig a well, step-by-step, so you can keep your homestead running, even when modern conveniences aren’t an option.
It’s All About the Water Table
Here’s the telegram. Digging a well by hand is going to be work intensive; takes time and is potentially dangerous. The deeper you dig the more you risk the chance of a cave in. We strongly recommend you check out videos on the Internet to learn more, and they all have disclaimers about the dangers of digging a well by hand.
As far as the actual task, it’s pretty hard to do alone. 2 to 3 people at a minimum are required. Once the well hole starts to get deep you need people up top to lift buckets of soil while one or two people below continue to dig. We’ll get into all the tools to make this possible mostly defined by pioneer tools like shovels, picks, buckets, ropes and pulleys.
The average depth of wells ranges from 7 to 100 feet. Even a 7 foot well is a lot of work, but digging down to 100 feet is a really bad idea. Also, there’s a critical consideration before you start digging. It’s evaluating where and how deep the water table may be.
Water Table Defined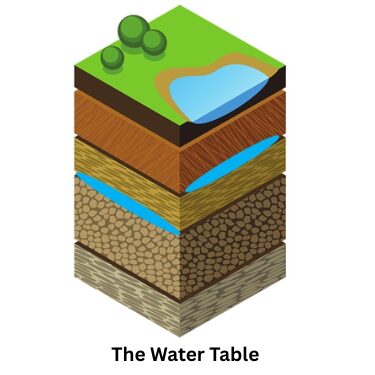
Soil is defined by layers sometimes referred to as strata. Somewhere below ground that strata captures water. The water table is where water pools and collects underground. Sometimes it’s above a layer of bedrock. At other times it can be above a layer of hard clay. How much water pools in those locations has a lot to do with the frequency of precipitation. In a drought many wells run dry. During seasons of average rainfall, the water table often maintains at its current level.
The Key Consideration Before You Dig a Well
Say what you will about the water table, the location of your hand dug well is the most important decision you’ll make. If you want your well high on the pretty hill next to your house you’re making a mistake. Hills just elevate soil above the water table. The best spot for a hand dug well is a low lying spot or an area that shows water pooling after a heavy rain. That’s a good sign that the water table is shallow in the ground. Better yet, any rainfall will continue to feed the water table below.
The only downside of placing a well in an area that’s briefly flooded is that if can make digging dangerous and compromise the integrity of the walls in the well. It’s all a question of finding a balance between areas that show promise for water but provide some degree of structural integrity in the soil.
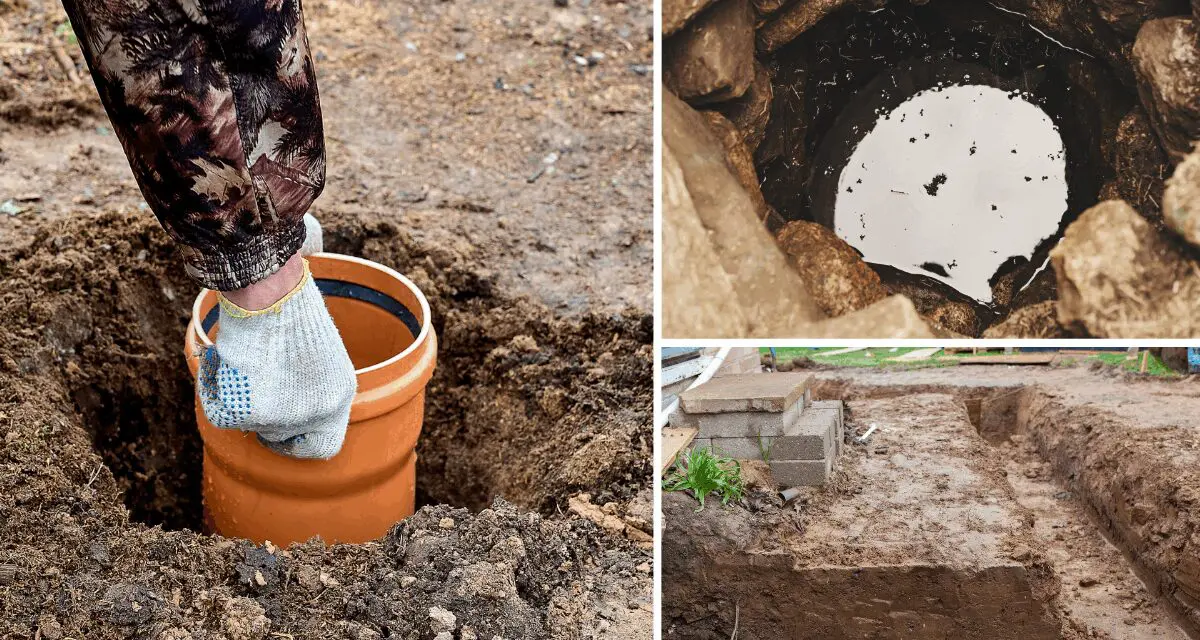
That doesn’t mean your well has to have earth walls. Most wells dug by pioneers had walls supported by barrels, timber, stones or bricks. If constructed properly they would support the surrounding soil so the well would not collapse.
A standard recommendation is that if you have to dig deeper than 10 feet to get at least 2 feet of water at the bottom of the well -give up. It’s just going to get more dangerous.
Hand Tools for Digging a Water Well
We’ll start with the common sense digging tools and let it get complicated from there. Here’s the list:
- Picks both small and large
- Shovels including pointed shovel, flat edged, and spades
- A hatchet for when you encounter roots
- A hardhat for anyone working in the pit (especially as it gets deeper)
- Work gloves
- A large bucket
- Rope
- A ladder or rope ladder to get down to the bottom as the well gets deeper.
- Hip waders for when you get into the mud and water at the bottom.
- A windlass or pulley to lift dirt in the bucket after it gets too deep to shovel it up and out of the hole
- A cold chisel in case you encounter an embedded rock in the side of the pit that just won’t come out
- A small sledge of hammer for that cold chisel
- A team. This is not a one person job. You need at least two people and ideally 3 or more. It’s a lot of work and you can rotate shifts or duties to give each other a break from the heavier work like digging.
Materials for Bracing the Walls of the Well
The photo above shows a very deep and scary well. Don’t even think about trying to dig a well this deep. It also demonstrates the importance of bracing. Here’s why: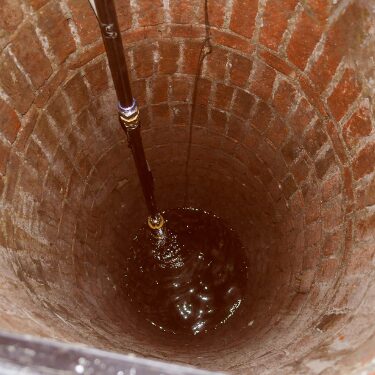
As your well hole gets deeper there’s always the danger of a cave in. That’s why most wells are usually braced on the sides to hold back the soil. It may not happen when you’re digging the well (hopefully) but over time it could happen. A lot depends on the type of soil. If you’re digging in clay there’s good news and bad news. Clay walls tend to be very sturdy. Digging in clay is a tough task. Digging in sand is another story. It’s an easy dig but the odds of collapse are great. Here are some thoughts on bracing and supports for well walls.
- Old barrels. This was the classic reinforcement used by our pioneer ancestors. The tops and bottom of barrels were removed, and they were dropped into the hole one after another. They were then backfilled with stone and gravel. A final barrel emerged from the top to form the well framework.
- Cedar is best because it resists rot. Hardwoods can also work. Drive them into the ground around the perimeter of the well angled outward.
- Or bricks. If you can afford them bricks make for a good well wall. You don’t install them until you hit the water table and have dug deep enough to draw water. They should be mortared as they well wall goes up.
- Or stone. The traditional well lining. These should also be mortared and clay with sand and wood ash was often used as an improvised mortar.
- Speaking of stone. You should put down a layer of large stones at the bottom of your well. It will allow you to drop the bucket without stirring up mud with every drop.
Digging the Well
Once you’ve chosen your spot, assembled your tools and your team, and have stacked and piled your bracing you’re ready to start digging. Here are the standard steps pioneers used when digging a well:
- Start by removing sod to create a circle 3 to 4 feet across.
- Your first foot or two will most likely be topsoil. Put it into your garden or compost heap.
- Under the topsoil you most likely encounter clay. This is tough digging. Professional landscapers sharpen their shovels like knives to literally shave and carve the clay. A spade on the side of the hole also helps with the clay.
- With any luck you’ll encounter a layer of sand and clay. That’s a good sign. You may also start to notice mud. That’s an even better sign.
- Continue to dig and hopefully you start to see pooling water around your feet. Continue to shovel the mud and stuff into buckets so your crew above you can pull it up and out.
- Ideally you want at least two feet of standing water at the bottom of your well. That gives you enough room to drop a bucket and fill it until you pull or winch it up.
- Drop fairly large rocks into the bottom of your well. That will help prevent you from stirring up mud when you draw water.
When I first thought about digging a well on my property, I’ll be honest: I had no idea just how much work and planning it would take. I learned the hard way that picking the wrong spot or underestimating the tools and support you need can turn a simple project into a dangerous one.
I found step-by-step guidance in one of the free bonuses that I received when I purchased A Navy SEAL’s Bug-In Guide. It walked me through every detail of building a backyard well safely, from selecting the right location with a shallow water table, to digging efficiently, bracing the walls, and even finishing it so the water stays clean and accessible. I also learned how to make root cellars and other essential off-grid projects, things I never would have tackled confidently on my own.
If you’ve ever wanted to take control of your homestead and make it truly self-sufficient, this guide is the shortcut that lets you do it safely, efficiently, and with confidence.
Water Treatment
Don’t assume for a minute that water from your new well is safe to drink. In fact, it may still be a bit cloudy. Filter it and purify. The easiest purification method is to boil it for at least 3 minutes.
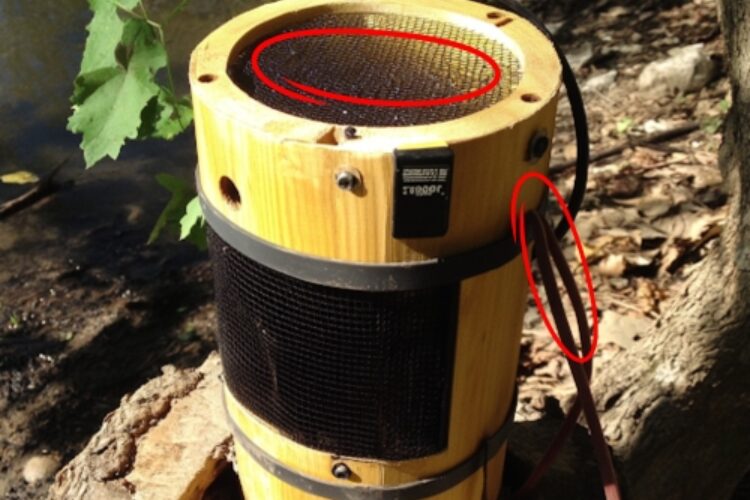
I’ve already invested in a solution designed to purify water and produce large amounts fast. This awesome DIY water generator is exactly what you need. Why? Because it can produce up to 40 gallons of pure water per day, straight from the air.
It’s affordable, easy to set up, and the results are instant. Personally, I consider this the smartest investment I’ve ever made in the health of my family.
If you want to go the ultra-cautious route, look at what the Amish community has been doing for over 200 years – thriving without relying on public utilities that, as you’ve seen, are pumping poison into our homes.
>>How to Stockpile 272 pounds of long-lasting food with just $5
The Amish Solution
I found out about a water filter used in Amish households from The Amish Ways Book by Eddie Swartzentruber. It’s a non-electric, automatic water filter that’s incredibly effective and doesn’t need any power to work.
According to Eddie – a former Amish himself – this filter (click the photo below) removes dangerous chemicals, bacteria, parasites, and other toxins like the ones we’ve already talked about.
Just imagine having clean water every single day, just like the Amish, without ever turning on the faucet. You collect the water yourself – and purify it yourself. Simple as that.
Your Water Well Lifecycle
Your hand dug water well could be good for up to 5 years or more. Just remember. Don’t go too deep. After 10 feet things get dicey and in sandy soil even more dangerous. This can be done and cultures around the world have done it. You just want it to be a positive experience with a good benefit as opposed to an injury or worse.
You may also like: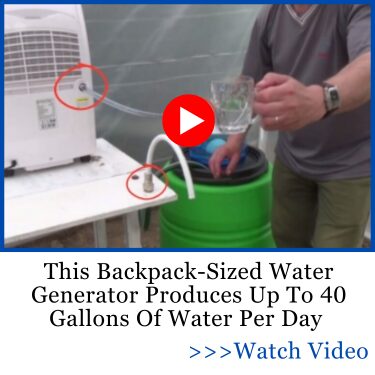
Pioneer Skills That Are Slowly Dying (But Shouldn’t)
Pioneer Recipes That Saved Me And Every Homesteader Should Learn (Video)
Soil Testing Methods Used By Pioneers That Still Work Today
What The Pioneers Did To Survive Harsh Winters
1800s Pioneer Items You Should Still Have At Home


