For thousands of years, Native American tribes lived closely with the land, while growing their food in some of the toughest environments in North America. They didn’t have any of the modern tools we have today. Instead, they learned to work with the natural landscape, using smart techniques that captured rain, stored moisture, and let their gardens water themselves.
And their time-tested methods still work perfectly today, even during dry spells.
If you want to cut down on watering time, save water, and grow healthier plants, this Native American practice could change the way you care for your backyard forever.
So, What Is the Olla Irrigation Method?
Olla is one of the most ancient yet simplest ways to water your plants. No, it doesn’t involve any fancy equipment or technical knowledge. All you need is an unglazed clay pot with a narrow neck and a round body. You can even use the ones you already have at home; no need to purchase new ones.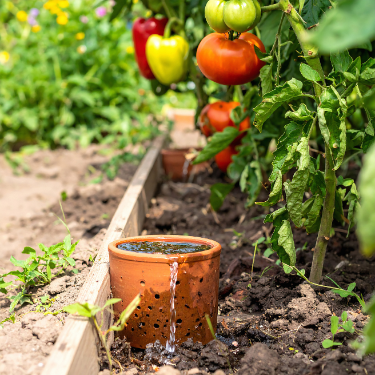
Next, you simply fill this pot with water and bury it in the soil right next to your plants. And that’s it, your job is done. No hassle of forgetting to water your plants, no wasting of water, in short, no stress about overwatering or underwatering your plants.
But how does this clay pot water your plants? Well, there’s some interesting science behind that.
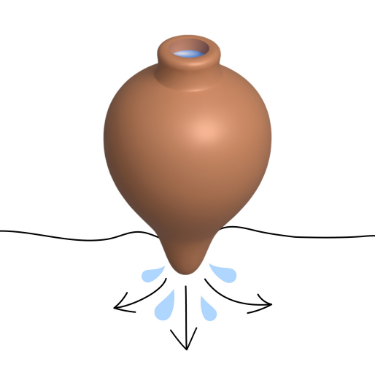
The real magic happens underground. So, as the pot used is unglazed, it is naturally porous. When buried, water through these tiny pores seeps out into the surrounding soil where it is dry. Keep in mind, your plants don’t absorb the water relentlessly. Instead, their roots take only the amount they actually need.
This self-irrigation method has been adopted by many over the centuries, including the Amish. This is just one example of the incredible off-grid techniques the Amish use to thrive without modern conveniences. But there’s so much more to learn. The Amish Ways book is packed with time-tested methods for food preservation, DIY projects, and practical homesteading knowledge that can help you live self-sufficiently.
The book covers everything from building your own root cellar to crafting homemade remedies, all with clear instructions and easy-to-follow steps. You can grab your own copy today and claim 3 FREE BONUSES using my exclusive 76% discount coupon right here.
And honestly, I wish more people knew about this.
Benefits of Using Ollas
For backyard gardens, ollas offer plenty of benefits such as:
- Save Water and Time: Ollas release water slowly and only when your plants need it. That means less frequent watering for you, so it’s perfect for busy homesteaders juggling animals, chores, and everything else.
 Keep Soil Healthy: Overwatering can wash away precious topsoil and nutrients. Ollas water from below, so your soil stays rich and full of the good stuff plants need.
- Reduces Water Wastage: One of the best things about ollas is that they significantly reduce water waste. How? Because the plants only absorb what their roots require, there is no extra water spilling out. Moreover, as these pots are buried deep down in the soil, there is no chance of the water evaporating either.
- Cut Down Weeds: Since water goes directly to your plants’ roots underground, the surface stays drier, which means fewer weeds popping up and stealing nutrients.
- Simple and Long-Lasting: Ollas don’t require any electricity to work and can naturally decompose. This makes them the most sustainable self-watering option, lasting for years when looked after properly.
- Better Yields With Less Effort: Healthier plants mean bigger harvests. Less time spent watering and weeding means more time for other homestead projects or relaxing with family.
 Keep Soil Healthy: Overwatering can wash away precious topsoil and nutrients. Ollas water from below, so your soil stays rich and full of the good stuff plants need.
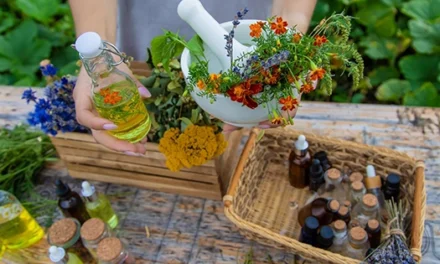
The olla method works especially well for watering medicinal plants. Herbs like yarrow, calendula, lemon balm, lavender, chamomile, or echinacea thrive with steady, slow moisture, and that is exactly what ollas provide.
I found a great kit with 4,818 high-quality, NON-GMO seeds packaged in the US, that you can turn into hundreds of powerful natural remedies without spending a dime at the pharmacy anymore. It contains one plant for every part of your body – you’ll find a painkiller, an anti-inflammatory, an anti-parasitic, and even some plants that can help people with diabetes and autoimmune disorders. It’s called the Medicinal Garden Kit and you can find it here. But you might wanna hurry, cause it’s that good it’s usually sold out.
What Do You Need?
To put ollas to work, you need to gather:
- An unglazed pot having a rounded body and a narrow neck.
- A clay lid or a flat stone to cover the pot.
- A handy shovel
- Water
Step-By-Step Guide to Installing an Olla
With all the supplies in your hand, are you ready to install the ollas? To begin, you first need to:
Step 1: Choose the Right Spot
You can’t just place an olla in your garden and expect it to water your plants. To have it work effectively, you first need to decide the right spot for it. In most ideal conditions, it should be at the centre of the garden beds, from where all the other plants can benefit. Additionally, you can also pick a spot where the roots can easily spread and absorb the moisture.
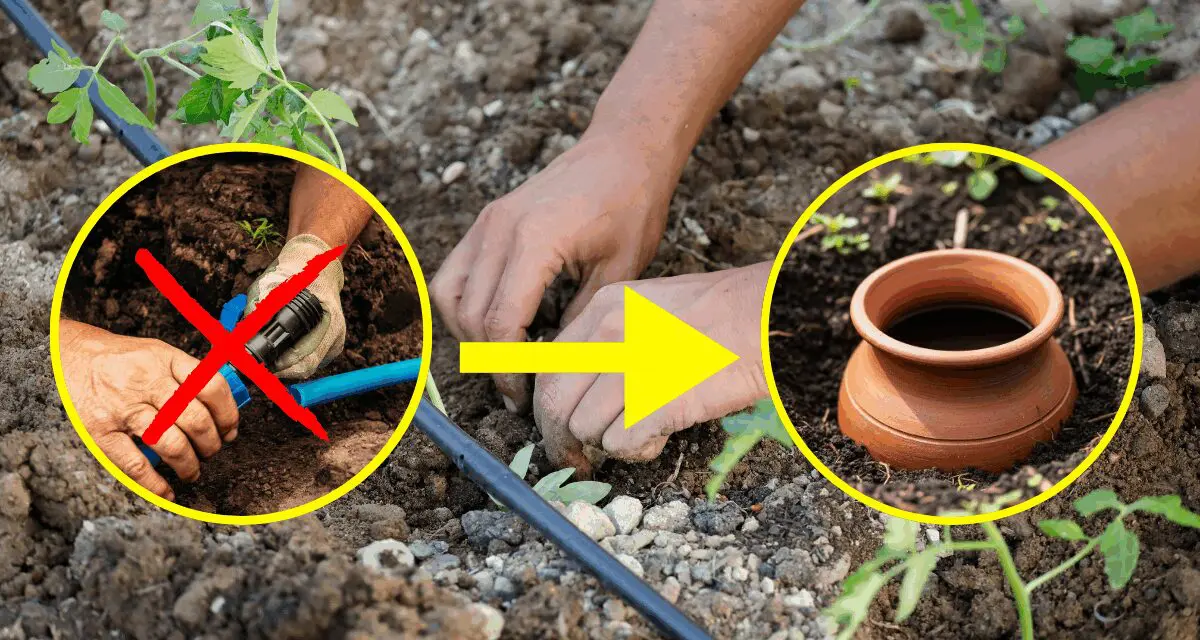
Step 2: Prepare the Ground
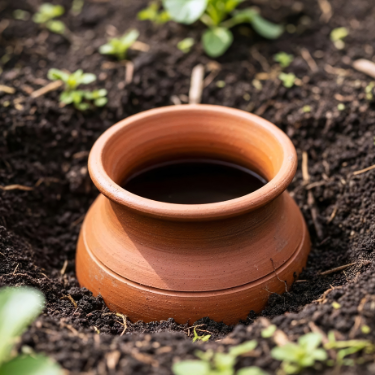
Now, using a gardening shovel, dig a hole deep enough to fit the olla. Only the opening part of the pot must remain visible on the soil level. Ensure to clear out any dirt, debris, or stones before placing the olla into the hole.
Step 3: Install the Olla
When the hole is clear, gently press down your clay pot into it. Make sure the olla is placed on a stable surface so it won’t tip over when filled with water. Now, using a hose or watering can, fill the pot with water up to the brim. Carefully cover the olla with a lid or a flat stone to keep the dirt out.
Step 4: Maintain Regular Check-ups
Once the olla irrigation system is in place, regularly inspect it to check if it is working well or not. Moreover, check the water levels every few days and refill when needed.
Tips to Maintain the Olla System
The olla system is extremely easy to maintain. However, there are still a few things to keep in mind, such as:
- Always Clean Ollas With Natural Solutions. A simple vinegar or baking soda solution can easily wipe out most of the residual build-up.
- Inspect for Clogs and Build-Ups Regularly. Run a quick rinse every week to catch any blockage of water. Look for dirt, debris, and algae buildup inside the neck and body of the olla.
- Ensure Seasonal Deep Cleaning. At the end of every season, rinse and gently scrub the ollas to prevent mold from forming inside the pots.
- Refill Regularly, but Don’t Overdo It. Too much water can make the soil soggy and destroy the purpose of the olla irrigation system.
- Monitor the Weather Changes. For instance, during hot spells, you may need to fill the ollas more often. On the other hand, during the rainy seasons, you may not have to top up frequently.
- Incorporate Companion Planting. A rule of thumb is to surround an olla with plant crops having similar water needs.
Similar Ways to Self-Water Your Backyard
Ollas are one of the oldest and simplest ways to keep your plants watered without moving a finger, but they’re not the only tried-and-true method homesteaders have used to reduce watering time and water waste. Here are a couple of similar, low-tech systems that work well alongside ollas:
- Swales and Contour Trenches: By digging shallow trenches along your land’s natural slope, you can catch and slowly soak rainwater into your garden soil, helping plants get the moisture they need without constant watering.
- Amish Rain Barrel Dripline Irrigator: Amish people use this clever system to capture rainwater in barrels and feed it through drip lines to plants’ roots. Unlike the automated sprinkler systems you find in stores, this one is 100% electricity free. It’s a simple DIY project you can build yourself, and the Amish Ways Academy even walks you through the whole process step-by-step. Once set up, your garden will stay watered and healthy, even when you’re busy or away. And the Academy isn’t just about this one project: you’ll also discover hundreds of other time-tested Amish tricks for your home and backyard, including DIY projects, long-lasting recipes, canning tips, and much much more!
- Planting Pits and Basins: Small depressions dug around plants act like little water catchers. When it rains, these basins hold moisture close to the roots, reducing the need for supplemental watering during dry spells.
- Mulching with Straw, Leaves, or Wood Chips: Covering your soil with organic mulch helps keep moisture in and soil temperatures stable. This means less frequent watering and healthier soil, all great for strong, productive plants.
- Hugelkultur Beds: This old-world technique uses decaying wood buried under garden soil to slowly release moisture and nutrients over time, helping your plants thrive with less watering.
Final Words
To sum it up, there is a lesson in every teaching of our pioneers. For instance, the installation of ollas teaches us how sustainable practices can help us save money on fancy gadgets or wasting precious resources. So, what are you waiting for? Roll your sleeves, get your supplies and put this Native American way to self-water your plants to work. Happy gardening!
You may also like:
Soil Testing Methods Used By Pioneers That Still Work Today
How To Make A Scalable Self-Sustaining Greenhouse (Video)
Drip Irrigation vs. Soaker Hose
Pioneer Skills That Are Slowly Dying (But Shouldn’t)
DIY Self-Watering Raised Garden Beds


