Straw Bales 101! So, you’ve decided to try tossing a straw bale out onto your lawn, maybe poke some seeds into it, and see what happens, right?
Great. Fantastic.
There’s a lot more to it than that.
Many 101 articles like to shrug off how, exactly, to start a straw bale garden. In this one, we’ll be dealing with a single bale and the assumption that you’re growing garlic (an easy-to-grow and fantastic starter plant for straw bale gardening). If you want to challenge yourself with something a little more chaotic (like watermelons, for instance), we have plenty of articles on that, too.
How Much Room Do I Need?
A square bale of straw is approximately 2 feet by 1 foot long. If you allow for 1 yard of space all the way around (area), you’ll have plenty of room to both work and grow. Some bales are a little larger than others. Ultimately, don’t pile your straw bales together. Give them room to breathe and you’ll be in great shape.
Finding Good Straw Bales
You’ve got your garlic, but what about your straw? Find a good, local farmer who bales straw and ask to see their soil test. This will give you a leg up on knowing what’s already in your straw. Garlic likes cooler weather, so you should be in the best season to find a straw (fall). Find a bale with a relatively low acidic quality and loader up.
Ideally, your bale is very tightly bound. If your twine slips off the end of the bale when you lift it, find a different bale.
Preparing and Planting
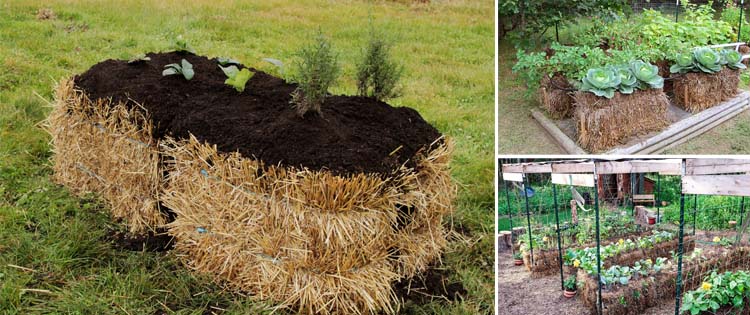
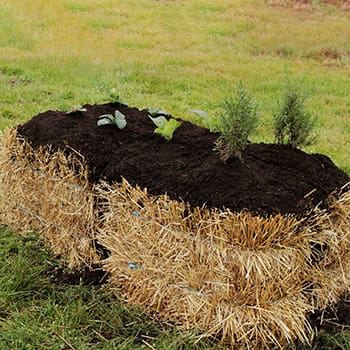
Once you get started, straw bales are easy to maintain and an ideal project for gardening beginners. Take your bale home and place a few layers of cardboard on the ground where you’ll want your bale. Set it up so the twine is on the side (in other words, the long, thin side should be facing toward the sky). Soak it down with your water hose for the next several days, adding blood, fish, or bone meal to the top every other day. In doing this, you’re adding fertilizer to the bale while you’re helping it break down. Have a day where it pours rain? Great. That’s fantastic. Go out and water it when the rain stops. You’ll be surprised how good your bale is at not soaking the rain down to the bottom.
Eventually, the bale will start to warm. We recommend having the bale away from potential fire hazards, including your house, as straw may combust during this process. It is extremely unlikely (I’ve never had a bale of straw go up) but, better safe than sorry.
Related: Straw Bale Gardening
After about two weeks of adding fertilizer and watering, you should be ready to plant. Gently scoop out a section of your bale 4-5″ deep. Add a handful of potting soil (or aged cow manure) to the bottom of the hole and tuck your garlic away. Replace the straw atop the hole but be careful not to tap it down too much. You’ll end up with a compacted bulb if you press down too hard and the plant may not get enough oxygen, causing rot.
Yes, it’s happened to me a few times. It happens to everyone. Don’t be surprised if you lose one or two plants your first year.
Most straw bales can handle 10-12 garlic plants at once. This will yield you (ideally) 8-10 finished bulbs come the later part of summer. If you begin to grow in September, your garlic should be ready toward the middle of July. However, you should take a look at the packaging your garlic seeds (or cloves) came in. This will give you a better idea of your proper local timeframe via the map on the back and the ideal planting time. Without knowing where you are, unfortunately, I can’t tell you for sure what your timeframe is.
Caring for the Bale

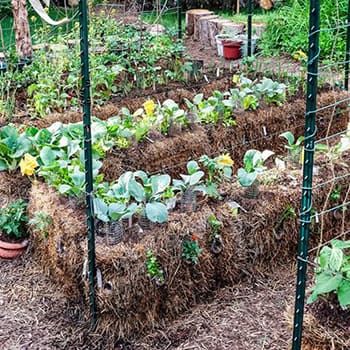
Ah, now you’re in for it. You’ll be caring for this bale for quite some time. You should see garlic shoots pop up within the first month-ish if you aren’t frosting/snowing over. If conditions are very cold, they may wait for a little longer than that. That means you should wait a little longer to harvest, too, in most common species.
Fertilize with a liquid fertilizer every week or every other week, depending on how your crop is growing. If you do have shoots, watch them for signals of what is going on in your bale. If they begin to yellow and go limp, slow down on your watering. If they seem stiff and pale green, wrap a blanket around the bale to help keep the heat in (this may be required for very cold winters) and add a little extra water.
Related: 13 Gardening Myths
The perfect garlic shoots should stand comfortably on their own, be a hardy leafy/grassy green, and smell faintly of garlic. If you are using a hard neck variety (it should say on your packaging), trim shoots if they begin to curl. These shoots are wonderful at spicing up stir-fries, stews, and the such over cold winter mornings and into chilly spring evenings. Softneck varieties should not curl; if they do, add a little extra calcium to the top of the bale and soak it down in. Liquid calcium is also acceptable if available but go easy on it. Liquid calcium scorches easily.
If your bale begins to fall apart, don’t worry unless the root of the garlic is exposed. However, this is a possibility. After all, winter storms seem to be getting worse these days. If you’re going to have a very windy day or your bale is simply failing, wrap the exposed area with plastic wrap (the stuff you get in the grocery store) for a few days to try to reform the bale.
In perfect situations, your bale will be a productive member of society! Keep watering, keep feeding, and you’ll have gorgeous garlic in no time!
After the Growing Season
Though used straw bales are often not the prettiest sight in the world, they are incredibly useful. We recommend using your used straw bale for two growing seasons before you throw it out; most will last that long and then some.
When it’s time to say goodbye, go ahead and let the bale dry out. Try to do this in the heat of summer, when there is a better chance that you won’t end up with too many showers. If it is going to rain and you are trying to dry your bale out, place a tarp over it. Do not leave the tarp on for more than a few days.
Eventually, your straw bale will be dry enough to toss in the trash or to take to your compost heap. Remove the twine and allow the straw to fully break down if you are composting it; aware that you are adding a lot of hot nutrients to your pile at once so give it some time before you feed on that pile again.
Remember, also, that wet straw bales are incredibly heavy. What once weighed 40 pounds upon pick up may be as heavy as 200-300 pounds when wet. Be careful and don’t hurt yourself if you need to pick up a heavy straw. Have a friend to help you or break the bale into smaller pieces.
You may also like:
How To Organize Your Garden For Maximum Harvest
New Invention 12X More Efficient Than Solar Panels (Video)
Best Crops For Your Survival Garden
This Is Why You Should Have Charcoal Around Your Property


This is freaking fantastic!!!! Thank you sooooooooooo much for such great detail and step by step. Someone else here recently posted a “how to garden with straw bales” article and it was deplorable (no detail, tons of loose ends left hanging) so I am particularly grateful for you picking up the slack and actually teaching us the HOW TO. Very much appreciated.
I had never heard of this! I live in a very dry climate and struggle with my garden. I will try to use this system for almost everything that I’d like to grow. Thank you so much for writing this article and for putting it on the web.
Happy (no) digging!!