Today we’re proud to present another DIY project from a fellow Doing the Stuff Networker. Jamie Burke is a master at repurposing trash and junk. His latest project shared on our DTSN Facebook Group not only saves money, but would be very useful both now (free is always good) and after a SHTF event.
Here’s Jamie’s down and dirty tutorial…
Firebricks and Wood Stove Logs Tutorial
This process only requires: Two buckets, a drill (or stabbing weapon), piece of wood (or bottom of another bucket), kinda a custom drill bit, water. + your TRASH!
Out of all of the physical spam you receive in the mail, leaves you rake, dead foliage, paper towel rolls, paper plates, napkins, beer boxes, egg cartons, etc., etc., etc., (any biomass material you can think of) – why not turn it into useable logs for your furnace, campfire, or cooking? Just don’t use the plastic coated things.
I’ve seen ‘devices’ you can buy that makes ‘newspaper logs’, but they never seem efficient, require you to pre-shred, take way too much time and the logs are not very solid. This is a much better method and doesn’t really cost anything.
Step 1
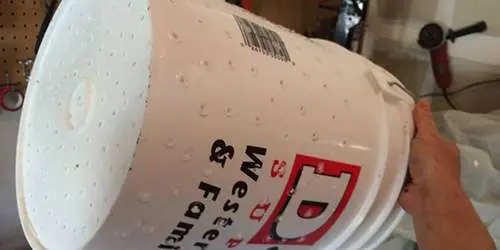
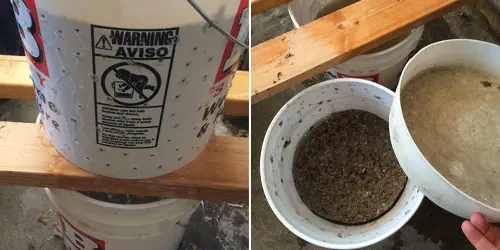
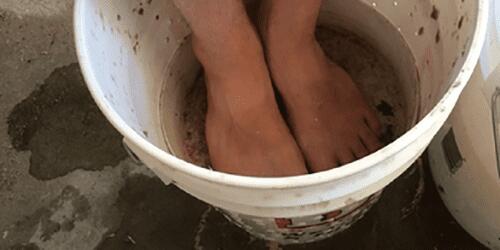
Get two 5 gal buckets. $3 each at walmart. Drill a lot of holes in it, about 2 inches down from the lips and around 3/16 size-ish. I used a soldering iron. You can use a screw driver and stab holes all in there. Go around all the bucket and on the bottom. [Todd’s note: Buckets can be had for free at bakery’s and construction sites]
Step 2
Place the holy bucket inside the other normal bucket. Start putting your papers, leaves, bio material in it. Add your water and fill’r up. Doesn’t really matter if you have too much water. You can leave these buckets of water setup by the mailbox, then just walk by and toss stuff in.

Step 3
You need a custom drill bit, which I have. A good thing to do is find an old table saw blade and weld it to s shaft of steel. This is “the hardest” part of this setup. Drill away and in seconds you will have a nice pulpy wet mess.

Step 4
Next, pull out the holy bucket and let it drain. I put the draining bucket on top of the other bucket to save the water – you can re-use the same water many times.
Step 5
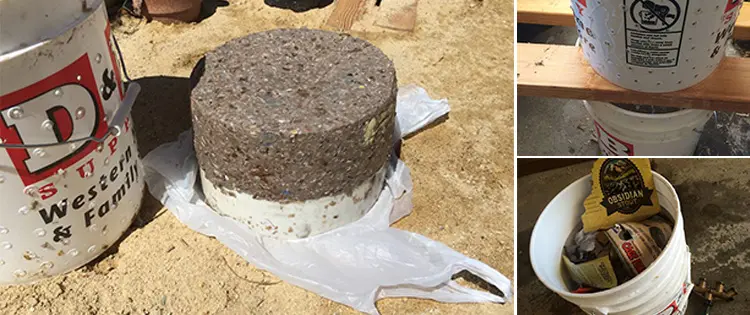
You should have a press that goes far down into the bucket to press out the remaining water. I found a bucket that someone cut the bottom off.. well perfect. But you will probably want to place a bucket down on some wood, trace around the base and cut out that piece of wood to use as a press.
Step 6
Set your press inside the bucket over the pulp. Then I set the re-used water bucket inside of that bucket (because water is heavy). That will work over time. I also sat on it.. put my anvil on it.. and stood in it. It’s pretty quick. whatever heavy you have for the top.
Step 7
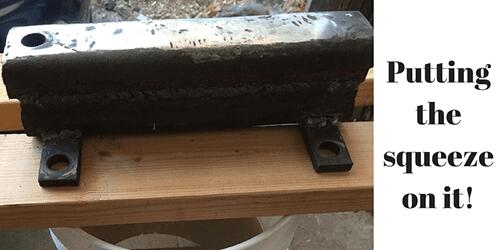
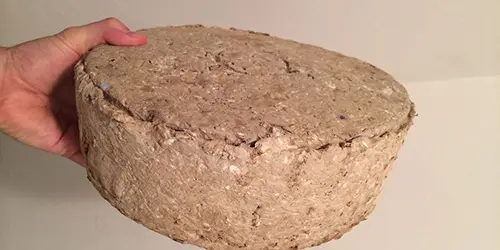
Now once most the water is pressed out – take it out to a sunny/dry place. Turn over the bucket and tap on the top. It will take some time to dry, depending on your location. We live in the desert so this will happen fast. If you want it to dry faster, cut these logs as you would a pizza, into sections.
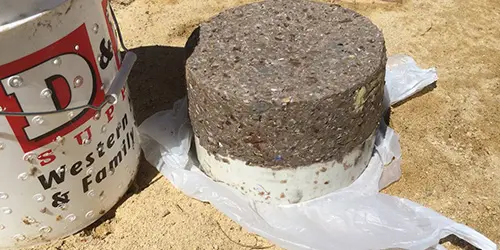
Once dry, these will burn a long time.. and cost you ~ nada.
Todd’s note: Hope you enjoyed Jamie’s tutorial. He’s a fine example of people who have traded theory for ACTION! Come check out all the other folks busy Doing the Stuff!
If you try it yourself, we’d like to know how it turns out.
Keep Doing the Stuff of self-reliance,
Todd
This article was written by Survival Sherpa and first appeared on Survival Sherpa.
You may also like:
How To Save Every Drop Of Water On Your Property
This Homemade Device Can Power Up Your Entire House 7 Days in a Row (Video)
50 Off the Grid Homesteading Tips and Tricks
Is It Legal To Harvest Rainwater In Your State?
How To Make Your Own Vertical Onion Planter


Is the left over water toxic, and if so how do you dispose of it, especially if your on septic and have a nearby well?
The article says you can keep the water and reuse it over again.
you can reuse the water until is consume by the fire-brick itself
No toxic water is flush out in nature