I’ve built 3 greenhouses. And like so many things we do, each one was progressively bigger. Along the way I learned some hard lessons. Some were fairly immediate, others showed up as time went on or when winter arrived.
Then again, I found some unique challenges in summer as well. Some of the problems were a failure to anticipate proper temperature management. Others were purely structural as high winds took their toll. Here’s my story and some of the mistakes I made and lessons learned.
The First Greenhouse
My first greenhouse was 2 feet by 5 foot and 6 feet tall at the peak. It was thick aluminium tubes for a framework and a thick, reinforced plastic as a surround. The door had a zipper down the middle. I was kind of like an outdoor closet for plants.
It took about 30 minutes to put together and I put separate shelves that I bought on either side. It was basically plastic around a couple of shelves, but it worked fine in summer, and I was able to store and start and grow a nice variety of plants.
The problem showed up when the weather cooled later in the year. Because it was such a small space, whenever I unzipped the door, any warm air trapped inside immediately escaped. I also failed to sufficiently pile soil or mulch around the base, and the gap between the bottom of the plastic and the ground allowed a constant draft to enter.
It was inexpensive and an easy build and I piled some mulch and soil at the bottom. It helped but there was just nothing I could do about letting all that cold air in any time I went inside. That took me to the next season and Greenhouse 2.
The Second Greenhouse
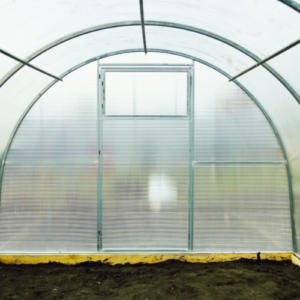
My second greenhouse was solid plastic sheets. It was another quick and easy build, and it was 6 foot by 6 foot. It also had gaps at the base, and I was quick to surround it with soil and sand. The only thing I neglected was the gap at the bottom of the door. I should have attached a thin piece of rubber as a gasket at the bottom of the door to prevent autumn drafts. I didn’t until I was standing in it and felt the draft from the door on a cold September day.
Generally, I was pleased with this step up. It had vents in the ceiling that allowed for good air circulation during the high heat of midsummer, and I was able to put shelves both on the sides and in the back. It was nice to be able to walk into the greenhouse but I should have reserved the back for a bench so I could do some potting. I eventually did.
Overall, I had some good success with the second greenhouse. Until…
One night while I was lying in bed, I could hear the rain hitting against my bedroom window like bb’s from a bb-gun. The wind was blowing, and I could see the branches of the tree outside my window dancing in the wind. The next morning, I looked out the window and the greenhouse was gone. It was lying upside down in my neighbor’s yard busted flat. I walked over there and tossed the pieces over the fence into my yard. There was no way to salvage it. I should have staked it down or done something to attach it to the ground.
After watching my second greenhouse get torn apart by the wind, I knew I needed a better approach. One that wouldn’t leave me picking up the pieces in my neighbor’s yard. My next one had to be different – stronger, smarter, built to withstand whatever nature threw at it. That’s when I started looking into how the Amish build their greenhouses.
They’ve perfected a method that doesn’t rely on fancy materials or complicated designs, yet their structures stand strong through harsh winters and fierce storms. So I started wondering, what do they know that most people don’t? Intrigued and eager to build my own unbreakable greenhouse, I started digging deeper into their techniques, and that’s when I found this book that unveils the secrets behind their time-tested approach (and not only). If I had known then what I know now after reading the book, I might have saved myself a lot of frustration. Anyway, reading it made me realize how I should build my third greenhouse.
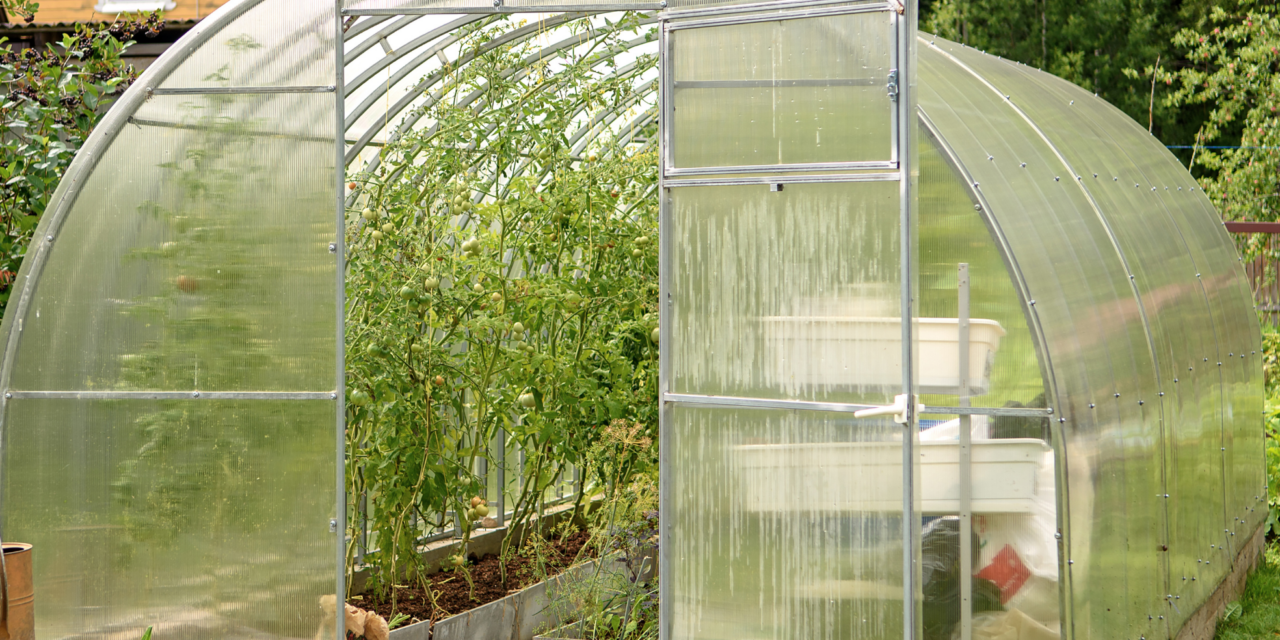
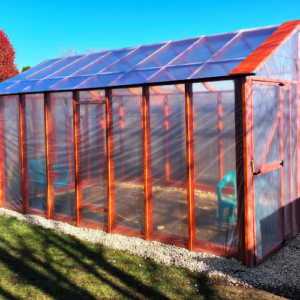
The Third Greenhouse

This time I decided to roll up my sleeves. I wanted a greenhouse, so I decided to build one with a lumber frame and support posts set in concrete.
Polycarbonate panels would cover the frame, secured with screws and rubber washers. The first step was cementing 4x4s into the ground to mark the 10×16-foot perimeter.
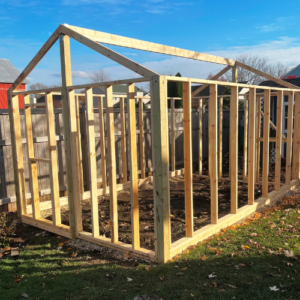
I secured 4x4s around the base to support the walls.
Next, I built the walls on the ground, then lifted them into place and fastened them to the base with large bolts, nuts, and plenty of 4-inch wood screws. I wanted it strong enough to handle the wind.
After that, I trimmed the corner 4x4s flush with the top of the walls and attached the end rafters and ridge pole.
At this point, I started sealing and staining the wood.
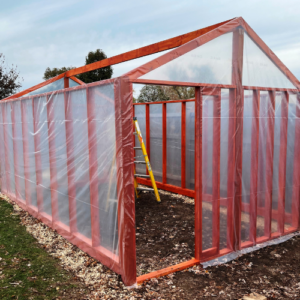
Then I wrapped the walls with 12 mil plastic, stapling it to the frame. I had some doubts about the staples but made sure they were secure, and they’ve held up just fine. I originally wanted polycarbonate panels all around, but my budget was already maxed out. So, I took a chance with the plastic.
Next, I finished installing and staining the rafters. To keep out drafts, I laid a layer of stone around the base where the plastic overlapped.
For the roof, I installed polycarbonate panels with a bead of silicone on the rafters, screws with rubber washers, and clear greenhouse tape on the seams.
I also built and installed the door.
Then, I installed a window on the back.
The greenhouse was basically done and I eventually put gravel down on the floor and more around the outside base of the greenhouse and added a rain barrel to collect rain from the roof.
Related: Avoid These 7 Common Greenhouse Gardening Mistakes
After finishing the greenhouse, I realized there was still one important piece missing – reliable water for my plants. The rain barrel I added was a good start, but I wanted something more efficient, something that could collect and purify the rainwater automatically.
I remembered I had a book that covered all kinds of different projects you could do around your household, so I quickly browsed through it. Surely enough, it had detailed instructions on how to build the kind of rainwater collection and purification system I wanted. It showed me how to make the most out of rainwater, filtering and pressurizing it so it’s ready whenever I need it. Reading through it, I realized just how much it could take my greenhouse to the next level of self-sufficiency.
So, I built it, and it made a huge difference. My water system was no longer a worry, and my plants thrived even more. If you’d like to know how I did it, you can also check it out here.
And Now for the Mistakes
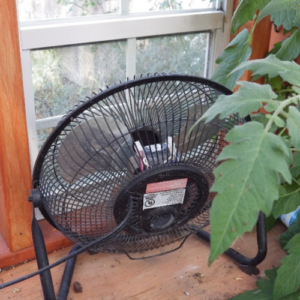
The number one mistake was assuming I could depend on the window and the door to provide sufficient ventilation. I installed a digital thermometer inside and the reading would hit 110 degrees F. in summer even with the door and window open.
I installed two solar powered fans on either end of the greenhouse towards the top and a fan by the window and that solved the problem for now.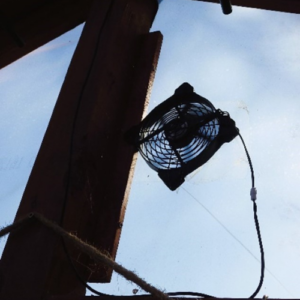
I’m planning to really take things to the next level this year, and I’m really excited about it. While searching for a way to fix my temperature problems, I remembered I had a book that introduced a brilliant idea – using the earth itself to regulate the temperature. It explained how digging into the ground to create a partially underground greenhouse could keep things cool in the summer and warm in the winter, using nature’s own insulation.
The guide had detailed instructions on how to design and build it, and I can’t wait to get started. It feels like the perfect solution to take my growing to the next level. And the best part? I didn’t have to pay a dime for it. I received it as a free bonus with another purchase. If you’re intrigued by what I’m talking about, I noticed that the offer is still available today. Don’t miss out – check it out and grab your free book here while you still can.
What I’m also going to do this summer is create a way to open one of the polycarbonate panels in the roof so hot air can escape.
Related: DIY Mini Greenhouse For Year-Round Vegetables
I also discovered that even though 12 mil plastic is thick and strong, it’s not indestructible. A tool fell against a wall and ripped a hole. Fortunately, I had a roll of 6-inch wide 20 mil clear tape and was able to make a quick repair. This summer I might replace the plastic with polycarbonate panels or simply overlay the plastic sheeting with polycarbonate panels along the walls and side.
I’m also going to add larger stones to the floor. I used pea gravel, and it tends to just disappear into the dirt in the floor and slip and slide around. River Rocks, which are a little bigger, will be another one of the improvements this summer.
Another mistake was assuming I could open the door for ventilation and that worked, until I found a rabbit chewing on the plants on the lower shelves. I had to improvise a varmint gate so I could keep the door open and the rodents out.
I’m going into my second season with this greenhouse and in spite of some setbacks I’m quite pleased with it. It’s 160 square feet of greenhouse and I have plants hanging from the ceiling in baskets and rows of large shelves.
I use the rain barrel for watering and am looking forward to my improvements this summer. I’ve learned from my mistakes. We’ll see what happens next.
You may also like:
10 Household Items You Can Use as Mini-Greenhouses
Even If You Have a Water Stockpile, You Need to Learn This (Video)
Solar Panel Mistakes That Could Kill You
Gardening Tips Learned from Native Americans


Awesome full of creativity