Are you looking for a more efficient way to keep your homestead warm without draining your wallet? Geothermal heating 101 explains how this sustainable system can reduce heating costs by tapping into the Earth’s natural heat. It might be exactly what you need to achieve efficient and affordable warmth.
The best part? It saves you money and helps reduce your carbon footprint, a bonus for your budget and the planet.
So, how does geothermal heating work, and why should you consider it? In this guide, we’ll dive into the ins and outs of this innovative heating solution. We’ll explore its long-term benefits and explain why it’s one of the smartest, eco-friendly investments you can make for your home.
Ready to learn more? Let’s jump right in!
Geothermal Heating 101: How Does It Work? 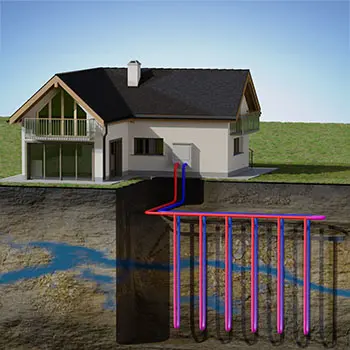
Trapping geothermal energy isn’t as simple as it sounds. There’s quite a bit of science behind it. About 6 to 10 feet underground, the Earth maintains a constant temperature of around 54°F, no matter the season.
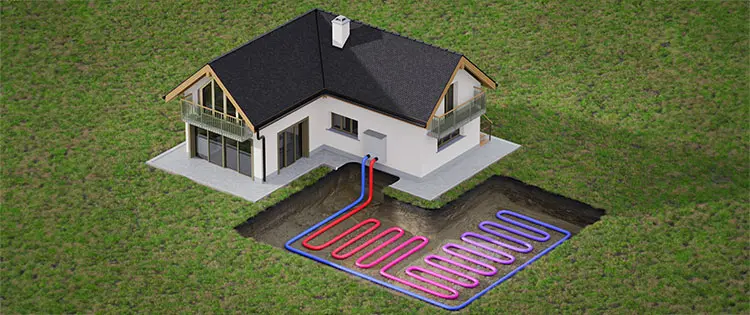
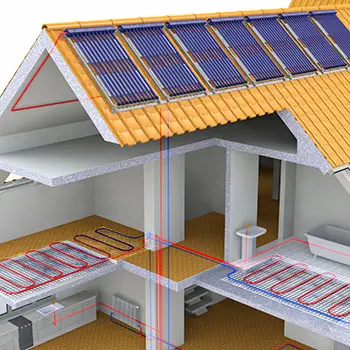
Pipes filled with water or an antifreeze solution are buried underground to capture the Earth’s natural heat. The fluid absorbs this heat and carries it back to the surface for use. A heat pump then stores and amplifies this heat, sending it into your home to keep you warm.
Geothermal Heating 101: Top Benefits
For homesteaders, geothermal heating offers countless benefits, including:
Geothermal Heating 101: Is It Sustainable?
Our major goal on the homestead is to be self-sustained, and geothermal heating helps us achieve that. However, since the process doesn’t involve burning or producing harmful emissions, it doesn’t contribute to air pollution. Instead, it taps into the Earth’s natural heat, making your home cozy without increasing the carbon footprint.
Low Maintenance
Geothermal systems are incredibly low maintenance. Once everything is installed, you only need an annual check-up to keep it running smoothly. It’s one of those systems you can set up and forget, knowing it’ll keep doing its job without much effort.
Geothermal Heating 101: Silent Operation
Unlike loud, clunky heating systems that make noise every time they kick on, geothermal systems run in near silence. There are no more clanking pipes or loud fans; they are just quiet, efficient comforts. It’s perfect for those peaceful homestead days when nature is the only sound you want to hear.
Tax Benefits
Installing geothermal heating also comes with some financial perks. Many states offer tax incentives for homeowners who choose geothermal systems. These incentives can help offset the initial cost, making it a more affordable option in the long run.
Geothermal Heating 101: Types You Can Use 
Geothermal heating comes in four main types. Choosing the right geothermal heating system for your homestead depends on your land and resources. Here’s an easy way to understand the options and decide which one suits you best.
If you have a lot of open land, a horizontal system might be your ideal choice. For this setup, pipes are buried in long trenches spread out across your property. Think of it like laying out a large underground blanket of pipes to collect heat from the Earth.
For smaller properties or areas with rocky or uneven terrain, a vertical system is a better option. Instead of wide trenches, this system uses deep drilled holes to place the pipes, saving space while still efficiently collecting heat.
If your homestead is near a pond or lake, consider a pond/lake system. Pipes are submerged in the water, allowing the natural temperature of the water to help heat your home. This method is perfect for properties with access to a reliable body of water.
Lastly, if you have a well with clean, steady water, an open-loop system could be a great fit. This system pumps water from the well into the geothermal system, where it absorbs heat from the ground. Afterward, the water is returned to its source, making it a practical and efficient choice.
If geothermal heating isn’t your thing, or if you’re skeptical about it, here’s a clever method the Amish still use today to heat their homes. With this cheap and ingenious technique, you can heat and cool your home, and even take a hot shower, all while the grid is down and the water’s not flowing from the tap.
Preparing to Install Geothermal Heating System
Before installing a geothermal heating system, ensure to:
Assess Local Geology
The first step is to understand your land’s geology. Geothermal systems depend on the ground’s ability to transfer heat, so knowing the soil and rock conditions is essential. This knowledge will help you determine your property’s best type of looping system.
Select an Experienced Local Contractor
Installing geothermal heating is a complex job that requires expertise. Find a reliable, experienced contractor who knows local conditions and has a track record of installing geothermal systems.
When searching for a contractor, there are a few strategies you can use to find the right one. Start by asking friends or neighbors for referrals—they may have had similar work done and can recommend someone trustworthy.
You can also check online reviews to get a better idea of the contractor’s reliability and quality of work. Finally, consider reaching out to local community groups for recommendations, as they often share valuable insights from their own experiences.
Geothermal Heating 101: Securing Necessary Permits and Approvals
Before you start the installation, check if you need any permits or approvals from your local government. Many areas require permits for geothermal systems because of the digging and ground changes involved. It’s better to sort this out early on to avoid any surprises later!
Calculate Installation Costs
Geothermal heating might require a bigger upfront investment. To get the best deal, get estimates from a few different contractors. Remember to factor in the costs of permits, equipment, and other system components.
Geothermal Heating 101: How Is Installed? 
Installing a geothermal heating system comprises the following steps:
Step 1: Drilling for Ground Loop Piping
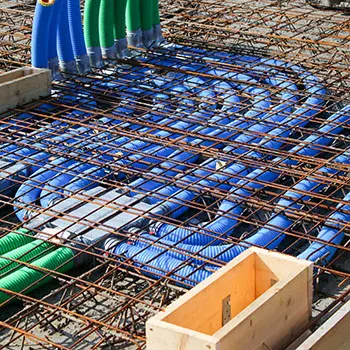
The first step is to install the ground loop pipes into the Earth. Depending on your chosen system, this involves drilling holes or digging trenches in your yard. Once the pipes are in place, they connect to form a continuous loop. This loop efficiently transfers heat.
Step 2: Channeling Ductwork
The next step is connecting your home’s heating system to the geothermal system. This is where ductwork plays a key role. The ducts carry warm air from the heat pump to various rooms. If your home already has ductwork, the process is straightforward. If not, new ducts will need to be installed.
Step 3: Heat Pump Unit Installation
Now, it’s time to bring in the heat pump. This powerhouse transfers heat between the ground loop and your home. The heat pump is usually installed in your basement, garage, or utility room, depending on what works best for your space.
Step 4: Connecting Wires
Finally, the system must be connected to your home’s electrical setup, and the controls should link to your thermostat. This step ensures you can easily manage the temperature and adjust it to your preference.
In conclusion, geothermal heating offers an efficient and eco-friendly way to keep your homestead warm throughout the year. Although the upfront cost may seem high at first, the long-term energy savings make it a worthwhile investment. If you’re considering this upgrade, remember to evaluate your land carefully, research thoroughly, and hire a professional with proven expertise.
With the right system in place, geothermal heating could be the game-changer your homestead needs to thrive—not just now, but for years to come.
Best of luck on your journey!
How to Keep the Lights On After the Grid Goes Down, Like the Amish Do (Video)
10 Medicinal Seeds You Should Start This Winter

