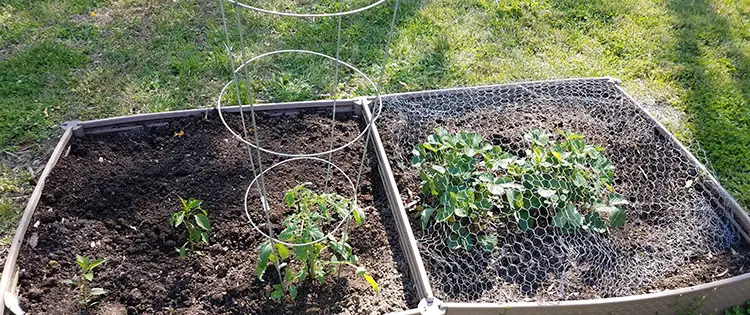
Gardening is a rewarding activity, but once you dive deeper, you’ll realize it comes with its challenges. For example, creating a DIY tomato cage can make managing your garden easier while adding a personal touch. Maintaining a beautiful garden always requires a bit of extra effort and creativity.
There are several useful tips and tricks with very helpful DIY projects that can assist someone who wishes to have a mesmerizing garden that gives lots of fruits and veggies without any mess. You can even try some indoor projects, like this DIY rat trap.
For instance, tomato plants can grow too long and have tots of branches which is not easy to maintain. And that is when tomato cages come into play. But the market-bought cages are either too loose to hold the plants or too expensive to fit into one’s budget.
Therefore, it is very beneficial to have a DIY tomato cage that is cheap and can fulfill your plant’s specific requirements. But before we make a tomato cage, let us discuss why we need a cage for our tomatoes and other important details about them.
Why Have a Tomato Cage?
Tomato plants can grow too long and have heavy bushes when fully grown. And this makes it difficult to handle. Some issues that might arise due to the improper handling of tomato plants are:
- You may not be able to find all the fruits easily. And as a result, you can leave some tomatoes unnoticed which will rot over time.
- When the plant touches the ground, insects and pests can harm the tomatoes. Some tomato-loving animals like rabbits can also harm them readily.
- Finally, your garden might not look fine. And it is always a good idea to have a clean and green garden.
Therefore, garden-organizing items like tomato cages can help you to keep your garden and produce well sorted and manageable.
DIY Tomato Cage: Materials Required
The following are the materials required to make a tomato cage:
- Remesh wire/metal wire(for making the cage all from the beginning).
- Connecting wire.
- Metal rods or t-posts.
- Wire bender.
- Snips tool (might require).
DIY Tomato Cage: Step-by-Step Instructions
Now, let us make a perfect tomato cage for you to manage your tomato plants. This cage can be made entirely from scratch or you may skip stepping 2.
Step 1:
In this step, we are going to make a mesh using metal wire.
● First, we need to cut the wire into 25 pieces of 80 inches long each.
● Then, bend each wire in the zig-zag shape(each angle of roughly 45degrees) with the help of a wire bender.
After bending the wire, the length will be reduced to around 60 inches each.
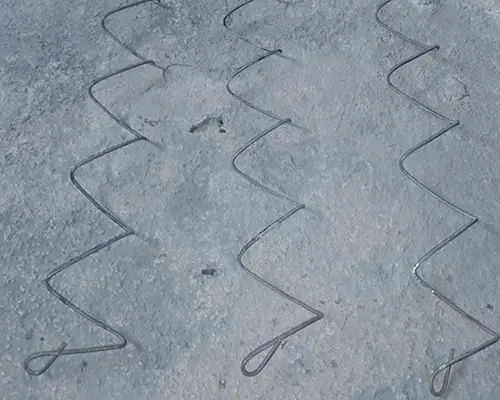
If you do not have a bending tool, you can use a hammer or plier to bend the wire.
● Lastly, connect all the reshaped wires to each other by passing them from one another. For this, you have to stack together two reshaped wires and then pass the third wire into them by rolling it.
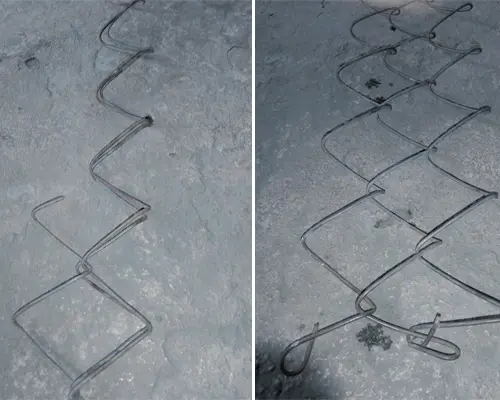
Hence, you will get your very own and maybe very first DIY remesh wire.

Step 2:
This step depends on the width of the remesh wire from the previous step. If your wire has a small width, then you need to roll it over any surface to give it the shape of a cylinder.
And if your wire has a large width, you do not need to roll it. This is because the wire is already too heavy and due to its large width it can not be bent easily. Therefore, this kind of wire requires more t-post or supporting pillars.
Step 3:
This is the final step towards building your tomato cage.
● Now, you need to prepare your garden bed and plant the tomato plant.
● Then, insert some iron rods or t-posts around the plant. Make sure that they are at least 5-6 inches deep into the ground.
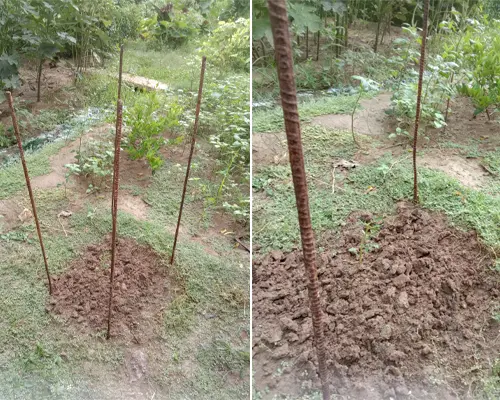
After that, you have to place the cage around the rods.
● Finally, connect the cage and the rods with the help of connecting wires.
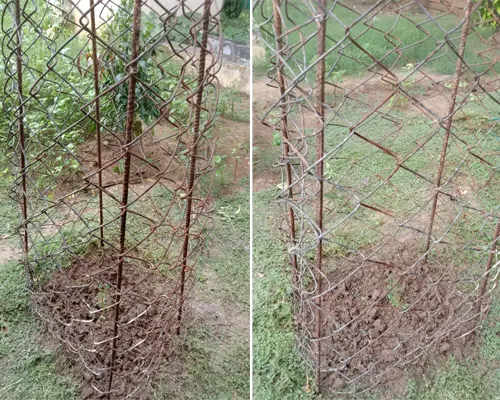
This way you have finished building your tomato cage. But if you want to try a more simple, easy, and cheap tomato cage, follow the steps below:
First, insert four iron rods or wooden sticks around the tomato plant making a shape of a square. After that knot one end of jute or any other rope on one rod. And roll it all around the four pillars, making several knots at different lengths.
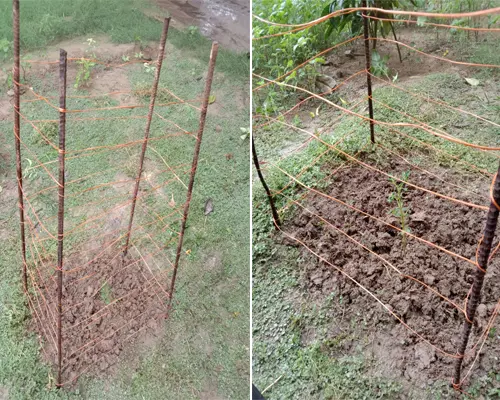
Thus, a more effortless and quick tomato cage is ready. But this kind of cage can not work for very long as compared to the iron cage. This is because it is not easy to handle it. Although, for a beginner gardener, this cage is perfect to start with.
How To Store Your DIY Tomato Cage
The tomato cage is finally finished. But a question related to the storage of this cage must have popped into your mind. The storage of cages depends on the type of wire that you are using.
If you are using the smaller-width wire or if you have made your cage using the store-bought remesh wire, then you need to open its connections with the rods(inserted in the ground around the plant) and unfold it. Even if you are unable to unfold the mesh, you can stack them into one another and store them.
Also, if you are not opening the joints that were made to create the cylinder, then you might face some issues while storing them.
Although, if you have enough space in your home or garden, you can keep them as they are. Otherwise, if you have used a large-width wire, you can open its connections and the cages can be very easily stacked on each other.
This is because such meshes are not easy to bend and they can not bend at all while building our cage. This way, you can store your tomato cages when they are not in use.
Finally, I hope that you would be able to make your DIY tomato cage without much trouble.
The Only Food That Grows Almost Faster Than You Can Eat It (Video)

