
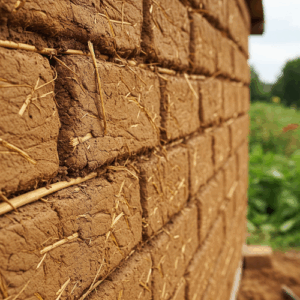
Cob building material is a mix of clay, sand, and straw, forming a sculptable mortar that dries rock-hard.
Unlike concrete, it requires no permits, no mixers, and no special tools. Cob literally bends to your needs.
With it, you can knock out functional homestead upgrades in hours instead of weeks.
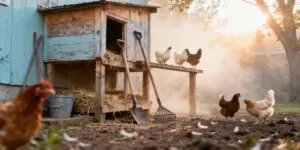
Last fall, I fixed a collapsing chicken coop wall using clay from my driveway and leftover straw. Total cost? Zero dollars.
Three weeks later, the patch outlasted the original wood.
If you’ve got a shovel and a weekend, you’ve got everything you need.
We’ve lined up some exciting, doable cob projects, so keep reading and skip the guesswork.
Why Cob is Perfect for Homestead DIY Projects
Cob’s greatest strength is its off-grid practicality. You don’t need to haul materials from a store.
Grab soil from your property, mix it with sand and straw, and start building. I’ve helped neighbors construct cob sheds using 90% on-site materials, slashing costs to under $20 for an 8×10-foot structure.
Unlike concrete, cob requires no heavy machinery or curing additives; a tarp and your boots work fine for mixing. Its thermal mass absorbs heat during the day and releases it slowly, which is why my cob pizza oven stays hot enough to bake bread for six hours after the fire dies.
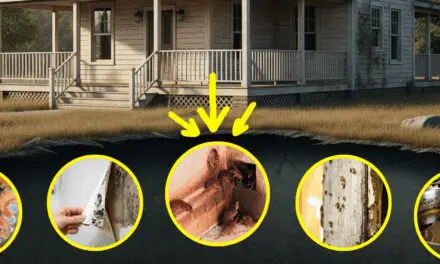
Cob also weathers harsh conditions. After a decade, the garden wall I built still deflects heavy rains, thanks to its 3:1 sand-to-clay ratio, a mix that prevents cracking. Beginners can reshape mistakes easily: just wet the surface and remold. No need for permits or specialized skills. If termites chew through your barn’s wooden beams, cob repairs take minutes. If you’re prioritizing affordability and resilience, cob is a logical first choice.
Building With Cob: Popular Cob Projects for Homesteaders
If you’re looking to add some sustainable, hands-on projects to your homestead, cob is an excellent material to work with. Here are a few popular ideas to get you started.
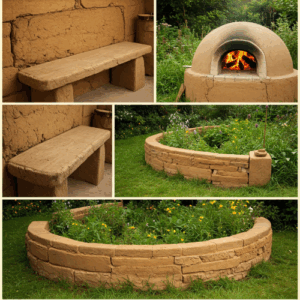
🪑 Cob Bench
A cob bench is a perfect gateway project to natural building. To start, mix equal parts clay-rich soil, sand, and straw by stomping on a tarp until the blend holds its shape when coiled. I built mine in a weekend. Just shape a 4-foot-long base, taper the edges for comfort, and let it cure for 18 days (humidity matters, so add two extra days if you’re in a damp climate).
If you want to add hidden storage, hollow out the seat and seal it with a cob lid. One of my clients pressed broken pottery shards into hers, turning a simple bench into functional garden art.
🍕 Outdoor Cob Oven
If you’ve been thinking about building an outdoor oven, cob is a great option. Cob ovens outperform store-bought models because they radiate heat evenly. To make one, start by layering a 6-inch base of cob over a sand mold, then add insulation with straw-clay slip. Pro tip: Adding a 2-inch-thick cob door will trap heat, perfect for slow-cooked stews.
That said, if you’re curious about a cooking method that doesn’t use any heat source at all – no fire, no fuel, not even a puff of smoke – there’s a really clever DIY solution I tried last year. It can help you prepare your meals with zero power consumption. It’s easier than you think, and the best part? It works in almost any setting and it could save your life in any crisis. If you want to know exactly how to build the oven that cooks without fire, fuel, smell, or smoke, check out this simple step-by-step tutorial.
🏡 Cob Garden Walls
Cob is fantastic for building garden walls too. You can easily create a 12-inch-high edging for raised beds using a 3:1 sand-to-clay mix, and top it off with lime plaster to help repel rain. For sloped land, terracing with cob locks the soil in place, creating a natural and sturdy solution.
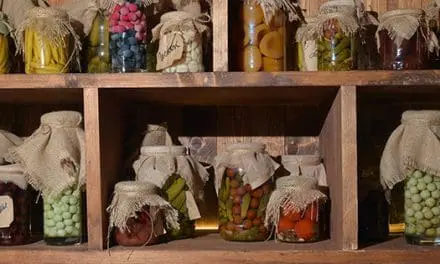
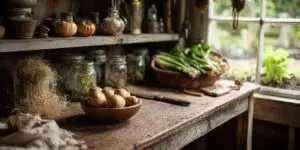
🥫Cob Amish Fridge
This underground cob fridge is a homesteader’s secret weapon. Tucked near the compost pile, it keeps root veggies crisp and jars cool, even in the middle of summer. One of mine held up through a July heatwave without a single soft potato. And it doesn’t even need the slightest bit of electricity, so it’s perfect to have of hand in case of a prolonged power outage. If you want to learn how to build one (or try your hand at other low-tech, self-reliant projects the Amish swear by), you’ll find step-by-step guidance right here.
Creative Cob Additions for Your Garden
If you’re looking for ways to bring both beauty and functionality to your garden, cob can be a game-changer. These creative additions are simple to make and will help you craft a unique, sustainable space that supports plants, pollinators, and your own needs.
🐝A water source for pollinators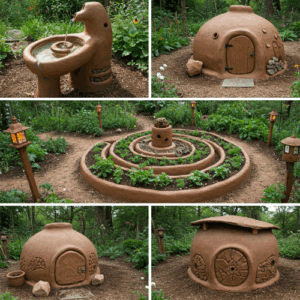
Carve a shallow cob bowl about the size of a dinner plate, let it cure for a week, then fill it with pebbles and rainwater. To prevent overflow, poke a pencil-sized hole near the rim. Cob’s porous nature helps keep the water from stagnating.
🌿A spiraled herb garden
Shape a 3-foot-wide cob spiral that rises to about 18 inches at the center. Plant drought-tolerant herbs like rosemary near the top and moisture-loving ones like mint near the base. For a clever touch, press wine bottles sideways into the spiral to act as built-in irrigation channels.
🏮Cob pathway lanterns
Mold cob around a recycled glass jar, leaving the top open, and embed a small solar-powered LED light inside. Let it dry for five days. For a rustic finish, roll the wet cob in crushed oyster shells or charcoal dust before it sets.
🐞A bug-friendly cob planter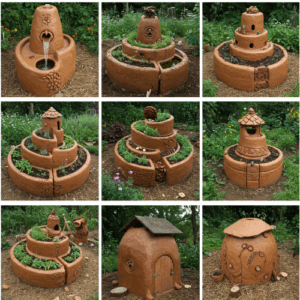
Sculpt a tall, hollow cob planter with a few finger-sized holes around the base. These openings give beneficial insects like ladybugs and lacewings a place to hide while your plants thrive on top. Fill the center with soil and tuck in pollinator favorites like calendula, lavender or borage.
Some of the seeds I used came from a Medicinal Garden Kit I got a while back, put together by Nicole Apelian. It’s packed with useful plants like Calendula, Lavender, Feverfew, Yarrow and more. They not only attract pollinators, but also help keep pests at bay and double as powerful home remedies. I like tucking them into spots where they can quietly pull double duty – pretty, practical, and potent.
🧱 A cob garden safe
Build a small cob “safe” disguised as a garden rock or stump. Hollow out the center while the cob is wet, just large enough to store a spare key, seed packets, or even a folded note. Once dry, add texture with bark or stone impressions and blend it into your landscape. It’s both functional and fun to reveal.
🗑️A cob compost cover
Create a thick cob lid to fit over your compost bin or pile. It helps retain heat and moisture, keeps pests out and even deters rain from turning your compost soggy. Press a loop of twine into the top for an easy handle.
Ingenious Cob Projects You Haven’t Considered
Cob isn’t just for functional projects—it’s also a fantastic material for creating unique garden features and art.

Whether you’re building a fire pit or sculpting garden creatures, these cob projects will add both charm and practicality to your homestead.
🔥Cob Fire Pit
Cob fire pits are showstoppers in any garden. Build a circular wall 3 feet in diameter, starting with a 6-inch gravel base to prevent heat transfer to the ground. For safety, keep the cob walls at least 8 inches thick and slope them inward slightly for added stability.
🌊 Self-Watering Cob Planters
Take advantage of cob’s natural porosity with self-watering planters. Mix in about 20% extra straw to boost water retention, then mold a 14-inch-deep box with a drainage hole at the bottom.
I grow basil and thyme in mine, and they only need watering twice a week, even in 90°F heat. For added texture, press fern fronds or river stones into the wet surface. One gardener I know even replicated fossil imprints this way!
Related: DIY Self-Watering Raised Garden Beds
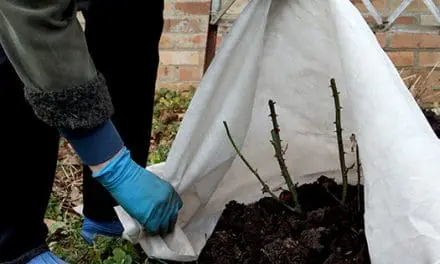
📦Underground Cob Storage Box
Bury a cob storage box near your compost pile to keep root veggies fresh for months. Line the interior with beeswax-coated cloth for extra protection, and it’ll act like a natural cellar.
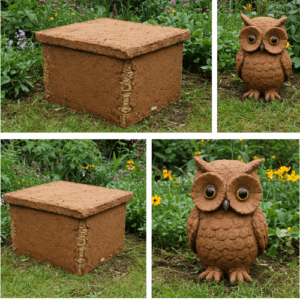
🗿 Cob Garden Art
For a fun and creative project, sculpt a 3-foot-tall cob owl or turtle. It’s easier than you might think—just use a wire armature for the wings or shells, then layer the cob over it to create texture and detail.
Functional Cob Structures for Homesteads
A cob tool shed cuts costs and blends into your landscape. Build walls 8 inches thick using a 2:1 sand-to-clay ratio, then cap them with a living roof of sedum or sod—it’ll last decades if you angle the roof for runoff.
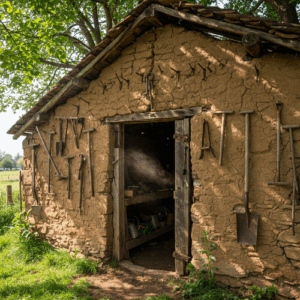
For insulation, mix extra straw into the cob, and embed reclaimed timber lintels above doorways. Need a rocket stove that burns twigs as efficiently as propane?
Stack firebricks into a J-shaped combustion chamber, wrap it in a 4-inch cob shell, and add a metal chimney pipe. My prototype uses 60% less wood than an open fire and boils a gallon of water in eight minutes.
For food preservation, cob solar dehydrators work like magic. Build a 3-foot-wide cob box with a glass-paneled south face and adjustable vents on top. Line the interior with wire mesh racks, and add a cob tray at the base to hold water jars for humidity control.
Related: Why You SHOULD Leave Your Food Out in the Sun
Essential Cob-Making Tips for Beginners
Avoid cracks by mastering the “snake coil” test: Roll a 1-inch-thick rope of cob and bend it into a circle. If it splits, add water or straw; if it slumps, mix in sand.
Aim for a 50% sand ratio, which keeps structures intact even during thermal shocks. For small repairs, like fixing a chicken coop, I keep a bucket of pre-mixed cob with 2 parts sand, 1 part clay, and a handful of straw.
Weatherproofing is non-negotiable. Lime plaster (3 parts sand to 1 part lime) extends a cob wall’s lifespan by 15+ years—my garden shed’s plaster has repelled Midwest thunderstorms since 2018.
For a natural finish, rub linseed oil into cured cob twice a year; it deepens the color and seals pores.
Start small. My first cob planter took 14 days to cure and cracked because I rushed drying in direct sun. Now, I build test batches—a 12×12-inch slab—to gauge local humidity’s impact. Practice with a bench or herb spiral first.
Start Building!
DIY projects with cob are easy to make!
Grab a shovel today, steal an hour between chores, and mix your first batch with 60% sand, 30% clay, and 10% straw.
Test it with the snake coil method.
If it holds, build something.
You may also like:
15+ One-Hour Projects You Need to Get Done By Summer
70 Ingenious Projects You Need To Add To Your Backyard (Video)
Pioneer Skills That Are Slowly Dying (But Shouldn’t)
Homesteading Items You Should Get From The Thrift Store
Automatic Chicken Feeder That Needs No Electricity: How Do You Make It?


