Most folks don’t realize it, but some of the stickiest, most reliable glues don’t come from a store-bought bottle. They come from right outside your house. Long before synthetic adhesives lined the hardware store shelves, people were making their own glue using tree sap, roots, and even common weeds. And you know what? A lot of those old recipes still work just as well today, without any the chemicals found in commercial formulas.
If you’ve got access to a backyard and a pot to boil water in, you’ve already got what it takes to make your own natural glue. Let’s find out how it’s done.
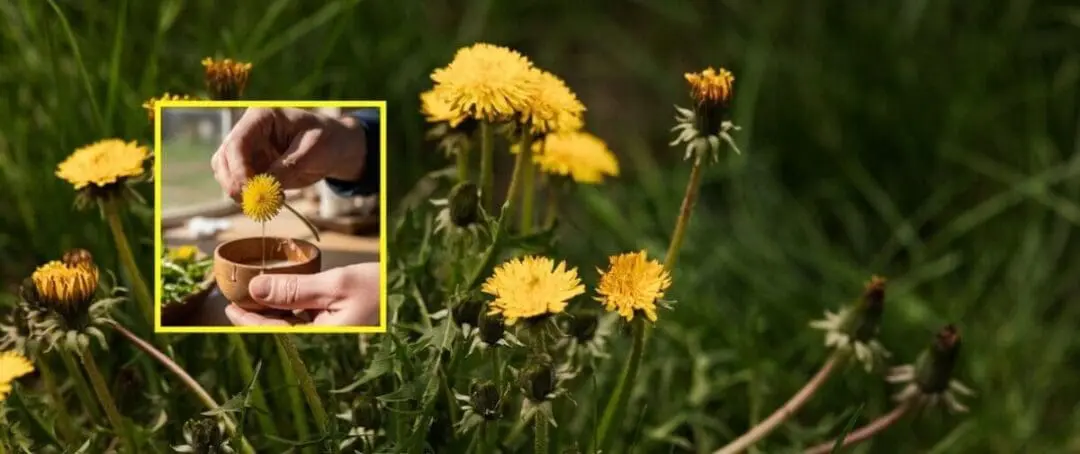
How to Make Natural Glue from Common Plantain
Common plantain (Plantago major) is one of the most useful backyard weeds you can find, and it’s not just for skin salves and bug bites. Its leaves contain a natural mucilage that becomes sticky when simmered, making it a surprisingly effective glue for light-duty tasks like paper crafts or temporary homesteadfixes.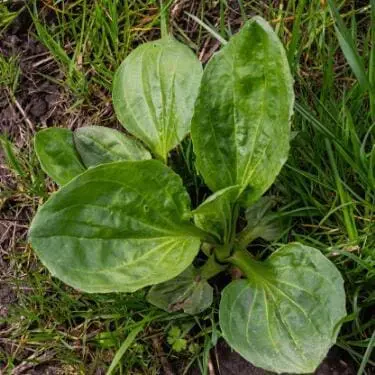
What You’ll Need
A handful of fresh plantain leaves (larger ones work best)
Small saucepan
Water (just enough to cover the leaves)
Spoon or mortar and pestle
Fine mesh strainer or cheesecloth
Jar or small container for storage
Instructions
To make glue from plantain, harvest a handful of fresh leaves (the bigger, the better). Rinse them off, chop them up, and simmer them in a small pot with just enough water to cover. Let it cook low and slow until the liquid thickens and turns slightly sticky. You can mash the leaves with a spoon or use a mortar and pestle to help release more of the mucilage—the gooey, glue-like substance inside.
Once the mixture has cooled a bit, strain it through a cloth or mesh. What remains is your natural glue. It’s best used fresh and stored in the fridge if needed, but like many homemade glues, it’s quick enough to whip up as needed.
Other Powerful Uses for Plantain
If you’ve got common plantain growing nearby, don’t stop at making glue. This little backyard weed has been a go-to remedy for generations, and not just for homestead hacks. Here are just some of them:
🦟Black Drawing Salve – A thick herbal paste that helps pull out boils, splinters, and even embedded tick heads. Just apply and let it do the dirty work.
🌡️Herbal Fever Compress – Simmered plantain makes a natural cooling cloth that helps reduce fevers and calm inflamed skin—no pills needed.
🩹Anti-Itch Plantain “Band-Aid” – Crush a fresh leaf and apply it directly to mosquito bites, bee stings, or poison ivy for fast, soothing relief.
You’ll find all three step-by-step recipes, and 200+ other forgotten ones, tucked inside this guide.
Natural Glue from Milkweed
Milkweed (Asclepias spp.) is best known for feeding monarch butterflies, but it also happens to be one of nature’s stickiest plants. The white latex sap inside milkweed stems and leaves dries into a strong, rubbery adhesive that can be used as a natural glue or even a makeshift sealant in survival situations.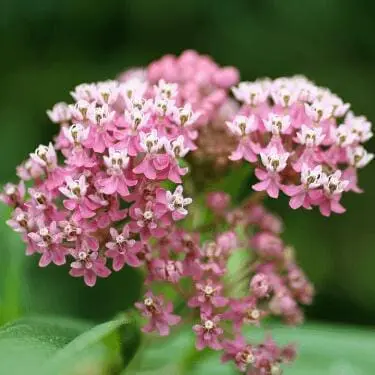
What You’ll Need
Fresh milkweed stems or leaves
Knife or scissors
Collection container (optional)
Stick or brush for application
Instructions
Locate and Identify Milkweed
Look for tall, leafy stalks with thick, milky sap inside. The leaves are broad and oval-shaped, and the plant often grows in clusters in sunny places. You might be surprised to find it growing along your fences or in your backyard corners.
Cut or snap a stem or large leaf and allow the white sap (latex) to drip out. It’s sticky and will dry quickly once exposed to air, so be ready to use it soon after harvesting.
Use a small stick or brush to apply the sap to the surfaces you want to bond. As it dries, it will become tacky and form a surprisingly strong bond, especially on porous materials like fabric, wood, or bark.
After you applied it, give the sap time to dry fully. This can take anywhere from a few minutes to an hour depending on how thick it was applied. The final texture will be somewhat rubbery, but firm.
Natural Glue from Okra Pods
Okra (Abelmoschus esculentus) isn’t just for gumbo. The pods contain a slimy mucilage that works well as a gentle, natural glue, especially for paper and light crafting materials. If you already grow okra in your garden, you’ve got an easy, nontoxic glue source right at your fingertips!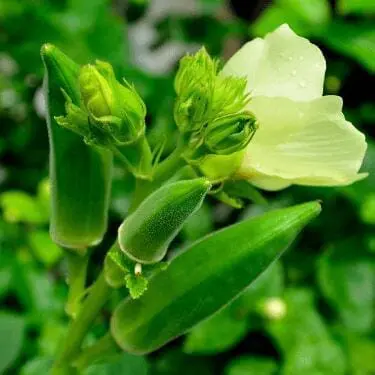
What You’ll Need
3–4 okra pods (fresh is best)
Knife and small saucepan
Water
Spoon or potato masher
Fine strainer or cheesecloth
Instructions
Wash the okra pods and cut them into thin slices. The inner goo is what you’re after. It becomes sticky when heated.
Place the slices in a saucepan and add just enough water to cover. Simmer on low heat for 15–20 minutes, stirring occasionally. As the pods cook, they’ll release a thick, glue-like mucilage.
Mash the softened pods with a spoon to extract as much mucilage as possible. Strain the mixture through a fine mesh or cheesecloth.
Let the glue cool before using. It will be slightly runny but very sticky. Store in a sealed container in the refrigerator for up to 3–5 days.
🌿Bonus: Natural Glues from the Wild and the Pantry
While these next two recipes don’t come straight from backyard plants, they’re timeless, easy-to-make natural glues worth having in your toolkit. Think of them as bonus options—one for tough outdoor projects and one perfect for paper and crafts, using ingredients you might already have in your homestead or can forage nearby.
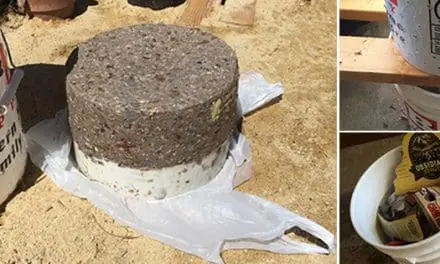
How to Make Pine Sap Glue
This is a wild foraging exercise. You just need to wander through the woods and see if you can spot any drips of pine sap coming from a pine tree.
All pines can bleed sap, especially white pines. If you want to encourage some fap flow you can strike a pine trunk with an axe or hatchet or cut an angled groove with a saw. It will take some time for any cuts you make to produce sap so keep walking through the woods.
Pine sap droplets are usually hard but typically sticky. Cut them from the tree with a knife and collect them in a metal or plastic bowl. Removing the sap won’t harm the tree, it’s just oozing from a wound.
Pine Sap Color Doesn’t Matter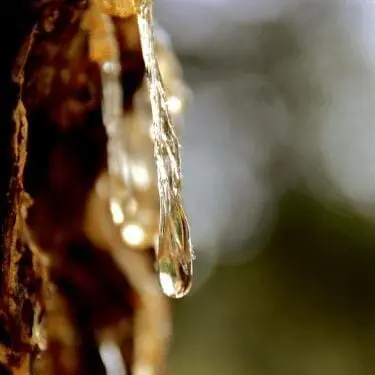
Some pine sap is clear, and some are an amber color. A lot of that has to do with the type or species of pine tree and how long the sap has been exposed to the elements. They’re all sticky and a good foundation for a natural glue. Pine sap eventually becomes amber and has survived for millions of years. It’s pretty tough stuff.
Making the Natural Glue
Before we get terribly complicated about all of this, pine resin when melted makes a great glue on its own. Ancient cultures have used it for thousands of years to bind everything from birchbark canoes to tools and shelters. And all they did was use it in its raw state.
But they learned something the hard way. Pine resin eventually crystalizes and cracks. As a result, they started to make some changes to the basic glue recipe to make it more resilient over time. Here’s some of the things they did:
- Charcoal Powder
Adding charcoal powder absorbs moisture and also retains moisture. That’s a curious characteristic but it helps something as basic as pine sap to have some integrity. The proportions are usually 1 to 10. Add the powdered charcoal to the pine sap when you’re slowly heating it in the instructions below.
- Beeswax
Okay, it doesn’t have to be beeswax, but that’s what they used thousands of years ago. Wax adds some structural integrity to the glue and gives it some flexibility. Flexibility is critical for any glued surfaces enduring any level of bending stress.
So, Let’s Make this Stuff!
You want to go low add slow on this. You’re just trying to soften things up to make a slurry. Here’s the equipment list: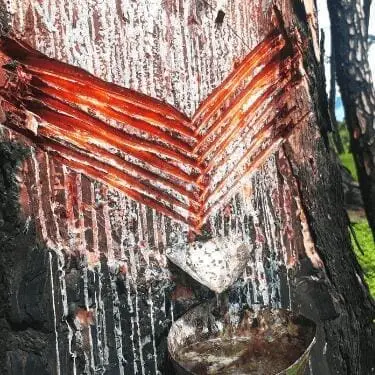
A small metal pot
A heat source like a hot pad or stove top burner
A spoon
A fine mesh screen or filter to remove impurities
Optional ingredients:
Powdered charcoal
Beeswax or shaved candle wax
Steps:
- Collect your sap from pine trees by scraping it gently into a container. Then again, you may have to carve it loose with a knife.
- Melt the resin in a pot over low heat. Go slow, it will be sticky.
- Filter out impurities using a fine mesh or cloth. A piece of metal screen works best.
- Mix in powdered charcoal to strengthen the glue. Sprinkle it in as you stir to get an even mix. You do this after filtering and mix it around until the charcoal is incorporated.
- Add beeswax (optional) to make the glue more flexible. You could also add candle wax, but beeswax is the traditional addition. Drop it into the warm sap in small chunks as stir until incorporated.
- Let it cool slightly before using. Not too cool but stiff enough so it’s workable.
If You See a Pine Tree, Do This Immediately…
Most people walk right past a pine tree without giving it a second thought. But that tree might be hiding more than just sap for glue. It could be a survival food source hiding in plain sight.
Not a lot of people know this, but inside those pinecones are edible nuts packed with fat, vitamins, and minerals. You could live off them alone for days if you had to. The only catch? They’re not that easy to extract, unless you know this little trick that makes it almost effortless. And this is just one of the many overlooked survival skills you’ll discover right here.
Natural Glue from Cattail
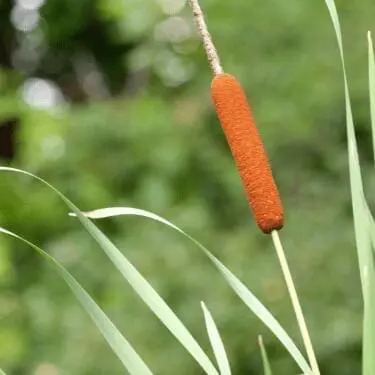
Cattails (Typha spp.) are incredibly versatile plants, often called the “supermarket of the swamp”. In addition to providing food and fiber, certain parts of the plant, especially the rootstock and inner stalks, can be boiled down into a sticky, starch-based glue perfect for paper, lightweight materials, and even natural binding agents for fire starters or insulation.
While they’re commonly foraged from marshes and ditches, cattails can also be grown in your backyard if you have an artificial pond, a rain garden, or even just a consistently wet area.
What You’ll Need
Several cattail roots (rhizomes) or inner stalks
Knife or hatchet
Saucepan and water
Spoon or masher
Fine strainer or cheesecloth
Instructions
Look for cattails growing in shallow water or damp soil. Carefully dig up the rhizomes (horizontal roots), which are usually thick and starchy. Be sure to collect from a clean, uncontaminated area.
Rinse the roots thoroughly to remove mud and grit. Chop them into small chunks to speed up cooking.

Place the chopped roots into a saucepan, add enough water to cover, and simmer for 30–45 minutes. The starchy gel will start to release as the roots soften.
Use a spoon or masher to break down the softened roots. Then strain the mixture through cheesecloth or a fine screen to separate the starchy glue from the fibers.
Let the glue cool slightly before use. Store in a sealed jar in the fridge for up to a week.
🌿 More Than Just Glue: Cattails are full of surprises. Learn how to use them to keep mosquitoes away and even make a soothing anesthetic gel from their inner sap.
Making Flour Glue
While pine sap is the most traditional source for a natural glue, there are other alternatives. Flour has often been used as a base for glue. Any flour works and all you add is some water, corn starch, salt, sugar and vinegar. Here’s the recipe:
Ingredients:
½ cup flour
⅓ cup water
1 teaspoon corn starch
1 teaspoon sugar (optional, helps with stickiness)
A few drops of vinegar (acts as a preservative)
Instructions:
- In a small saucepan, mix the flour and water until smooth.
- Heat the mixture on low, stirring constantly, until it thickens into a paste.
- Add sugar and vinegar, stir well, then remove from heat.
- Let it cool, then transfer it to a container. Store in the refrigerator for up to a week.
Glue Storage
Store your glue in a mason jar with a lid in a cool dark space. When it’s time to reuse the glue, gently heat the pin sap glue before using. The flour glue may need to have a splash of water added to restore its glue texture.
You may also like:
DIY Mosquito Repellent Candles
How to Make and Use Primitive Glue (Video)
Do Not Throw Away Your Plastic Bottles, Do This Instead
50 Uses For Aluminum Foil In Your Homestead
How to Manage Serious Wounds With Household Items


