They didn’t have coolers. They didn’t have canned beans or freeze-dried packs.
What they did have were long days in the saddle, scorching sun, and a desperate need for food that could survive weeks on the trail without spoiling.
The cowboys of the Great Western Cattle Trail were no strangers to hardship, and their food had to be just as tough as they were. From foods that could outlast a thunderstorm to jerky tough enough to chew after days on the trail, these trail-tested staples were the original off-grid survival food.
And many of them are still just as useful today—especially if you’re looking to stock a pantry that can outlast a blackout, a storm, or a supply chain collapse. If they could thrive on them, so can you.
Let’s take a look at the long-lasting foods that kept the cattle drivers going… and how you can make or store them right at home.
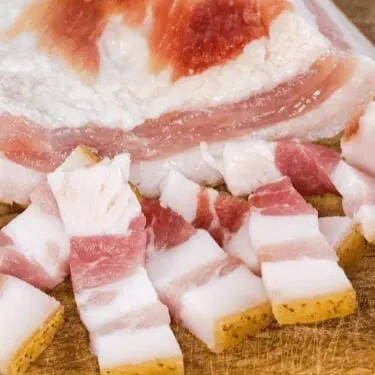
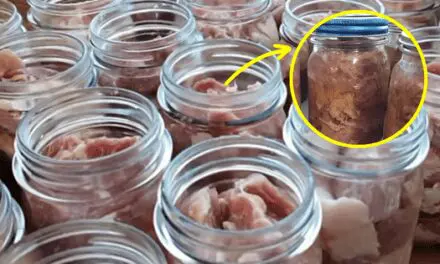
Salted Pork
Off-grid life can be unpredictable, and at times, the power outages can be unreal, lasting for days and weeks. In these situations, refrigerating pork or any meat can become impossible.
However, when you have the wisdom from your ancestors, you never have to worry about spoiling meat.
Cowboys walked trails with the meat, and it never spoiled just because they would use salt to preserve it. You can do the same too. Just rub a generous amount of salt on pork belly or shoulder and store it in the coolest corner of your house.
But what about the saltiness when cooking? Simply soak the meat in water before cooking, and the excess salt will be rinsed. Toss it into the beans, vegetables, or just fry it up, and the meat will retain its nutritional value and flavors.
Pro tip:
For longer storage, slice and pack into jars submerged in lard — confit-style preservation extends shelf life even further.
➡️How to Make Lard and Tallow Just Like the Amish
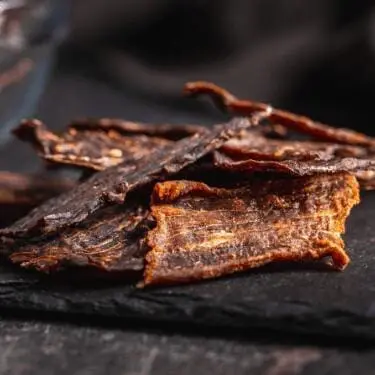
Beef Jerky
One basic staple that every pioneer cowboy would swear by is beef jerky. It is not only long-lasting, but it’s overloaded with protein and, of course, flavours. When you have ready jerky on your homestead, you never have to worry about your meal.
To prepare a batch for yourself, slice the meat into thin slices and marinate using spices such as paprika, oregano, and salt. You can also add vinegar to this marinade to preserve the jerky for a longer time. Finally, dry this meat using a low-flame smoker. Once dried, beef jerky can last for many months to come.
Modern homesteader’s twist:
Choose lean cuts like eye of round or top sirloin to avoid spoilage from excess fat. Marinate the strips in a mix of apple cider vinegar, salt, cracked pepper, smoked paprika, and garlic powder.
You can add a touch of honey or molasses for a slight sweetness. Dry your jerky using a dehydrator or low oven (160°F / 70°C) until completely dry but still pliable.
Storage trick:
Vacuum-seal small portions with oxygen absorbers. You can store them for a year or more this way.
💨🥩Want a deeper, smokier flavor the old-fashioned way?
Jerky shouldn’t taste like dried leather. If you’ve ever tried oven-drying meat and ended up with something tough, bland, or just… off—you’re not alone. Without smoke, you’re missing half the flavor and most of the shelf life.
That’s why I use this compact vertical charcoal smoker. It is a true all-in-one powerhouse. Use it as a fire pit for cold nights, flip it into two BBQ grills for a cookout feast, or slow-smoke your favorite meats to perfection. Hot smoking with charcoal or cold smoking with a pellet tube—whatever your style, it adapts effortlessly.
It’s compact enough to fit on a porch, but big enough to handle a full batch of jerky or a couple of trout at once. Built solid, easy to use, and runs entirely on charcoal—no electricity needed. And my meat turns out mouthwatering every single time. This smoker literally does it all.
👉 Check out the Realcook Vertical Smoker here
Pickled Wild Onions and Garlic
While riding the Great Western Cattle Trail, cowboys often foraged what nature offered, and wild onions and garlic were among their favorites. Not only did they add flavor to otherwise bland trail meals, but they also helped ward off illness thanks to their natural antimicrobial properties. A small jar of pickled onions or garlic tucked into a saddlebag could turn a tough cut of salted pork or beans into something far more enjoyable.
How to make it:

1.Gather small onions (pearl onions work great) or whole garlic cloves.
2. Blanch in boiling water for 1-2 minutes to soften and peel easily.
3. Pack tightly into sterilized jars.
4. In a saucepan, combine:
2 cups apple cider vinegar
1 cup water
1 tablespoon pickling salt – I personally use this one
1 tablespoon sugar (optional)
1 teaspoon mustard seeds, a few peppercorns, bay leaf, and a pinch of chili flakes.
5. Bring brine to a boil, then pour over onions and garlic.
6. Seal jars and refrigerate, or water-bath can for long-term pantry storage.
Homesteader bonus:
The longer they sit, the better they get — tasty, crunchy, and full of gut-friendly probiotics.
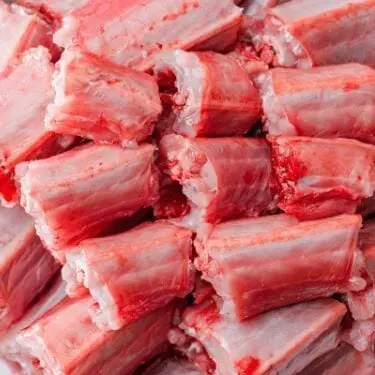
Salted and Dried Rattlesnake Meat
When food ran short, cowboys weren’t too proud to look down at the ground. Rattlesnakes may have been dangerous, but they were also a ready meal waiting to be caught — and one that could last for weeks once salted and dried. Some cowboys, especially those traveling through Texas and the Southwest took advantage of what the land offered. Rattlesnakes were abundant, high in protein, and could be preserved for later use. It may sound exotic today, but back then, it was pure practicality.
The meat is surprisingly mild, similar to a tender, lean chicken. And once properly salted and dried, it kept for weeks, sometimes even months, without refrigeration.
How to prepare rattlesnake meat for long-term storage:
1.First, always exercise caution when handling and cleaning. Remove the head safely, discard all venom glands, and carefully skin the snake.
2. Rinse the meat thoroughly and cut into small fillets or strips.
3. Brine the strips overnight in a solution of:
1 gallon water
½ cup kosher salt
1 tablespoon apple cider vinegar (helps tenderize and preserve).
4. After brining, pat dry with clean towels.
5. Generously coat the strips with coarse salt and lay them out on drying racks.
6. Dry in the sun, in a dehydrator, or in a low oven (120–140°F) until the meat is fully dried and leathery.
7. Store in sealed jars, vacuum bags, or waxed cloth in a cool, dark place.
➡️How to Use Salt and Oil for Tooth and Gum Decay
Homesteader’s tip:
If rattlesnake isn’t available (or your thing), you can use this exact same process for small game: rabbit, squirrel, or even quail.
Rehydrate dried meat in water or broth before cooking in stews, skillet meals, or with beans — exactly like cowboys would have done on the trail.
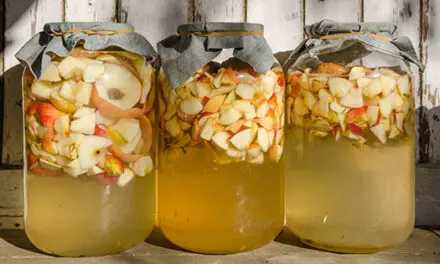
Pickled Vegetables in Whiskey Brine
Cowboys carried whiskey for a quick buzz, but also for its preservative properties.
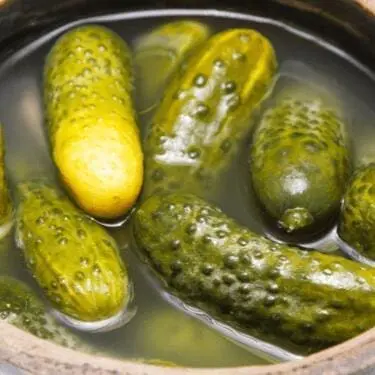
Pickling root vegetables (carrots, turnips, onions) in a whiskey-vinegar brine created long-lasting snacks that helped prevent scurvy and kept taste buds happy.
How to Make Whiskey-Brined Pickled Vegetables:
- Start with fresh, firm root vegetables — carrots, turnips, onions, even radishes
- Prepare a brine combining vinegar, water, salt, sugar, and a splash of whiskey. The whiskey adds antimicrobial properties and a warm, smoky flavor.
- Add spices like mustard seeds, coriander, peppercorns, and bay leaves for complexity.
- Pack your sliced or chopped veggies tightly into sterilized jars, pour the hot brine over, seal, and let them ferment in a cool place or refrigerate.
- After about a week, these pickles will be tangy and ready to enjoy. They can last for months when stored properly.
Trail Wisdom: Whiskey’s alcohol content helped slow spoilage, making these pickles a reliable food source even without refrigeration. Plus, the rich flavors helped break up the monotony of trail food.
Pemmican
Pemmican used to be the old-school protein bar for cowboys who wanted to boost their protein intake. Because these people often had to cover long trails, they would often choose nutrition over taste.
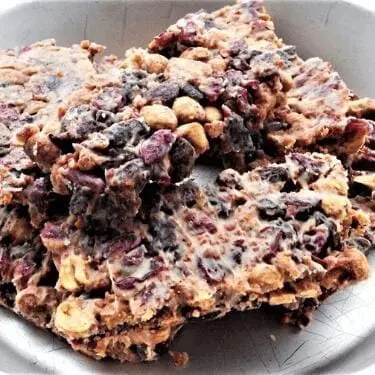
And pemmican in that case was a perfect snack to give them all the energy they needed to work hard.
Today, homesteaders still use pemmican due to its nutrient-dense, long-lasting nature. When stored properly, it can last for months without losing its nutritional value.
To make some:
- Sun-dry lean meat on a rooftop.
- Once the meat is completely dried, grind it into fine powder.
- Gradually add tallow over this powdered meat and stir until both ingredients are fully combined.
- To add some more protein, you can also consider adding dry fruits or dried berries.
- Shape this stiff dough into bars, let it cool at room temperature, and pemmican is ready to munch on.
Storage tip:
Store pemmican in airtight containers in a cool place. Properly made, it can last a few years years easily — sometimes longer.
Parched Corn and Johnnycakes
Parched corn was a cowboy and Native American trail staple, prized for its long shelf life and energy boost. Dried kernels are gently roasted in a dry pan or over a low fire until they puff and crackle.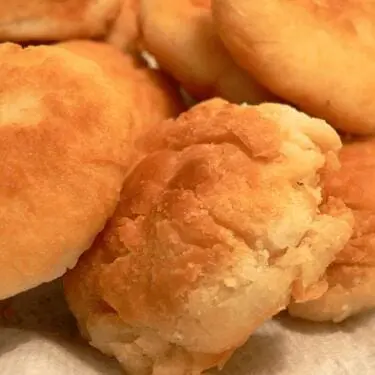
The result is a lightweight, nutty-flavored snack that stores extremely well. Cowboys would carry pouches of parched corn to nibble on during long cattle drives — no cooking needed.
Likewise, beans can also be dried and stored for a very long time. To make it more flavorful, you can also sprinkle a bit of spices like oregano or paprika over it. Or you can roast beans and corn together, add some salt, and enjoy a complete protein snack.
Johnnycakes can also be made out of dry cornmeal. These simple breads were a staple on the trail. They could be cooked fresh over a fire or baked and stored for a few days. Cornbread was hearty, filling, and used minimal ingredients.
Modern homesteader tip:
Johnnycakes can be made shelf-stable for weeks by fully baking them into hard cakes and storing them like hardtack.
You can also substitute part of the cornmeal with ground parched corn for extra crunch and longer storage.
Cooking over an open fire or wood stove calls for the kind of gear that won’t fail when it matters most. That’s why I keep my Lodge 10.25-Inch Cast Iron Skillet close by. It’s made of pure iron, seasoned naturally, and completely free of any questionable coatings. This thing’s as tough as it gets—built for both the kitchen and the campfire.
Whatever I’m cooking, it delivers perfect results every single time. And with just a bit of care, it’ll outlast anything else in my kitchen.
Smoked Wild Trout or Fish
While cattle dominated the Great Western Cattle Trail, some cowboys and settlers near rivers or streams took advantage of local fish. Trout, catfish, or perch were easy to catch — but preserving them without refrigeration was the challenge. Smoking solved that problem.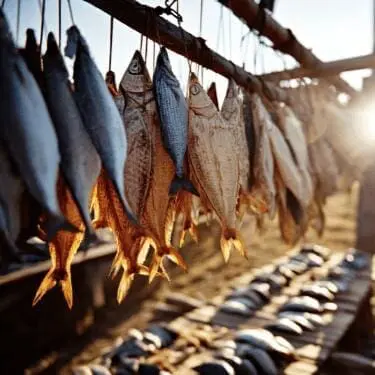
Smoking not only dried the fish but also infused it with flavor and extended its shelf life for weeks or even months, depending on storage conditions.
Traditional smoking method:
- Clean and fillet the fish, leaving the skin on to help hold moisture during smoking.
- Salt heavily or brine the fish (1 cup salt per gallon of water) for 12–24 hours to draw out moisture and kill bacteria.
- Rinse and pat dry.
- Hang or lay fish on racks in a cool, shaded area to air dry for a few hours.
- Smoke over a low fire (around 150–180°F) using hardwoods like hickory, apple, or oak. Avoid resinous woods like pine. Smoke for 6–12 hours, depending on thickness and moisture content.
Once cooled, the smoked fish could be wrapped in cloth or stored in sealed crocks. Cowboys would often carry slabs of smoked trout or catfish as trail protein that was ready to eat or could be rehydrated in soups and stews.
Modern tip:
Vacuum-sealing and storing smoked fish in a cool pantry or root cellar can extend shelf life dramatically without refrigeration.
You can also pressure-can smoked fish, which makes it shelf-stable for over a year — a great protein backup for modern off-grid living.
Try making smoked fish jerky by slicing fillets thin and smoking longer — very lightweight, perfect for bug-out bags or camping.
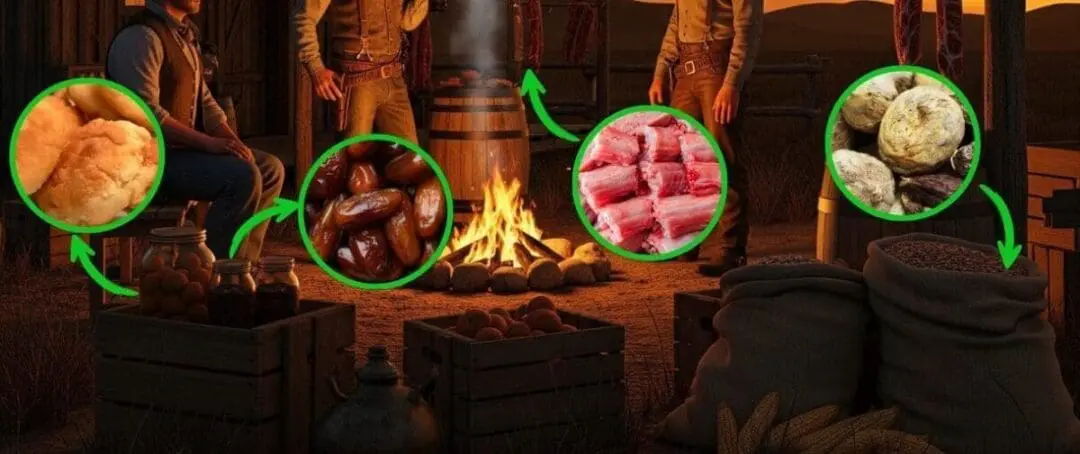
Lard Rounds
Lard rounds might not sound glamorous, but they were a vital energy source on the Great Western Cattle Trail. Fat was precious for cowboys, providing concentrated calories and flavor that helped keep them going through long days on the trail. Lard rounds are simply chunks of rendered pork fat that have been cooled and stored—easy to carry and ready to use whenever needed.
How to Make Lard Rounds: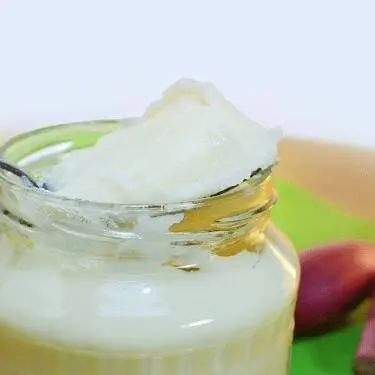
- Start by rendering pork fat slowly over low heat until it melts into liquid lard.
- Strain out any bits of meat or cracklings.
- Pour the hot liquid into shallow pans or molds.
- Let it cool and solidify into firm “rounds” or blocks.
- Wrap them in parchment paper or cheesecloth for storage.
Cowboys kept these fat rounds in their saddlebags or camp kits, melting them over a fire to cook meals or adding a spoonful to beans or coffee for extra energy.
Tips:
Store your lard rounds in airtight containers in a cool, dark place, or refrigerate for longer shelf life.
Lard is also perfect for making homemade soap or candles — great for reducing waste and using every part of the animal.
Try seasoning your lard with herbs like rosemary or sage during rendering. This not only imparts a delicious flavor to your cooking fat, but also gives you medicinal herbal benefits.
Speaking of which, make sure you stock up on both food and seeds. This way, when everyone pays for antibiotics in gold, you’ll have them growing in your own backyard. This crisis-proof seed pack contains one plant for every part of your body – you’ll find a painkiller, an anti-inflammatory, an anti-parasitic, and even some plants that can help people with diabetes and autoimmune disorders.
Vinegar-Pickled Eggs
Pickled eggs were a staple on the Great Western Cattle Trail for cowboys needing a quick, portable protein snack that could last for weeks without refrigeration. The acidity of vinegar preserved the eggs, while the pickling spices added bold flavor to keep taste buds happy on long drives.
How to Make Vinegar-Pickled Eggs:
- Hard boil fresh eggs, then peel and set aside.
- Prepare a pickling brine by simmering vinegar (usually white or apple cider), water, salt, sugar, and spices like mustard seeds, peppercorns, dill, and crushed red pepper.
- Pack peeled eggs into sterilized jars and pour the hot brine over them, ensuring eggs are fully submerged.
- Seal jars tightly and refrigerate. The eggs develop flavor over a few days but can last for several weeks if properly refrigerated.
Modern Homesteader Tips:
Use vinegar with a higher acidity (5% or more) for longer shelf-life. Experiment with flavors: add sliced jalapeños for heat, beet juice for a vibrant color, or fresh herbs for complexity.
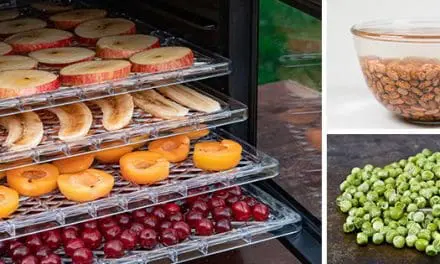
Dried fruit
Don’t have enough time to bake or make snacks while looking after your homestead? Then just dry your favourite fruits in the sun, and you have a quick yet healthy snack ready. This used to be one of the go-to and long-lasting snacks of cowboys because it doesn’t require any hard work. Just slicing apples, kiwis, apricots, or peaches and then drying them naturally.
These dried fruits can last very, very long. And because they are dried using all-natural methods, the nutrients and taste also remain the same. Want to know an even better combination? Mix them up with dried beans, corn, and nuts to make a homemade trail mix.
Fill Your Pantry The Old-Fashioned Way
Inside A Navy SEAL’s Bug-In Guide, you will discover exactly how to build a long-lasting stockpile that needs no refrigeration. It starts with a complete stockpile that you can eat from morning, lunch, and dinner for three months. Then you’ll have another one for six months and another for a full year.
You’ll see exactly where to buy these foods so they’re as affordable as possible. You’re also going to get a day-by-day and meal-by-meal rationing plan to make sure you are not only getting around 2,200 calories a day but also the vital protein, fat, and other nutrients that will keep you healthy in the long run.
Besides what I’ve mentioned so far, here are some other things you’ll find inside:
- The Under $1 Walmart Canned Goods You Absolutely Need to Add to Your Food Reserves
- A Meal in a Jar That Can Feed You for a Week
- How to Make the Ultimate Survival Food with a 25-Year Shelf Life
- The Only Seeds You Need to Stockpile for a Crisis
- What Item You Should Remove from Your Pantry Immediately
- How to Hide That You Still Have Power Left in a Blackout
- What Great Depression Foods We’ll Be Eating Again Soon
- How to Use a Car Battery to Power Up Your Radios
- What Happens if You Take Expired Medications
And so much more!
The author has printed only a limited batch of copies this time, and once they’re gone, they’re gone for good. You can access my personal discount from the button below!

Final Thoughts
Cowboys are a prime example for us homesteaders on how we can live sustainably off-grid. Using their wisdom, we can surely have our pantries filled with endless staples for many seasons. With proper storage, these foods will consistently provide nutrition as well as flavours regardless of the challenges that come your way.
Happy Homesteading!
You may also like: 
How to Make Cowboy Bread (Lasts Months in Your Pantry)
The Native American’s Food Trick That Helped Them Fight Starvation (Video)
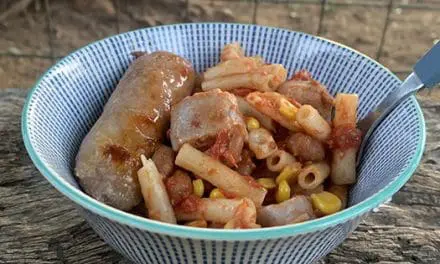
DIY Long-Lasting Cowboy Casserole
How To Make Aztec Warrior Cake That Lasts for 10+ Years
Dutch Oven Recipes Cowboys Survived On


Oh god I love pickles so much. Cannot live without them. 100 years from now people would still be using pickles since they just make food last longer and…well…tasty
You need your SEEDS to fit your ecosystem in your specific location. There is nothing like have a garden that won’t grow because the plants are not for your season . KNow your soils, weather patterns, and location as well as your cycle of weather patterns so you can predict when to expect a time of excess water and save for a predicted drought.