How on earth can I bake bread without an oven? You may wonder.
When the Covid pandemic hit the world, it was the time most of us turned to doing our own thing in the kitchen. One of my favorite food is Bread. Without my daily bread, I feel as though something is missing.
With the lockdowns it was difficult to get groceries and especially bread as bakeries had closed down. Power cuts were frequent making it almost impossible to bake in an oven.
I turned to making my own bread with ingredients always available in my pantry and in the fridge. Without the oven, I make milk bread in my rice cooker or in a non-stick pan on the stove.
This is what I use to make Soft Milk Bread with a crunchy crust on the top which is optional.
If you are like me and love that crunchiness; especially with a generous dollop of butter, grated cheese a spicy chicken curry (which I love), or home-made pineapple or strawberry jam, it is simply heavenly. I also love dipping the bread in yogurt mixed with olive oil with just a pinch of salt and a dash of pepper, sliced green chillies and red onions mixed with boiled and crumbled tuna!.
The best part is taking pride in baking your own bread that you will never again want to buy bread from your local bakery.
I will let you in on a little secret ingredient that I add for that extra soft spongy milk bread. So read on.
The Dry Ingredients
- 500 gms Flour (You can choose whole-wheat/ all-purpose or bread flour)
- 7 gms Instant yeast
- ½ tsp Salt
- ½ tsp Sugar
The Liquid Ingredients
- ½ cup Full cream or Low fat milk
- 02 Medium size eggs
- ½ Cup Olive oil
- ½ Cup luke warm water
Related: Homestead Pantry Tour
Secret Ingredient
2 Tablespoons Plain yogurt or Curd
Additional Ingredients
- A teaspoon of butter to brush the Pan or the Rice cooker pan
- A little oil to brush the top of the Milk Bread Dough to give it that lovely golden look
Optional: Egg wash
The Method
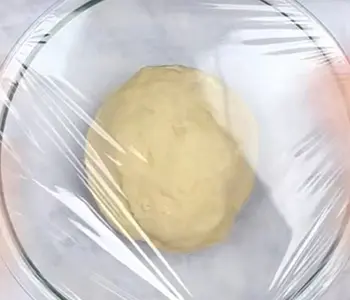 Into a bowl add the warm water with the yeast and stir until it is completely dissolved.
Next add the salt and sugar. Add the flour, eggs, milk, butter and curd. Mix this with a wooden spoon until the dough does not stick onto the spoon. Sprinkle a little flour on the countertop or board and knead the dough till it is consistent.
Next lightly brush the pan with butter or oil. Form a ball with the dough and leave it for about 10-15 minutes in a warm place covered with either a kitchen towel or cling wrap.
The dough should be soft like molding clay and should not stick onto your fingers. If it does simply sprinkle a little flour and knead.
The dough by now should have doubled in size. If you wish to, let it rest for a further 10 minutes.
Punch the dough and if it bounces back then it means that the dough has risen. With instant yeast anyway the dough rises quickly as it acts real fast. Leave it covered for a further 25 minutes.
Related: How To Wax Cheese For Long Term Storage
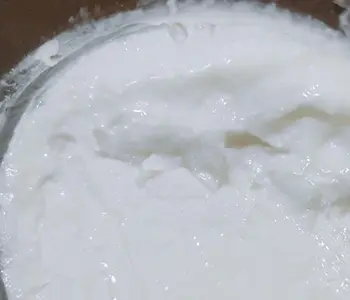 Now gently take the ball of dough with a spatula neatening the sides and place it in the Rice Cooker or in a non-stick pan if you are using a stove. Bruch some milk and egg wash on the dough to give it that golden color.
I usually keep the rice cooker on for about 5 minutes and then switch it to “Warm” and leave it overnight. The heat is sufficient to beautifully cook the Milk Bread giving me beautiful fluffy bread for breakfast.
If you are using a stove then remember to have the heat at the lowest possible or the bread could burn. It is best to first put a grill or a pan cover on the stove and then place the non-stick pan on top of it. This way the direct heat will be blocked and an even distribution of heat will help to cook the bread.
You can check it better if you have a glass top cover for the pan so you know when to take it off the stove.
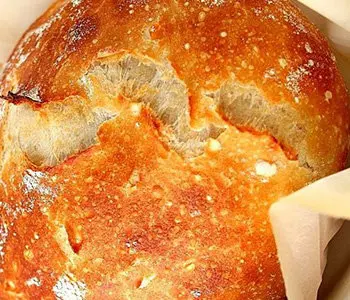
By now, there will be that lovely aroma of home baked Milk bread wafting through the house. Take it off the stove or Rice cooker and place on a rack to cool.
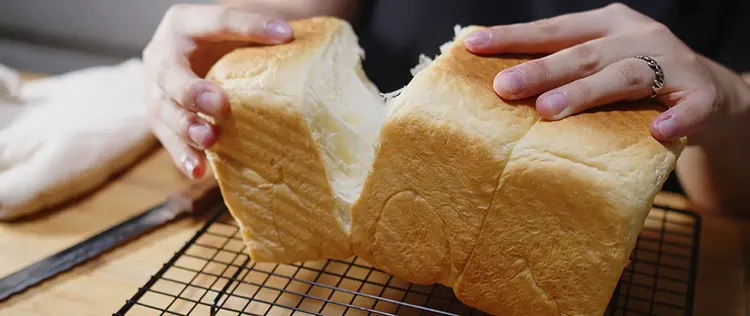
Once the bread has cooled it is now ready to eat. You can either slice it or break it and have it for breakfast or dinner with a nice thick chicken and mushroom soup.
In cool climates you can leave the bread out on a paper towel in a wicker or cane basket, but in extreme heat conditions it is better to store it in the lower part of the fridge.
Related: 5 Recipes That You Can Make If You Live Fridge-Less
Since eggs are an ingredient in the Milk Bread, due to extreme heat in some places the bread can develop mold so it’s best to refrigerate in the lowest part of the refrigerator. You can either steam it or heat it and you will have your Milk Bread as fresh as ever.
It is not difficult once you get the hang of it and you will never want store bought bread. This is great for the family to have their own Milk bread made at home without an oven. You can make this even with a wood stove but it should be made in a cast iron pan and on the coals or else it would burn. I’ve almost stopped using my regular stove completely because I have finally learned how to cook without almost anything (including bacon and vegetables – yes, you heard that right) without it, without smoke, no hassle at all. Here’s my method.

Making Milk Bread on a wood fire will be very quick due to the extreme heat.
As an alternative you could put a few coals into a cast iron pan and then put the Milk Bread dough into a smaller pan, cover it and let the Milk Bread rise and bake to perfection.
Overall, you do not need an oven to bake bread and you can easily cook it in 3 different ways that are given in this article. The ingredients are generally always available in a pantry and you do not have a high energy bill since you won’t need an oven to bake this bread.
You can see my grandbaby Blake enjoying his bread 🙂
Happy Soft Milk Breading!
You may also like:
 What to Eat When the Power Goes Out
The Lost Remedies of Our Grandparents That You Should Still Have at Home (Video)
How To Dehydrate Milk For Long Term Storage



Curious, how long do you cook it on stove top–when the bread rises? clean toothpick inserted?? wasn’t clear here. Thanks!
Hi Doc Depends on the heat generated on the stove. Usually a glass lid is easy to check when it is baked and yes a skewer used for cake or wet knife as toothpick won’t go all the way in . Around 35-45 minutes on low heat will be ok. Judy
Some people are so funny..I mean surely a tooth pick won’t go far enough to check on dough ?? Sometimes even when baking the middle can be raw…?? A skewer should do the needful and anyway you can surely see when bread rises and the smell of baked bread cannot be disguised ?? Honestly !!!!
Elina 🙂
Yonea you can convert Grams to Oz.??.google it and in a few seconds would give you the answer?? I did see the author had given some info in a reply..measurements are available online and don’t see an issue !? The world has progressed from oz to grams
Thanks Latiffa. Judy
I tried this out. Came out really soft. I made it on The Gas cooker, reduced the flame to really low, put a grill pan and then into the grill pan I put a little mesh stand and then placed the pan with the dough. Got myself a lovely soft little loaf in about 45-50 min. I guess with more attempts I will get the perfect loaf. It’s lovely to be able to make your very own bread. Nice recipe specially loved adding yoghurt. It gives a lovely flavour to the bread. Maybe I will make little buns?? with this same dough. I must try this in the Rice cooker as the author has done. My hubby was going to buy me a rice cooker with a pan that has Teflon coating .
That’s great Chrytelline . Thanks for your feedback. Means a lot.
Wow love this recipe. I used butter. Awesone
500 gms?? Why not just state 2 cups + 1 tbsp
Metric measurements are used by most people and to get the conversion it’s easy as it’s available online .
Yes Metrics can be converted online
I love this baking in a different and unique way! We need more energy efficient stuff like this. Wonderful. Such a cute little munchkin eating bread ❤️
Thanks Latiffa. Judy
Sounds great, and I’m tempted to attempt baking without an oven. We all love bread too and we should try this at home. It would save the extra money we spend buying bread from the supermarket. Nice article 😍
Hi yes oil has to be incorporated into the dough . Sorry ..I wrote this article . I’m Judy. 500 grms flour is around 17.954 oz 7 grams yeast is around 2.5 teaspoons. Hope this clarifies. Regards Judy
Thanks Judy. I really like this novel idea of making bread this way. We are just trying it out and it’s coming out beautifully. Everyone is drooling and waiting for me to take it out. We plan on having it with oxtail soup. Yummy! Keep up the good work. Thanks to the ADMIN for this page. Very informative.
Thanks v.much for the encouragement . Judy
Hi Yonea
I’m Judy . I wrote this article and Sorry it upsets you that grams instead of cups is used as measurement but thanks for highlighting this . Kind regards Judy
I don’t see a major issue with conversion ?? Grams to Oz and vice versa?? The world deals with Kilometers not miles so why not Grams ? Geez seriously !!!!
So what’s the big deal?? Ha ha
Lucky 😉
You didn’t say anything about the 1/2 cup olive oil. Is that in the mix with the water ? How much is 7 gms yeast and 500 gms for flour. Thanks
Hi yes oil has to be incorporated into the dough . Sorry ..I wrote this article . I’m Judy. 500 grms flour is around 17.954 oz 7 grams yeast is around 2.5 teaspoons. Hope this clarifies. Regards Judy
Thanks Judy. I’m about to try this out. I love to read food articles . So interesting and we learn something new daily. Cute little boy. Is he your grandson? What a cute angel.
Many thanks Benita🥰 Yes he is my Grandbaby Blake.
Agree such a cute with the home-made bread.
Wonder how some people will deal with Gordon Ramsay professional chef if they asked him to convert weight..I guess they will have to plug their ears. This is a home made receipe for goodness. It’s nice to have receipes that people put their time energy effort and then write it and share. I appreciate this page and the articles. Some may not be 100% accurate but what is today? If you know so much then write it yourself 😜Admin please approve post.
Hi 7 grams yeast is .25-2.5 teaspoons 509grms flour is 17.954 ozs approx olive oil to be incorporated into the dough to make it flexible.
I’m going to try this it looks good as an energy saving method with our energy bills going through the roof this would be so cool and will use a rice cooker.
I too Love bread but too lazy to do it..maybe will ask my daughter. She loves cooking ha ha
😂😂😂
Wow I love this article. Well written and informative. Thanks to the page admin/owner for this. Useful in this day and age. Good job
Thanks.
I’m going to try this it looks good as an energy saving method with our energy bills going through the roof this would be so cool and will use a rice cooker.
Hi Yonea
I’m Judy . I wrote this article and Sorry it upsets you that grams instead of cups is used as measurement but thanks for highlighting this . Kind regards Judy
I love this baking in a different and unique way! We need more energy efficient stuff like this. Wonderful. Such a cute little munchkin eating bread ❤️
Yes this is a novel way to make bread for the family.Ita also nice because the author has made it at home with Love. Articles like this are so nice to read not stereotype professional chefs .
Aww thanks Claudia . Judy
Thanks to the Admin for articles like this. I’m new to this page. Great stuff…who knew we can use our rice cooker to make bread. That’s awesome.
Yay..I made this on a wood fire stove with my aiater. So tasty ..got a wee bit roasted at the bottom probably too much fire..lol..but overall it was super tasty and the hubby and kids loved it. I guess practice makes perfect and adding yoghurt made it light fluffy and tasty. We need more recipes like this please.
I tried this out. Came out really soft. I made it on The Gas cooker, reduced the flame to really low, put a grill pan and then into the grill pan I put a little mesh stand and then placed the pan with the dough. Got myself a lovely soft little loaf in about 45-50 min. I guess with more attempts I will get the perfect loaf. It’s lovely to be able to make your very own bread. Nice recipe specially loved adding yoghurt. It gives a lovely flavour to the bread. Maybe I will make little buns?? with this same dough. I must try this in the Rice cooker as the author has done. My hubby was going to buy me a rice cooker with a pan that has Teflon coating .
Informative article. Like to try this out.
I love crispy crunchy bread soft on the inside. Nice recipe . Covid threw us all into try to be self sufficient. It’s a good thing to learn how to make your own bread.
Must try this out.
Petty people commenting about the Grams and Oz. Move on countries that still use OZ and LBS he he Google Search..ever heard of it LOLZ homemade bread how lovely
A home maker shares a recipe to make bread and people want Mathematical calculations. How Stupid can you get. Some people are just such a cussard lot on pages
Oh wow nice to make bread without the traditional way of baking. Who knew.
Adding yoghurt made it super fluffy
Having home bakers receipes is such a wonderful thing. Really liked this receipe. Novelty is adding yoghurt. Wonderful.
From now on this is the way I will make my bread