Homemade stoves are an economical solution for preppers living off the grid. The good thing with these heating and cooking fixtures is that they are easy to craft from locally available materials in your backyard.
In the aftermath of a disaster (either natural or human), you will require an efficient solution to cook, keep your shelter warm, or even boil water. Fortunately, a clay, a brick, or even a stone rocket stove will guarantee effective results within a few hours of construction.
Rocket stoves aka low-mass stoves are creative designed cooking solutions that also offer efficient heat in a shelter.
These stoves are not only economical but creative, easy to forge, and downright cozy. Besides, the working principle in all these stoves is the same. They use twigs, wood scraps, and branches to achieve maximum burn time.
Clay Rocket Stove
Can you imagine cooking and keeping your shelter warm without LPG gas or kerosene in a grid-down situation?
Well, making a mud rocket stove is one solution that guarantees warm shelter, hot dinner, and boiled water. Note that clay rocket stoves can work the same as the Native American Dakota fire hole.
Follow these steps to build an efficient mud rocket stove for under $10.
This DIY stove took me less than an hour and a half to forge.
Gather all the necessary tools and utilities.
You will need: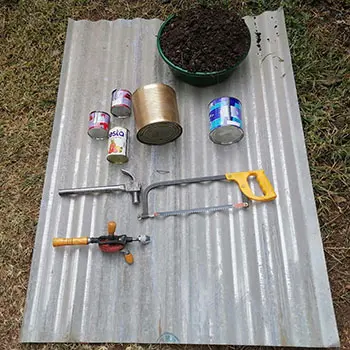
- Black cotton soil. Natural clay mud is the best material for pottery because it is malleable.
- Four tins: One big tin for the feeding chamber, two smaller cans for the airflow chambers, and one large can for the combustion chamber.
- Hacksaw
- Tin snips or a hand drill
- Tin can opener
- Claw hammer
- Bucket
Prepare the ground until you get bare dirt.
Make sure that the ground you choose is strategic. The best spot should not be close to trees because you do not want to interfere with the roots.
The best spot should be in an open but slightly raised space. I decided to put it on an iron sheet because tree roots were not deep enough.
Mix black cotton soil with water.
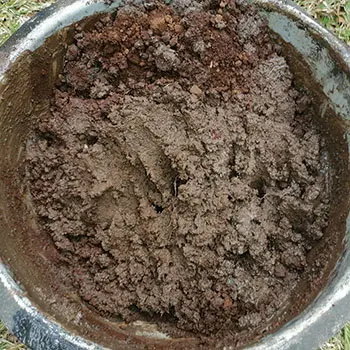
Now this step can be overwhelming and exhausting because mixing the clay with water requires a bit of skill. Use feet if the clay is hard to mold with your hands.
Fill a bucket with black cotton soil. But you can use other types of soil apart from the sand. Though, it is not necessary to use the bucket because you can still mix the clay on the ground.
Slowly add water into the bucket and mix. Make sure the clay is not watery. But you should feel the texture to know if you must add more water. I manually mixed the clay until I achieved the required stiffness.
Cut holes on the tins.
I used a hacksaw to cut the bottom of the bigger can. Also, I manually cut the bottom of the two small metal cans with a kitchen tin can opener to create the air feeding chambers.
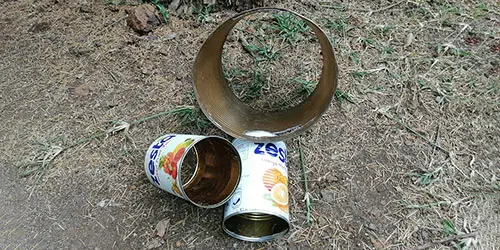
I made two ventilators on the large can with the steel nail and a pair of tinsnips. These ventilators will allow sufficient airflow through the stove and allow efficient burning.
Transfer the clay from the bucket to the ground.
Carefully transfer the clay to the specific spot you have chosen and mold a round base.
Place the tin cans.
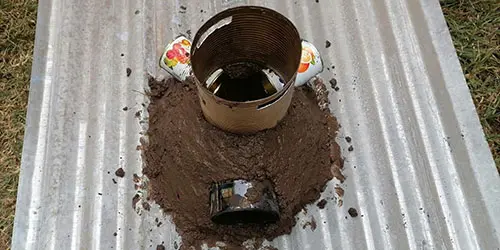
Start by placing the bigger can for the feeding chamber, then the two small tins for the air flow chambers horizontally on the mud, and continue to forge it.
Place the main burning chamber vertically and ensure it lies on top of the three cans you had initially placed. This step will support the main chamber after the stove has completely dried.
Continue forging the stove.
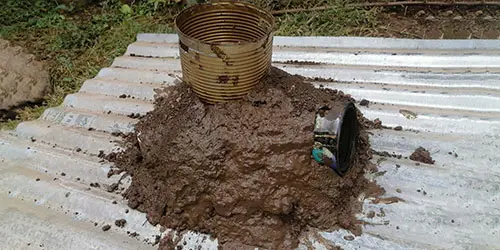
Continue forging the stove with clay slowly so that you can secure the cans and avoid leaving air gaps on the sides of the stove. Ensure the cans are perfectly enclosed.
Allow the clay stove to dry.
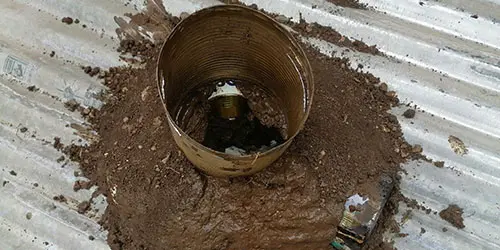
Give the clay stove one day to dry before you begin using it.
Use the stove.
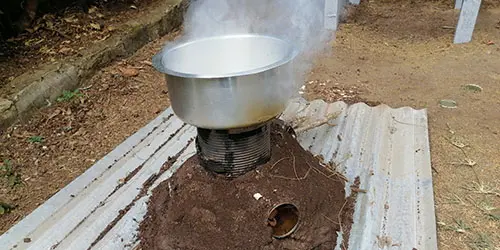
You can begin using the clay stove after it has dried completely.
Side Note: I did not have wait until the clay stove was completely dried.. But if you do, you should remove the tins and remain with a mud stove.
Tin Rocket Stove
After a disaster, you might not have the luxury of using your modern gas cooker, electric burner, or multifunctional modern breakfast-making machine. You will need a creative and portable solution that guarantees efficient results.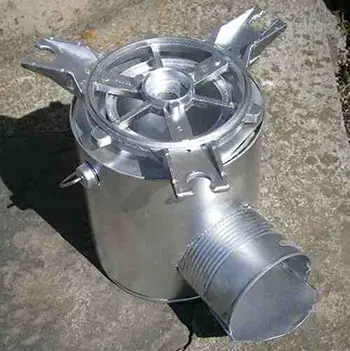
Here is a brief step-by-step tin rocket stove design that uses a few wood scraps to cook an entire meal from scratch.
- Gather three different size tins.
- Gather all the necessary materials.
- Cut the tins according to the directions.
- Slowly forge a portable tin rocket stove.
Fire Clay Bricks Rocket Stove
Clay bricks can not only make vertical walls. These versatile building materials can design efficient cooking solutions. You can make a brick stove in under an hour in a grid-down situation with the correct step-by-step guide.
Gather all necessary tools and utilities.
- Fire clay bricks
- 4-inch square wire mesh
- Cotton ball
- Dry firewood
- Gas range grill
Chose a flat and secure spot.
Avoid areas with tree roots or plants to avoid burning them. Place a 16-inch square paver if you do not have the best spot.
Arrange the first level.
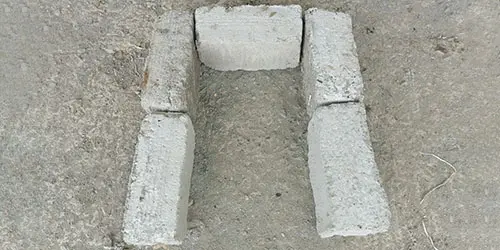
Place five fire clay blocks in a rectangular design, then place a mesh wire on top for a better draft.
The wire draft separates the combustion chamber into two. The upper section holds the firewood while the lower section collects ash.
Continue layering the bricks.
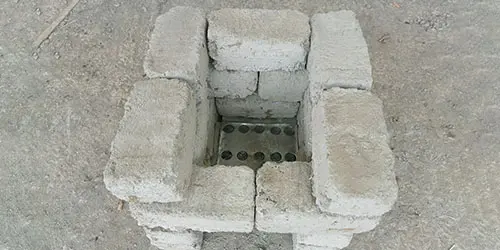
You will avoid cutting the bricks if you can arrange the bricks systematically. I overlap the clay bricks like in the picture.
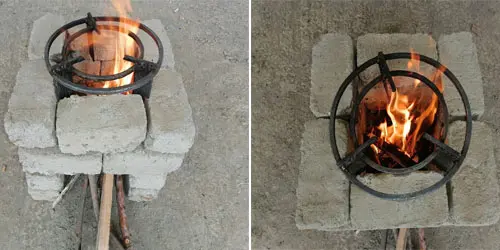
Proceed until the last layer.
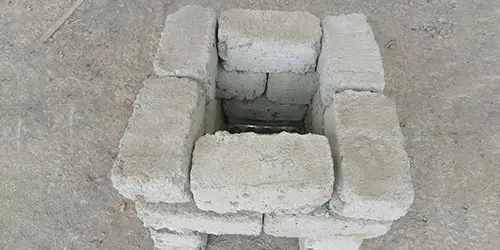
Arrange the bricks up to your favorite height. I chose to go up to layer four to give the flame enough room to burn efficiently.
Side note: Fire clay brick stoves with taller chimneys draw better and burn efficiently. But always remember to overlap the bricks for a firm construction.
Install a grill on top of the stove.
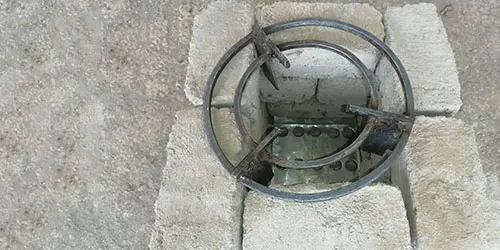
Place an old gas grill with a diameter that precisely fits the stove’s allowance.
Light the stove.
Use cotton balls and firewood or firebricks to light the stove. I prefer dry birch because it is easy to light and burns efficiently.
Cinder Blocks Rocket Stove
You can design a cinder or hollow block stoves within minutes. These types of stoves do not require any architectural designs. Here is a quick step process to create the best cinder block stove.
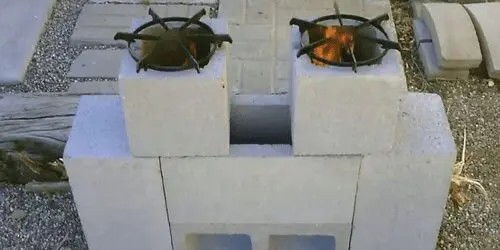
- Get four 8in x 8in x 16in hollow blocks.
- Set up the stove on a platform to raise its height. Though, you can skip this step if you prefer a low-profile stove.
- Place one block standing on its width with the hollow side facing in front.
- Lay another block at the back, with the solid side or block wall facing up. The hollow side should face sideways.
- Cut the end of one block with a circular saw and a masonry blade. This block will be the burn chamber or heat riser.
- Lay the last block directly on top of the cutout cinder block.
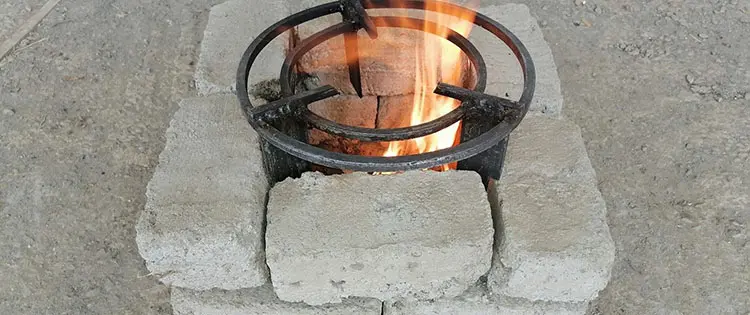
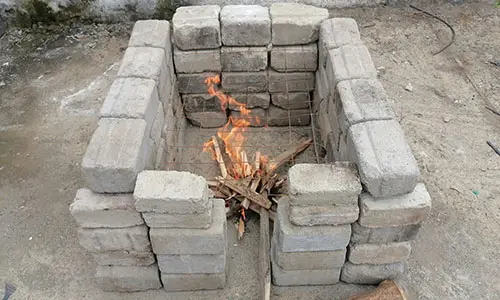
Large Concrete Bricks Rocket Stove
For an intense cooking situation, you require a bigger solution. Fortunately, there is no better alternative than the bigger version cement brick rocket stove.
Prepare the ground.
Make sure to choose a spot with little or no trees. An open space is safe because large stoves produce wide flames than smaller stoves.
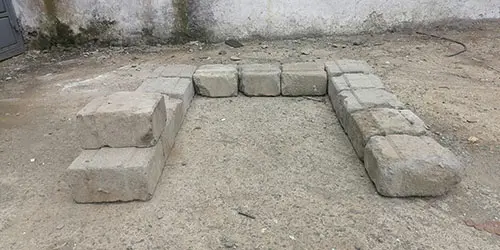
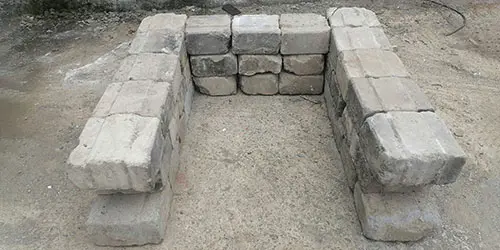
Arrange the first layer.
Arrange two 5 stone blocks in a straight line and three blocks at the back. These blocks should be 9 inches to create a firm base.
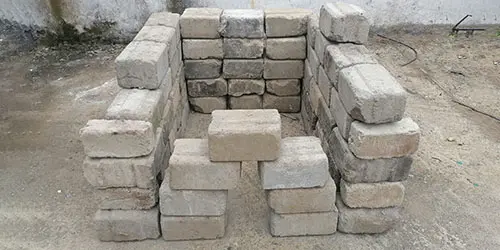
Arrange layers two and three.
Arrange two more layers of 9-inch wide building blocks for the second and third levels. I decided to continue with two more layers because I was planning to use a lot of firewood.
Note: You can stop at this level if you have limited firewood. A higher course concrete stove means a taller burning chamber between the firewood and the mesh wire.
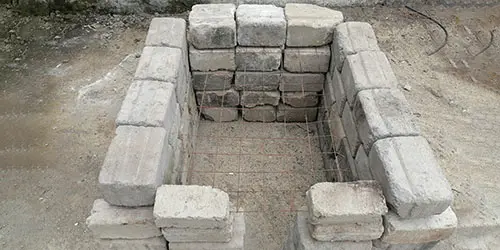
Arrange layers four and five.
Now I decided to use the 6-inch building blocks because the stove was stable enough to hold the grill in this step.
Place a mesh wire.
Place 3 feet by 2 feet mesh wire between layers four and five. Make sure that the mesh wire fits the allowance firmly.
Gather firewood.
I chose dry birch firewood because it is easy to light and does not produce a lot of smoke. Also, birch gives quality flame enough to cook a large course meal.
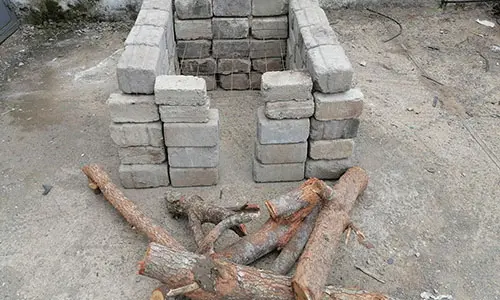
Light the firewood and cook.
Small Concrete Bricks Rocket Stove
A small concrete brick rocket stove guarantees better service. Remember that cement will not crack over time after continuous exposure to heat.
The steps for making a small concrete brick stove are similar to that of making a large concrete brick rocket stove. The only difference is the size of the stones used. Follow the guide above.
Refractory Fire Bricks Rocket Stoves
Refractory fire clay bricks or red extruded clay bricks are an alternative to cement bricks/paving bricks. They are considered the best material for making firing accessories. Nonetheless, clay bricks work the same as cement bricks. The only differences are their physical design and weight.
Concrete bricks are forged from cement and sand, while clay bricks have core holes. Also, concrete bricks are heavier than clay bricks.
In a grid-down scenario, you can make a refractory fire clay brick rocket stove using similar steps used to make a concrete brick rocket stove.
Note: A standard extruded fire brick measures 9in x 4in x 3in. These bricks have holes to reduce their weight and ensure each piece has fired evenly.
A homemade rocket stove is another necessary accessory you should know how to build. It will not only cook meals but keep you warm on cold nights.
This guide has looked at how to forge economical rocket stoves using readily available materials. The design you pick should be the best for you and your family.
This article first appeared on Ask A Prepper.
You may also like:
7 Projects That Turn You Into A Self-Sufficient Homesteader
How To Make The Invisible Root Cellar (Video)
DIY Corner Vegetable Storage Bin
50 Off the Grid Homesteading Tips and Tricks
How To Repurpose Old Items Into New Projects For Your Backyard


Can you please give a definition for “black cotton soil”? I’ve not seen that term before.
Thank you. 🙂