Think gardening’s just tossing seeds and sprinkling water? Think again! Behind every thriving garden lies a secret weapon – understanding your soil. Don’t fret if you lack fancy gadgets. You can still crack the soil code with a few simple DIY tests. They’ll clue you on what’s really going on underground.
Sure, you could wing it. But if you’re aiming for a bumper harvest, you’ll need to get close and personal with your soil. Trust me, your future produce will thank you!
Essential Elements for Plants
Before we dive into testing techniques, let’s quickly cover the vital nutrients plants need from the soil to thrive:
- Nitrogen: Essential for leaf growth and that lush green color.
- Phosphorus: Crucial for root development and flower/fruit production.
- Potassium: Helps with overall plant health and disease resistance.
Think of these as the “meat and potatoes” of plant nutrition. But just like humans need more than just those basics, plants also require smaller amounts of micronutrients like iron, magnesium, and calcium.
Signs of Nutrient Deficiencies
Your plants will tell you if they’re not getting what they need. Here are some common signs to watch for:
- Yellowing leaves: Often indicate nitrogen deficiency.
- Purple-tinged leaves: May signal a lack of phosphorus.
- Brown leaf edges: This could mean your soil is low in potassium.
- Stunted growth: A general sign that something’s off in your soil’s nutrient balance.
By learning to read these signs, you can address issues before they become serious problems.
Pioneer Soil Testing Techniques
Now, let’s get our hands dirty with some old-school soil testing methods. Pioneer soil testing methods refer to the early techniques used to analyze soil properties and fertility.
These methods were essential for agriculture and land management, helping farmers and landowners make informed decisions about crop production.
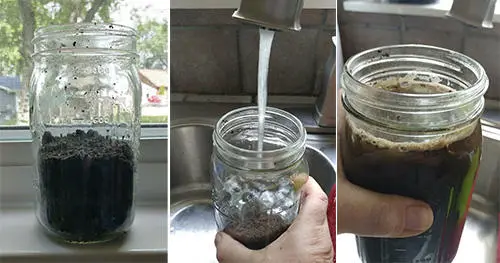
The Jar Test
This test gives you a more precise breakdown of your soil composition.
You’ll need:
- A clear glass jar with a lid
- Soil sample
- Water
- Dish soap (optional)
Steps:
- Fill the jar about 1/3 full with your soil sample.
- Add water until the jar is almost full.
- Add a drop of dish soap to help separate particles (optional).
- Screw on the lid and shake vigorously for several minutes.
- Set the jar down and let it settle for 24 hours.
Reading the results:
After settling, you’ll see distinct layers:
- Bottom layer: Sand (heaviest)
- Middle layer: Silt
- Top layer: Clay (lightest)
- Very top: Any organic matter will float
Measure the height of each layer and calculate the percentage. Ideal garden soil is often described as having roughly 40% sand, 40% silt, and 20% clay.
The Feel Test
This test helps determine the clay content of your soil.
Steps:
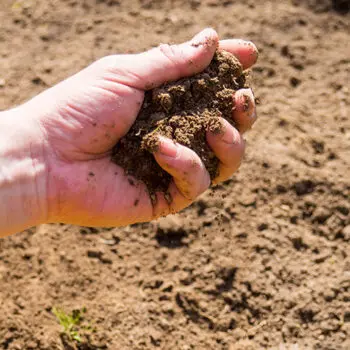
- Moisten a handful of soil.
- Try to roll it into a ball.
- If successful, squeeze the soil between your thumb and forefinger to form a ribbon.
Interpreting the results:
- If you can’t form a ball then the soil is sandy
- If the ribbon length is 3-4 inches the soil is loamy and ideal for gardening
- If a longer ribbon is formed then there’s high clay content
- A shorter ribbon means low clay content
The Vinegar Test
This quick and easy test gives you a rough idea of your soil’s pH level.
You’ll need:
- Soil sample
- White vinegar
- Baking soda
- Water
Steps:
- Place a few tablespoons of soil in a container.
- Add 1/2 cup of vinegar.
- If it fizzes, your soil is alkaline (pH above 7).
- If there’s no reaction, repeat with fresh soil and add water and baking soda.
- If it fizzes with baking soda, your soil is acidic (pH below 7).
- No reaction to either? Your soil is likely neutral.
While not as precise as modern pH tests, this method can give you a general idea of where your soil stands. Most vegetables prefer slightly acidic to neutral soil (pH 6.0 to 7.0).
The Soil Health Check
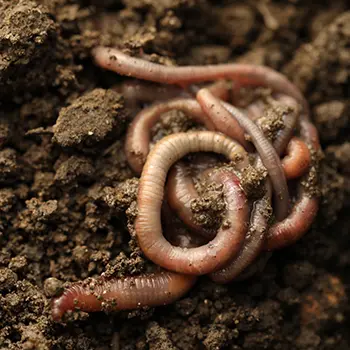
This simple test helps you assess the biological activity in your soil using nature’s tiny gardeners: earthworms.
You’ll need a:
- Shovel
- Cardboard or tarp
- Thermometer (optional)
Steps:
- Wait for a day when the soil temperature is about 50°F and the soil is moist.
- Dig up a cubic foot of soil (roughly 12″ x 12″ x 12″).
- Spread the soil on cardboard or a tarp.
- Break apart soil clumps and count the earthworms.
Interpreting the results:
- The presence of 10 or more earthworms means the soil health is perfect for crop or vegetable production
- Fewer than 10 means that the soil may need more organic matter
If your earthworm count is low, consider adding:
- Compost
- Aged manure
- Leaf mold
These additions attract worms and improve soil structure and nutrient content.
The Sniff Test
This test is the easiest in this list as it uses your sense of smell and intuition to assess the health of your soil. Just take a handful of soil and bring it close to your nose so you can inhale it deeply.
Interpreting the results:
- A fresh, earthy scent means the soil is healthy soil and full of beneficial microbes
- A rotten eggs or mildew smell means there’s poor drainage
- If there’s no smell then there is low microbial activity, hence not good for gardening or crop production.
The Weed Whisperer’s Guide
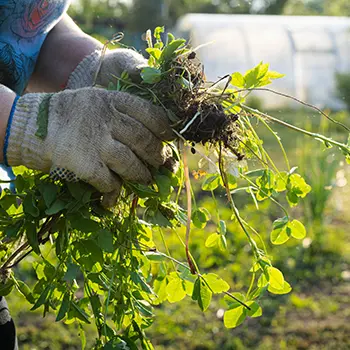
Almost as easy as the previous one – this test uses common weeds as indicators of soil conditions.
Common weed indicators:
- Having clover and dandelions means the soil is struggling with nutrients
- Sedges around means there’s overwatering
- The presence of Queen Anne’s Lace might be a big indicator that the soil is dry
Remember: Weed indicators can vary by region. Research local weed species for more accurate results.
Limitations and Considerations
It’s important to recognize that these pioneer methods, while useful, have their limitations. They provide a good starting point but lack the precision of modern lab analysis.
For example, the vinegar test can tell you if your soil is very acidic or very alkaline, but it won’t give you an exact pH number. Similarly, the feel test is subjective and takes practice to interpret accurately.
Modern Adaptations and Resources
While we’ve focused on traditional methods, modern homesteaders have access to some great resources that bridge the gap between pioneer techniques and laboratory analysis:
- Home soil testing kits: Available at most garden centers, these provide more precise pH and nutrient readings.
- Online soil testing services: Mail in a sample and receive a detailed analysis.
- Local extension offices: Many offer affordable or free soil testing services.
- Digital pH meters: For quick and accurate pH readings.
These modern tools can complement the traditional techniques we’ve discussed, giving you a more complete picture of your soil’s health.
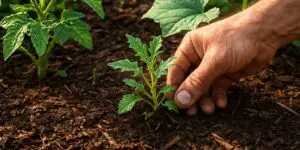
Planning Your Garden
Use your soil test results to guide your planting decisions. For example:
- If you have sandy soil, choose drought-tolerant plants or those that prefer well-drained conditions.
- In clay soil, look for plants that can tolerate “wet feet” or consider raised beds.
- For acidic soil, blueberries, rhododendrons, and azaleas will thrive.
There are many gardening books and online resources that can help you find plants that’ll flourish in your specific region and soil conditions, so don’t be shy to sniff around.
From Soil to Success
Understanding your soil is the foundation of a successful garden. By using these simple, pioneer-inspired techniques, you’ve taken the first step towards creating a thriving homestead garden.
Remember, soil testing isn’t a one-time event. Soil changes over time, so it’s a good idea to retest every few years or if you notice changes in plant health. If you’re dealing with persistent plant problems or planning a large-scale garden, it might be worth investing in a professional soil test.
So which of the pioneer tests are you trying out first? Leave a comment below!
You may also like:
How To Use Weeds To Read Your Soil
If You See This Plant in Your Backyard, Burn It Immediately! (Video)
How To Choose The Best Plants For Your Soil Type
7 Unexpected Things You Can Turn Into Compost


