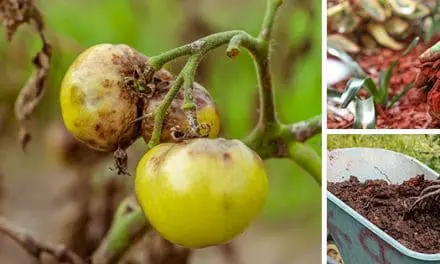
The great thing about rain is we don’t have to water. But that assumes we’re home assessing how much water any of our plants or gardens need. Everything gets complicated when we go on vacation, visit relatives or even a business trip when someone’s living alone. The time of year is always a factor, but if you’re gone long enough you can come home to a lot of dead plants and withering gardens if it fails to rain. And as far as indoor plants are concerned, well that’s when things get more complicated.
It’s a particular challenge with those indoor houseplants, potted plants, and plants that are not drought tolerant or at least need some degree of regular watering. Fortunately, there are some old fashioned solutions (and some new ones) that can bring you home to a healthy garden and thriving potted plants. Here are some of those solutions we’ll cover:
All of these techniques are based on the gradual distribution of water over time. That’s the whole idea. How do you slowly release water to a plant over hours, days and maybe a week or more? Some of the concepts are based on slow percolation. The water is released slowly and percolates into the ground.
Other concepts are based on wicking. This is when the water is literally drawn up or out of a container to keep soil moist. They all work, it just depends on what you’re trying to water and its location whether in the ground or a container. Let’s get started.
The Wicking Bed (A Raised Bed Solution)
A wicking bed concentrates water at the bottom of a raised bed. The water is typically contained in large, corrugated pipes about 4 to 6-inches in diameter with slits cut in the top half. They are then topped with a mix of mulch and soil that slowly “wicks” the water up to the roots of plants growing in the bed.
A funnel in the corner of the bed is connected to a tube used to refill the pipes below.
Before you leave for a vacation or extended road trip you fill the corrugated pipes, and the wicking action will continue to supply water to the plants for days or even a week or more if the pipes are large enough.
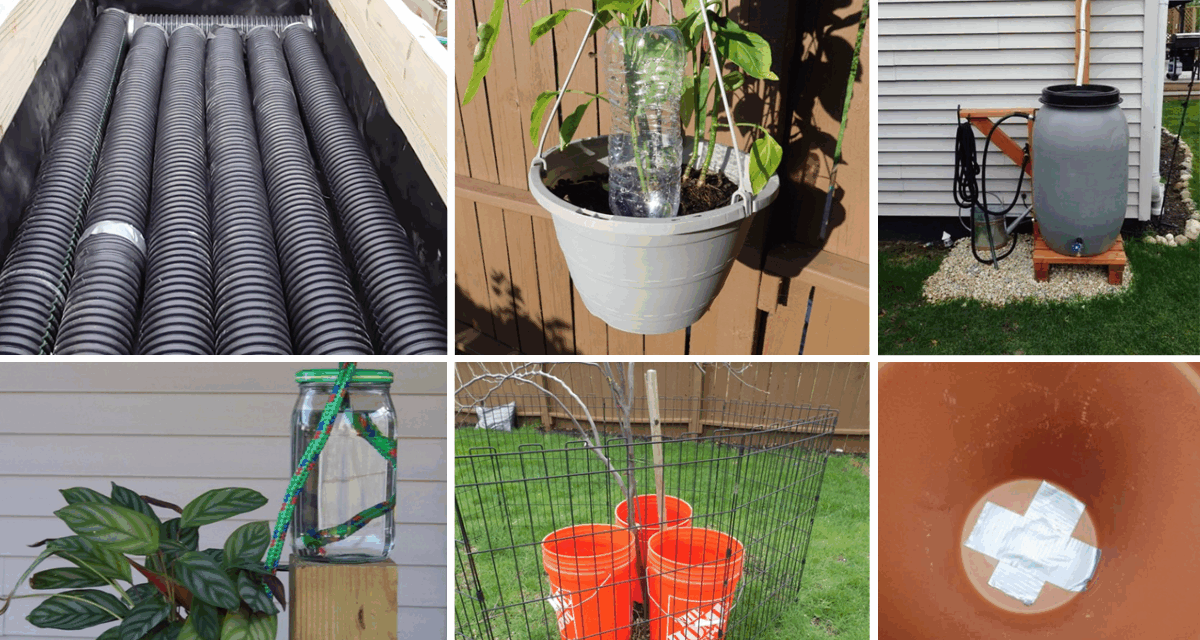
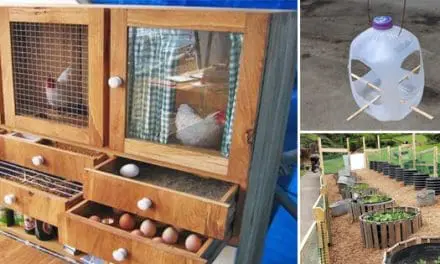
The Water Bottle Trick (Great for Potted Plants)
This is a very simple solution that’s easy to do. The key is to use a plastic water bottle with a screw on top. You drill small holes in the top and fill the bottle with water.
You then invert the bottle into the soil, and it will slowly release water into the soil around the plants.
This is a great solution for potted plants. The size of the bottle should be proportionate to the size of the pot or container. For small pots and hanging plants you could use a 12-ounce bottle. For larger pots and containers, you could use up to a 1-gallon jug.
The number of holes you drill in the top will vary the amount of water released. You may have to do some trial and error to determine how much water is released and how many holes to drill and how large. You don’t want the bottle to empty in a couple of hours. The idea is for a slow and steady release. You want just enough to keep the soil moist until you get home and can assess if the plant needs a good soak. The idea is to keep things alive while you’re gone.
This self-irrigation method has been adopted by many over the centuries, including the Amish. This is just one example of the incredible off-grid techniques the Amish use to thrive without modern conveniences. But there’s so much more to learn. The Amish Ways book is packed with time-tested methods for food preservation, DIY projects, and practical homesteading knowledge that can help you live self-sufficiently.
The book covers everything from building your own root cellar to crafting homemade remedies, all with clear instructions and easy-to-follow steps. You can grab your own copy today and claim 3 FREE BONUSES using my exclusive 76% discount coupon right here.
And honestly, I wish more people knew about this.
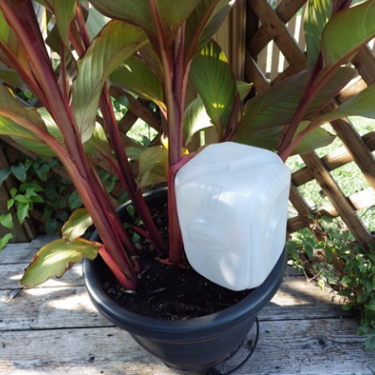
Soaker Hoses and Rain Barrels (For Large Gardens)
A rainwater harvesting system is always a good idea. Most usually have spigot at the base and an overflow outlet at the top. If you’re heading out for a few days you can connect a hose to the spigot at the bottom connected to a soaker hose running through a garden bed.
How much you open the spigot will determine the amount of water released into the soaker hose(s).
The idea is to keep a constant flow of water running into the soaker hose(s) so you can maintain moisture in the garden bed over time. This is another exercise in trial and error.
Try this at home sometime before you head out and see how long it takes for a full rain barrel to empty. If you see that it has continued to release water over a period of a certain number of days, keep track of how open you left the spigot so you can be assured that water will continue to seep into the soaker hoses while you’re gone.
You can actually make your own pressurized rainwater collecting system using nothing but some blue barrels and the instructions from this guide. Regardless of the liquid you choose, make sure you have a spacious container that can accommodate other ingredients later on.
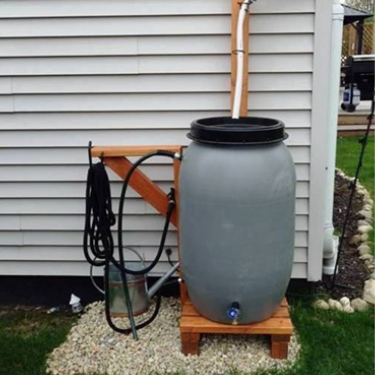
Wick in a Jar (Save the Houseplants)
If you take a long piece of a rope and drop it into a bottle of water with a hole cut in the cap, you can wick the water from the bottle to a potted plant or container.
The size of the bottle and the amount of water depends on the size of the plant container, but it can keep a houseplant watered while you’re not home. What’s important is that the bottle of water be above the level of the plant. That will allow gravity to help wick the water from the jar to the soil in the pot.
This is another time to experiment. Try it for a day or two while you’re home. See how it works and how long the amount of water keeps the pot watered and you can determine what you need to do when you’re away as far as the size of the jar and the amount of water.
The Clay Pot Trick (Works Every Time)
Terra cotta clay pots are semi-permeable.
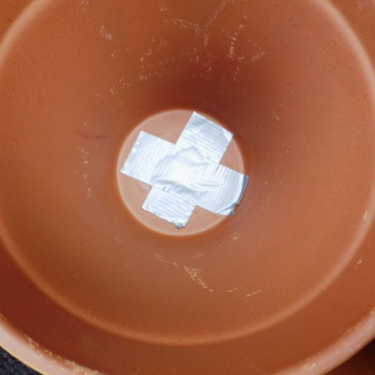
Any water in the pot will slowly migrate through the terra cotta to the surrounding air or soil. And if you bury a water filled terra cotta pot in the ground it will slowly water the soil surrounding it.
Start by sealing the hole in the bottom of the pot with duct tape.
You don’t want the water to drain through the hole, or it will be gone in less than a day. The idea is to allow the pot to slowly transpire the water to the surrounding soil and plant roots over a period of days.
The size of the pot can be any size you want and once again it helps to experiment. Try putting different sized pots in the ground and see how long it takes for the water to leach into the ground. It also helps to keep the pots covered some way. Otherwise, you can lose some water to evaporation.
A clay pot buried in the ground can also create an effective food storage solution, especially for root vegetables. But if you’re looking for an even easier way to keep your food fresh without worrying about temperature fluctuations, you might want to consider this Easy Cellar that you can build yourself in less than a week!
The 5-Gallon Bucket Trick
This is simple. Drill some small holes in the bottom of 5-gallon buckets and fill them with water. Test to see how long it takes for the buckets to drain and determine timing. This is great for newly planted trees or shrubs that require regular watering while they are first developing their root systems.
You could also place these in a conventional garden and just let them drip away into the ground.
They All Work
Which method you choose depends on what you’re trying to keep watered. If you have a combination of gardens in the ground and potted or hanging plants, combine them to meet the situation. What’s important is to experiment a bit and get an idea of what works best and how you need to adjust things to keep things watered and healthy while you’re gone. Once you have a sense for what works you’ll never lose another plant to those times when you simply couldn’t give them the water they need.
You may also like:
The Native American Way To Self-Water Your Backyard
The Only Way To Survive In a World Without Water (Video)
DIY Self-Watering Raised Garden Beds
Drip Irrigation vs. Soaker Hose
This Is How Much Water You Actually Need


