Celery may not be the first crop most people think to grow, but once you add it to your garden, you’ll see why it deserves a spot. This crisp, flavorful vegetable is a staple in soups, stews, and snacks, and growing your own means avoiding the limp, chemical-treated stalks often found in grocery stores.
Unlike many other garden vegetables, celery requires a bit of patience and care, but the reward is worth it. Here’s everything you need to know to plant celery successfully and keep your pantry stocked with homegrown flavor.
Choosing the Right Variety
Not all celery varieties are created equal. Some are bred for tenderness, others for flavor, and some are better suited to your climate.
- Tall Utah: A popular heirloom variety with crisp, tall stalks.
- Golden Self-Blanching: Naturally blanches in the sun, producing milder stalks.
- Chinese Celery: Smaller, more flavorful, and easier to grow in warmer climates.
If you’re planting for self-sufficiency, choose heirloom varieties. They allow you to save seeds and replant year after year, which cuts down on your dependency on seed companies.
It’s also worth considering how you plan to use your celery. If you want thick stalks for raw snacking and juicing, Tall Utah is a classic choice. But if your main use will be seasoning soups or drying the leaves for storage, Chinese Celery may serve you better thanks to its stronger taste.
In cooler climates with shorter summers, self-blanching types can be helpful because they don’t require extra labor to protect stalks from the sun. Think of your variety choice as the foundation of your harvest—choosing right at the beginning will make the entire process easier.
 Starting Celery from Seed
 Starting Celery from Seed
Celery is slow to germinate, so plan ahead. Start seeds indoors about 10–12 weeks before your last expected frost date.
- Use a shallow seed tray and sow seeds on the surface of the soil.
- Press them in lightly—celery seeds need light to germinate.
- Mist with water and cover with a clear lid to maintain humidity.
- Keep the tray in a warm spot, ideally between 65–75°F.
Germination may take 2–3 weeks, so don’t get discouraged. Patience is part of celery’s nature.
Once seedlings emerge, thin them carefully so that each one has enough room to grow without crowding. Overcrowded seedlings will grow spindly and weak, making them harder to transplant later. Use scissors to snip off extra seedlings at soil level instead of pulling, which can disturb the roots of those you want to keep.
Lighting is equally important. Without enough light, celery seedlings will stretch and weaken. If natural sunlight is scarce, invest in a simple grow light to give them the strong, steady light they need to develop sturdy stems. Early strength will pay off once they’re in the ground.
Transplanting Outdoors
Once seedlings have reached 3–4 inches tall and all danger of frost has passed, they’re ready to move outdoors. Harden them off by gradually exposing them to outdoor conditions for about a week.
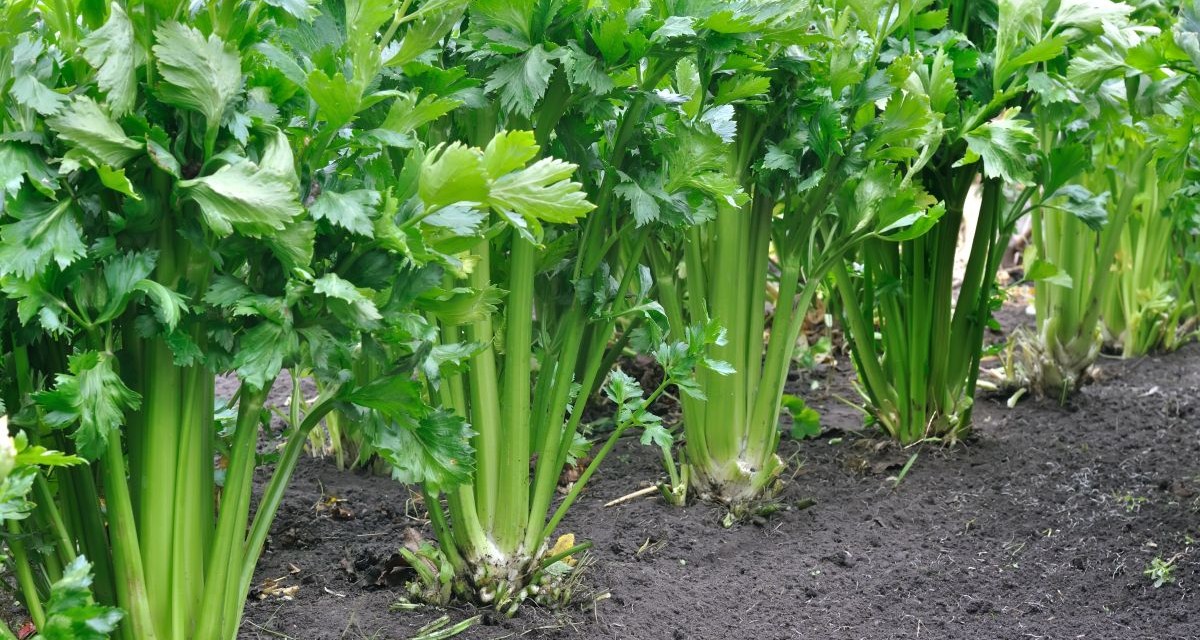
Choose a sunny location with rich, well-drained soil. Celery thrives in moisture-retentive soil with plenty of organic matter. Mix in compost or aged manure before planting. Space seedlings 8–10 inches apart in rows about 2 feet apart.
Planting celery in trenches can also make later blanching easier. Dig shallow trenches about 4–6 inches deep, plant your seedlings at the bottom, and as the plants grow, you can gradually fill in soil around them to naturally blanch the stalks.
Be mindful of spacing. Crowded plants are more prone to disease and poor airflow, while those with enough room will develop thicker, healthier stalks. Mulching immediately after transplanting will also help the soil retain its critical moisture.
 Watering and Feeding
 Watering and Feeding
Celery is a thirsty plant. To produce crisp, tender stalks, it needs consistent moisture. Water deeply at least once or twice a week, and more often in hot or dry conditions. Mulching around the base will help retain soil moisture and reduce weeds.
For best growth, feed with compost tea or a balanced organic fertilizer every 2–3 weeks. Celery is a heavy feeder and will reward you with robust stalks if properly nourished.
Neglecting water is the most common reason celery turns out tough or stringy. Uneven watering stresses the plant, leaving you with bitter stalks. It’s better to water regularly in smaller amounts than to let the soil dry out and then drench it. Consistency is key.
Organic options like worm castings, aged chicken manure, or seaweed fertilizer provide nutrients without the harsh chemicals that can disrupt soil life. Remember that celery grows slowly, and giving it steady, gentle feeding over time works better than one heavy dose.
Blanching the Stalks
Blanching is the process of shielding celery stalks from the sun to make them pale, tender, and less bitter. While not strictly necessary, many gardeners prefer the taste of blanched celery.
About 2–3 weeks before harvest, tie the stalks loosely together and wrap them with newspaper, cardboard, or a milk carton with the bottom cut out. Another option is to mound soil around the stalks to block sunlight.
Some gardeners choose not to blanch at all, preferring the stronger, greener taste of unblanched celery. If you’re growing for cooking, especially soups and stews, you may not need to blanch. On the other hand, if you want celery for fresh snacking, blanching will make a noticeable difference.
Experimentation is often the best teacher here. Try blanching half of your crop and leaving the other half natural. This will help you decide what works best for your palate and your family’s use.
Harvesting Celery
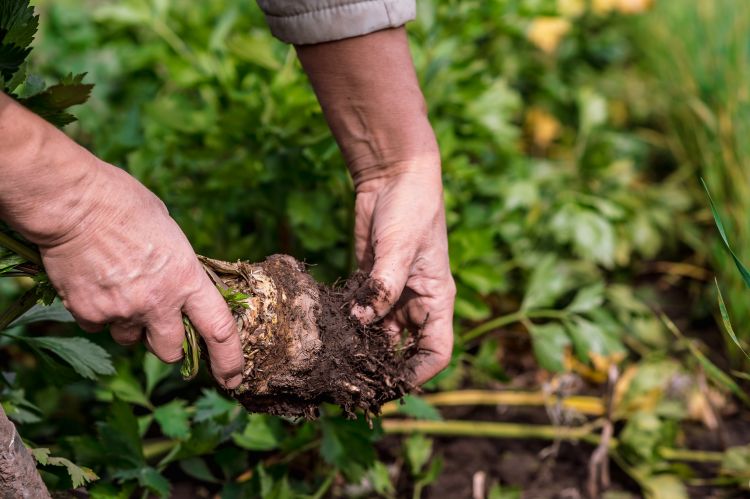 Harvesting Celery
Celery takes about 85–120 days from transplant to harvest. You can cut outer stalks as needed, or harvest the whole plant by cutting at soil level. The leaves can also be dried and used as a seasoning.
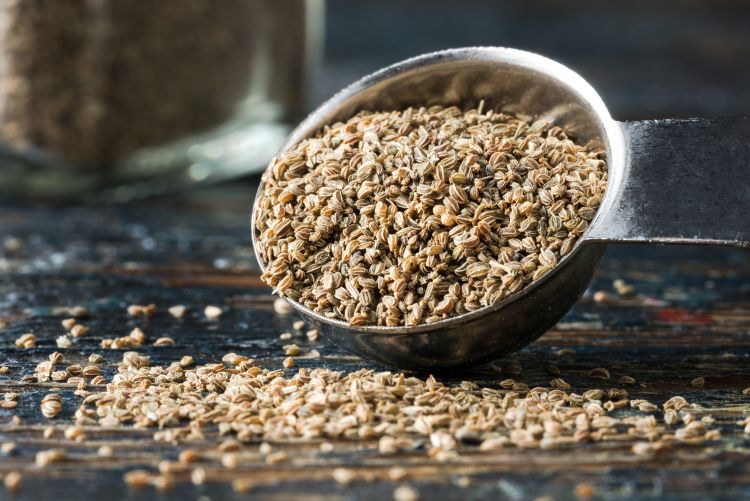
If you plan to save seeds, let a few plants overwinter and go to seed in their second year. This ensures you’ll have your own supply of celery seed for planting, cooking, or even making celery salt.
Harvest timing also affects flavor and texture. Younger stalks will be tender and mild, while older ones may be more fibrous but stronger in taste. Tailor your harvest to your needs—salads benefit from younger celery, while broths and dehydrating can make use of mature plants.
After harvest, celery can be stored in the fridge for a couple of weeks or preserved for longer use. Drying the leaves for a seasoning mix or freezing chopped stalks are both practical options for extending your harvest into the colder months.
Common Challenges
- Bolting: Celery can bolt (flower prematurely) in hot weather. Keep soil consistently moist and provide shade if needed.
- Pests: Aphids and slugs are common. Hand-pick slugs and spray aphids off with a strong jet of water or insecticidal soap.
- Disease: Leaf blight and rot can occur in overly wet conditions. Proper spacing and airflow will help prevent these issues.
Another challenge is nutrient deficiency, which often shows up as yellowing leaves or stunted growth. This is a sign your celery needs a boost—add compost tea or side-dress with organic fertilizer to revive it.
If you’re growing in a small garden, crop rotation is also essential. Avoid planting celery in the same spot year after year to prevent disease build-up in the soil. Rotating with legumes or brassicas will help restore balance.
Final Thoughts
Celery may demand more care than other garden vegetables, but it pays you back in flavor, nutrition, and self-sufficiency. With the right planning, steady watering, and a bit of patience, you’ll be able to grow crisp, delicious celery straight from your backyard.
Not only will you avoid store-bought stalks that travel thousands of miles, but you’ll also gain a renewable source of food you can rely on year after year.
Homegrown celery is one of those crops that makes you realize the difference between supermarket produce and fresh, living food. The texture, aroma, and taste are simply more vibrant. And the pride of raising such a “difficult” plant is a reward of its own.
When you choose to grow celery, you’re not just planting another vegetable—you’re building resilience into your food supply and proving to yourself that with knowledge and patience, self-sufficiency is possible even with the most finicky crops.
You may also like:
No Seeds Needed! How to Grow Tomatoes from a Single Slice
A Walgreens Is Opening In Your Backyard (Video)


