
If you’ve ever yanked a dandelion from your yard without a second thought… you might’ve just tossed away one of the most underrated survival foods out there.
In a pinch, these so-called “weeds” can be turned into a golden jelly that’s not only packed with nutrients, but can last up to two years on the shelf without refrigeration.
And no, this isn’t just a sweet treat. Dandelion jelly has been used by old-timers as a gentle liver tonic, a sore throat soother, and even a quick energy booster in lean times.
Let me show you how to make this powerful, homemade jelly the right way, step by step, so you can stock your shelves with something that’s just as practical as it is delicious.
Dandelion jelly has a soft, sweet flavor that is kind of similar to honey, but a little more herbal and with a hint of lemon. It seems like something that would be an amazing sore throat remedy. It goes great on biscuits or cornbread!
Why Dandelions?
Since ancient times, dandelion has been highly valued for its extraordinary healing properties in different national cultures. You’ll find it growing in cracks of sidewalks, along fence lines, and scattered across fields. It also doesn’t ask for much, except sunshine and a place to grow.
But here’s what really sets it apart: nearly every part of the dandelion is useful.
🌼The roots can be roasted into a coffee substitute.
🌼The leaves are packed with vitamins A, C, and K and can be eaten fresh or cooked.
🌼Your jelly comes from the flowers, and they hold more than just sweetness.
Dandelion petals are rich in antioxidants and have been used traditionally to support liver function, digestion, and inflammation. During times when medicine was scarce, folks turned to wild remedies like these to get by. Making jelly from them was a way to preserve their benefits for the lean months ahead.
In short, dandelions are free, dependable, and loaded with nutritional and medicinal value. And turning them into jelly is one of the smartest ways to keep them on your shelf long after the season’s passed. It’s also an ideal summer dessert!
But here’s something most folks don’t know: liver health and gut health are two sides of the same coin. A sluggish digestive system could weigh everything down, from your mood to your energy.
Old-time healers had a saying: “Fix the gut, and the rest will follow.”
That’s why they didn’t just rely on dandelions. When someone was bloated, sluggish, or worn thin from poor digestion, they’d turn to a whole mix of gut-balancing herbs. These weren’t just teas, they were full-on survival blends.
If you don’t have time to hunt down and prep all those herbs yourself, you can still get the same kind of support with this Gut Blend Tincture.
It’s like having an old-school digestive tonic already made — just a few drops and you’re good to go. Here’s what you can find in it:
🌿 Slippery Elm & Marshmallow Root – to coat and calm the gut when food was scarce or spoiled
🍄 Reishi & Turkey Tail Mushrooms – used to build up long-term immunity and fight gut-related fatigue
🌾 Plantain Leaf – one of the most dependable wild plants for inflammation
🧠 Lion’s Mane – believed to support the gut-brain connection and help people stay sharp during stressful times
If that sounds like the kind of backup you’d need in a crisis, but you don’t have time to forage, tincture, and blend all of that yourself… this is the shortcut.
👉 The Balanced Gut Blend Tincture is wild-harvested, double-extracted, and made the old way, so you get the full power of each herb in just a few drops.
How to Make Long-lasting Dandelion Jelly
Step 1: Harvest Dandelion Flowers
Dandelions can be found pretty easily in spring, summer, and fall. You’ll need a lot of them to make jelly, so be prepared to do a lot of picking!
You’ll need one quart (four cups) of dandelion blossoms, but only the white insides and yellow petals. Avoid getting any of the greenery or milky stems into your blossoms.
You can trim them for use with scissors, or you can simply use your hands and separate the petals from the base as pictured.
Tips: Avoiding green in your dandelion petals can also help your jelly to obtain a brighter yellow color. The mixture turns a more green-yellow that looks a little sickly if you allow greens into the flower petals!
Also, using large, open flowers will help you get the requisite amount faster, and it will help you be able to separate the petals from the greens more easily. Be prepared for stained fingertips, too!
Step 2: Steep the Flowers
There are a couple methods for steeping the flowers, one long and one short. The strength and flavor of your jelly will vary a little depending on which you choose, with a milder flavor for the long method and a more intense, flowery flavor for the short method. You’ll need two quarts (eight cups) of water and the four cups of petals, either way.
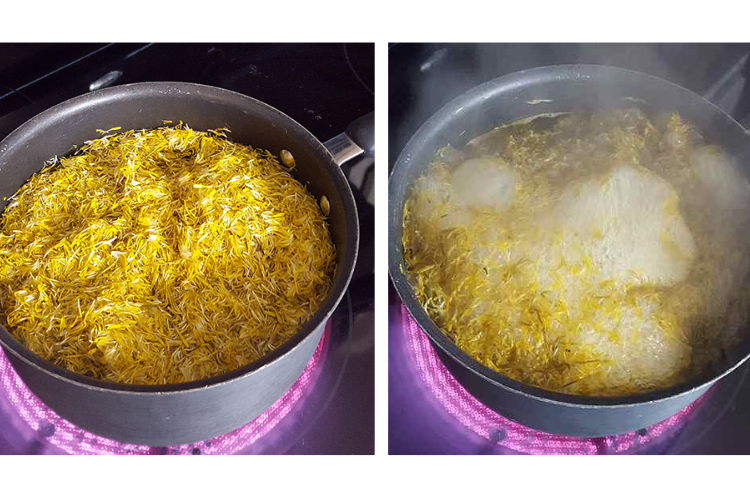
Long method: Pour two quarts of boiling water over four cups of dandelion petals and allow to sit for two to twenty-four hours.
Place the flower petals in a large pot along with 2 quarts of water. Bring the water to a boil and keep it there for ten minutes.
Step 3: Strain
Now, you’ll need to strain the flowers from the water. KEEP THE WATER! That’s what you’ll use to make the jelly.
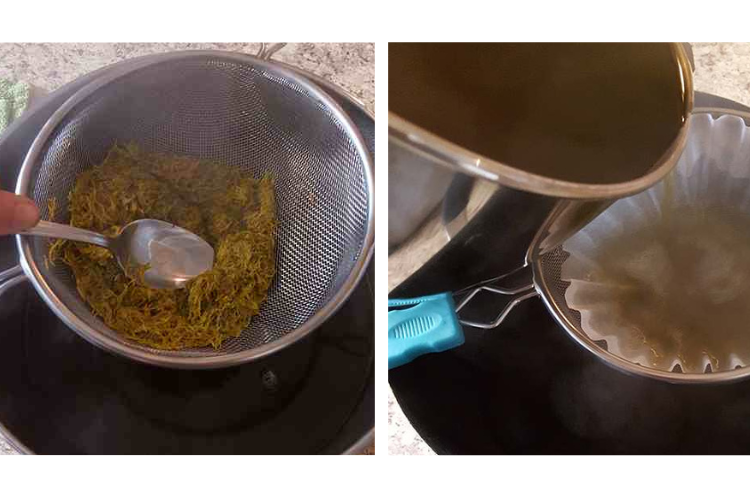
You can do this in a variety of ways, including using a fine wire mesh strainer or cheesecloth. Once initially strained, squeeze the water out of the petals. Strain the water again using a coffee filter to make sure you get out all of the solid matter.
Step 4: Mix Jelly Ingredients Together
Add the following ingredients to a large pot:
2 tablespoons of lemon juice (fresh or reconstituted will do, and lime will work in a pinch, too!)
1 package (1 ¾ ounce) powdered pectin
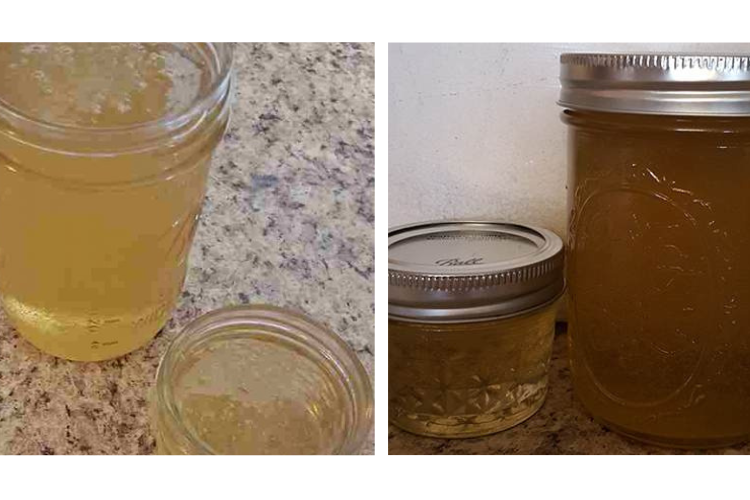
3 cups of the dandelion liquid.
Step 5: Prepare Jars
While many people don’t choose to water bath or pressure can this jelly, instead inverting the jars full of jelly to create the seal, you will still need to prepare the jars regardless of which canning method you choose to use. You can use any size (or shape) canning jar you please. Plan for seven half pints or fourteen quarter pint jelly jars. Place clean jars in the sink and cover with very hot water. You can also use the sterilize feature on your dishwasher to heat jars. It’s not recommended by most jar manufacturers to use dry heat, like in an oven, to heat jars as it may compromise the glass and potentially cause injury.
Step 6: Boil, Add Sugar, and Boil Some More
Bring these ingredients to a full boil, then add 5 ½ cups granulated white sugar. Stir well to help the sugar dissolve completely. Boil for an additional 1 ½ minutes, stirring continuously. Check to make sure that the sugar is fully dissolved by dipping in a wooden spoon and watching if the mixture sheets from the utensil.
Step 7: Put Jelly in Jars
It’s time to pour your jelly into the hot, clean jars you prepared in Step 5 of this tutorial. Spoon the hot mixture into the jars, leaving 1/8 inch of space at the top. Clean off each jar rim then put the lid and ring in place.
At this point, the jelly can be kept in the refrigerator and used within a couple weeks, or you can seal the jars so that the jelly can keep for up to a year when stored properly.
Step 8: Seal Jars
If you choose to use the inversion method to can this jelly, simply flip the jars upside down on a tea towel that has been laid over a hard surface. Wait about ten minutes and check to see if the jars have sealed by inspecting the button in the center of the lid that pulls in when a proper seal has been achieved. If not, you’ll need to move on to the water bath canning method or use the jelly within a couple weeks’ time.
Follow the USDA guidelines for water bath canning of jams and jellies if you choose to use the water bath method. When canned properly, this jelly can be stored for up to two years in a cool, dark area.
If you want to learn how to preserve food for decades for the pennies on the dollar, all you need to do is learn from the only people who have been living without electricity, toxin-ridden foods and modern conveniences for all their life. Here, you’ll get access to several never-before-seen videos where you can see:
- The deadly canning mistake the Amish never make (but most Americans do… without even realizing it)
- Why the Amish put this single leaf in their flour
- How they make powdered eggs
- How they store eggs for over a year—without a fridge, vacuum sealer, or added chemicals
And that’s barely scratching the surface of what these videos will reveal. They’re made by a former Amish who has been excommunicated for sharing these secrets with the outside world. So try and check them out before the videos get taken down!
It is absolutely recommended that you go ahead and water bath can any jelly you wish to use more than a couple weeks from when you make it. If water bath canning isn’t a part of your plan, please consider giving excess jelly away as gifts so that it can be enjoyed within a couple weeks!
Skip the Picking, Steeping, and Stirring…
You could spend all afternoon pulling petals…or you could reach for something that works while you’re doing something else entirely.
Don’t get me wrong: I love a good batch of dandelion jelly. But as much as I love filling my pantry with this homemade recipe, let’s be honest—there are days when you just don’t have time to pick hundreds of flowers, separate petals, steep overnight, and babysit a boiling pot.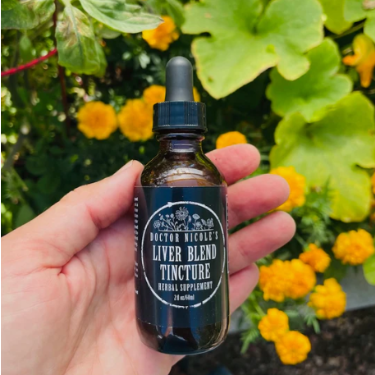
But that doesn’t mean you have to miss out on the liver-supporting power of dandelion.
This Liver Blend Tincture is what I reach for when I want the benefits without all the work. It’s made with dandelion root, milk thistle and schisandra berries… a potent old-time formula that’s ready to use straight from the bottle.
No harvesting. No canning. Just a few drops a day, and you’re giving your liver the kind of deep herbal support our ancestors swore by. It’s the shortcut our great-grandparents wished they had.
👉 Here’s where to find it in Nicole’s Apothecary.
Because some days, you need the remedy without the recipe.
When Pharmacies Run Dry… This Is What You’ll Wish You Had
You can swap out your food. You can choose fluoride-free toothpaste. You can try to eat organic. But as long as you’re still dependent on over-the-counter pills, creams, and prescription drugs, you’re not safe.
The truth is, every shelf in every store is loaded with chemicals. Even the ones labeled “natural.” And if we ever reach a point where the system cracks — if supply chains freeze, shelves go empty, or drug ingredients get restricted — you’ll have nothing.
That’s when this book becomes your lifeline.
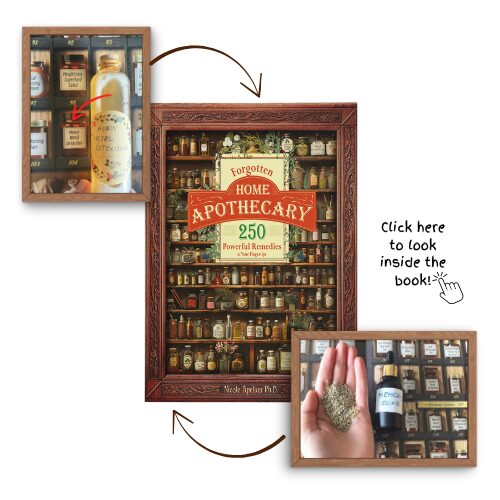
The Forgotten Home Apothecary is the ultimate guide to replacing chemical-laced, pharma-dependent products with powerful, time-tested remedies you can make at home.
You’ll learn exactly how to make your own tinctures, capsules, oils, teas, salves, elixirs, syrups, and poultices from plants you can find growing around you — or already in your kitchen.
These are not “Pinterest cures” or folk tales. These are battle-tested remedies used by herbalists, survivalists, and those who want real protection when nothing else is available.
Inside, you’ll discover powerful remedies like:
 Memory Elixir – made with rosemary to help restore clarity, focus, and short-term memory
 Painkiller in a Jar – crafted from wild lettuce, known as “nature’s opium” but legal, safe, and non-addictive
 Nature’s Amoxicillin – a plant-based antibacterial formula to help fight infections and boost immunity
 Medicinal Herbal Smoking Blend – designed to clear lungs and soothe inflammation with mullein and other wild herbs
 Heavy Metal Detoxifier – flushes out mercury, aluminum, and lead from your bloodstream using safe, herbal chelators
 Herbal Parasite Flush – a powerful three-ingredient recipe to eliminate worms and cleanse your gut
 The Backyard Aspirin – learn to use willow bark like early apothecaries did — it works like real aspirin, without the synthetic junk.
And that’s just the beginning.
This book may be the only thing standing between you and full pharmaceutical dependence in a time of crisis.
 Click here to get The Forgotten Home Apothecary before it’s gone. Limited edition. Real remedies. No chemicals.
You may also like:
DO THIS With The Dandelions Growing Around Your House
If You See This Plant In Your Backyard, Don’t Step On It! (Video)
Stop Throwing Away Your Weeds, Do This Instead!
Weeds You Should Never Pull From Your Backyard
Wild Edibles People Ate During The Great Depression


