Bread has sustained civilizations for thousands of years. But the foundation of bread has always been flour. Flours made from grains, seeds, nuts, beans and even bark.
It should come as no surprise that plenty of experimentation occurred over those centuries. Once ancient cultures understood how to grind flour the experiments began.
Grains dominated many early flours including wheat, rye, barley, oats, flax, spelt and rice. And for the record, a grain is defined as seeds sprouted from grass. Even corn is defined as a grass and the kernels are considered grains. But then there are true seeds.
Many of us have heard of buckwheat flour and yes, it’s made from the buckwheat plant, but the seeds emerge from the flower of the buckwheat plant. The result is a curious combination of words: flour from a flower. And the seed list continues to seeds from the amaranth plant, millet, and more.
And then there’s nuts. Grinding flour from nuts is a bit tricky or you’ll end up with a nut butter.
Wild Grains
Here are the most common grains often harvested from grasses and used for flour making:
- Wheat
- Rye
- Barley
- Oats
- Spelt
- Rice
- Corn
Wild grains like rye, oats, and wheatgrass seeds can make a hearty, flavorful flour if you don’t mind a bit of extra work. When the seed heads are fully mature and dry, I gather them by hand or shake them into a bag. It’s important to dry them completely before you do anything else, otherwise they’ll mold when you try to store or grind them.
Once dry, I winnow away the chaff, tossing them in a light breeze or in front of a fan so the lighter husks blow off and the heavier seeds drop back down. After that, it’s just a matter of grinding them into flour. A hand-crank grain mill is ideal, but a sturdy mortar and pestle or even a flat stone and roller will do the job in a pinch.
Wild grains are smaller than store-bought wheat, so it takes patience to collect enough, but the payoff is a flour that keeps well when stored dry and sealed. In a grid-down situation, a jar of this flour could mean the difference between going hungry and having something to put on the table.
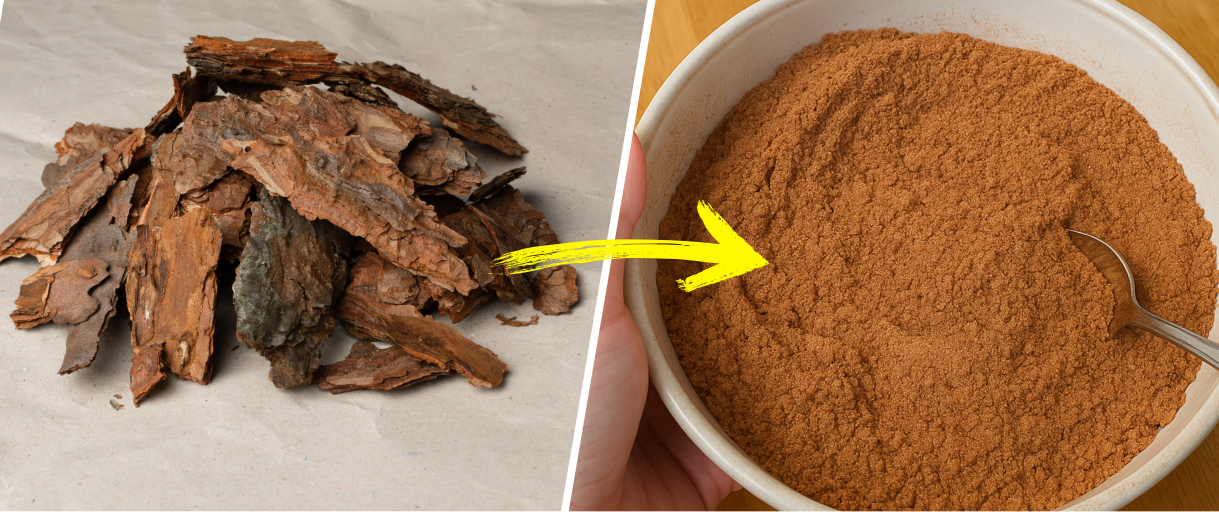
Bark
Native American tribes across the U.S., including the Ojibwe, Cree, and Lakota, made flour and porridge from the inner bark of pine, birch, and slippery elm.

Pine cambium was scraped fresh and eaten as a sweet, resinous snack or dried for winter. Slippery elm wasn’t just food: it was medicine, ground into a fine meal and used as a healing gruel for the sick or to soothe stomach ailments.
When settlers moved westward, they quickly learned these techniques from the tribes they encountered. During the harsh winters of the 1700s and 1800s, when stored grain ran out or crops failed, bark flour became a staple. It wasn’t uncommon for early American families to mix pine or birch flour with what little cornmeal or wheat they had left to make a dense, hearty bread that kept bellies full until spring planting.
Making it isn’t complicated, but it’s a skill worth practicing before you need it. I peel back only a small section of outer bark to avoid harming the tree, then slice the pale cambium into thin strips. Once they’re dried completely, they can be ground into a fine powder. Pine produces a slightly sweet, resin-flavored flour, birch is milder and almost herbal, and slippery elm gives a silky, smooth flour that blends beautifully with nut or seed flours.
➡️If You See a Pine Tree, Do This Immediately…
Most people walk right past a pine tree without giving it a second thought. But that tree might be hiding much more beneath the bark. It could be a survival food source hiding in plain sight.
Not a lot of people know this, but inside those pinecones are edible nuts packed with fat, vitamins, and minerals. You could live off them alone for days if you had to. The only catch? They’re not that easy to extract, unless you know this little trick that makes it almost effortless. And this is just one of the many overlooked survival skills you’ll discover right here.

Seeds
Seeds were another flour source, and we already mentioned that buckwheat is in fact a seed from a flour. Other seeds made into flour include:
- Amaranth
- Quinoa
- Flax
- And Millet
Wild seeds like amaranth, lamb’s quarters, and dock are some of the most dependable flour sources I’ve found. These plants grow almost anywhere, and once you know what they look like, you’ll spot them all over your property. I gather the seed heads once they’ve dried on the stalk, rubbing them into a container and sifting out debris.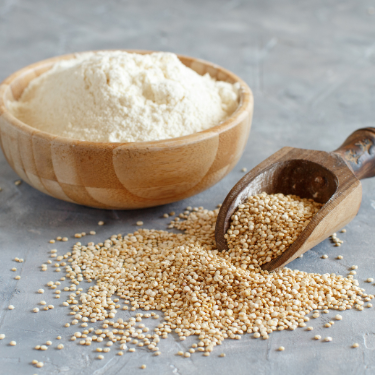
For dock, a quick dry roast deepens the flavor and makes it less bitter. Seed flour has an earthy, satisfying taste and mixes well with grain or nut flours for better baking. Properly dried and sealed in an airtight jar, it can last through the winter with no problem. In a long-term emergency, these wild “weeds” can keep you from relying on dwindling pantry stores.
➡️And while these take care of the pantry, some seeds are worth keeping for an entirely different reason. A handful can feed you, but another handful can keep you well.
So make sure you stock up on both food and medicinal seeds. This way, when everyone pays for antibiotics in gold, you’ll have them growing in your backyard.
I found a great kit with 4,818 high-quality, NON-GMO seeds packaged in the US, that you can turn into hundreds of powerful natural remedies without spending a dime at the pharmacy anymore. It contains one plant for every part of your body – you’ll find a painkiller, an anti-inflammatory, an anti-parasitic, and even some plants that can help people with diabetes and autoimmune disorders. It’s called the Medicinal Garden Kit and you can find it here. But you might wanna hurry, cause it’s that good it’s usually sold out.
Nuts
Nut flours are growing in popularity. Nuts used to make nut flours include:
- Coconuts
- Cashews
- Hazelnuts
- Walnuts
- Pecans
- Almonds
➡️Almonds aren’t just good for flour either. Turn them into almond milk and you’ve got the base for one of my favorite kitchen remedies: a warm spiced milk that works as a natural anti-inflammatory.

Almond milk is packed with nutrients that benefit your whole body: it’s rich in vitamin E, a powerful antioxidant that helps protect your cells from damage and supports healthy skin. It also contains healthy fats that support your brain and heart. It’s also gentle on digestion and even helps support your pancreas, the organ that regulates blood sugar and insulin. And because it contains essential minerals like magnesium and calcium, it’s also good for bone health.
Add anti-inflammatory spices like ginger and cinnamon, known to help balance blood sugar and soothe aching joints, and you’ve got a comforting, diabetes-friendly tonic that’s easy to make at home. You can find the full recipe for this wonder-milk tonic right here.
Nut flour is one of the richest, most filling staples you can make, and acorns, walnuts, and chestnuts are all excellent choices. Acorns take the most work because of the tannins, but once leached, they produce a mild, slightly sweet flour that stores well if kept cool.
I crack the shells, leach the acorn meat in several changes of water, dry it thoroughly, and then grind it fine. Nut flours are high in fat, which means they’re calorie-dense and perfect for winter stores and emergency rations. I vacuum seal mine in small jars and keep them in the cellar or freezer to extend their shelf life. When mixed with a bit of wild grain or seed flour, it makes a dense, sustaining bread that sticks to your ribs on cold days.
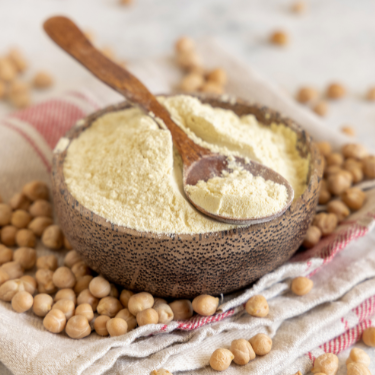
Beans
Beans are another emerging flour choice and have been used for centuries to make flour for baking. The list of possibilities is long including:
- Chickpeas (garbanzo beans)

- Black beans
- Pinto beans
- Navy beans
- Lima Beans
- Great northern beans
- Red lentils
- And even green peas
If you can find wild peas or mesquite beans, you’ve got another long-lasting flour option that’s loaded with protein. I dry them thoroughly, and sometimes roast them lightly to make grinding easier and bring out the flavor.
Bean flour can be stored in airtight containers for months and works perfectly for stretching grain flours when supplies are low. It makes a dense, filling dough that’s ideal in survival situations because it gives you both energy and protein in one meal. Every homesteader knows the value of a food source that doesn’t spoil easily, and this is one you can keep on hand for the long haul.
Grinding Your Own Flour
Once you’ve gathered your grains, seeds, nuts, or even bark, the next step is turning them into usable flour. There are a few different ways to do it, and the best choice often depends on what you have on hand and the situation you’re in.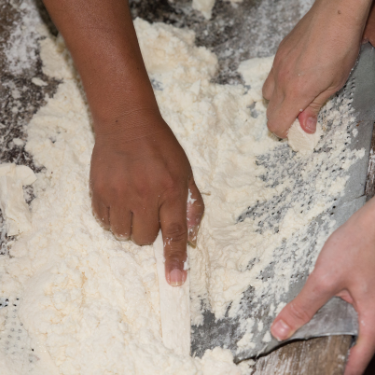
If you’ve got power, an electric flour mill or even a sturdy food processor can turn most natural sources into a fine powder in minutes. But for many homesteaders, relying on electricity isn’t always the goal. A good hand-cranked flour mill is worth its weight in gold. Models with metal plates give you a coarser grind, perfect for cornmeal or rustic breads, while mills with stone burrs can produce a soft, fine flour that’s closer to what you’d buy in a bag.
If you’re out in the field or dealing with a grid-down situation, you can always go back to basics. Indigenous tribes and early settlers often used nothing more than a flat rock and a grinding stone to pulverize grains and bark into flour, and the method still works as well today as it did centuries ago.
The real trick isn’t the tool—it’s the grind. Coarse meal is ideal for things like cornbread or hearty survival loaves, while fine flour is better for softer breads and biscuits. The longer you grind, the finer the texture. A lot of old recipes even specify the grind you should aim for, so if you’re working from scratch, it’s worth experimenting until you find the consistency that works best for what you’re baking.
Grinding your own flour isn’t just about making bread. It’s about independence. Whether you’re using a modern mill, a hand-cranked grinder, or a couple of rocks, you’re taking raw food straight from nature and turning it into something that can keep you and your family fed through good times and bad.
➡️ How to Stockpile 272 pounds of long-lasting food with just $5
Recipes
The recipes we’re going to cover present a range of baked foods, from flatbread to biscuits to loaves. All use one of these flour sources we’ve explored.
Whole Wheat Flatbread
Probably the first type of bread to emerge in early civilizations and popular to this day.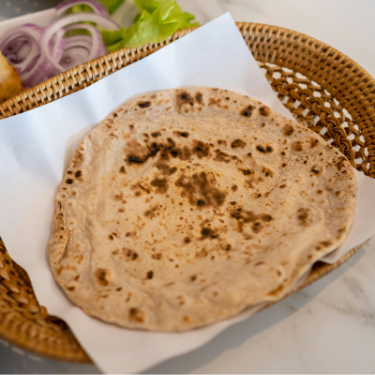
INGREDIENTS:
¾ cup of water
2 tablespoons of plain yogurt
1 egg
2 teaspoons of salt
1 tablespoon of olive oil
3 cups of whole wheat flour
1 ½ tablespoons of active dry yeast
DIRECTIONS:
- Put all of the ingredients into Mixmaster bowl with a dough hook or on a table surface if you’re going to knead by hand.
- Knead the dough until you have a dough ball and turn the dough out onto a floured surface and cut into 6 equal size pieces.
- Using your hands and fingers press the dough out into a flatbread about 6 to 8 inches in diameter.
- Let the dough pieces rise for about 15 minutes. In the meantime, heat an ungreased cast iron skillet over high heat until it is very hot.
- Toss the flatbread onto the skillet one at a time for about 2 to 3 minutes a side or until you have some browning.
- Stack the flatbreads as you go and when done, serve.
➡️Here’s how you can make Bread in a Jar!
Cornbread
A popular bread that first emerged in central America using corn meal as the foundation ingredient. It’s baked in an oven in a cast-iron skillet but can also be baked in a covered Dutch oven with coals below and on top.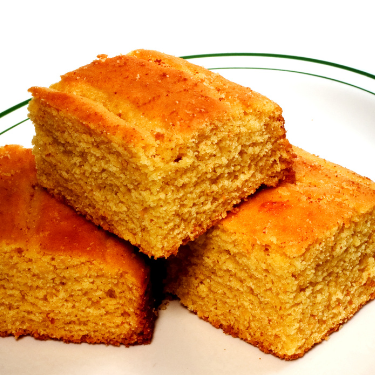
INGREDIENTS:
2 cups of cornmeal (Make sure it’s the granular cornmeal and not a cornmeal or corn mix that has been ground to a flourlike consistency sometimes referred to as Masa Harina)
1 tsp. salt
1 tsp. baking soda
2 tsp. baking powder
1 egg
4 tbsp. butter
1 ½ cups of plain yogurt or sour cream or buttermilk
4 tbsp. honey
Add water to get a batter-like consistency up to one cup
💡 Tip:
➡️If you’ve ever struggled with cornbread that turns out dry or crumbly, here’s a simple fix: use the traditional Amish Friendship Bread starter. You only need a single potato to make it! And you can also use it for many different things in your kitchen, like crackers, pizzas, cakes, rolls…anything you want.
This natural starter not only helps your cornbread rise beautifully but also keeps it moist and flavorful—no need to measure multiple leavening agents or worry about your baking powder being fresh.
Using this makes the process easier and more reliable, especially if you want consistent results every time. Plus, once you have your starter going, you can keep it going for future batches or other recipes.
DIRECTIONS:
- Place all of the ingredients into a bowl in the order indicated.
- Blend together well either with a spoon or using your hands. You could also use a Mixmaster or a hand mixer. The result will be a batter rather than a dough.
- Pour the batter into the cast-iron pan.
- Preheat the oven to 400° F./205° c.
- When the oven reaches temperature place on the center baking rack and bake for 20 to 30 minutes.
- Test the center with a toothpick and if it comes out dry remove from oven and let rest for 10 minutes.
- Slice and serve.
Spelt Pretzels
You don’t have to use spelt flour but we’re trying to stretch the limits here with a variety of grains and seeds.
INGREDIENTS:
1 1/4 cups of water at 110 degrees Fahrenheit or 176 degrees Celsius
2 tbsp sugar
1 1/2 tsp salt
1 tbsp oil
1 egg yolk at room temperature
3 1/2 cups spelt flour
2 1/4 tsp active dry yeast
GLAZING AND TOPPING
4 egg yolks
2 tablespoons of water
Various sprinkle options including coarse salt, peppercorns, poppyseeds caraway seeds, cracked pepper, rehydrated onion or garlic flakes, freshly chopped garlic, or whatever you prefer.
DIRECTIONS:
- Place all of the ingredients in the bread machine in the order indicated in the ingredients section of the recipe and select the basic dough setting.
- When the dough is done, dump out of the bread pan onto a lightly floured surface.
- Preheat the oven to 375 degrees Fahrenheit or 176 degrees Celsius.
- Using a rolling pin, roll out the dough to a thin sheet.
- Cut the sheet into long strips about an inch wide.
- Roll the strips forming dough strings.
- Form the stings into a pretzel shape.
- Bring a large pot of water to a boil and drop the pretzels into the boiling water a few at a time.
Flip in the water with a slotted spoon after 15 to 20 seconds and boil for another 15 to 20 seconds.
- Remove from the boiling water with the slotted spoon and let dry on a wire rack.
- Glaze the pretzels with the egg yolk wash.
- Sprinkle your choice of toppings onto the raw pretzels.
- Bake on a lightly oiled cookie sheet for 15 to 20 minutes or until browned to your liking.
- Remove from the cookie sheet and serve immediately or reserve for later.
Ezekiel Bread
Ezekiel Bread is a hearty loaf inspired by the biblical verse Ezekiel 4:9. It’s made from a blend of sprouted grains and legumes, offering a complete protein profile and rich fiber content. Here’s a simplified version: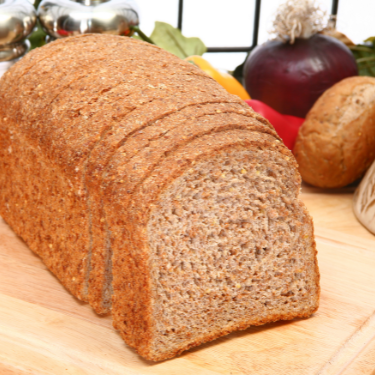
🧺 Ingredients
2 cups warm water
2 tbsp honey
¼ cup olive oil
1 packet active dry yeast
1 cup whole wheat flour
1 cup spelt flour
¼ cup millet flour
2 tbsp oat bran
2 tbsp green lentils (ground or sprouted)
2 tbsp kidney beans (ground or sprouted)
2 tbsp black beans (ground or sprouted)
¼ tsp salt
Directions:
- Activate the yeast: In a large bowl, mix warm water, honey, and olive oil. Sprinkle in yeast and let sit for 5–10 minutes until foamy.
- Combine all flours, legumes, and salt in a separate bowl.
- Stir dry ingredients into the yeast mixture until well combined. The dough will be sticky and loose.
- Pour into a greased loaf pan. Cover and let rise in a warm place for 45 minutes or until it reaches the top of the pan.
- Bake at 350°F (175°C) for 45–50 minutes until golden brown.
- Let cool on a wire rack before slicing.
💡 Tips:
- For a more traditional touch, use sprouted grains and legumes.
- Add sesame or sunflower seeds on top for extra crunch.
Bark Flour Flap Jacks
Bark flour emerged in Scandinavia and was used to make flatbreads, muffins and especially pancakes or flap jacks.
Ingredients:
1 cup bark flour (or a mix of ½ cup bark flour + ½ cup all-purpose flour)
2 eggs
1 ½ cups milk
1 tbsp sugar (optional)
Pinch of salt
Butter for frying
Instructions:
- Whisk eggs and milk together until smooth.
- Add flour, sugar, and salt; mix until lump-free.
- Let the batter rest for 15–20 minutes.
- Heat a skillet with a bit of butter.
- Pour a thin layer of batter and swirl to coat the pan.
- Cook until golden, flip, and cook the other side.
- Serve rolled with jam, honey, or even lingonberries for a Nordic touch.
💡 Tip: Bark flour is very absorbent and can be dense, so mixing it with regular flour helps balance texture and flavor.
Gluten Free Buckwheat Biscuits
Buckwheat seeds from the buckwheat flour are gluten free, but when blended with a ½ cup of bread flour it will give the yeast what it needs to rise.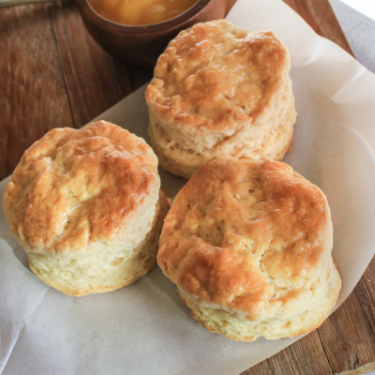
Ingredients:
2/3 cup milk (you can substitute buttermilk if you like)
2 large eggs
1 1/4tsp. salt
3 cups of buckwheat flour and ½ cup of bread flour (bread flour is high in gluten and will give some rise to the biscuits)
1 tbsp. active dry yeast
1 tbsp. honey
1/3 cup unsalted butter
Directions:
- Add the ingredients to a bowl and mix well. You could also use a Mixmaster with a dough hook.
- When the dough is done remove the dough to a floured surface and roll out until 1/2″ thick.
- Preheat oven to 425° F.
- Cut rounds out of the dough with a water glass or dough cutter to the shape and size you like.
- Place on a buttered or oiled cookie sheet and bake for 15 minutes or until browned.
Almond Flour Bread
Yes, almond flour bread tastes like almonds and the slivered almonds on top add the perfect accent.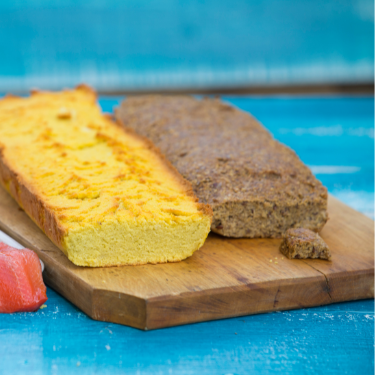
Ingredients:
1 ½ cups of almond flour
1 cup of bread flour
1 cup of warm water
1 tablespoon of dry yeast
1 tablespoon of honey
1 cup of slivered almonds
Directions:
- Combine all of the dry ingredients in a bowl and blend together
- Add the warm water and knead with your hands or in a Mixmaster with a dough hook.
- When you have a dough ball, roughly shape it into a loaf and set it into a buttered bread pan.
- Let the bread rise in a warm place covered with a wet washcloth for 1 hour.
- Pre-heat the oven to 350 degrees F.
- Bake for 35 minutes.
- Let rest for 10 minutes and slice and serve.
Storing Home Ground Flours
The best way to store any home ground flour is in a mason jar with a tight fitting lid. Store it in the pantry where you typically store other flours. It should be good for 1 to 2 months. If you want to extend the shelf-life, refrigerate it.
Experiment
It’s fun to make flour from new ingredients and you can experiment with flour combinations. Try combining almond flour with coconut flour, or chickpea flour with amaranth flour. What you’ll typically find is that gluten free flours work best in batter breads but the addition of some flour with gluten can even make pine bark flour rise to the occasion every time.
You may also like:
Common Plants You Can Turn Into Flour in a Crisis
Why You Should Can Dandelions Growing in Your Backyard (Video)
Tinderbread: The Fireproof Biscuit That Lasts Forever
How to Make Cowboy Bread (Lasts Months in Your Pantry)


