Survival in the 1800s depended on proper food storage. Families couldn’t run to the grocery store.
They had to make their harvest last 6-8 months. A failed storage system meant empty stomachs and real hunger.
Crop failures hit hard in the 1800s. The potato blight of 1845 proved how crucial backup food stores were. Families who mastered storage techniques survived, while others faced starvation.
Markets existed in bigger towns, but most families lived too far away. A trip to town often meant a full day’s journey. This distance made self-sufficiency through food storage essential, not optional. Here are a few methods they used to do just that:
Ash Storage for Root Vegetables
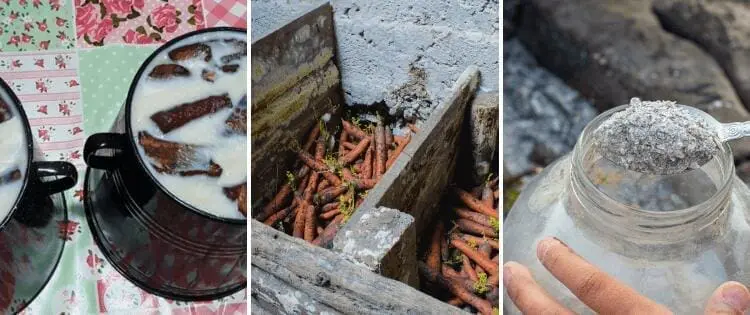
Wood ash served as a powerful preservative for root vegetables. Families collected clean ash from their wood stoves and fireplaces throughout the year. They layered vegetables like carrots, turnips, and beets in boxes or barrels, covering each layer with 2-3 inches of ash. This method kept root vegetables fresh for 4-6 months.
The ash method worked because it created a dry, alkaline environment that prevented rot and kept pests away. The ash also absorbed excess moisture that would normally cause vegetables to sprout or mold. I’ve found old farm records showing families stored up to 200 pounds of root vegetables this way.
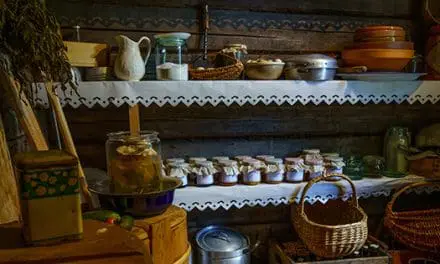
Preserving in Clay Pots and Jugs
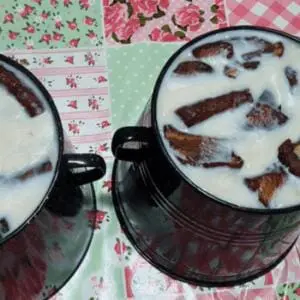
 Clay pots and jugs played a crucial role in 1800s food storage. The natural porosity of clay created ideal conditions for many foods. Families stored butter, milk, and cheese in unglazed clay containers. These pots kept dairy products 10-15 degrees cooler than the surrounding air temperature.
The key lay in the preparation. Before using new clay pots, families soaked them in cold water for 24 hours. This process filled the clay’s micropores, creating a natural cooling system through evaporation. They placed these pots in cool, shaded areas or buried them partially in sand. Here you’ll find exactly how to use this old method with the materials you have on hand.
Buried Food Preservation
Root cellars weren’t the only underground storage solution in the 1800s. Many families dug specific holes for different foods. A properly constructed storage pit kept food at 32-40 degrees Fahrenheit year-round. These pits worked through simple physics – the earth’s natural cooling properties combined with strategic ventilation holes kept food fresh.
Families lined storage pits with straw and dried leaves as insulation. They dug most pits 4-6 feet deep, with the bottom slightly deeper than the entrance for cold air to settle. Different foods needed different pit designs. Cabbage needed shallow, wide pits, while potatoes did better in deeper, narrow spaces. If you want to make your own root cellar, this is the complete blueprint for an underground bunker you can make yourself with less than a few hundred dollars.
Storing Food in Straw and Hay
 Straw storage protected fruits and vegetables through winter. Apples and pears stayed fresh for 3-4 months when packed properly in clean, dry straw. Each piece of fruit needed complete wrapping to prevent contact with its neighbors. Farm records show that a single family often stored 500-600 apples this way.
The method required specific straw preparation. Families dried the straw thoroughly and stored it off the ground to prevent mold. They checked stored fruit weekly, removing any spoiled pieces before rot could spread. In Minnesota, farmers stored their winter squash crop in straw-lined attics, where temperatures stayed between 50-60 degrees.
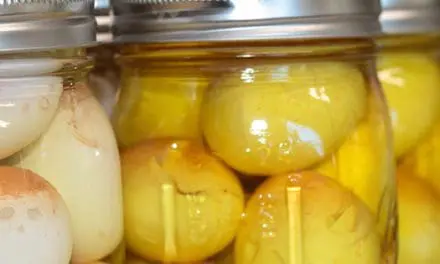
Preserving with Vinegar Soaks
Vinegar preservation went beyond simple pickling. Families used vinegar soaks to preserve eggs, meat, and vegetables. They mixed vinegar with specific ratios of salt and water based on what they needed to store. Eggs stored in a vinegar solution lasted 6-8 months, while meat stayed good for 2-3 months.
The process demanded precise measurements. Too much vinegar made food inedible, while too little risked spoilage. Families kept detailed records of their vinegar ratios, passing successful formulas down through generations.
Storing in Coconut Shells
Coconut shells served as natural storage containers in coastal and trade-connected areas. These shells protected salt, spices, and dried herbs from moisture.
The natural oils in the shell’s fibers kept the contents dry for months. Families cleaned and dried shells for 2-3 days before use, then sealed them with beeswax around the edges.
Related: How To Preserve Food Without Electricity
Each shell held about 1 cup of dried goods. The bigger shells stored enough salt for a family’s monthly needs. Traders often carried spices in coconut shells because they traveled well and didn’t break like glass or pottery.
Tallow or Lard Preservation for Meats
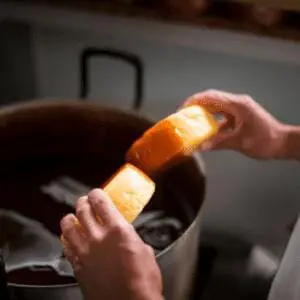
 Meat preservation with tallow or lard kept protein available year-round. Families melted beef tallow or pork lard and poured it over cooked meat in crocks. The fat sealed out air and bacteria, preserving meat for 4-6 months. They stored these crocks in cool areas at 50-60 degrees.
The process needed careful attention. The tallow had to completely cover the meat, without any air pockets. Families marked their crocks with the packing date and type of meat. They used about 2 pounds of tallow for every pound of meat stored. I use an Amish technique for making lard and tallow that I found in this online course where the instructor is Eddie Swartzentruber who grew up in an Amish community but left when he was just 17. In this course, he’s sharing their best-kept secrets.
Preserving with Lye (Lye Curing)
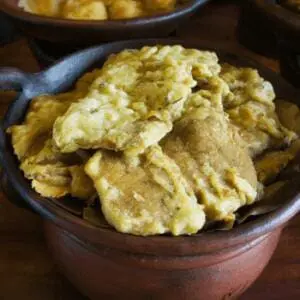
Lye curing preserved food through a chemical process. Families made lye from wood ash and water, creating a strong alkaline solution. They soaked corn in lye to make hominy, which lasted months longer than untreated corn. The lye changed the corn’s structure, making it more nutritious and easier to digest.
The process took skill. Too much lye ruined the food, while too little didn’t preserve it. Families tested lye strength using an egg – the right solution made the egg float at a specific height. They used wooden or ceramic containers because lye corroded metal.
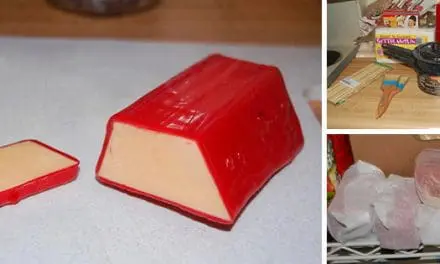
Using Beeswax Wraps for Cheese and Meats
 Beeswax wraps protected cheese and cured meats from mold and insects. Families collected beeswax from their hives or traded for it. They mixed the wax with pine resin and a small amount of oil to create flexible wraps. These wraps kept cheese fresh for 2-3 months and protected dried meats from dust and insects.
The wraps needed specific care. Families washed them in cool water and dried them completely between uses. One pound of beeswax made enough wraps to store 20 pounds of cheese. They reused these wraps for several years before making new ones.
Hanging Food in Cold, Dry Conditions (Air Drying)
Air drying preserved herbs, fruits, and meats effectively. Families built drying racks in attics or covered porches where air circulated freely. They hung herbs in bundles of 8-10 stems, while fruits needed single-layer spacing. Meat required careful preparation – they cut it into strips no thicker than 1 inch and soaked it in brine before hanging.
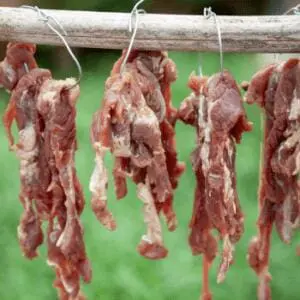
The drying process took 2-4 weeks, depending on the weather. Families checked their hanging food daily for signs of mold. They stored dried foods in cotton bags or wooden boxes, keeping them in cool, dark places. A family of six needed about 100 pounds of dried food to last through winter.
How 1800s Food Storage Methods Influence Today’s Homesteading Practices
The basic principles remain sound – cool, dry, and dark storage spaces still preserve food best.
These techniques worked and still work today because they follow basic science – controlling temperature, moisture, and airflow. A root cellar keeps food at 35-40 degrees whether it was built in 1850 or yesterday.
Some methods fit modern needs perfectly. Beeswax wraps work better than plastic for cheese storage. Ash storage still keeps root vegetables fresh for months.
Even buried food pits make sense for homes without basements. My neighbors use a modified version of the old pit design to store their winter squash crop.
The biggest lesson from 1800s food storage comes down to this: work with nature, not against it. Underground storage uses the Earth’s natural cooling. Air drying harnesses wind and sun. These methods don’t need electricity or special equipment – just knowledge and careful attention. These prove simpler isn’t always worse.
So which method are you gonna try out first?
You may also like:
The Only Plants Soldiers Looked For During The Civil War
An Insanely Effective Way To Build A 5 Year Food Stockpile (Video)
Security Mistakes You’re Probably Making On Your Property
Do This For Your Chickens So They Lay More Eggs
Soil Testing Methods Used By Pioneers That Still Work Today


