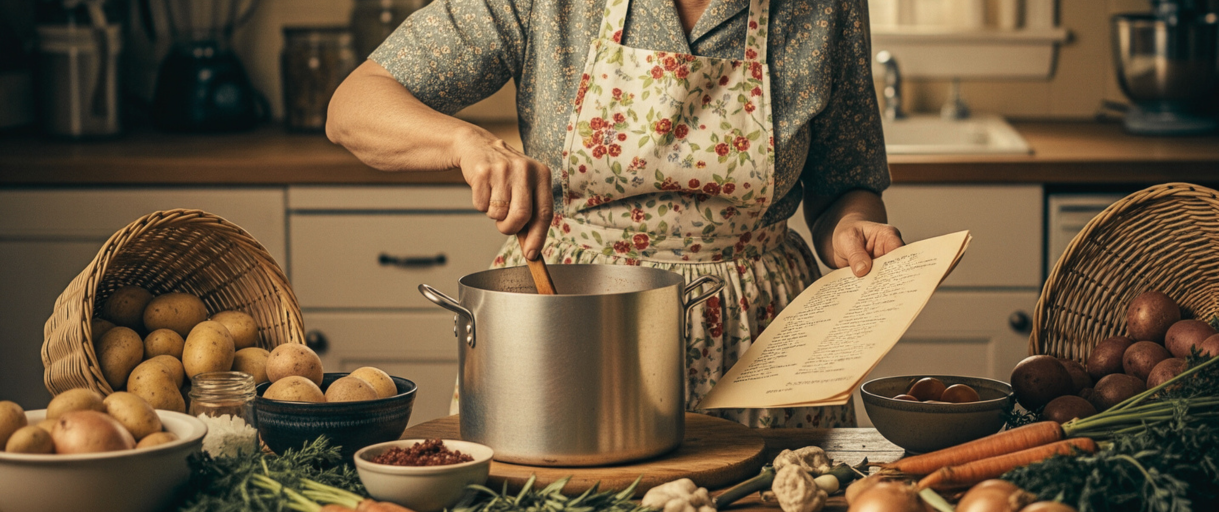
When the grid goes down…when supply chains break… when the grocery store shelves are bare, what are you going to feed your family?
In times like that, you need food that’s filling, reliable, and made from ingredients you already have on hand.
Grandma’s Survival Stew is exactly that. A simple, hearty meal built to stretch what you’ve got and deliver real nutrition when it counts most. It’s made from basic ingredients, slow-cooked to bring out the deepest flavors, and packed with calories and vitamins to keep you going through even the toughest days. This recipe was shaped by the Great Depression, a time when careful planning and zero waste were a necessity.
If there ever comes a time when fuel is scarce, the grid goes down, or food becomes harder to come by than anyone wants to admit… this is the kind of recipe you’ll be grateful you memorized.
Let me show you how to make it—exactly the way Grandma did.
Total Nutrition in a Bowl
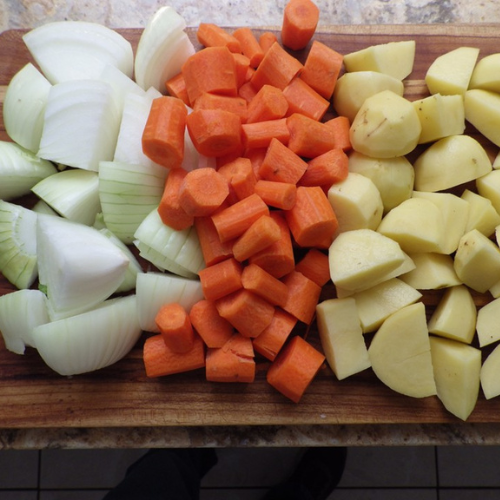
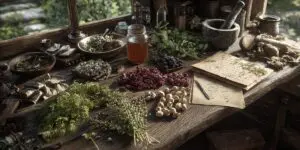
The ingredients in Grandma’s Survival Stew are basic, but loaded with nutrients and generous with calories. It starts with chunks of beef and the slow stewing makes even the toughest cuts tender and delicious. Vegetables are the main component including onions, carrots and potatoes but Grandmas were often creative adding surprises like peas or corn and even cut up pieces of asparagus or cauliflower.
Herbs and spices enriched the flavor, and you could always see tell tale bits of parsley, rosemary, thyme and cracked black pepper. Salt or a broth delivered the overall finish to the flavor and some surprises like paprika and both onion powder and garlic powder, but the real secret was the caramelization of the meat and vegetables before the stewing began.
The Caramelization Secret
When you sauté vegetables like carrots or onions and meats like beef, they will often develop browned and even lightly blackened edges. It’s when the natural sugars in the vegetables or meats cook and turn brown. In culinary terms it’s known as “caramelization”, and that’s important with Grandma’s Stew recipe.
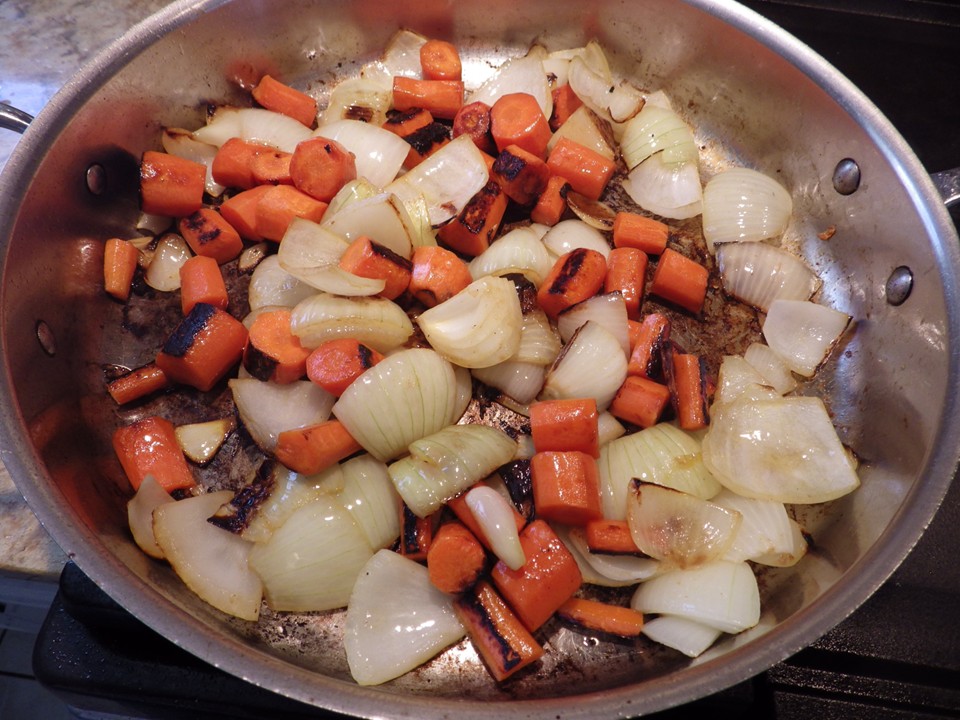
Caramelization adds color to the gravy and flavor. It brings a flavor and body to the stew that goes beyond herbs and spices and broths. We’ll cover caramelization in detail in the recipe.
Low and Slow Stewing
Another secret is long, low and slow stewing. You can use a Dutch oven outdoors over an open bed of hot coals, a pot on the stove with a folded layer of tinfoil underneath the pot, or a slow cooker. We’re going to use a slow cooker/crockpot because it’s low maintenance.
➡️For times when there’s no power, no fuel, and no good way to cook a hot meal, there’s a little-known solution that could actually save you in such a crisis. You can easily build an oven that cooks without fire, fuel, smell, or smoke. It doesn’t need electricity or even a flame to work, and yet, it manages to slow-cook food like you wouldn’t believe. The best part is, it’s surprisingly easy to build with just a few basic materials. You can watch this short video to find out more details about it.
The average stewing time varies. In a crockpot, it averages 6 to 8 hours. On the stove 3 to 5 hours. Over an open pit of coals it varies depending on the heat from the coals, but figure 3 to 6 hours. The best check for doneness is to taste one of the hunks of beef and see if it’s tender. All check a carrot chunk. They take a while too stew as well.
Grandma’s Survival Stew Recipe
Grandma’s recipe starts with vegetables. The primary vegetables are onions, carrots and potatoes.
She also added some herbs and spices. Here’s the basic list of ingredients:
- 6 carrots
 5 to 6 potatoes
- 2 large onions
- 2 to 3 pound chuck roast
- 1 to 2 teaspoons of salt
- ½ teaspoon rosemary
- 1 teaspoon parsley
- ½ teaspoon thyme
- 1 teaspoon cracked black pepper
- 3 to 4 tablespoons of corn starch or flour (to thicken the gravy)
- 3 plus another 2 tablespoons of butter (used when caramelize the vegetables and beef)
- Enough water and broth to cover the vegetables and meat in the pot
 5 to 6 potatoes
Basic Prep
What’s important is to cut the vegetables a bit thick or into chunks. Use the varieties you like but we used Vidalia onions like grandma would have done because they matched her natural sweetness.
You would typically slice a carrot thin or dice an onion for a soup, but for stew you want each cut to fit a spoon with an average 1-inch to a half inch in size.
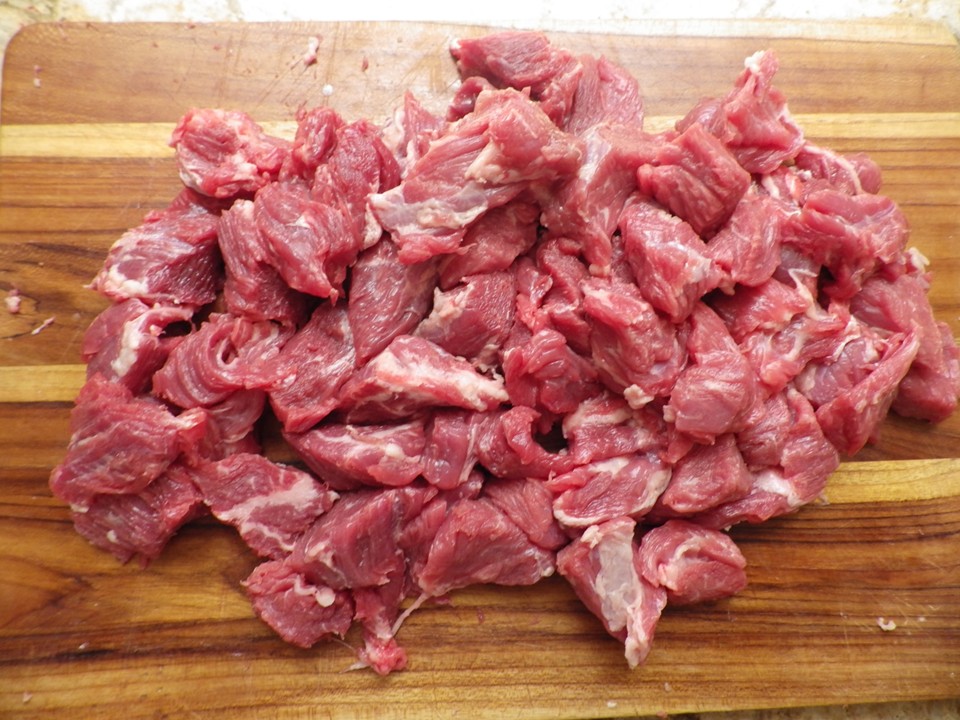
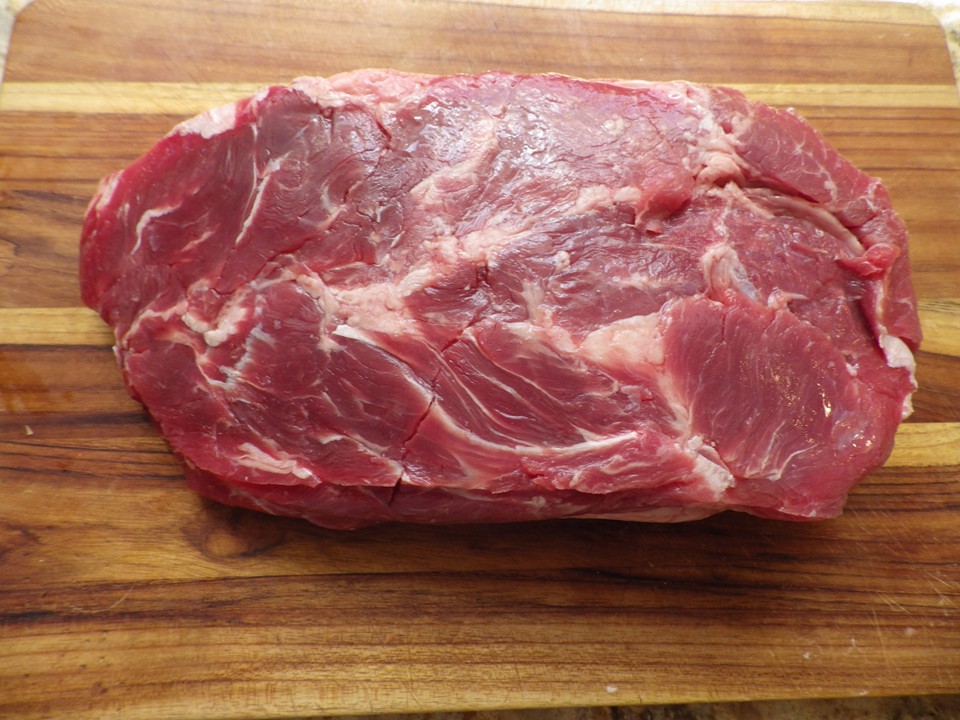
Next up is the beef.
We’re using a 2-and-a-half-pound piece of chuck roast.
We trimmed the fat as much as possible and cut the roast into chunks about 1-inch square.
You can use any cut of beef but we’re going with the toughest, because Grandma was one tough girl. It’s also the least expensive.
Spices are up to you, but grandma was liberal with herbs and spices and moderated them carefully. Salt is the biggest challenge. If you add too much salt it’s hard to get rid of it without pouring off some of the broth or gravy and adding water. Grandma tasted as she stewed to make sure herb and spice proportions were right.
It’s Caramelization Time
To get off to a good start, place a large pan on the heat and get it hot over high heat.
Add 3 tablespoons of butter until melted and then drop in your carrots and let them brown a bit.
Next up are the onions and carrots. Dump them in the pan and let the caramelization begin.
Toss the onions and carrots around and reduce the heat to medium. Let them caramelize for another couple of minutes and repeat the stir/toss until you see nice browning on the carrots and onions.
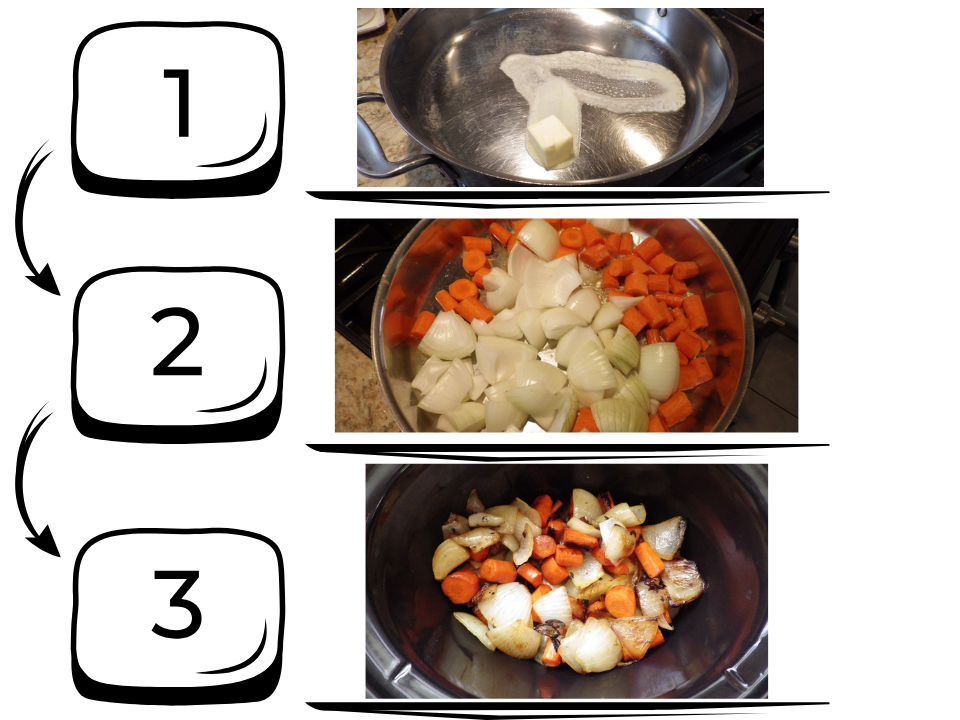
When they look good and caramelly, toss them into the crockpot.
You’ll then want to toss in your peeled and chunked potatoes.
Potatoes don’t need to be caramelized so they can go straight in the crock on top of the onions and carrots.
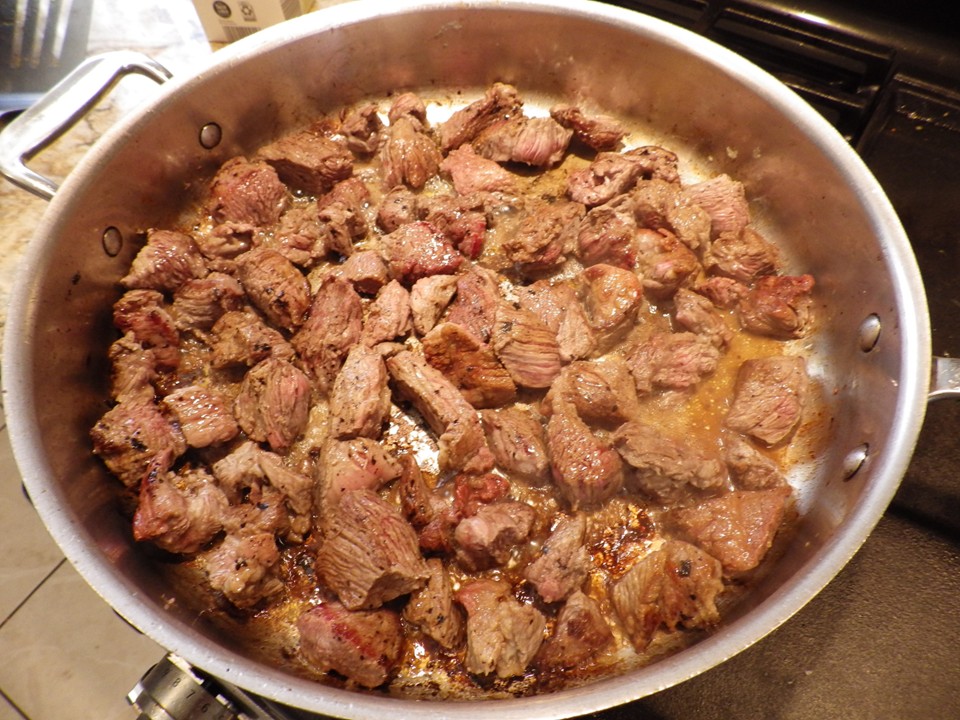
Cut up your chuck roast into squares and turn up the heat again.
Add 2 tablespoons of butter and toss in the chunks of chuck. Let them sear and caramelize turning and tossing every couple of minutes.
When you see browning on your beef chunks, add them on top of the vegetables in the pot. And now it’s time to harvest the caramel.
Add 2 cups of water or broth to the pan over medium heat and scrape the bottom with a spatula. You want to loosen up the burnt and browned bits in the bottom of the pan.
Keep doing this until you see some color come into the liquid and the pan showing few bits at the bottom. This is called “deglazing” the pan.
Pour your caramelized stock into the pot and set the crockpot on high for 6 to 8 hours.
After 1 hour, taste the broth. It will probably need some help. Now is when you add your herbs and stir them in. Don’t add any salt yet.
After another hour, taste the broth. It should demonstrate some level of flavor but it may be obvious it’s “salt time.”
Add a teaspoon of salt at a time and stir into the broth. Wait a few minutes and taste and add more salt to suit your taste.
From Broth To Gravy
Now it’s time to thicken your gravy. Do this about 2 hours into stewing. There are a couple of ways to do this using either corn starch or flour. If using corn starch, mix it with water until dissolved in a cup. We added some extra bits of rosemary to the mix.
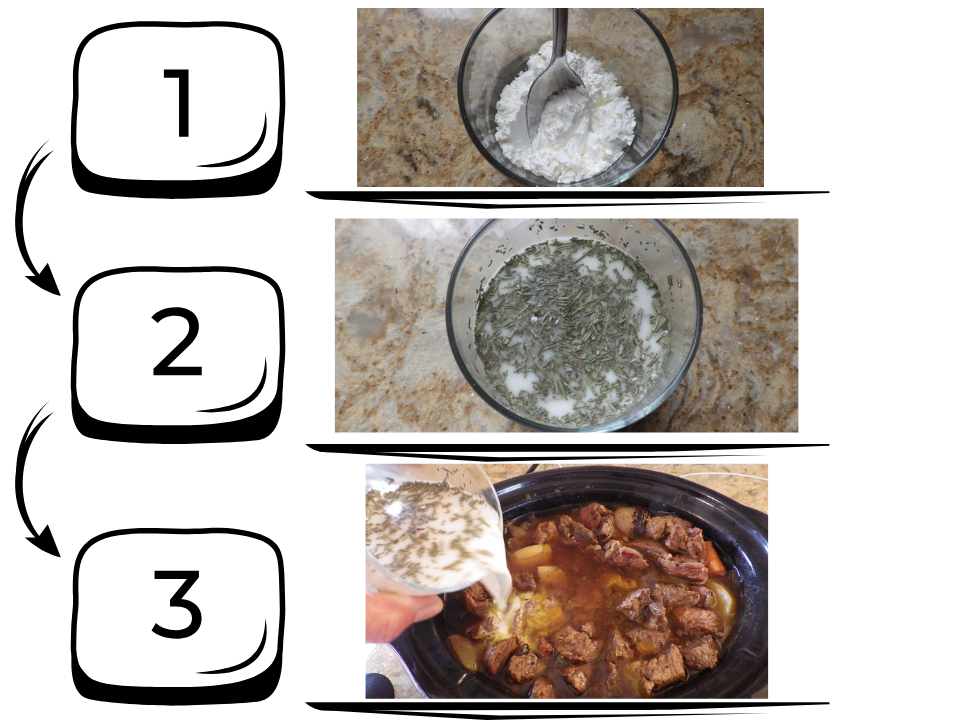
If you use flour, melt 2 tablespoons of butter in a small pan and add the flour and stir until blended.
If you don’t dilute the corn starch with water or meld the flour into butter you’ll get lumps. Lumps are bad in any gravy.
Stir in your thickener and keep stewing. In about an hour your gravy should start to thicken (maybe sooner). If you don’t feel it has the consistency you want, add some more cornstarch or flour but always temper with water or melted butter.
Grandma’s Taste Test
When your stew looks done, ladle out a small taste of the beef and each vegetable. Taste it and assess tenderness and flavor. If it needs more time, give it more time. You can also adjust flavor (usually a bit more salt but maybe some pepper).
Grandma’s recipes stick around for good reason: they work. These aren’t just meals. They’re time-tested remedies made from simple, natural ingredients you probably already have. These are the recipes that don’t just soothe symptoms, but actually help your body heal when nothing else is available.

💊Grandma’s Homemade Antibiotic: A powerful natural alternative to fight infections when antibiotics aren’t an option.
🍃Grandma’s Nettle Soup: A vitamin-rich tonic that boosts your immune system and keeps you strong through any illness.
🔥Grandma’s Hot Salve for Back Pain: Quickly soothes aches and muscle soreness so you can get back on your feet.
🥗Grandma’s Watercress Broth: Loaded with antioxidants and healing nutrients to speed recovery and build strength.
All of these are proven remedies passed down through generations, and they are ready for you to rely on when the modern world lets you down. You won’t find these trusted recipes anywhere else—they’re all detailed in The Forgotten Home Apothecary. Copies are limited and selling fast, so secure yours now before they’re all gone.
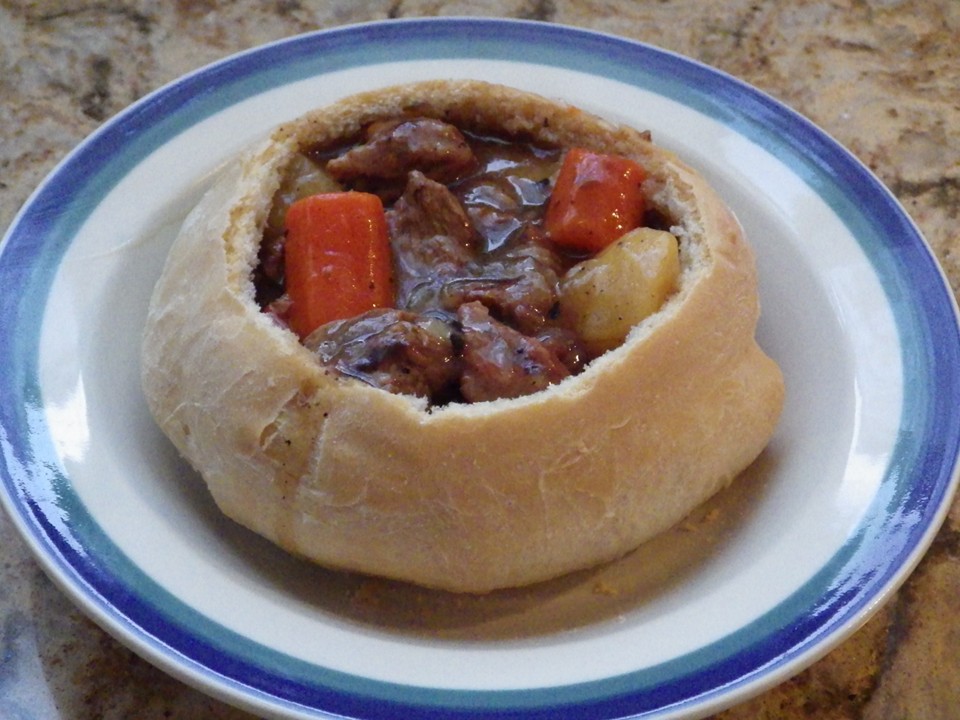
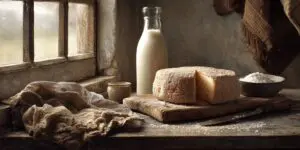
Grandma’s Big Surprise: Bread Bowls
Grandma’s stew in a bowl always tasted great, but she didn’t stop there. She actually made bread bowls to hold the stew and let you dip some of the bread into the gravy and then of course -eat the whole bread bowl. The recipe is simple and here’s what she did.
Ingredients:
- 1 tablespoon of yeast
- 1 teaspoon of sugar
- 2 cups of hot water (110 degrees F.)
- 5 cups of flour
- ¼ cup of olive oil
Directions:
(We’re using a Mixmaster but you can do this in a bowl and then knead by hand on a board or countertop)
- Add the yeast, sugar, hot water and ¼ cup of flour to the bowl and blend well.
- Let the mixture sit for 5 to 10 minutes to proof the yeast. It will appear bubbly and a bit puffed up in the bowl.
- Add the remaining flour and olive oil and knead until well blended.
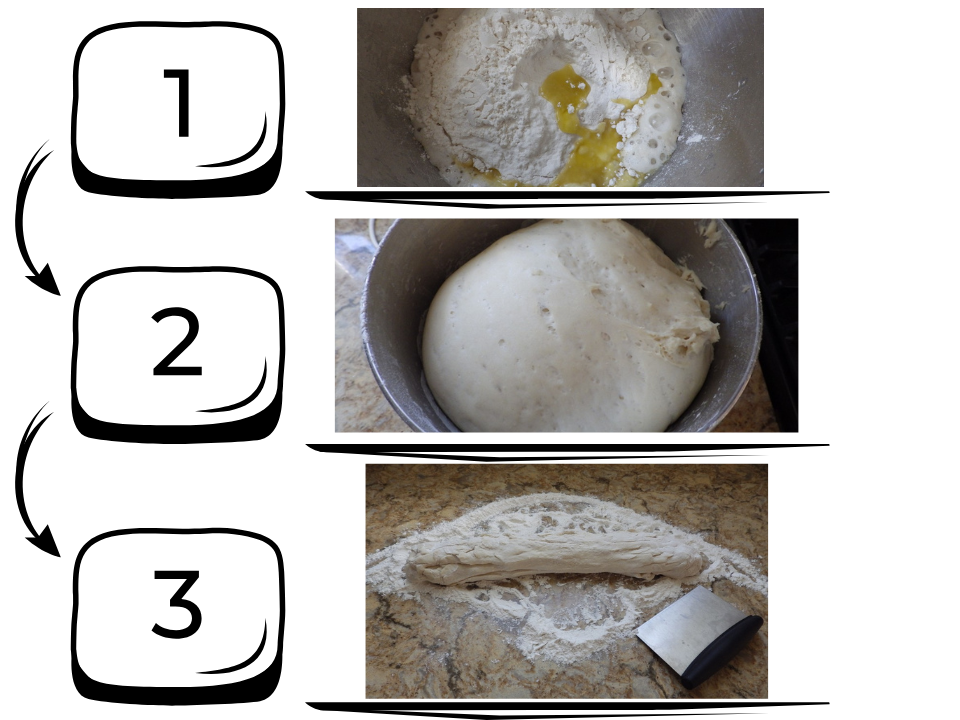
If the dough appears sticky, add a little more flour until you have a good dough ball.
- Let the dough rest in the bowl for an hour.
It will rise.
- Stretch the dough out on a floured surface and cut into 6 pieces.
- Hold, fold and create 6 large dough balls and let rest on the floured board or countertop
- Oil up two baking sheets with olive oil (we’re using 2 large pizza pans) and place the dough balls on the pans and let rest and rise for one hour.
- Bake in preheated oven at 350 degrees F. for 30 minutes or until the tops are browned.
- Remove from the oven and let cool and rest for 20 minutes.
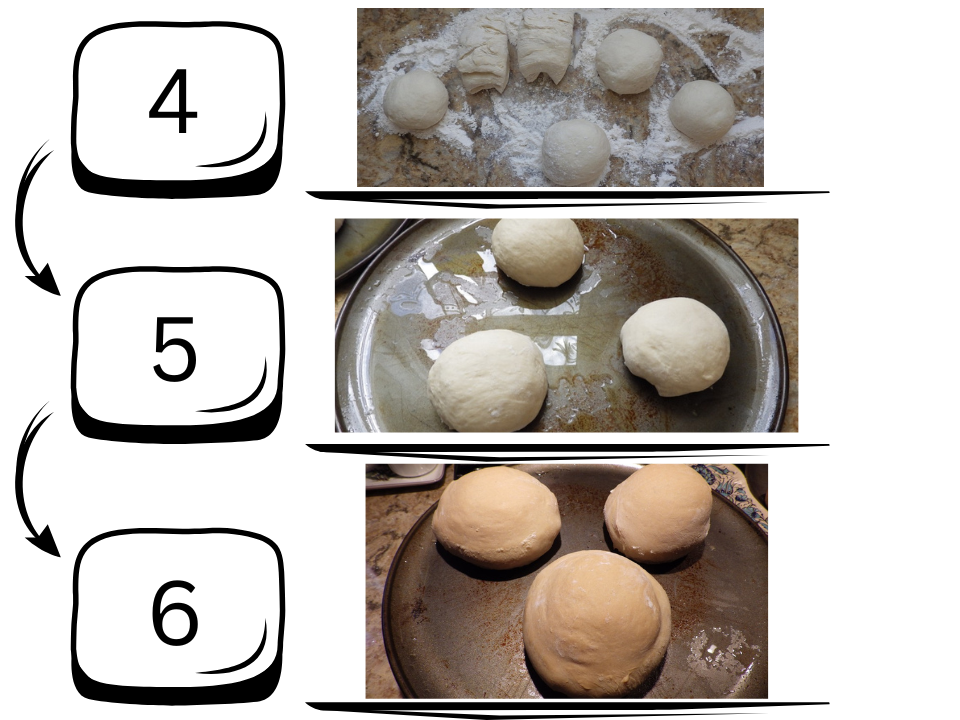
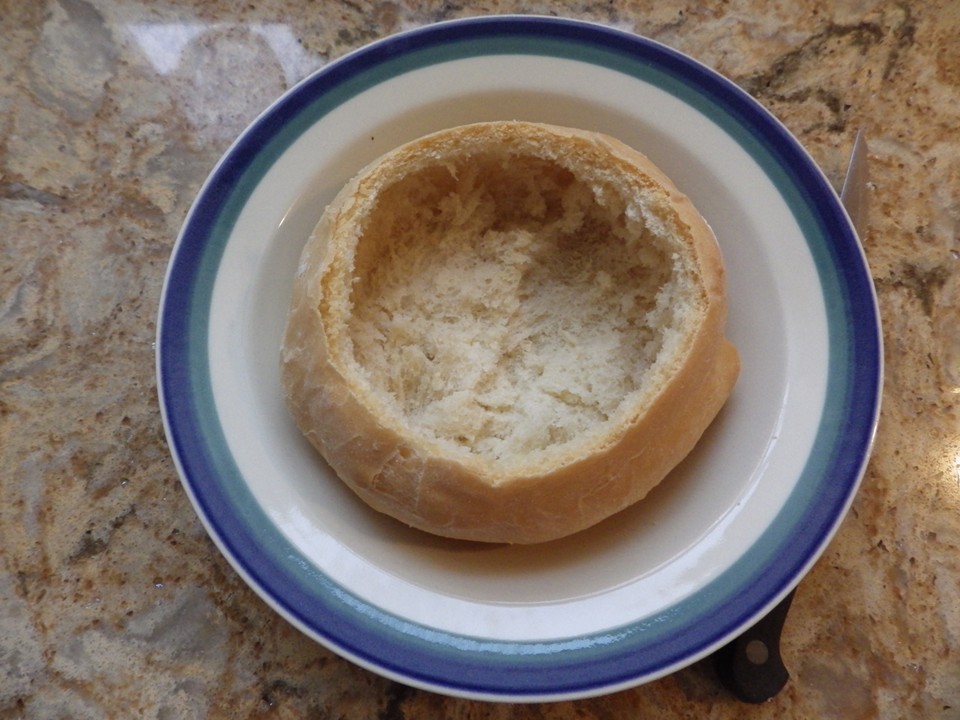
Making the Bread Bowls
- With a knife, carefully cut a circle into the top of one of the small loaves.
- Remove some of the bread from the middle with your fingers and set aside for dipping in the gravy.
- Ladle your stew into the bread bowls and serve.
- Don’t forget to eat the bowl.

Want More Inspiration For Your Pantry?
If you’re hungry for more than just stew, there’s a treasure trove of simple, time-tested foods and remedies that can transform your kitchen, and your ability to weather whatever comes.
The Amish live without electricity, running water, or modern conveniences — yet their pantries are stocked with nourishing, long-lasting staples made from scratch. When supply chains strain or power goes out, their way of life barely blinks.
The Amish Ways is a book written by Eddie Swartzentruber, who grew up in one of the strictest Old Order Amish communities. Inside, he shares these hard-earned secrets, such as:
🍽️What the Amish Ate During the Great Depression Real meals made from scraps and simple ingredients, built to stretch every bite and keep hunger away.
📜Forgotten, Long-Lasting Foods That Don’t Need Refrigeration
Foods designed to keep for months, even when the fridge is dead and the power’s out.
🍖Amish Poor Man’s Steak
How to turn tough, cheap cuts into filling, nourishing meals your family can count on.
🧈The Amish Forever Butter
A rich, shelf-stable butter that lasts when fresh dairy won’t, giving you calories and flavor when every calorie counts.
🍞Amish Bread in a Jar
A clever, shelf-stable way to keep bread fresh and ready when the bakery shelves are bare.
🪱The Amish Parasite Flush
A potent, all-natural cleanse to keep parasites at bay when modern medicine is out of reach.
If you want to build a pantry that holds strong even when the world around you feels uncertain, this book will guide you there.
The Recipes Are Easy
Both of these recipes are very simple. They just take a bit of patience and attention. Those are qualities that Grandma always had with all of us so be like Grandma and celebrate her by making her survival stew. Do you want even more recipes? You can always find some here.
You may also like:
10 Canning Recipes From The Amish
Beans and Rice Survival Soup That Can Last Up To 10 Years (Video)
How To Make The Hoover Stew Of The Great Depression
Recipes I Made From The Lost Super Foods Book: Canned Hamburger Meat


