Many homesteaders are nervous about using fermentation as a method of preserving their harvest simply because they are unfamiliar with it, so I created a fermentation 101 guide for you to understand this process better.
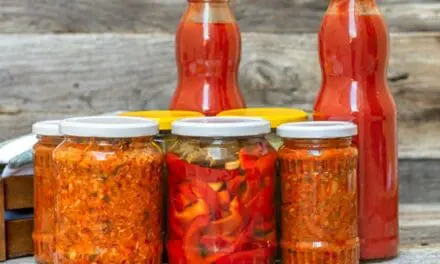
Imagine having a pantry stocked with homemade pickles, cured meats, and flavorful condiments, ready to enjoy no matter the season. Sounds amazing, right? Well, when you’re living on a homestead, fermentation is your secret weapon for making that dream a reality.
Dating back to 10,000 B.C.E., fermentation is an ancient technique that preserves food while keeping its nutritional goodness intact. In this guide, we’ll dive into everything you need to know about fermentation, helping you live a more sustainable lifestyle on your homestead.
So, no more waiting to taste those delicious delights—let’s jump in!
Fermentation 101: Understanding the Process
We’ve all probably wondered, at some point, how simple vegetables turn into pickles. Or, how do dairy products come about? What’s the science behind it all? Well, I’ve got the answers, and I’m here to break them down for you in the simplest way possible.
I’ll share a lot on this topic, but if you really want to be prepared, I highly recommend having this on your shelf. In a crisis, knowing how to preserve food can be the difference between making it and going hungry. This guide breaks it all down, with simple food preservation tips and over 160 long-lasting recipes to keep your stockpile fresh no matter what. And honestly, I wish more people knew about this.
Fermentation is a natural process in which beneficial microbes like bacteria, yeasts, or molds work their magic on food. These tiny little workers break down sugars and starches, turning them into acids, gases, or alcohol. Consequently, the food is not only preserved for a long time but also gains additional flavor, texture, and nutritional benefits.
Essential Tools and Ingredients for Successful Fermentation 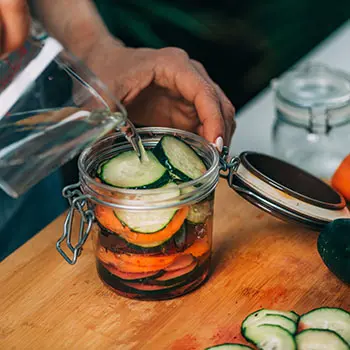
The good news is fermentation doesn’t require fancy equipment or complicated ingredients. In fact, chances are many of these tools are already tucked away in your homestead attic or kitchen. Here are a few things you might need:
- Glass Jars: Glass jars are a perfect option for fermenting smaller batches of food. They’re easy to clean, easy to monitor, and you can reuse them again and again. Make sure to choose jars with wide mouths for easier packing and cleaning.
- Fermentation Weights: These weights are essential for keeping your food fully dipped in the brine, which is crucial for successful fermentation. However, if you can’t find fermentation weights, don’t worry! A clean rock that fits snugly into the jar would work fine to keep your food in place.
- Salt: Non-iodized salts, like sea salt or kosher salt, are essential for fermentation. They help draw moisture from the food and create the perfect environment for the good bacteria to thrive. Moreover, if you have Himalayan or pink salt on hand, that works well too! It’s packed with minerals and helps keep the fermentation process healthy.
Fermentation 101: Basic Types of Fermentation Every Homesteader Should Know
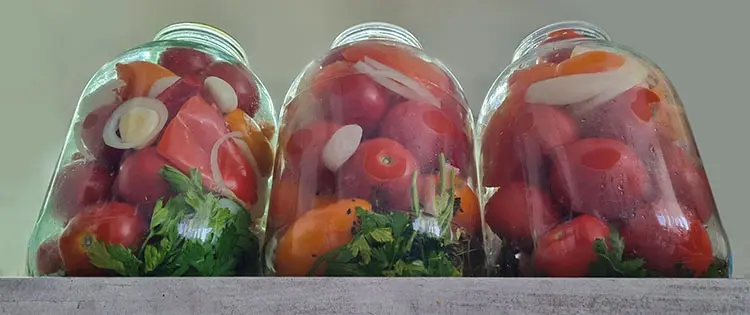
Vegetable Fermentation 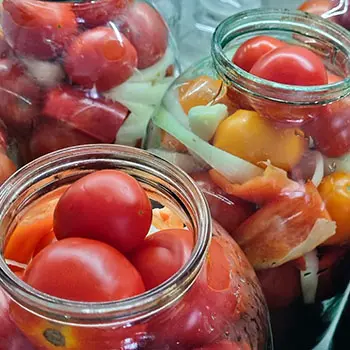
Every homesteader loves preserving their garden harvest for the year. Vegetable fermentation is one of the easiest ways to do that. To get started, all you need to do is:
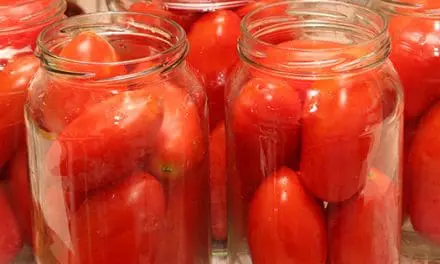
- Choose fresh, firm vegetables.
- Prepare them by cutting, chopping, or slicing as needed.
- Pack them into your glass jar tightly, leaving some space at the top.
- Add a brine solution of water and salt to cover the veggies.
- Seal the jar and let it sit in a cool, dark place.
- Taste along the way, and once it’s to your liking, store it in your pantry.
Dairy Fermentation
As the name suggests, dairy fermentation deals with dairy products such as yogurt, kefir, cheese, and buttermilk. This process transforms fresh milk into tasty, tangy treats while preserving it for longer. Here’s how to get started:
- Depending on your preference, choose fresh, high-quality milk from cow, goat, or sheep.
- Heat the milk to around 180°F to eliminate any unwanted bacteria.
- Then, let it cool down to about 110°F, the perfect temperature for adding your starter culture.
- Next, mix in your culture, such as yogurt starter or kefir grains.
- Let the mixture ferment in a warm, undisturbed spot for a few hours or until it reaches your desired consistency.
- Once it’s ready, enjoy your delicious homemade dairy product!
Beverage Fermentation 
Beverage fermentation is a fun and flavorful way to create your own drinks, from fizzy kombucha to homemade cider or mead. It’s easier than you might think! Here’s a simple breakdown of the steps to make your fermented beverages:
- Choose Your Base Liquid: The base liquid for kombucha could be tea, fruit juice for cider, or honey water for mead.
- Add Sugar: Sugar is the food for the fermentation process, so make sure to add enough to feed the beneficial bacteria or yeast.
- Add Your Starter Culture: For kombucha, use a SCOBY (a symbiotic culture of bacteria and yeast). For cider, wild yeast works perfectly, and for mead, you can ferment it with just honey. In fact, wild yeast is naturally present in the air, so you don’t need to buy it. Simply embrace what nature provides and work with what you have!
- Cover the Container: Finally, cover the container with a cloth or airlock to allow gases to escape while keeping contaminants out.
- Ferment in a Warm, Dark Place: Depending on the beverage, fermentation time can range from a few days to a few weeks. To create the ideal environment for fermentation, store the containers in a warm, dark spot in your home.
- Taste as It Ferments: Once the beverage has reached your desired flavor and fizziness, strain it, transfer it to bottles, and enjoy!
Fermentation 101: Things to Watch Out for During the Process
Fermentation is a hands-off process, but there are a few things to keep in mind to ensure success. Some important things to watch for include:
- Mold or Film: Sometimes, a white film or mold may form on the surface of your ferment. If it’s just a thin layer, remove it carefully, and everything underneath should still be good. On the other hand, if you notice a dark, fuzzy mold, discard the batch and try again.
- Temperature Control: Fermentation requires a stable, warm environment. Too much heat can kill the beneficial microbes, while too little heat can slow the process. To keep things running smoothly, aim for a range between 65°F and 75°F.
- Submerged Food: When fermenting vegetables, it’s important to keep them fully submerged in brine. This prevents exposure to air, which can lead to mold or spoilage. A rule of thumb is to use fermentation weights to keep everything submerged.
How to Make Poor Man’s Pickles: A Depression-Era Classic 
During the Great Depression, store-bought pickles were a luxury many couldn’t afford. Instead, people turned to simple fermented vegetables like carrots, cucumbers, and green beans. These “Poor Man’s Pickles” were cheap to make, required no vinegar, and lasted much longer than fresh produce. Plus, they added a tangy crunch to otherwise bland meals.
If stored correctly in a cool place (like a cellar or fridge), fermented carrots can last 3 to 6 months or even years if you store them like this. The key is keeping them submerged in their brine to prevent mold. Over time, they continue fermenting slowly, developing a stronger sour taste.
Ingredients:
- 1/4 cup water kefir grains (reusable)
- 4 cups water (non-chlorinated)
- 1/4 cup sugar
- (Optional) A few raisins or a slice of lemon
Instructions:
First, take about four cups of non-chlorinated water and dissolve a quarter cup of sugar in it. Stir well until the sugar is completely mixed in. Once the sugar water is ready, add a quarter cup of water kefir grains. If you want extra flavor, you can toss in a few raisins or a small slice of lemon.
Cover the jar with a clean cloth or a loose lid, allowing it to breathe while keeping dust and bugs out. Let it sit at room temperature for about 24 to 48 hours. The longer it ferments, the tangier it will get.
After the fermentation time is up, strain out the kefir grains and set them aside for your next batch. Pour the finished kefir into a clean bottle or jar, then store it in the fridge. It’s best to drink within a week for the freshest taste. Enjoy your homemade probiotic drink!
Fermentation is one of the easiest and most rewarding ways to preserve the delicious flavors of your homestead. And the best part? You don’t need fancy gadgets—just a few basic tools and ingredients, and you’ll be enjoying fresh, homemade foods all year long.
So, why wait? Start your fermentation journey today and check another goal off your homesteading bucket list.
Best of Luck!
You may also like: 
Pioneer Recipes Every Homesteader Should Learn
The Only Food That Grows Almost Faster Than You Can Eat It (Video)
Forgotten Nose-to-Tail Recipes Every Homesteader Should Know
This Common Mistake Can Ruin Your Entire Food Stockpile
Frugal Lessons From My Grandfather Who Lived Through The Great Depression


