If you’re like me, you probably don’t have a recycling plant nearby. Sounds strange to those in the city, but I’m pretty sure my southern, country county hasn’t even considered putting one in. Much less, I doubt that anyone would even use it. Frustrating to some, perhaps, but not surprising.
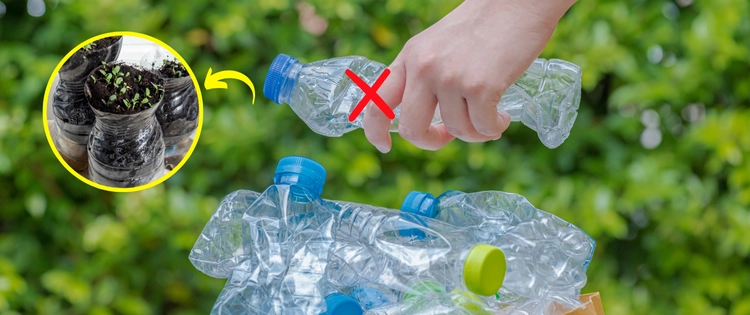
Sometimes that means that reusing is a little more accessible than recycling. Today, we’ll be looking at ways that you can reduce your impact on climate change and reuse your plastic bottles rather than toss them out. Let’s get started.
Seed Starters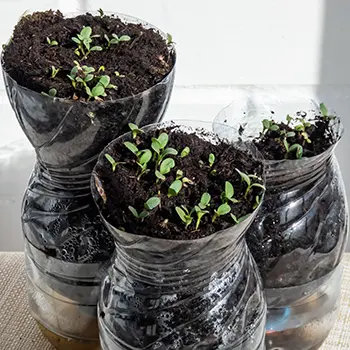
This is, perhaps, one of the very best ways to reuse your plastic bottles. Cut a bottle in half and retain the side with the cap. Fill it with soil and place it in a hollow (it can be anything) that can help it hold its shape and keep it level. Add your seeds, and cover them with the appropriate amount of soil, and water. When the seeds sprout, you should be able to track the growth of your root base.
As your plant grows, it’s perfectly acceptable to remove the lid on the seedling planter. The roots should hold the soil where it belongs and this allows a wonderful way to let the soil drain naturally and encourage the root to stretch toward the bottom of the container. Tired of shallow, wide-spread roots? This is one way to make them dig deeper.
Related: Seed Mistakes To Avoid At All Cost
If the roots start to poke out the bottom, no worries. It’s easy enough to remove your seedlings for transplanting. Simply cut open the side of the bottle seedling grower and remove all the soil and the plant at once, then transplant. Worried about reusability if using this method? You can just duct tape it into form again. Duct tape will hold up for years against this kind of abuse, giving you several seasons of wear and tear on one bottle topper.
One note of caution, I would only do this with food-grade plastic and only in areas where the sun is not going to refract from it and cause issues or superheat it. We talk about this a lot but try to be careful with your positioning.
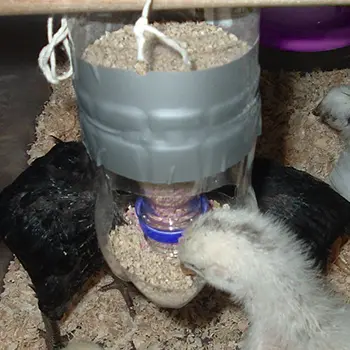
Chick Waterers and Feeders
Have you priced these recently? $10=$15 for very basic models that are going to get disgusting in very short order. Before the chicken-keeping boom early in the pandemic, your average feed store had these for a few dollars and they were basically replaceable on a yearly basis. And let’s be honest: most of them needed to be. Chicks are some of the nastiest little friends we ever encounter, after all.
To make a good chick feeder out of a spare water bottle, you’ll need hot glue, a small plate (this can even be a paper plate if you want to replace it regularly, though you’ll need something more robust if you’re going to use this method to build a waterer), and whatever size water bottle you want.
Related: Never Feed THIS to Your Chickens
Put holes about the size of a dime near the very bottom of your bottle, then glue it to the plate. Untwist the cap at the top, use a funnel to fill it with feed, and twist the top back on. Instant chick feeder. Takes about 10 seconds to make, and it’s practically free.
You can make a waterer for chicks, poults, goslings, and larger young poultry. I do not recommend these for quail chicks and smaller poultry due to the likelihood of drowning.
Place a gallon-sized water jug in a small bucket that is easily accessible to whatever sort of poultry you’re raising. Put small, pen-tip-sized holes near the bottom of your bottle. If necessary, you may fill the bucket with shiny stones to help prevent drowning if you stop at the water level or a little below it. Fill your bottle with water. This is an instantly-fed gravity waterer that works splendidly. This also works well for adult birds IF they don’t try to remove the bottle. This one depends on your flock. I have a dozen flocks who can deal with this and one who can’t. Baby birds can’t dislodge it, but adults can. Know your birds.
Decorations Around the Garden

This may be a little more controversial, but we noticed that birds and bugs tend to be attracted to shiny, colored plastic. Again, using food grade only, we frequently build little bird baths, watering areas for toads and bugs, and attractive, colorful dishes for the other wildlife. We’ve also made ramps to help stranded wildlife get out of deeper pools of water (such as ones intended for our dogs when they are having a good time outside).
Other things we would suggest doing would be pinwheels and windmill toppers. It’s very easy to cut, form, and glue these into an appropriate shape. Just be careful of the sharp edges.
Winter Gardening
Have a bunch of gallon jugs because your water isn’t to your liking? Perhaps it tastes like sulfur or you have a different reason for disliking it. We can’t say we blame you; we’ve lived in a lot of places where the water’s aftertaste made it nearly undrinkable.
How do you do winter gardening like this? Place a bunch of jugs full of good gardening soil in a very sunny area. Cluster them tightly together and put a couple of layers of plastic wrap around them. Toss in your seeds, water them down well, and let nature do the rest of the work.
The best things I’ve grown this way are root vegetables (carrots, potatoes, peanuts, etc) and legumes, simply because they seem to be a little more robust in cooler weather than some other plants.
What about you and your garden? These days, we all have a simply enormous amount of plastic lying around our property. What are you going to do with it to help keep it out of the landfill? We’d love to hear about your ideas and creativity down below. And, as always, remember, happy gardening!
You may also like:
Read This Before Stockpiling Water
If You See This Plant in Your Backyard, Burn It Immediately! (Video)
Do Not Throw Your Plastic Bags, Do This Instead
30 Survival Uses For Wood Ashes You Never Thought Of
DIY Self-Watering Raised Garden Beds


