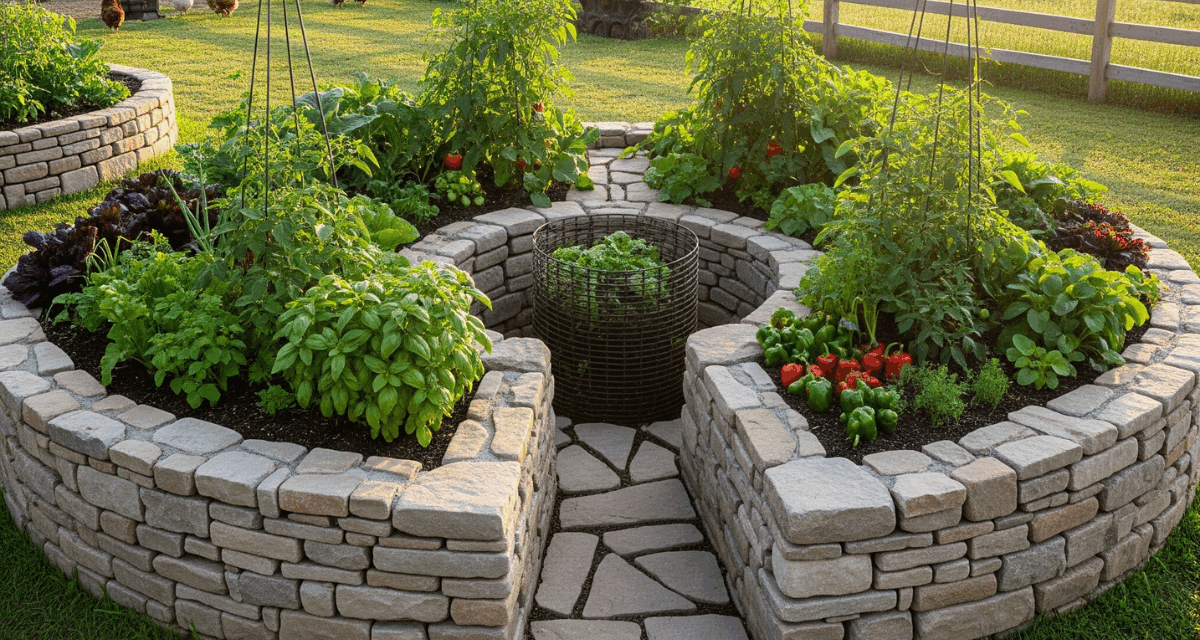
Keyhole gardens were first developed as a concept in Africa to help to grow food in dry areas. They are now becoming popular in other hot, dry areas of the world, like Texas, for the same reasons they have become popular in Africa.
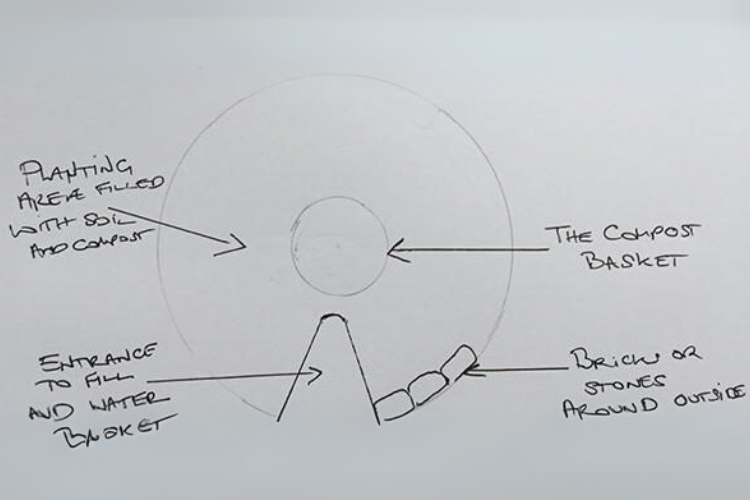
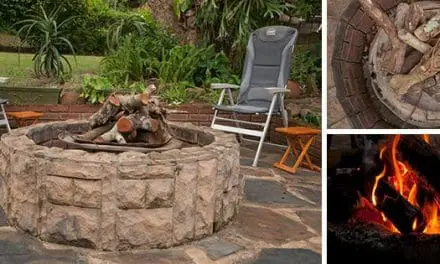
Keyhole gardens are built to optimize the conditions needed to grow vegetables. They are known as a keyhole garden because the structure involves using a central enclosed area, or basket, which holds compost.
Soil is then placed around this central area and kept in place using stones or bricks. It is usually circular in form. When the garden is watered (by hand or when it rains) the central basket then leaches out nutrients from the compost to the rest of the garden.
Keyhole gardens are a little like a big compost heap. As someone who has several large compost heaps in my garden, I can say that they work very well to grow veggies like potatoes and carrots. I had several potato plants growing successfully in one of my compost heaps last year.
Materials Needed to Build Your Keyhole Garden:
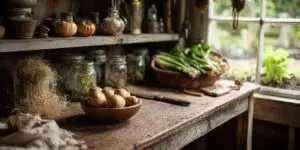
Compost – ideally from your own compost heap
Animal manure (ideally horse manure)
Soil
Straw
Wire or twill
Large stones or bricks
Rusty cans, broken plant pots or broken crockery
Canes or strong sticks
Permeable material, like hessian
You may also want to add wood ash depending on the pH and quality of the soil. I first learned this old-school trick from here and honestly, I wish more people knew about it. It’s a game-changer for any homesteader.
Companion Planting in a Keyhole Garden
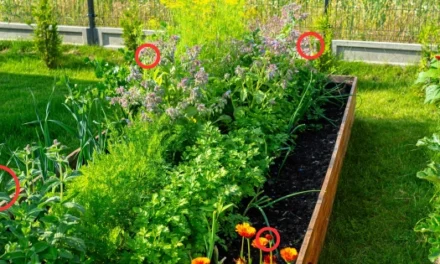
One of the best ways to get the most out of a keyhole garden is by using companion planting. This means placing plants together that naturally help each other grow. For example, beans add nitrogen to the soil, which benefits leafy greens like lettuce and spinach. Calendula not only looks beautiful, but it also attracts pollinators and repels harmful pests. Strongly scented herbs like rosemary and sage can keep insects away from more vulnerable plants such as carrots or cabbage. By mixing vegetables and medicinal herbs strategically, you’ll create a healthier, more balanced garden without relying on chemical sprays. All of these techniques and other time-tested methods for maximizing your garden and homestead are detailed in The Amish Ways Book, a fantastic resource for practical advice told straight from an ex-Amish.
How to Make Your Own Keyhole Garden (Step by Step Guide With Pictures)
Where is it going to be placed?
You’re going to need a spot that will allow a circle of radius approx. four feet which is around 25 feet in circumference. Choose a spot in a garden or field where you can make a keyhole garden that is cleared of any grass, weeds or other plants.
Take one of your canes and tie some twine or wire to it of a length of approximately four feet. Place this cane in the center of your cleared area and tie another cane to the end of the twine. Pull this tight and scrape out a circle using the untethered cane.
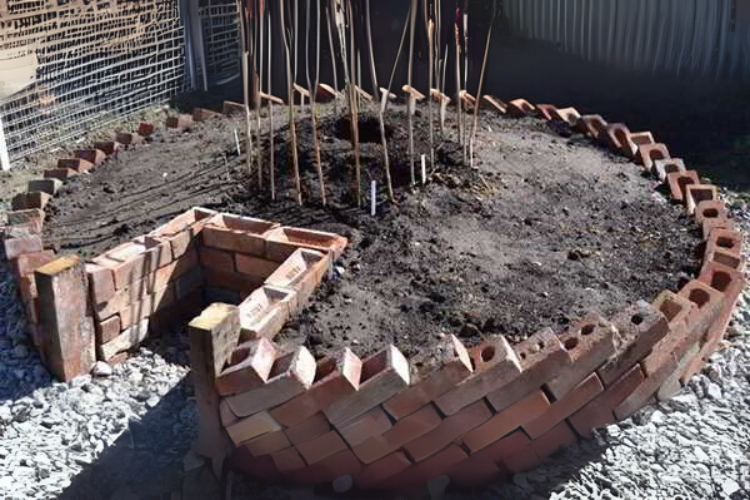
This will be the outline of your keyhole garden:
Starting to build the outside of your keyhole garden
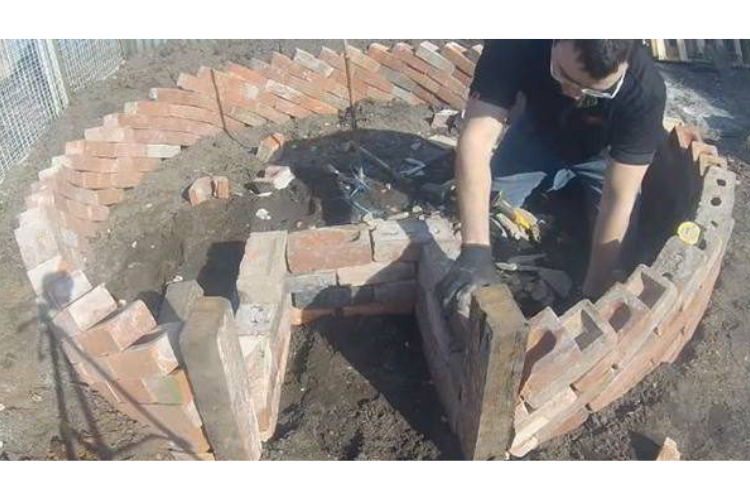
Take the large stones or bricks you’ve collected and start to make an outline of the perimeter of your keyhole garden. You can also use sacks to create smaller gardens.
NOTE: leave an entry point to your garden so you can reach into the compost basket and pour in water.
Making the basket
The cane you placed in the middle of your keyhole garden is where your basket will be placed.
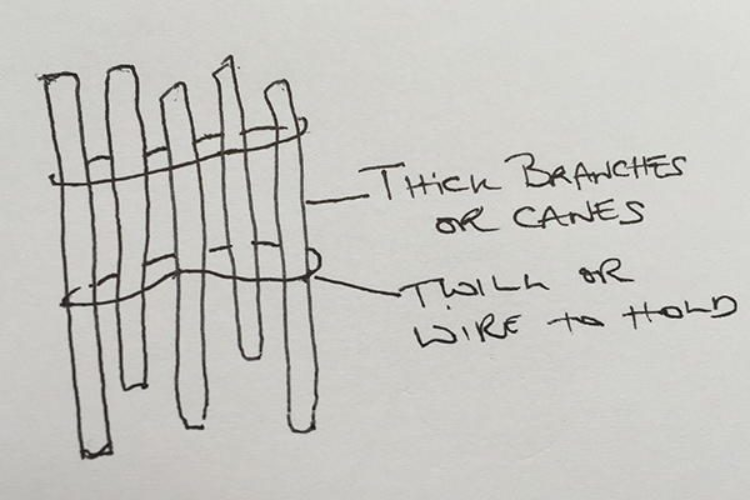
The rest of your canes will be used to create a circular basket. Place the canes in the middle of the keyhole garden circle, pushing them down into the soil to anchor them. Tie the wire or twine around them several times from top to bottom, to create the basket outline and hold the canes or sticks together.
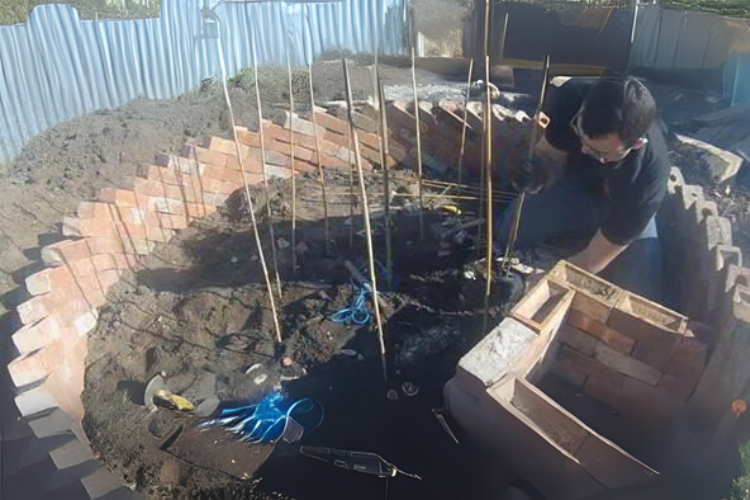
Filling the basket
Add some of the soil to the basket. Also add in the wood ash if using.
Fill to about half way, and then add straw to the inside walls of the basket to line it. You might also want to add straw to the outside of the basket too, pushing it up against the soil – holding it in.
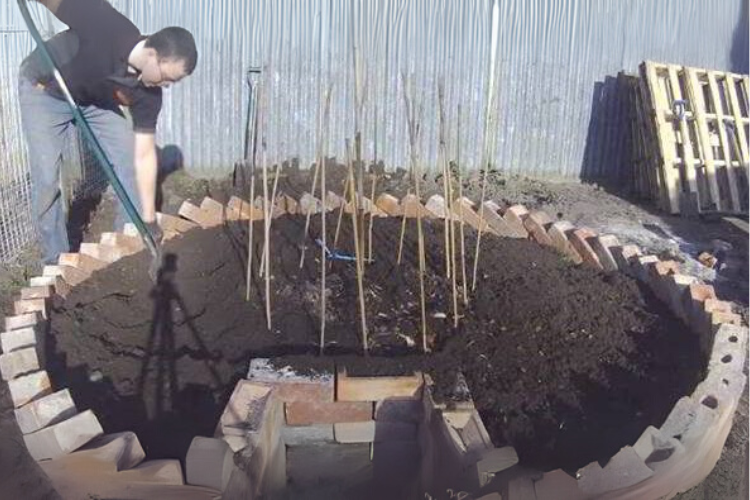
The wall of the keyhole garden
Continue to build up the outside wall of the keyhole garden using your stones or bricks. You can make it as high, or low, as you like as long as it holds the soil in.
Improving drainage
Before adding any soil or compost to the keyhole garden, add in a layer of broken pots or cans or some type of broken crockery. This helps drainage.
Finishing the keyhole garden
Now add soil and compost to the garden. Add layers of compost with soil on top – you can mix in ash and straw too for drainage and nutrients. Continue to layer, but always finish with topsoil. Ideally place the soil/compost layers sloping up towards the basket – this allows the water and nutrients to drain down into the whole garden.
- Place straw or hessian covering over the basket to help retain moisture.
- Leave to settle for a week or two before planting any seeds or potatoes.
- You can also add straw onto the soil to help retain moisture.
What Kind Of Plants Would This Set-up Work Best For?
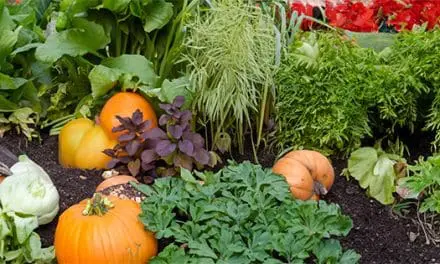
Keyhole gardens are most often used for vegetables, and they’re excellent for crops that enjoy steady nutrients and moisture, such as potatoes, carrots, lettuce, beans, and leafy greens. But this set-up isn’t limited to food alone. It’s also a great option for medicinal plants. Herbs like chamomile, calendula, and echinacea thrive near the nutrient-rich center, while drought-tolerant herbs such as lavender, rosemary, and sage prefer the drier edges. Even moisture-loving plants like lemon balm or mint can be tucked in closer to the basket, though you may want to keep the more aggressive growers contained.
I found a great kit with 4,818 high-quality, NON-GMO seeds packaged in the US, that you can turn into hundreds of powerful natural remedies without spending a dime at the pharmacy anymore. It contains one plant for every part of your body – you’ll find a painkiller, an anti-inflammatory, an anti-parasitic, and even some plants that can help people with diabetes and autoimmune disorders. It’s called the Medicinal Garden Kit and you can find it here. But you might wanna hurry, cause it’s that good it’s usually sold out.
With the right mix, a single keyhole garden can provide both fresh vegetables for the kitchen and a steady supply of herbs for your home apothecary.
Keeping the Garden Growing
A keyhole garden is an ongoing project. The basket is built to take in compost over time. Add already composted material, or compostable food waste, to the compost basket in the center of the keyhole garden. Over time this will decay down, and nutrients from it will leach into the garden as you water it or it rains.
To make the most of this setup, a pressurized rainwater collection system can be a game-changer. By capturing and storing rainwater in an elevated tank, you can use gravity to create a steady, gentle flow of water straight into your garden basket. This ensures your plants get consistent moisture without relying on a hose or hand watering, even during dry spells. It also makes your keyhole garden more self-sufficient, reducing dependence on municipal water and helping you maintain healthy, productive soil year-round.
You could use this project for a lifetime. And if you connect it to the water filter I’m about to show you, then you will also have clean water to drink and cook with. Here’s a video on how you can make it.
If you add a permeable material cap, like hessian, to the top of the basket this will help it to compost, whilst allowing water to seep through.
Some people like to create a cover for their keyhole garden to protect young plants from strong sunlight. You can do this by creating a cage around the edges of the garden and using this to hold a cover in place.
The article was first published on askaprepper.com
You may also like:
Vertical Garden: 26 Plants To Grow Your Own
10 Killer Trees You Should Never Have In Your Backyard (Video)
How To Grow Food for a Year in Just 4 Square Feet
This DIY Garden Setup Can Feed Your Family All Year
Bad Gardening Habits That Could Ruin Your Crops


I started mine a few weeks ago, using 18 CBS blocks for each of the 3 layers and some chicken wire made into an 18″ circle x 3′ high for the compost. I’m in Zone 9, so hoping to do some early fall planting in the next couple of weeks, the compost is composting 😀 and I am making sure I water the compost bin daily. Happy planting!
Hi Sandi, that’s awesome! Sounds like you’ve got a really sturdy setup going. Zone 9 is perfect for getting that early fall planting in too. I love how you’re already keeping the compost active and watered, your keyhole garden will be feeding itself in no time. Happy planting!! 🌿