Every homesteader knows that building a DIY greenhouse is a fantastic way to extend your growing season while shielding plants from harsh weather.
It creates a controlled environment for growing everything from vegetables to flowers, allowing you to grow year-round. In addition, it helps keep pests out and can save you money when buying produce.
After considering all the benefits, I decided to build my own.
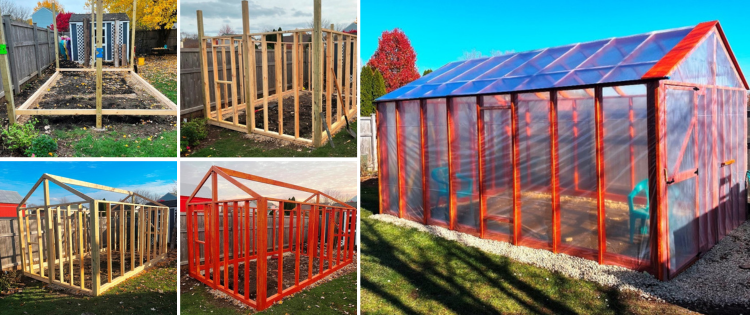
I’m building a 10×16-foot greenhouse using 2x4s and 4x4s, covered in plastic sheeting with a polycarbonate roof. To ensure durability, I used standard-grade lumber and sealed it with a water-resistant stain.
Now, here’s how I built my own greenhouse and how you can make your own:
DIY Greenhouse: Tools and Materials
Before starting your DIY greenhouse, gather the essential tools: a post-hole digger, circular saw, Sawzall, drill, hammer, staple gun, post levels, 4-foot level, silicone sealer, and pebbles for the floor. Don’t forget water sealer for the lumber and these basic materials:
Lumber:
- 2 x 16-foot 4x4s (mainframe)
- 2 x 12-foot 4x4s (additional support)
- 6 x 10-foot 4x4s (side frame supports)
- 1 x 16-foot 2×6 (crossbeam)
- 2 x 16-foot 2x4s (framing)
- 52 x 8-foot 2x4s (walls and roof)
- 4 x 8-foot 2x2s (smaller supports)
- 34 x 8-foot 1x2s (finishing touches)
Other materials:
- 300 x 3-inch wood screws
- 50 x 4-inch wood screws
- 3 bags of concrete
- 24 x 2×4 polycarbonate roof panels
- 72 x 1-inch lathe screws with rubber washers
- 1 roll of 40 x 50 feet 6 mil plastic sheeting
Construction Steps
1. Stake Out the Foundation:
Start your DIY greenhouse project by marking a 16×10-foot rectangle for the perimeter. Place stakes at each corner and at the center of each 10-foot side to guide the main support beams. Use a string to measure and ensure the corners are perfectly square.
2. Dig Post Holes:
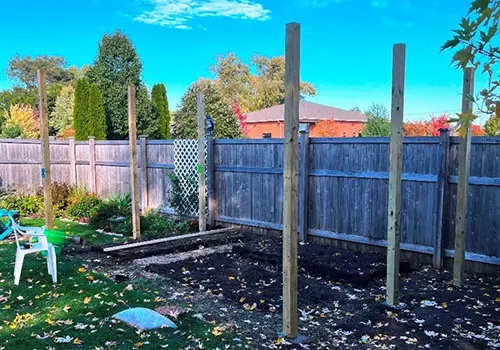
Dig six post holes, each about 2 feet deep, where your stakes are located. These will hold the vertical 4×4 support posts that form the structure of your greenhouse.
3. Position and Set the Posts:
Place the 10-foot 4×4 posts into the holes and support them with 3 to 4 inches of stone, adjusting them for alignment. Use a post level to check that the posts are vertical.
Once aligned, fill each hole with dry concrete and add water to form a thick slurry. Let the concrete set for 24 hours to securely anchor the posts for your DIY greenhouse.
4. Install the Foundation Beams:
Attach 4×4 beams across the bottom of the structure, making sure they are level and positioned just above ground level to avoid direct contact with the soil. Add stones underneath the beams to support them and keep them dry.
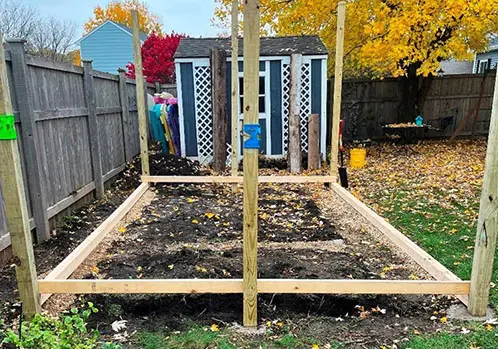
5. Build the Walls:
For the walls, begin by attaching two 16-foot 2x4s at the top and bottom of each side. Next, nail or screw in additional 2x4s, spaced 24 inches apart. This spacing is crucial for the roof, where you’ll attach polycarbonate panels.
Assemble the walls with 3-inch screws to ensure each joint is secure. Finally, attach the walls to the 4×4 beams at the corners using 4-inch screws to complete your DIY greenhouse frame.
Related: How to Collect Rainwater Without Gutters
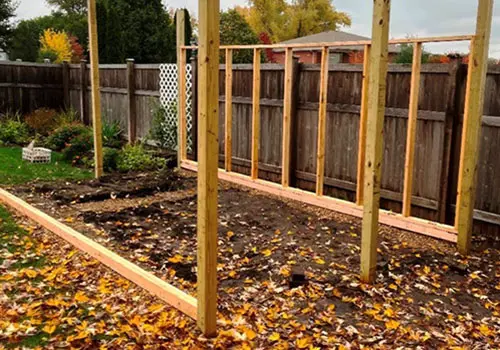
6. Construct the End Walls:
Next, build the two end walls. For the back end, measure and cut 2x4s to fit, leaving 12-inch spacing between them. For the second end wall, be sure to leave space for a window, ensuring the frame is sized properly.
Then, install the end walls in the same way as the side walls, securing them tightly to the 4×4 beams.
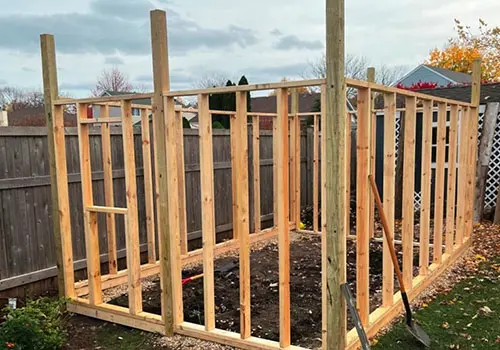
7. Install the Door Frame:
The front wall will include a door. The frame should be 6.5 feet high and 36 inches wide. Attach the door frame just as you did with the other walls, ensuring it fits securely within the 4×4 structure.
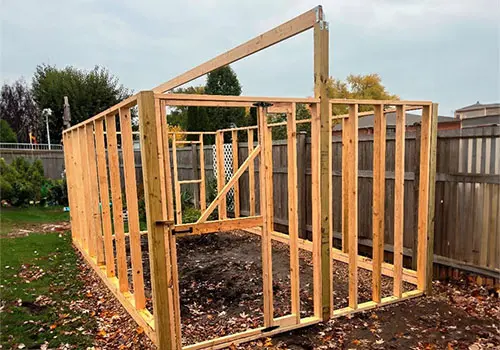
8. Attach the Top Beam and Cut the Posts:
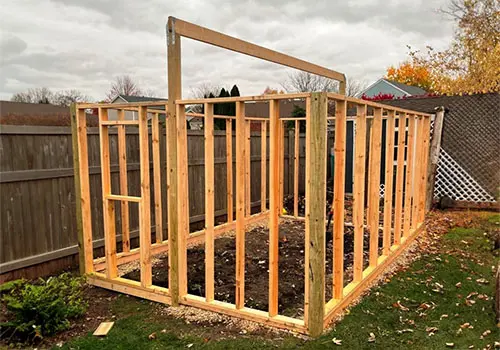
Use metal wood braces to attach the top ridge beam to the corner posts. After securing the top beam, use a reciprocating saw to cut the corner posts flush with the tops of the side walls.
9. Build and Attach the Door:
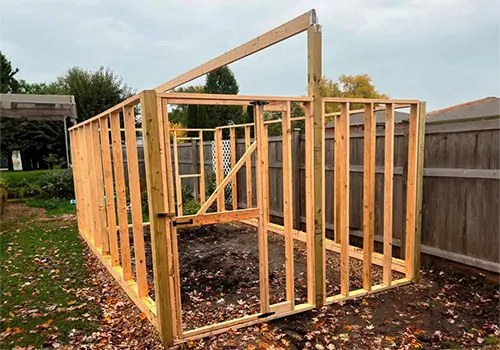
Build the door frame using 2x2s and add a slanting brace for extra support. Attach the door to the frame with hinges and add a handle. For a tight seal, use door clips and window insulation tape around the edges to prevent drafts.
Related: 10 Household Items You Can Use as Mini-Greenhouses
10. Install Roof Rafters:
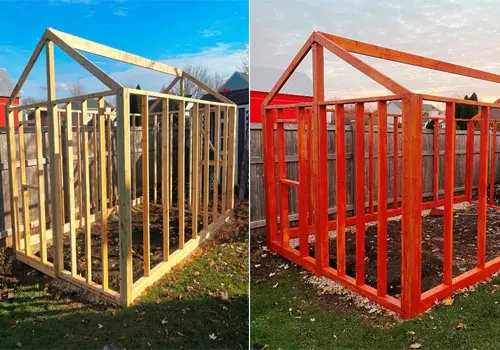
First, cut four 2x4s at an angle and attach them to the roof ridge and the 4×4 posts at the corners. Then, apply a water sealer to all the lumber before proceeding.
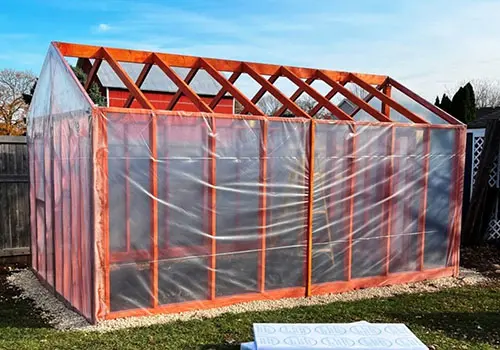
After that, stretch plastic sheeting around the sides of the greenhouse, stapling it securely. Once that’s done, install 1×2 furring strips to hold the plastic in place.
11. Install the Roof Panels:
Attach polycarbonate roof panels to the rafters using lathe screws with rubber washers. Apply a long bead of silicone sealer along the rafter under each panel to create a watertight gasket. You can also use greenhouse tape to seal the seams where two panels meet.
12. Attach the Window and Final Touches:
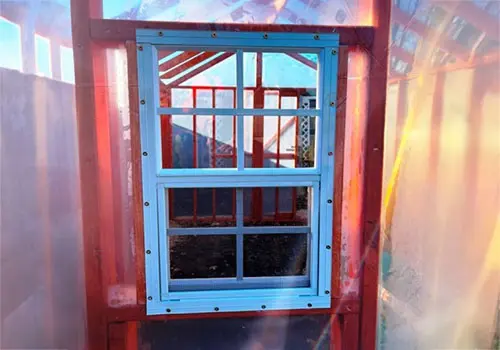
Start by cutting the plastic sheeting around the window opening, then staple it to the frame. Next, install the window according to the manufacturer’s instructions. If desired, you can also purchase metal roof ridges to finish the roof. Once you have them, install these at the top of the roof and secure them with screws.
13. Add Flooring:
Finish the greenhouse by spreading stones or gravel on the floor to help with drainage and maintain a clean surface.
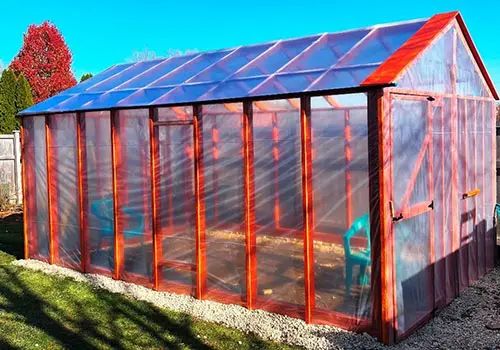
Once completed, you’ll have a fully functional DIY greenhouse, ready for planting. Not only will it provide a controlled environment for year-round gardening, but it will also help you save money on produce and protect your plants from pests.
Ultimately, building your own DIY greenhouse is a rewarding project that pays off with fresh, homegrown food year-round.
How to Build the Oven That Cooks Without Fire, Fuel, Smell, or Smoke (Video)
Veggies You Only Plant Once And Harvest Forever

